As any photographer knows, keeping the camera sensor clean is crucial for achieving high-quality images. Over time, dust, dirt, and other particles can accumulate on the sensor, resulting in spots or marks on your photos. These contaminants can significantly affect the overall image quality and require post-processing efforts to remove.
Checking your DSLR camera sensor for contamination is an essential maintenance task that should be performed regularly. Fortunately, there are several methods and tools available to help you identify and clean these particles effectively.
One of the most common methods is to take a test photo of a bright, evenly lit object, such as the sky or a blank white wall. Then, inspect the photo on your computer using image editing software or zooming in to identify any spots or marks. However, it’s important to note that this method may not always be accurate, and small contaminants may be challenging to detect.
Another popular method is using a dedicated sensor cleaning kit, which typically includes a sensor cleaning swab and a cleaning solution. With this method, you need to follow the manufacturer’s instructions carefully to avoid damaging the sensor. It’s crucial to use a clean and controlled environment, such as a dust-free room or a clean table, to prevent introducing additional particles.
Regularly checking your DSLR camera sensor for contamination and cleaning it when necessary will ensure that your images are free from spots and unwanted marks. By maintaining a clean sensor, you can focus on capturing beautiful moments without worrying about post-processing efforts to remove those pesky spots.
The importance of checking your DSLR camera sensor
Keeping your DSLR camera sensor clean is essential for achieving high-quality images. Dust, dirt, and other contaminants can accumulate on the sensor over time, leading to spots, smudges, and other unwanted artifacts in your photos.
Regularly checking your camera sensor for contamination is a crucial maintenance task for any DSLR user. By doing so, you can ensure that your photos remain pristine and free from any distracting imperfections.
Here are a few key reasons why checking your DSLR camera sensor is important:
|
1. Image quality: |
Dust and dirt on your camera sensor can negatively impact your image quality, causing specks, smears, or blurry spots in your photos. By regularly checking and cleaning your sensor, you can maintain a high level of image quality. |
|
2. Time-saving: |
Removing sensor contamination in post-processing can be time-consuming. By detecting and addressing the issue early on, you can save yourself valuable editing time, allowing you to focus on capturing more great shots. |
|
3. Cost-saving: |
If dust or dirt on your sensor goes unnoticed and is not cleaned regularly, it can cause more severe damage to your camera. This could result in costly repairs or even the need to replace your camera entirely. |
|
4. Consistency: |
A clean camera sensor ensures consistency in your photos. It allows you to reproduce accurate colors and sharp details across all of your images, making them more cohesive and professional-looking. |


Remember, prevention is better than cure when it comes to sensor contamination. Make it a habit to check your camera sensor regularly and clean it using safe and proper techniques to maintain the optimal performance of your DSLR camera.
Choosing the right tools
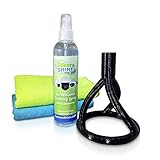
When it comes to checking DSLR camera sensors for contamination, having the right tools is essential. Here are some key tools that you will need:
- Blower brush: A blower brush is a useful tool for removing loose dust and contaminants from the sensor. It is a soft brush attached to a handheld bulb blower that allows you to blow air onto the sensor to dislodge any particles.
- Sensor cleaning swabs: Sensor cleaning swabs are specifically designed to clean the sensor surface. They are usually made of lint-free material and come in different sizes to fit different sensor sizes. These swabs are typically used with a cleaning solution to remove stubborn stains and smudges.
- Cleaning solution: A cleaning solution is necessary for deep cleaning the sensor. It helps to dissolve oils and smudges and ensures that the sensor surface is thoroughly cleaned.
- Sensor loupe: A sensor loupe is a magnifying tool that allows you to inspect your camera sensor for contamination. It typically has built-in LED lights and a magnifying lens that helps you to see any dust, stains, or smudges that are not visible to the naked eye.
It is important to note that not all cameras are designed to have their sensors cleaned by the user. Some camera manufacturers recommend sending the camera to an authorized service center for sensor cleaning. Make sure to check your camera’s manual or contact the manufacturer for specific instructions.
Remember to always handle your camera and its sensor with care. If you are unsure about cleaning the sensor yourself, it is best to seek professional help to avoid any damage to your camera.

Essential tools for sensor contamination check
When it comes to checking the sensor of your DSLR camera for contamination, having the right tools is essential. Here are some of the must-have tools for an effective sensor contamination check:
1. Sensor Loupe: A sensor loupe is a specially designed magnifying glass that allows you to closely inspect the sensor of your camera. It provides a clear view of any dust or debris particles that may be present on the sensor surface.
2. Blower: A blower is a handy tool for removing loose particles from the sensor. It blows a stream of clean air to dislodge any dust or debris that may have settled on the sensor. Make sure to use a blower specifically designed for camera sensor cleaning to avoid damaging the delicate sensor surface.
3. Sensor Cleaning Swabs: Sensor cleaning swabs are specially designed to remove stubborn or sticky contaminants from the sensor surface. They are premoistened with a cleaning solution that is safe for use on camera sensors. It’s important to use swabs specifically designed for your camera’s sensor size to ensure effective cleaning.
4. Sensor Cleaning Solution: A sensor cleaning solution is used in conjunction with sensor cleaning swabs to gently remove contaminants from the sensor surface. It is important to use a sensor cleaning solution that is specifically formulated for camera sensor cleaning to avoid any damage to the sensor coatings.

5. Sensor Cleaning Brush: A sensor cleaning brush is a gentle tool used to remove loose particles from the sensor surface. It has soft bristles that help dislodge particles without scratching the sensor. It’s important to use a brush specifically designed for camera sensor cleaning to avoid causing any damage.
6. Inspection Light: An inspection light is a portable light source that helps you visualize any contamination on the sensor surface. It allows you to spot even the smallest particles that may not be visible under normal lighting conditions. An LED inspection light with adjustable brightness is highly recommended for accurate sensor inspection.
By having these essential tools at your disposal, you can easily and effectively check your DSLR camera sensor for contamination and ensure optimal image quality.
Preparing your camera
Before checking your DSLR camera sensor for contamination, it is important to properly prepare your camera to ensure accurate results. Follow these steps:
- Turn off your camera and remove the lens.
- Inspect the lens to ensure there is no dust or debris on it. Use a blower brush or a lens cleaning cloth to gently remove any particles if necessary.
- Next, clean the camera’s LCD screen and viewfinder using a microfiber cloth. This will help you see any sensor contamination more clearly.
- Insert a fully charged battery into your camera to avoid any power interruptions during the sensor check.
- Set your camera to manual mode and choose a small aperture (high f-stop number) for a wider depth of field. This will make it easier to identify any dust spots on the sensor.
- Attach a clean lens or use a body cap to protect the camera’s sensor from any further contamination.
By following these steps, you can ensure that your camera is properly prepared for checking the sensor for contamination. This will help you obtain accurate results and maintain the overall quality of your DSLR camera.

Steps to prepare your DSLR camera for sensor check
Before checking the sensor of your DSLR camera for contamination, it is important to properly prepare your camera to ensure accurate results. Follow these steps:
1. Clean your camera body:
Start by cleaning the exterior of your camera body using a microfiber cloth. This will help remove any dust or debris that could potentially transfer onto the sensor during the check.
2. Fully charge your battery:
Ensure that your camera battery is fully charged before proceeding. This is important as a low battery level can affect the functioning of your camera and potentially impact the sensor check results.

3. Remove the lens:
Take off the lens from your DSLR camera carefully. Make sure to do this in a clean environment to minimize the risk of introducing additional dust or contaminants.
4. Set your camera to manual cleaning mode:
Switch your camera to manual cleaning mode to lock the mirror in an upright position. This will provide better access to the sensor for inspection.
5. Use a blower to remove loose particles:
Using a camera blower, gently blow air onto the sensor to remove any loose particles. Avoid using canned air or compressed air, as these can potentially damage the sensor.
6. Inspect the sensor for contamination:
Now that your camera is prepared, carefully inspect the sensor for any signs of contamination. Use a specialized sensor loupe or a magnifying glass for a closer examination.
7. Take test shots:
To further confirm the presence of contamination on the sensor, take a few test shots using a small aperture (e.g., f/16) and a plain, evenly lit background. Inspect these shots for any visible spots or marks.
8. Clean the sensor if necessary:
If you notice contamination on the sensor, it may be necessary to clean it. Refer to your camera’s user manual for specific instructions on sensor cleaning or seek professional assistance if you are unsure.
By following these steps, you can properly prepare your DSLR camera for a sensor check and ensure accurate results when inspecting for contamination.
Using the blower method
The blower method is a common technique used to clean camera sensors from contamination. It involves using a specialized tool called a blower to blow air onto the sensor, dislodging any dust or debris that may be present.
Before using the blower method, it is important to ensure that the camera’s battery is fully charged and that there is no remaining power in the camera. This will help prevent any potential damage to the camera’s sensor or internal components.
To begin, first, remove the lens from the camera body. This will expose the sensor, which is typically located at the back of the camera body. It is important to avoid touching the sensor directly as it is a delicate component that can easily be damaged.
Next, hold the blower in one hand and position it near the sensor. Ensure that the blower’s nozzle is not touching the sensor. Gently squeeze the blower to release a burst of clean, dry air onto the sensor.
While blowing air onto the sensor, it is important to keep the camera body facing downwards. This will help prevent any dislodged dust or debris from falling back onto the sensor and potentially causing further contamination.
Repeat this process several times, moving the blower around to cover the entire sensor area. Take care to blow air into any hard-to-reach areas, such as the corners and edges of the sensor.
Once the sensor has been thoroughly blown, you can reattach the lens to the camera body. Before testing the camera, it is advisable to perform a visual inspection of the sensor to check for any remaining contamination.
If there is still visible contamination on the sensor after using the blower method, it may be necessary to consider more intensive cleaning methods or seek professional assistance.
Cleaning your DSLR camera sensor using a blower
When it comes to cleaning your DSLR camera sensor, using a blower is one of the safest and most effective methods. A blower is designed to produce a strong burst of air, which can dislodge and remove dust particles that may have accumulated on your sensor.
Step 1: Prepare your equipment
Before starting the cleaning process, make sure you have the necessary equipment. You will need a blower specifically designed for camera sensor cleaning. It is important to use a blower specifically designed for this purpose, as using any other type of blower may cause damage to your camera sensor.
Step 2: Choose a clean environment
Find a clean and dust-free environment to clean your camera sensor. It is recommended to do this indoors to minimize the risk of dust particles landing on your sensor during the cleaning process.
Step 3: Remove the lens
Carefully remove the lens from your camera body. Make sure to turn off your camera and activate the sensor cleaning mode if available. This will ensure that the sensor is more exposed and easier to clean.
Step 4: Use the blower
Gently squeeze the blower to create a strong burst of air. Direct the blower’s nozzle towards the sensor, keeping it at a safe distance. Use short bursts of air to dislodge and remove any dust particles on the sensor surface. Avoid touching the sensor with the blower or any other objects.
Step 5: Inspect and repeat if necessary
After using the blower, inspect your sensor to check if the contamination has been removed. You can use the camera’s sensor cleaning mode or a specialized sensor loupe to examine the sensor surface. If there are still visible dust particles, repeat the process until the sensor is clean.
Using a blower to clean your DSLR camera sensor is a simple and effective method. However, if you are unsure or uncomfortable cleaning your camera sensor yourself, it is always recommended to seek professional assistance. Cleaning the sensor improperly can cause permanent damage, so it’s better to be safe than sorry.
Using the wet cleaning method
If you have determined that your DSLR camera sensor is contaminated and dry cleaning methods have not been successful in removing the debris, you may need to use the wet cleaning method.
Before you begin:
- Make sure you are working in a clean and dust-free environment.
- Turn off your camera and remove the lens.
- Ensure you have the necessary cleaning supplies, including a sensor cleaning solution and a sensor cleaning swab.
1. Prepare the cleaning solution:
Use a sensor cleaning solution specifically designed for DSLR cameras. Do not use ordinary cleaning solutions, as they may damage the sensor. Apply a few drops of the solution to the cleaning swab, making sure not to oversaturate it.
2. Clean the sensor:
With the camera’s sensor facing downwards, gently swipe the cleaning swab across the sensor in one smooth motion. Avoid excessive pressure, as this may lead to scratches or damage. Use a new swab for each pass to ensure effective cleaning.
3. Inspect the sensor:
After cleaning, use a flashlight or a sensor loupe to inspect the sensor for any remaining debris. If you notice any spots or marks, repeat the cleaning process.
4. Reassemble your camera:
Once you are satisfied with the cleanliness of the sensor, carefully reattach the lens and turn on your camera. Take a test shot to ensure the removal of any remaining contaminants. If spots are still visible, you may need to repeat the wet cleaning method or consult a professional camera technician.
Note: Wet cleaning the camera sensor should only be done as a last resort when other methods have failed. If you are unsure about the process, it is recommended to seek assistance from a professional.
Step-by-step guide to wet cleaning your DSLR camera sensor
If you notice contamination on your DSLR camera sensor such as dust, smudges, or spots in your images, it’s time for a wet cleaning. Follow these steps to safely and effectively clean your camera sensor:
- Gather the necessary cleaning tools: sensor cleaning solution, sensor cleaning swabs, blower brush, and a fully charged camera battery.
- Before starting the cleaning process, ensure that you are working in a clean and dust-free environment.
- Detach the lens from your camera and turn on the camera’s sensor cleaning mode, if available. This will lift the mirror and expose the sensor for cleaning. Consult your camera manual if you are unsure how to activate this mode.
- Use a blower brush to gently remove any loose dust or debris from the camera sensor. Be careful not to touch the sensor with the brush.
- Take a sensor cleaning swab and apply a few drops of sensor cleaning solution to the swab. Be sure to use a cleaning solution that is specifically designed for camera sensors.
- With a steady hand, carefully swipe the sensor cleaning swab across the camera sensor. Start from one side and move across in a straight line. Avoid applying excessive pressure or dragging the swab back and forth.
- Inspect the sensor with a magnifying loupe or by taking a test shot to ensure that all contamination has been removed. If necessary, repeat the cleaning process.
- Once you are satisfied with the cleanliness of your camera sensor, turn off the sensor cleaning mode and reattach the lens.
- Remember to properly store your cleaning tools in a clean and dust-free environment for future use.
By following these steps, you can effectively clean your DSLR camera sensor and maintain the quality of your images.
Question-answer:
What is DSLR camera sensor contamination?
DSLR camera sensor contamination refers to the presence of dust, dirt, or other particles on the sensor of a DSLR camera. These particles can affect image quality by causing spots or smudges in the photos.
Why is it important to check DSLR camera sensor for contamination?
It is important to check DSLR camera sensor for contamination because any particles on the sensor can affect the quality of your photos. Dust or dirt on the sensor can show up as spots or smudges in your images, which can be difficult or even impossible to remove during post-processing.
How can I check if my DSLR camera sensor is contaminated?
There are a few ways to check if your DSLR camera sensor is contaminated. One method is to take a test photo of a piece of white paper or a clear blue sky, and then inspect the photo for any spots or smudges. Another method is to use the sensor cleaning function in your camera’s menu to shake off any loose particles, and then inspect the sensor with a magnifying loupe or a sensor cleaning kit.
What should I do if I find contamination on my DSLR camera sensor?
If you find contamination on your DSLR camera sensor, you have a few options. You can try using the sensor cleaning function in your camera’s menu to shake off any loose particles. If that doesn’t work, you can use a sensor cleaning kit to safely remove the contamination. If you’re uncomfortable cleaning the sensor yourself, you can also take your camera to a professional camera store or service center for a sensor cleaning.
How often should I check my DSLR camera sensor for contamination?
The frequency at which you should check your DSLR camera sensor for contamination depends on how often you use your camera and the conditions in which you use it. It’s a good idea to check your sensor regularly, especially if you frequently change lenses or shoot in dusty or sandy environments. As a general guideline, you may want to check your sensor every few months or whenever you notice a decrease in image quality.


