As any photographer knows, sensor dust can be a real nuisance when it comes to taking clear and sharp photos with a mirrorless camera. Dust particles can easily find their way into the camera body and settle on the camera sensor, resulting in annoying specks and spots on your images. But fear not! Cleaning your camera sensor is easier than you may think, and with a few simple steps, you can get rid of those pesky dust particles and get back to capturing stunning photos.
Step 1: Before you start cleaning, make sure to fully charge your camera battery and remove the lens. This will help prevent any accidental damage to the camera or lens during the cleaning process.
Step 2: Start by using a blower to gently remove any loose dust particles from the camera sensor. Hold the camera upside down and use short bursts of air to blow away the dust. It’s important to avoid touching the sensor with the blower or any other object, as this can lead to scratches or damage.
Step 3: If the blower doesn’t completely remove all the dust, you can move on to using a sensor cleaning brush. Make sure to use a brush specifically designed for camera sensors, as other brushes may have bristles that are too coarse and can cause damage. Lightly brush the sensor in a single direction, being careful not to press too hard or scrub back and forth.
Step 4: If there are still stubborn dust particles remaining, a sensor swab may be necessary. Sensor swabs are specially designed tools that allow you to apply special cleaning fluids to the sensor surface. Follow the manufacturer’s instructions carefully and gently swipe the swab across the sensor surface, making sure to use a new swab for each swipe.

Step 5: After cleaning, it’s important to check the camera sensor for any smudges or streaks. Use a sensor loupe or magnifying glass to inspect the sensor surface. If you notice any smudges or streaks, repeat the cleaning process using a fresh swab or brush.
Remember, cleaning your camera sensor requires patience and a gentle touch. Take your time and always follow the manufacturer’s instructions and recommendations. Regular sensor cleaning will help you maintain the quality of your images and ensure that dust doesn’t ruin your shots.
What is sensor dust
When it comes to mirrorless cameras, sensor dust can be a common issue that photographers have to deal with. Sensor dust refers to tiny particles that settle on the camera’s image sensor, resulting in visible spots or blotches in your photos.
These particles can come from a variety of sources, such as dust in the environment, debris from the camera’s own mechanisms, or even microscopic particles from the camera lenses. They are particularly problematic because they can affect the quality and clarity of your images.
Sensor dust is more noticeable when you are using small apertures or shooting against a bright background. When you have dust on your sensor, it becomes more difficult to achieve sharp, clean images. This is especially true for landscape or architectural photography where you often have clear skies or smooth surfaces that can emphasize any imperfections.

Removing sensor dust requires proper cleaning techniques and tools. It is important to handle the camera and sensor carefully to avoid causing any damage. In the next sections, we will discuss different methods for cleaning sensor dust and how to prevent it from happening in the first place.
Importance of cleaning sensor dust
Dust particles on the sensor of a mirrorless camera can have a significant impact on the quality of your photographs. It is important to regularly clean the sensor to ensure optimal image quality and avoid unwanted dust spots that can ruin your shots.
1. Image quality and sharpness
When dust accumulates on the camera sensor, it can appear as dark spots on your photographs, especially when shooting with narrow apertures. These spots can be distracting and reduce the overall image quality. Additionally, dust particles can cause the loss of image details and sharpness, resulting in softer and less defined images.
Regularly cleaning the sensor helps maintain high image quality, ensuring your photos are vibrant, clear, and sharp.
2. Time-saving in post-processing
If you neglect to clean your camera sensor, you may find yourself spending more time in post-processing removing dust spots from your images. Dust spots can be particularly troublesome when photographing a clear sky or any plain background. Removing them individually can be a time-consuming process, especially when dealing with a large number of images.
By keeping your camera sensor clean, you can save time during post-processing and focus more on enhancing your images rather than fixing dust spots.
Remember to always follow the manufacturer’s instructions when cleaning the sensor and use appropriate tools and techniques to minimize the risk of damaging it. With regular sensor cleaning, you can ensure your mirrorless camera performs at its best and consistently produces high-quality images.
Step 1: Gather the necessary tools
Before you begin cleaning the sensor dust of your mirrorless camera, it is important to gather all the necessary tools. Having the right tools at hand will ensure a safe and efficient cleaning process. Here are the essential tools you will need:
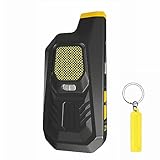
Clean Air Blower
A clean air blower is a crucial tool for removing loose dust particles from your camera sensor. The blower blows a stream of clean, filtered air to dislodge any debris that may be clinging to the sensor surface. Make sure to use a blower specifically designed for camera sensor cleaning, as compressed air can contain moisture or other contaminants that could damage your camera.
Microfiber Cleaning Cloths
Microfiber cleaning cloths are ideal for gently wiping off any stubborn dust or smudges from the camera sensor. These cloths are specially designed to be non-abrasive and lint-free, ensuring that they won’t scratch the sensor surface or leave behind any fibers. Make sure to use a clean and dry microfiber cloth to avoid introducing additional dirt or moisture to the sensor.
Sensor Cleaning Solution
A sensor cleaning solution is a cleaning fluid specifically formulated for removing stubborn smudges or stains from the camera sensor. It is important to use a sensor cleaning solution recommended by the camera manufacturer or a trusted photographic equipment supplier. Avoid using regular household cleaning solutions, as they may contain harsh chemicals that could damage the sensor.
These are the essential tools you will need to gather before you can start cleaning the sensor dust of your mirrorless camera. Having these tools ready will ensure that you can perform a thorough and safe cleaning process.
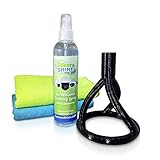
Cleaning kit
A good cleaning kit is essential for properly cleaning the sensor dust of your mirrorless camera. Here are some items you should consider including in your cleaning kit:
- Dust blower: A dust blower is a must-have tool for removing loose dust particles from the camera’s sensor. It provides a gentle blast of air to dislodge dust without causing any damage.
- Microfiber cloth: A microfiber cloth is great for wiping away smudges and fingerprints from the camera’s body and lens. Make sure to use a lint-free cloth to avoid leaving any residue.
- Sensor cleaning swabs: Sensor cleaning swabs are specifically designed to clean the camera’s sensor. They are usually made of lint-free material and come in different sizes to fit various sensor sizes. It’s important to use the right size swab for your camera.
- Sensor cleaning solution: A sensor cleaning solution is used in combination with sensor cleaning swabs to remove stubborn dirt and smudges. Make sure to use a solution that is specifically designed for camera sensors.
- Sensor cleaning brush: A sensor cleaning brush is a handy tool for removing stubborn dust particles from the camera’s sensor. It has soft bristles that are designed to safely brush away dust without scratching the sensor.
- Cotton swabs: Cotton swabs can be used in combination with the sensor cleaning solution for cleaning hard-to-reach areas of the camera.
When using the cleaning kit, it’s important to follow the manufacturer’s instructions and exercise caution to prevent any damage to your camera. Regularly cleaning the sensor dust will help maintain the image quality of your mirrorless camera.
Blower
A blower is a commonly used tool for cleaning sensor dust off mirrorless cameras. It is a handheld device that blows a controlled stream of air to remove dust particles from the camera sensor.

Using a blower is a safe and effective method to clean sensor dust, as it does not involve physical contact with the sensor. It is especially useful for removing loose dust particles that are not firmly attached to the sensor surface.
Benefits of using a blower:
1. Non-contact cleaning: Blowing air onto the sensor does not pose a risk of scratching or damaging the delicate sensor surface.
2. Quick and easy: Using a blower is a simple and fast process that can be done in a matter of seconds.
3. Portable: Blowers are usually small and lightweight, making them easy to carry in your camera bag for on-the-go cleaning.
How to use a blower:
1. Power off your camera and remove the lens.

2. Ensure you are in a clean and dust-free environment to avoid introducing more dust onto the sensor.
3. Hold the camera with the sensor facing downwards to prevent dislodged dust from resettling onto the sensor.
4. Gently squeeze the blower to release a controlled stream of air.
5. Aim the blower nozzle towards the sensor, but avoid making physical contact.
6. Blow air onto the sensor in short bursts, moving the blower around to cover the entire sensor surface.

7. Repeat the process if necessary or use other cleaning methods if persistent dust is still present.
Remember to always handle the blower carefully and avoid blowing air too forcefully, as it may cause damage to the sensor or other camera components.
Microfiber cloth
A microfiber cloth is an essential tool for cleaning the sensor dust of a mirrorless camera. It is made up of tiny microfibers that are designed to attract and trap dust particles without scratching the delicate surface of the camera’s sensor.
When using a microfiber cloth, it is important to handle it with care to avoid introducing additional dust or debris. Start by gently blowing any loose particles off the sensor using a bulb blower. Then, fold the microfiber cloth into a small square and lightly wipe the sensor in one direction. Avoid applying too much pressure, as this could potentially damage the sensor.
Tips for using a microfiber cloth:
- Only use a clean microfiber cloth specifically designed for camera cleaning.
- Avoid touching the cloth with your fingers to minimize the transfer of oils and dirt.
- Regularly inspect the microfiber cloth for any signs of dirt or damage and replace it if necessary.
- Store the microfiber cloth in a clean and dust-free environment to prevent contamination.
Remember, proper maintenance and cleaning of the camera’s sensor will help ensure optimal image quality and prevent any unwanted specks or marks in your photos.
| Advantages | Description |
|---|---|
| Safe for delicate surfaces | The soft and fine microfiber material prevents scratches or damage to the camera’s sensor. |
| Efficient dust removal | The microfibers effectively attract and trap dust particles, leaving the sensor clean and dust-free. |
| Reusable | Microfiber cloths can be washed and reused multiple times, making them a cost-effective cleaning option. |
| Lint-free | The tightly woven microfibers do not leave any lint or fibers behind, ensuring a clean sensor surface. |
Cleaning Fluid
When it comes to cleaning the sensor dust on your mirrorless camera, using a cleaning fluid is a common method that many photographers rely on. Cleaning fluids are specifically formulated solutions designed to remove stubborn dust particles without damaging the sensor.
Before using a cleaning fluid, it is important to read and follow the instructions provided by the manufacturer. These instructions will guide you on how to properly apply the cleaning fluid to the sensor surface.
Here are a few steps to help you properly use a cleaning fluid:
- Start by turning off your camera and removing the lens.
- Ensure that you are working in a clean and dust-free environment.
- Apply a small amount of the cleaning fluid to a sensor swab or cleaning tool.
- Gently swipe the swab across the sensor surface, making sure to avoid any excessive pressure.
- Repeat the process if necessary, using a fresh swab for each pass.
- Once you have cleaned the sensor, inspect it to ensure that all dust particles have been removed.
- Finally, attach the lens back to your camera and turn it on to check whether the sensor is now clean.
Remember, using a cleaning fluid requires caution and precision. If you are unsure about using a cleaning fluid or if the sensor dust persists, it is recommended to consult a professional camera technician.
Step 2: Prepare the camera
1. Gather your cleaning supplies:
Before you start cleaning your camera’s sensor, it is important to gather all the necessary cleaning supplies. This will help you avoid any interruptions during the cleaning process.
Here are the cleaning supplies you will need:
- Blower brush or air blower
- Microfiber cloth or lens cleaning tissue
- Sensor cleaning solution
- Cleaning swabs (optional)
2. Find a clean and well-lit area:
Choose a clean and well-lit area to ensure that you can see any dust or debris on your camera’s sensor clearly. A table or a desk with a white background is ideal for this task.
3. Charge your camera battery:
Before starting the cleaning process, make sure that your camera battery is fully charged. This will prevent any sudden power loss during the cleaning, which may cause damage to your camera’s sensor or other components.
4. Remove the lens and cap the camera body:
Remove the lens from your camera to expose the sensor. Be careful not to touch the sensor while doing this. Once the lens is removed, immediately cap the camera body to prevent any dust or debris from entering it.
4. Enable sensor cleaning mode (if available):
If your mirrorless camera has a sensor cleaning mode, enable it before starting the cleaning process. This setting will help shake off any loose dust particles from the sensor.
Note: Refer to your camera’s user manual to learn how to enable the sensor cleaning mode.
Turn off the camera
Before attempting to clean the sensor dust on your mirrorless camera, it is crucial to turn off the camera completely. This is important to prevent any accidental damage or interference with the sensor cleaning process.
First, make sure that the camera is in a safe and stable position, such as placing it on a flat surface or using a tripod. This will help avoid any accidental movements or vibrations while cleaning the sensor.
Next, locate the power switch on your camera. It is usually located on the top or side of the camera body. Switch the power off by sliding or pressing the switch to the designated “off” position. Ensure that the camera’s LCD screen or electronic viewfinder is no longer displaying any information or image.
Why turn off the camera?
Turning off the camera eliminates the risk of accidentally triggering the shutter release or activating any other camera functions while cleaning the sensor. Any movement or operation of the camera during the cleaning process can lead to further dust particles being attracted to the sensor surface or potentially scratching it.
Furthermore, leaving the camera powered on while cleaning the sensor can cause the camera’s internal mechanisms to create static electricity, which can cause the dust to stick onto the sensor even more.
Precautions to follow
While turning off the camera is an essential step, it is also important to follow a few additional precautions:
Protect the sensor: Once the camera is turned off, avoid exposing the sensor to direct light by keeping the camera body facing downward or cover it with a body cap or the lens. Dust particles and debris that come into contact with the sensor during cleaning can cause scratches or damage if exposed to direct light.
Remove the lens: If you haven’t done so already, it is recommended to remove the lens from the camera body before cleaning the sensor. This will provide easier access to the sensor and reduce the risk of accidentally touching or damaging the lens during the cleaning process.
Handle with care: Always handle your camera with clean hands and use proper cleaning tools and techniques to avoid introducing more dust or scratches. Remember to follow the manufacturer’s instructions and guidelines for your specific camera model when cleaning the sensor.
Now that the camera is turned off and you are aware of the precautions, you are ready to proceed with cleaning the sensor dust on your mirrorless camera.
Remove the lens
Before cleaning the sensor dust of your mirrorless camera, it’s important to remove the lens to ensure easy access to the sensor. Follow these steps to safely remove the lens:
| 1. | Switch off the camera to avoid any accidental damage during the lens removal process. |
| 2. | Locate the lens release button on your camera body. It is usually marked with an icon resembling an open lock. |
| 3. | Press and hold the lens release button while gently rotating the lens counterclockwise (when viewed from the front). Keep rotating until the lens is fully detached from the camera body. |
| 4. | Carefully place the lens in a clean and safe location, preferably in a lens pouch or a dust-free environment. This will prevent any damage or exposure to dust particles during the cleaning process. |
Once you have successfully removed the lens, you can proceed to the next step of cleaning the sensor dust.
Activate sensor cleaning mode
One of the first steps to remove sensor dust from your mirrorless camera is to activate the sensor cleaning mode. This mode is designed to vibrate the sensor and dislodge any dust particles that may have settled on it.
To activate the sensor cleaning mode on your mirrorless camera, follow these steps:
Step 1: Access the settings menu
Turn on your camera and access the settings menu. The exact location of the settings menu may vary depending on the camera model, but it is usually represented by an icon that looks like a gear or a wrench.
Step 2: Find the sensor cleaning option
Once you are in the settings menu, navigate through the different options until you find the sensor cleaning option. This option may be labeled as “Sensor Cleaning” or “Dust Removal”.
Some cameras have a dedicated button for sensor cleaning, which eliminates the need to access the settings menu.
Step 3: Activate the sensor cleaning mode
Select the sensor cleaning option and choose the “Activate” or “Start” option to initiate the sensor cleaning mode. Your camera will then start vibrating the sensor to remove any dust particles.
It is important to note that some camera models have an automatic sensor cleaning feature that activates every time you turn off your camera. If your camera has this feature, it is advisable to turn off the camera and turn it back on to activate the sensor cleaning mode.
Finally, it is recommended to perform the sensor cleaning in a clean and dust-free environment to prevent further contamination. Remember to follow the manufacturer’s instructions and guidelines for sensor cleaning to avoid any potential damage to the camera.
Step 3: Clean the camera sensor
Once you have identified the sensor dust on your mirrorless camera, it is important to clean it properly to avoid any damage. Here are the steps to clean the camera sensor:
- Turn off the camera: Before starting the cleaning process, make sure to turn off your camera to prevent any accidental damage.
- Remove the lens: Carefully remove the lens from your camera body. Make sure to do this in a clean environment to minimize the risk of introducing more dust.
- Inspect the sensor: Use a sensor loupe or a magnifying glass to inspect the camera sensor for any visible dust particles. Take note of the locations of the dust spots.
- Use an air blower: Gently use an air blower to remove loose dust particles from the camera sensor. Hold the camera with the lens mount facing downwards to prevent any dislodged particles from falling back onto the sensor.
- Use a sensor cleaning kit: If there are stubborn dust spots that cannot be removed with an air blower, you may need to use a sensor cleaning kit. Follow the instructions provided with the kit to safely clean the camera sensor.
- Double-check the sensor: After cleaning the sensor, use the sensor loupe or magnifying glass again to ensure that all dust particles have been removed. If you still see some spots, you may need to repeat the cleaning process.
- Reattach the lens: Once you are satisfied with the cleanliness of the sensor, carefully reattach the lens to the camera body.
- Perform a test shot: Turn on your camera and take a test shot to check if the sensor is clean. Inspect the image for any remaining dust spots. If you still see dust spots, you may need to repeat the cleaning process or consult a professional.
Remember to always exercise caution and follow the manufacturer’s instructions when cleaning the camera sensor. Cleaning the sensor can be a delicate process and if done incorrectly, it can cause damage to your camera. If you are unsure or uncomfortable cleaning the sensor yourself, it is recommended to seek professional assistance.
FAQ
What is sensor dust?
Sensor dust refers to small particles that accumulate on the image sensor of a mirrorless camera. These particles can cause spots or marks on the photographs.
How does sensor dust affect image quality?
Sensor dust can affect image quality by causing spots or marks on the photographs. These spots can be particularly noticeable in areas of the image with uniform color or bright backgrounds. They can be distracting and may require post-processing to remove.
Can sensor dust be prevented?
Sensor dust cannot be completely prevented, but there are steps you can take to minimize the risk. Avoid changing lenses in dusty or windy environments, keep your camera’s lens mount facing downward when changing lenses, and regularly clean the camera’s sensor using appropriate tools and techniques.
How often should I clean my camera’s sensor?
The frequency of sensor cleaning depends on how often you use your camera and the conditions in which you use it. If you frequently change lenses or use your camera in dusty or outdoor environments, you may need to clean the sensor more often. As a general guideline, it is recommended to clean the sensor every few months or whenever you notice visible dust or spots in your photographs.