Having a DSLR camera is a great asset for any photography enthusiast. These cameras offer advanced features and amazing image quality. However, over time, dust and spots can accumulate inside the camera, affecting the quality of your photos. Cleaning the inside of a DSLR camera may seem like a daunting task, but with the right tools and techniques, it can be done easily and effectively.
Step 1: Prepare your workspace
Before you start cleaning the inside of your DSLR camera, it is essential to create a clean and dust-free workspace. Choose a well-lit area with good ventilation. Make sure to turn off the camera and remove the battery to prevent any accidental damage.
Step 2: Remove the lens
Next, remove the lens from your DSLR camera. This will give you access to the sensor, where most dust and spots tend to accumulate. Be careful not to touch the sensor or any other delicate parts inside the camera.
Step 3: Use a blower or brush
Now it’s time to remove the dust and spots from the sensor. You can use a blower or a brush specifically designed for sensor cleaning. Gently blow air onto the sensor or brush away the dust using soft strokes. Make sure not to apply too much pressure to avoid any damage to the sensor.
Step 4: Use a sensor cleaning solution
If there are stubborn spots or marks on the sensor, you may need to use a sensor cleaning solution. Apply a small amount of the solution to a swab or cleaning pad and gently swipe it across the sensor. Be cautious and use minimal pressure to avoid damaging the sensor.
Remember: Cleaning the inside of your DSLR camera requires patience and precision. If you are unsure or uncomfortable doing it yourself, it’s best to take your camera to a professional for cleaning. Regular maintenance and cleaning will ensure your camera continues to produce high-quality images.

How to Remove Spots from Inside DSLR Camera: 9 Easy Steps
Step 1: Gather the Necessary Tools
Before you start cleaning the inside of your DSLR camera, gather the necessary tools. You will need a blower, lens cleaning solution, lens cleaning tissues, a soft microfiber cloth, and a pair of tweezers.
Step 2: Ensure a Clean Environment
Find a clean and dust-free environment to work in. A small, enclosed space such as a bathroom with the shower running can help minimize dust particles in the air.
Step 3: Remove the Lens

Turn off your camera and remove the lens carefully. Place it in a clean and safe location.
Step 4: Use the Blower
Use the blower to gently blow air onto the sensor and inside the camera body. This will help remove any loose particles or dust.
Step 5: Avoid Touching the Sensor
Be cautious not to touch the sensor or any other delicate electronic parts inside the camera. Oils and fingerprints can damage these components.

Step 6: Dampen a Cleaning Tissue
Apply a few drops of lens cleaning solution onto a lens cleaning tissue. Make sure the tissue is not too wet, as excess liquid can harm the camera.
Step 7: Gently Wipe the Sensor
Using the damp cleaning tissue, gently wipe the sensor in a single direction. Avoid applying excessive pressure to prevent any potential damage.
Step 8: Use Tweezers for Stubborn Spots

If there are any stubborn spots or debris on the sensor, carefully use the tweezers to remove them. Be gentle to avoid scratching the sensor surface.
Step 9: Reassemble the Camera
Once the sensor is clean, carefully reassemble the camera by attaching the lens back in place. Ensure it is securely attached and turn the camera on to check for any remaining spots.
Note: If you are unsure about cleaning the inside of your DSLR camera, it is recommended to seek professional assistance or consult the camera manufacturer’s guidelines.
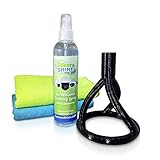
Gather Essential Cleaning Supplies
When it comes to cleaning spots from inside a DSLR camera, having the right cleaning supplies is essential. Here is a list of items you will need:

- Cleaning solution: A gentle camera cleaning solution specifically designed for removing dirt and spots from camera lenses and sensors. Avoid using household cleaning products as they may damage the camera.
- Cleaning swabs: These are specialized swabs designed to clean delicate camera sensors and other parts without causing scratches or residue.
- Bulb blower: This is a handy tool for safely removing loose dust and debris from camera lenses and other hard-to-reach areas.
- Sensor cleaning brush: A soft brush with fine bristles that can effectively remove stubborn dirt and particles from the camera sensor without causing damage.
- Cotton swabs: These can be used to clean small crevices and tight spaces inside the camera.
- Microfiber cloth: An essential item for wiping down camera surfaces and removing smudges and fingerprints.
- Lens cleaning tissue: These disposable tissues are designed for cleaning camera lenses without scratching or leaving lint.
Before you start cleaning, make sure you have all the necessary supplies. It’s important to use the right tools and products to avoid damaging your camera. By gathering the essential cleaning supplies listed above, you can ensure a thorough and safe cleaning process for your DSLR camera.
Power Off and Remove Camera Battery
One of the most important steps to take when cleaning spots from inside your DSLR camera is to power off the device and remove the camera battery. This is crucial to ensure your safety and prevent any damage to the camera.
Before starting the process, make sure your camera is turned off completely. This will prevent any accidental settings changes or damage to the internal components.
Removing the Battery
Once the camera is turned off, locate the battery compartment on the bottom or side of the camera. Different camera models may have slightly different battery compartment designs, so refer to your camera’s user manual if you’re unsure.
To remove the battery, usually, you’ll need to slide the battery compartment door open and then gently push the battery release button or lever towards the designated direction. This will release the battery from the compartment, allowing you to remove it.
Waiting for the Camera to Cool Down
After removing the battery, it is recommended to wait a few moments for the camera to cool down before proceeding with the cleaning process. This is especially important if you’ve been using the camera for an extended period as the internal components can become warm.
Cooling down the camera helps to avoid any potential risks, such as burns or damage to the internal circuitry, that may occur from cleaning the camera while it’s still warm.
Once you’ve allowed sufficient time for the camera to cool down, you can proceed with the next steps of cleaning the spots from inside your DSLR camera.
Access the Interior of the DSLR Camera
Before attempting to clean the spots from inside your DSLR camera, it is important to access the interior properly. Follow these steps to gain access:
1. Turn off the Camera: Make sure your DSLR camera is turned off before attempting any maintenance or cleaning procedures. This will prevent any accidental damage and keep you safe.
2. Remove the Lens: Carefully remove the lens by pressing the lens release button on the camera body and twisting the lens counterclockwise. Keep the lens in a safe place to avoid any damage.
3. Inspect the Mirror Box: Look inside the camera body where the lens was attached. You will see a mirror box, which is responsible for reflecting the light coming through the lens to the viewfinder. Take a close look at the mirror box and identify any visible spots or dust particles.
4. Access the Sensor: To clean the spots on the sensor, you will need to access it. Most DSLR cameras have a sensor cleaning mode that automatically locks up the mirror and opens the shutter, allowing access to the sensor. Consult your camera’s user manual to find out how to enable this mode for your specific camera model.
5. Use a Blower: Once you have access to the sensor, use a blower to remove any loose dust particles or debris. Hold the camera with the lens mount facing downwards and gently puff air onto the sensor. This will help dislodge any particles that may have settled on the sensor surface.
6. Clean with a Sensor Cleaning Kit: If the blower doesn’t completely remove the spots, you may need to use a sensor cleaning kit. These kits typically include specialized cleaning swabs and a sensor cleaning solution. Follow the instructions provided with the kit to safely clean the sensor surface.
7. Reattach the Lens: Once you have finished cleaning the sensor and mirror box, carefully reattach the lens by aligning the red dot on the lens with the corresponding dot on the camera body. Then, turn the lens clockwise until it locks into place.
By following these steps, you can safely access the interior of your DSLR camera and clean any spots or dust particles that may be affecting the image quality. Remember to handle your camera with care and refer to the camera’s user manual for any specific instructions or precautions.
Use a Blower to Remove Loose Dust and Debris
One of the easiest and safest ways to clean spots from inside your DSLR camera is by using a blower. A blower is a great tool for removing loose dust and debris that may be causing spots on your camera’s sensor or lens.
Before using a blower, make sure to first turn off your camera and remove the lens. This will provide easier access to the areas that need cleaning.
- Hold the blower upright and gently squeeze the bulb to create a blast of air.
- Aim the blower at the areas where you see spots or dust.
- Keep the blower at a safe distance from the camera’s sensor or lens to avoid causing any damage.
- Move the blower in a controlled manner, directing the airflow to the specific spots that need cleaning.
- Continue using the blower until you are satisfied that all loose dust and debris have been removed.
It is important to note that a blower may not be effective in removing stubborn or sticky spots. In such cases, you may need to use other cleaning methods or seek professional assistance.
Using a blower regularly as part of your camera maintenance routine can help prevent spots from forming on your camera’s sensor or lens. By removing loose dust and debris, you can ensure that your photos remain spot-free and of the highest quality.
Remove Stubborn Spots with a Microfiber Cloth
If you notice stubborn spots or smudges on the inside of your DSLR camera lens or sensor, you can try using a microfiber cloth to clean them.
Step 1: Switch off your DSLR camera
Before cleaning the inside of your camera, make sure to switch it off to avoid any potential damage.
Step 2: Remove the lens
Unscrew the lens from your camera carefully, following the manufacturer’s instructions. Place it in a clean and safe location, away from dust or debris.
Step 3: Inspect the lens or sensor
Use a flashlight or a bright light source to inspect the lens or sensor for any stubborn spots or smudges. This will help you identify the areas that require cleaning.
Step 4: Wipe the lens or sensor with a microfiber cloth
Gently wipe the affected areas using a clean microfiber cloth. Avoid applying excessive pressure, as it can damage the delicate surface. Use light, circular motions to remove the spots or smudges.
Step 5: Reattach the lens
Once you have cleaned the lens or sensor, carefully reattach the lens to your DSLR camera, following the manufacturer’s instructions.
Note: If the spots or smudges persist, it is recommended to consult a professional camera technician for further assistance.
Step 6: Test your camera
After reattaching the lens, switch on your camera and take a test shot to ensure that the spots or smudges have been effectively removed. If you still notice any issues, repeat the cleaning process or seek professional help.
Clean the Camera Sensor with Sensor Swabs
One of the most important parts of the DSLR camera that needs regular cleaning is the camera sensor. Dust and other particles can easily accumulate on the sensor, affecting the quality of your photos. To clean the sensor effectively, you will need sensor swabs.
Step 1: Begin by turning off the camera and removing the lens. This will expose the camera sensor, which is typically located at the back of the camera.
Step 2: Carefully inspect the sensor for any visible dust or dirt. You can use a magnifying glass or the camera’s built-in sensor cleaning feature to help identify any spots.
Step 3: Take a sensor swab and apply a few drops of sensor cleaning solution to the swab. Be sure to use a cleaning solution that is specifically designed for cleaning camera sensors.
Step 4: Gently and smoothly swipe the sensor swab across the sensor in one direction. Avoid applying too much pressure or using a back-and-forth motion, as this may scratch or damage the sensor.
Step 5: Inspect the sensor again to see if any spots are remaining. If necessary, repeat the process with a fresh sensor swab and cleaning solution.
Step 6: Once the sensor is clean, turn the camera off and reattach the lens. Be sure to clean the lens as well before reattaching it to prevent any dust or debris from transferring back to the sensor.
Note: Cleaning the camera sensor can be a delicate process, so it’s important to follow these steps carefully. If you are unsure or uncomfortable with cleaning the sensor yourself, it is recommended to take it to a professional camera service center.
Handling Persistent Spots with Isopropyl Alcohol
If you are still noticing stubborn spots on the inside of your DSLR camera, you may need to use isopropyl alcohol to tackle the issue. Isopropyl alcohol is a common cleaning agent used to remove dirt and grime from various surfaces, including camera equipment.
Caution: Safety Precautions
Before using isopropyl alcohol on your DSLR camera, it is important to take some safety precautions:
- Make sure your camera is turned off and the battery is removed.
- Use a lint-free cloth or microfiber cloth to apply the alcohol.
- Avoid applying the alcohol directly to the camera’s sensor or mirror.
- Apply the alcohol sparingly and gently to avoid damaging delicate camera components.
Step-by-Step Instructions
Follow these steps to clean persistent spots on the inside of your DSLR camera using isopropyl alcohol:
- Prepare a clean, lint-free cloth or microfiber cloth.
- Moisten the cloth with a small amount of isopropyl alcohol.
- Using gentle, circular motions, wipe the affected areas inside the camera.
- Allow the camera to dry completely before reassembling it.
- Inspect the camera thoroughly to ensure all spots have been removed.
Please note that isopropyl alcohol should only be used as a last resort when dealing with persistent spots. If you are unsure about the cleaning process or if the spots are still present after attempting to clean them, it is recommended to seek professional assistance from a camera technician.
Reassemble the Camera and Reinsert Battery
Once you have finished cleaning the spots from inside your DSLR camera, it is time to reassemble it.
Start by carefully placing the image sensor back into its original position. Ensure that it is properly aligned and fits snugly into place.
Next, reconnect any cables or connectors that were detached during the cleaning process. Make sure to match the labels or markings on the cables with their corresponding ports.
Once all the components are securely reconnected, carefully close the camera housing. Make sure that all screws or clips are properly fastened to secure the camera’s internal components.
Finally, reinsert the battery into the camera. Make sure it is fully charged or replace it with a new one if necessary.
Before turning the camera back on, take a moment to double-check that everything is properly reassembled and any cleaning tools or supplies are removed from the camera.
Now, you can power on your camera and check if the spots have been successfully removed. Take a few test shots to ensure that the images are clean and free from any remaining spots.
If you notice any lingering spots or issues with the camera’s performance, it may be necessary to consult a professional camera technician or contact the manufacturer for further assistance.
Test and Inspect Your Cleaned DSLR Camera
Once you have finished cleaning the spots from the inside of your DSLR camera, it is important to thoroughly test and inspect your camera to ensure that you have effectively removed all dirt and dust particles. Follow the steps below to check the cleanliness of your camera:
|
1. Power Off and Remove the Lens Before proceeding with the inspection, first, power off your camera and remove the lens. This will allow you to get a clear view of the camera sensor and other internal components. |
|
2. Inspect the Camera Sensor Take a close look at the camera sensor using a sensor loupe or a magnifying glass with good lighting conditions. Check for any remaining spots, smudges, or dust particles. If you notice any, repeat the cleaning process again until the sensor appears spotless. |
|
3. Check Other Internal Components Inspect other internal components of the camera such as the mirror, focusing screen, and viewfinder. Look for any dust or smudges and carefully clean them if necessary. Remember to use the appropriate cleaning tools and techniques recommended by the camera manufacturer. |
|
4. Attach the Lens and Perform a Test Shoot After you are satisfied with the cleanliness of the camera, attach the lens back to the camera body. Power on the camera and take some test shots in different lighting conditions and at different focal lengths. Review the test shots on a computer to check for any visible spots or abnormalities in the images. |
|
5. Repeat the Process if Necessary If you discover any issues or spots in the test shots, you may need to repeat the cleaning process. It is essential to have a clean camera sensor and internal components to ensure optimal image quality and avoid any potential damage to your camera. |
By carefully testing and inspecting your cleaned DSLR camera, you can ensure that it is free from spots and ready to capture beautiful, spotless images.
Question-answer:
Why do spots appear inside DSLR cameras?
Spots often appear inside DSLR cameras due to dust particles or dirt settling on the sensor or other internal components.
What are the consequences of leaving spots inside a DSLR camera?
Leaving spots inside a DSLR camera can result in them appearing in your photos and affecting image quality. Additionally, over time, the spots can accumulate and become more difficult to remove.
How can I clean spots from inside my DSLR camera?
You can clean spots from inside your DSLR camera by first using a blower to remove loose dust particles. Then, you can use a sensor cleaning kit to carefully remove any remaining spots or debris from the sensor or other internal components.