
Keeping the inside of your digital camera lens clean is crucial for maintaining the clarity of your photos. Dust, dirt, and smudges can accumulate on the lens over time, affecting the quality of your images. In this article, we will guide you on how to clean the inside of a digital camera lens, so you can continue capturing stunning photos.
Step 1: Gather the necessary tools
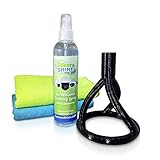
Before you start cleaning the inside of your camera lens, it’s important to gather the right tools. You will need a blower brush, a lens cleaning solution, a microfiber cloth, and lens cleaning wipes. These tools will help you remove any dust, dirt, or smudges from the lens.
Step 2: Remove the lens
In order to clean the inside of your camera lens, you will need to remove it from the camera body. Refer to your camera’s user manual for specific instructions on how to remove the lens safely. Once the lens is detached, hold it with the lens opening facing downwards to prevent any loose particles from falling back into the lens.
Step 3: Use a blower brush
Begin the cleaning process by using a blower brush to remove any loose dust or particles from the inside of the lens. Gently brush the interior surfaces of the lens, being careful not to touch the glass elements. The blower brush will help dislodge any dust or dirt that may have accumulated inside the lens.
Step 4: Apply lens cleaning solution
Next, apply a small amount of lens cleaning solution to a microfiber cloth or lens cleaning wipe. Make sure to use a cleaning solution that is specifically designed for camera lenses. Avoid using any harsh chemicals or abrasive materials that can damage the lens coatings.
Step 5: Clean the glass elements

Gently wipe the glass elements of the lens using the lens cleaning solution. Start from the center and move towards the edges in a circular motion. Be sure to apply gentle pressure and avoid rubbing too vigorously, as this can scratch the lens. Use a fresh part of the cloth or wipe for each glass element to prevent cross-contamination.
Step 6: Let the lens dry
After cleaning the inside of the lens, allow it to air dry completely before reattaching it to the camera body. Avoid using any additional cleaning agents or drying methods, as they can leave residue or damage the lens.
By following these steps and regularly cleaning the inside of your digital camera lens, you can ensure that your photos remain sharp and clear. Remember to handle the lens with care and avoid touching the glass elements directly to prevent any smudges or scratches.
Why is it important to clean the inside of a digital camera lens?
A digital camera lens is a crucial part of the device that plays a significant role in capturing high-quality and clear images. Therefore, it is essential to keep the lens clean, both on the outside and the inside. While cleaning the exterior of the lens is a common practice, many people tend to overlook the importance of cleaning the inside of their camera lens.

Preventing image quality degradation:
Over time, dust, dirt, smudges, and other particles can accumulate on the inner surface of the lens. These contaminants can affect the image quality by causing blurriness, reduced sharpness, or even spots on the photos. Cleaning the inside of the camera lens ensures that the light passing through is not obstructed by any unwanted particles, resulting in sharper and clearer images.
Preventing damage to other components:
When the inside of the camera lens is dirty, particles may find their way into other internal components of the camera. These particles can harm critical elements such as the image sensor or the autofocus mechanism, leading to malfunctions and costly repairs. Regularly cleaning the inside of the lens helps prevent such damage and ensures the overall longevity of your camera.
Note: Cleaning the inside of a digital camera lens is a delicate process that requires appropriate tools and techniques. If you are not confident in doing it yourself, it is advisable to seek professional assistance.

Dust and debris affect image quality
One of the most common issues that can arise with the inside of a digital camera lens is the accumulation of dust and debris. These tiny particles can significantly impact the quality of your images by causing blurriness, spots, or streaks in your photographs. Dust and debris can also obstruct the light entering the lens, resulting in reduced overall image sharpness and clarity.
It is crucial to regularly clean the inside of your camera lens to maintain optimal image quality. By removing dust and debris, you can ensure that your photos turn out sharp, clear, and free from unwanted artifacts.
Prevention is key
Preventing dust and debris from entering your camera lens in the first place is the best approach. When not in use, always keep a lens cap or a UV filter attached to your lens, as they can act as a protective barrier against dust and other particles. Additionally, try to avoid changing lenses in dusty or dirty environments.
How to clean the inside of a digital camera lens

If dust or debris has already accumulated on the inside of your lens, it is important to clean it properly to avoid causing any damage. It is highly recommended to bring your camera to a professional technician or a camera service centre for internal cleaning. They have the necessary tools and expertise to disassemble the lens safely and remove any dirt that may be affecting your photos. Attempting to clean the inside of the lens yourself without proper knowledge or tools may result in irreversible damage.
Note: It is worth mentioning that cleaning the external surface of your camera lens can be done by yourself using a lens cleaning solution and a microfiber cloth. However, for the internal part, it is always best to seek professional assistance.
Prevent damage to the lens
Keeping the inside of your digital camera lens clean is important for capturing sharp and clear photos. However, it’s equally important to prevent any damage to the lens during the cleaning process. Here are some tips to help you avoid damaging your camera lens:
1. Handle the camera with care
When cleaning the inside of your camera lens, ensure that you handle the camera with utmost care. Avoid applying excessive pressure or force on the lens, as this can cause scratches or other damage. Use gentle and controlled movements while cleaning to minimize the risk of accidents.
2. Use appropriate cleaning tools
Using the right tools is crucial to prevent damage to the lens. Avoid using rough or abrasive materials that can scratch the lens surface. Instead, use a microfiber cloth or lens cleaning paper specifically designed for camera lenses. These materials are gentle on the lens and effectively clean away dirt and smudges without causing harm.

Additionally, use a blower bulb or lens cleaning brush to remove any loose debris or dust from the lens before wiping it gently with a cloth. This helps prevent particles from scratching the lens during the cleaning process.
3. Avoid touching the lens directly
Try to avoid touching the lens directly with your fingers, as the natural oils on your skin can leave smudges or fingerprints. If you need to remove any stubborn dirt or smudges, apply a small amount of lens cleaning fluid to the cloth and gently wipe the affected area. Always follow the manufacturer’s instructions when using any cleaning fluid.
By following these preventive measures, you can effectively clean the inside of your digital camera lens without causing any damage. Regular cleaning and maintenance will help ensure that your camera lens lasts longer and continues to deliver high-quality images.
| Preventive Measures: |
|---|
| Handle the camera with care |
| Use appropriate cleaning tools |
| Avoid touching the lens directly |
How to Remove the Lens from Your Camera
If you are planning on cleaning the inside of your digital camera lens, you will first need to remove the lens from the camera body. Here are step-by-step instructions on how to safely remove the lens:
-
Turn off the camera
Before removing the lens, make sure the camera is turned off to prevent any damage or interference. This will also prevent the sensor from being exposed to dust.
-
Press the lens release button
Locate the lens release button on your camera body. This is usually found near the lens mount. Press and hold the button down to release the lens.
-
Rotate the lens
While holding down the lens release button, rotate the lens counterclockwise. The lens should easily detach from the camera body. Be careful not to force it or apply excessive pressure.
-
Clean the contacts
Once the lens is removed, inspect the contacts on both the lens and the camera body. Use a soft, lint-free cloth to gently wipe away any dirt or smudges. This will help maintain a good connection between the lens and the camera.
-
Store the lens properly
After cleaning the contacts, it’s important to store the lens in a safe and dust-free environment. Use a lens cap to protect the front and rear elements from scratches and dust. Consider using a camera bag or case for added protection.
By following these steps, you will be able to safely remove the lens from your camera and proceed with cleaning the inside of the lens.

Tools you will need
Before you begin cleaning the inside of your digital camera lens, make sure you have the following tools:
Clean microfiber cloth
A clean microfiber cloth is essential for cleaning the lens without causing any scratches or damage. Make sure the cloth is specifically designed for camera lenses and is free from any dust or dirt particles.
Blower or brush
A blower or brush can be used to remove any loose dust or debris from the lens before wiping it with a cloth. It helps in preventing any scratches that could be caused by rubbing particles against the lens.
Note: Avoid using compressed air as it can potentially damage the lens.
Lens cleaning solution
A lens cleaning solution specially formulated for camera lenses is recommended for removing stubborn smudges and fingerprints. Make sure to use a solution that is compatible with your camera lens and follow the instructions on the bottle.
Tip: Avoid using household cleaners or alcohol-based solutions, as they can damage the lens coating.
With these tools at hand, you are ready to clean the inside of your digital camera lens effectively and safely.
Lens cleaning solution
Properly cleaning the inside of a digital camera lens requires the use of a lens cleaning solution. This solution is specifically designed to remove dirt, fingerprints, smudges, and other debris from the lens surface without causing any damage. Here are some important points to consider when using a lens cleaning solution:
- Choose a high-quality lens cleaning solution that is specifically formulated for camera lenses.
- Apply a small amount of the solution to a clean microfiber cloth or lens cleaning tissue.
- Gently wipe the cloth or tissue across the lens surface, using circular motions. Avoid applying excessive pressure as it can scratch the lens.
- If there are stubborn stains or smudges, you can dampen the cloth or tissue slightly with the cleaning solution.
- Never spray the cleaning solution directly onto the lens. This can lead to the liquid penetrating the lens and causing damage to internal components.
- Always make sure the lens cleaning solution is completely dry before using the camera again.
- Store the lens cleaning solution in a cool and dry place, away from direct sunlight.
By following these guidelines, you can effectively clean the inside of your camera lens and maintain its optimal performance for capturing high-quality images.
Lens cleaning cloth
A lens cleaning cloth is an essential tool for cleaning the inside of a digital camera lens. It is specifically designed to remove dust, fingerprints, and smudges without scratching or damaging the lens surface.
When choosing a lens cleaning cloth, it is important to look for a high-quality microfiber cloth. Microfiber has tiny fibers that are effective at picking up and removing particles from the lens. It is also gentle enough to not leave any scratches on the lens surface.
To clean the inside of a digital camera lens using a lens cleaning cloth, follow these steps:
- Power off the camera: Before cleaning the lens, make sure the camera is turned off to prevent any accidental damage.
- Gently blow away any loose particles: Use a blower brush or a can of compressed air to blow away any loose dust or particles from the lens surface.
- Dampen the cleaning cloth: Moisten the lens cleaning cloth with a few drops of lens cleaning solution. Avoid using any harsh chemicals or abrasive substances, as they can damage the lens.
- Gently wipe the lens: Using gentle, circular motions, wipe the lens surface with the dampened lens cleaning cloth. Start from the center and work your way outwards. Be careful not to apply too much pressure.
- Inspect the lens: After cleaning, inspect the lens surface for any remaining smudges or marks. If necessary, repeat the cleaning process.
- Store the lens cleaning cloth: After use, store the lens cleaning cloth in a clean, dry place to prevent it from collecting dust or dirt.
Regularly cleaning the inside of your digital camera lens using a lens cleaning cloth will help maintain the clarity and quality of your photos. It is important to handle the lens and cleaning cloth with care to avoid any damage. If you are unsure about cleaning your camera lens yourself, it is always recommended to seek professional help.
Lens blower
A lens blower is a useful tool for cleaning the inside of a digital camera lens. This tool is specifically designed to remove dust and debris without causing any damage to the lens surface.
To use a lens blower, follow these steps:
- Ensure the camera is turned off and remove the lens from the camera body.
- Hold the lens blower upright and gently squeeze the bulb.
- Direct the nozzle towards the lens and blow air onto the surface of the lens.
- Avoid getting the nozzle too close to the lens to prevent any potential scratches.
- Continue blowing air onto the lens until all visible dust particles have been removed.
- Reattach the lens to the camera body and turn on the camera to check for any remaining dust.
It is important to remember that a lens blower should only be used for removing loose particles such as dust and debris. If there are stubborn stains or smudges on the lens, it is best to use a lens cleaning solution and a microfiber cloth for a more thorough cleaning.
Step-by-step guide to cleaning the inside of a digital camera lens
Cleaning the inside of a digital camera lens may seem daunting, but with the right tools and techniques, you can remove any dust or debris that may have accumulated, ensuring that your photos remain clear and sharp. Follow these simple steps to clean the inside of your camera lens:
- Gather the necessary tools: Before starting, make sure you have these items handy: a blower brush, a lens pen, lens cleaning solution, lens tissues, and a microfiber cloth.
- Select a clean workspace: Find a well-lit and dust-free area to work on your camera. A clean table or desk would be ideal.
- Turn off the camera: Before cleaning the lens, it’s important to turn off the camera to prevent any accidental damage.
- Remove the lens: Carefully remove the lens from the camera body. Refer to your camera’s manual for instructions specific to your model.
- Blow away dust: Use the blower brush to gently blow away any loose dust or debris that may be on the lens surface. Be careful not to touch the lens with the brush.
- Use the lens pen: Use the lens pen’s brush end to remove any remaining dust on the lens. Then use the carbon-tipped end to remove smudges or fingerprints. Gently rotate the pen in a circular motion over the affected areas.
- Apply lens cleaning solution: Apply a small amount of lens cleaning solution to a lens tissue. Be cautious not to use excessive liquid, as it may seep into the lens and cause damage.
- Gently wipe the lens: Use the damp lens tissue to gently wipe the lens surface, starting from the center and moving outwards in a circular motion. Be gentle and avoid applying too much pressure.
- Dry the lens: Use a dry lens tissue or a microfiber cloth to gently dry the lens and remove any remaining moisture.
- Reattach the lens: Once the lens is clean and dry, carefully reattach it to the camera body. Ensure that it is properly aligned and securely fastened.
Following these steps regularly will help keep your camera lens clean and free from dust, ensuring optimal performance and clear image quality. Remember, it’s important to approach the cleaning process with care and attention to detail to avoid any potential damage to your camera lens.
Choose a clean and dust-free environment
When cleaning the inside of a digital camera lens, it’s important to work in a clean and dust-free environment. Any particles or debris present in the air can easily land on the lens and cause further damage or affect image quality.
Here are a few tips for creating a suitable environment:
1. Find a quiet and spacious area
Choose a room or an area where you can work without distractions. Make sure you have enough space to lay out your tools and disassemble your camera lens if necessary.
2. Reduce airborne contaminants
Avoid working in areas with strong drafts or in close proximity to open windows or doors. This can introduce dust particles or other contaminants into the environment. If necessary, use a soft cloth to cover any open windows or vents.
3. Prevent static electricity buildup
Static electricity can attract dust particles and cause them to cling to your lens. To minimize the risk, avoid wearing clothing made of synthetic materials and use an anti-static wrist strap if you have one.
4. Work on a clean surface
Use a clean and smooth surface, such as a table or a desk, to work on. Avoid surfaces that may easily shed fibers or leave residues, such as carpets or rough fabrics.
By choosing a clean and dust-free environment, you can minimize the chances of introducing further dirt or damage to your digital camera lens during the cleaning process.
Remove the Lens Carefully
Before attempting to clean the inside of the camera lens, it is essential to remove the lens safely and gently. Follow these steps to ensure a proper removal:
- Power Off: Turn off the camera and remove the battery to prevent any accidental damage.
- Release the Lens: If your camera has a release button or switch to detach the lens, activate it. Otherwise, refer to the camera’s manual for specific instructions.
- Remove the Lens: Hold the camera body with one hand and use your other hand to gently twist the lens counterclockwise until it detaches.
- Protect the Lens: Place a lens cap or cover on both the back and front of the lens to prevent dust or debris from entering.
It is crucial to handle the lens with care during removal to avoid any damage or scratches. By following these steps, you can ensure that the lens is safely removed and ready for cleaning.
Question-answer:
What supplies do I need to clean the inside of a digital camera lens?
To clean the inside of a digital camera lens, you will need the following supplies: a blower brush, a lens cleaning solution, lens cleaning tissues, a microfiber cloth, and a lens cleaning pen.
Can I use compressed air to clean the inside of my camera lens?
No, it is not recommended to use compressed air to clean the inside of a camera lens. The high pressure can damage delicate internal components of the lens. It is better to use a blower brush to gently remove any dust or debris.


