Security cameras have become an essential part of our lives, helping to protect our homes, businesses, and loved ones. These cameras capture footage that can be used to identify potential intruders or monitor activities. However, in order to make the most of your security camera system, it is crucial to connect them to a switch.
A switch serves as the central hub for your security camera system, allowing you to connect multiple cameras and control their operations. By connecting your security cameras to a switch, you can easily manage and monitor all the cameras from a single location. This not only provides convenience but also enhances the overall security of your property.
So, how can you connect a security camera to a switch? The process is relatively straightforward. First, you need to ensure that your security camera system is compatible with a switch. Most modern cameras support this connection, but it is always recommended to check the manufacturer’s specifications.
Once you have confirmed compatibility, you will need an Ethernet cable to establish the connection. Plug one end of the cable into the Ethernet port of your security camera. Then, connect the other end to any available port on the switch. Repeat this process for each camera you want to connect. It is advisable to label each cable and corresponding camera for ease of identification.
Overview of connecting a security camera to a switch
Connecting a security camera to a switch is an important step in setting up a surveillance system for your home or business. By connecting your camera to a switch, you can easily control and manage multiple cameras from a central location.

Before connecting your security camera to a switch, you need to make sure that you have the necessary equipment, including the camera, a compatible switch, and appropriate cables. You should also have a basic understanding of networking concepts and how to configure network settings.
Step 1: Choose the right switch
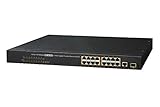
The first step is to choose a switch that is compatible with your security camera. It should have enough ports to accommodate all of your cameras, and should support the necessary protocols for video transmission.
Step 2: Connect the camera to the switch
Once you have the right switch, you can connect your security camera to it using an Ethernet cable. Most cameras have an Ethernet port that allows you to connect directly to the switch. Simply plug one end of the Ethernet cable into the camera and the other end into an available port on the switch.
It is important to ensure that the Ethernet cable is securely connected to both the camera and the switch to establish a stable connection.
Step 3: Configure network settings
After connecting the camera to the switch, you need to configure the network settings to ensure that the camera is properly integrated into your network. This involves assigning an IP address to the camera and setting up any necessary network security features.

Refer to the camera’s user manual or the manufacturer’s website for instructions on how to access and configure the camera’s network settings.
Once the camera is properly connected to the switch and the network settings are configured, you should be able to access the camera’s live feed and manage it through the switch’s user interface or compatible software.
By following these steps, you can successfully connect a security camera to a switch and enhance the surveillance capabilities of your home or business.
Choosing the right security camera for your needs
When it comes to choosing a security camera for your needs, there are several factors to consider. Depending on your specific requirements, you may need a camera with certain features and capabilities. Here are some important considerations to keep in mind:
1. Indoor or outdoor
First, consider whether you need an indoor or outdoor security camera. Indoor cameras are typically smaller and can be easily mounted on walls or ceilings. They are designed to monitor specific areas inside your home or office. Outdoor cameras, on the other hand, are built to withstand harsh weather conditions and protect your property from potential threats.
2. Resolution and image quality
The resolution and image quality are crucial factors to consider when choosing a security camera. Higher resolution cameras will provide clearer and more detailed images, allowing you to easily identify people or objects. Nowadays, many security cameras offer HD or even 4K resolution options, ensuring optimal image quality.
3. Night vision
If you need to monitor your property during nighttime hours, it’s essential to choose a security camera with night vision capabilities. Look for cameras that offer infrared technology, as this will allow you to clearly see objects even in complete darkness. The range of the night vision is also an important factor to consider.
4. Field of view
The field of view refers to the amount of area a security camera can capture. Cameras with a wide field of view can monitor larger spaces with fewer cameras. If you need to cover a large area, consider a camera with a wider field of view. Alternatively, if you need to focus on specific areas in detail, a camera with a narrower field of view may be more suitable.
5. Wired or wireless
Security cameras can be either wired or wireless. Wired cameras require a physical connection to a power source and a recording device, while wireless cameras operate via Wi-Fi or other wireless technologies. Wired cameras offer a more reliable and consistent connection, but wireless cameras provide greater flexibility in terms of placement and installation.
By considering these factors and assessing your specific needs, you will be able to choose the right security camera that meets your requirements and provides optimal surveillance for your property.

| Factors | Considerations |
|---|---|
| Indoor or outdoor | Consider the location where the camera will be installed. |
| Resolution and image quality | Higher resolution provides clearer and more detailed images. |
| Night vision | Ensure the camera has infrared technology for clear visibility at night. |
| Field of view | Choose a camera with a suitable field of view for your surveillance needs. |
| Wired or wireless | Consider the pros and cons of wired and wireless cameras. |
Gathering the necessary equipment for the installation
Before you can connect a security camera to a switch, you need to gather all the necessary equipment. Here is a list of items you will need:
- A security camera: Choose a camera that fits your needs and requirements. Consider factors such as resolution, field of view, and night vision capabilities.
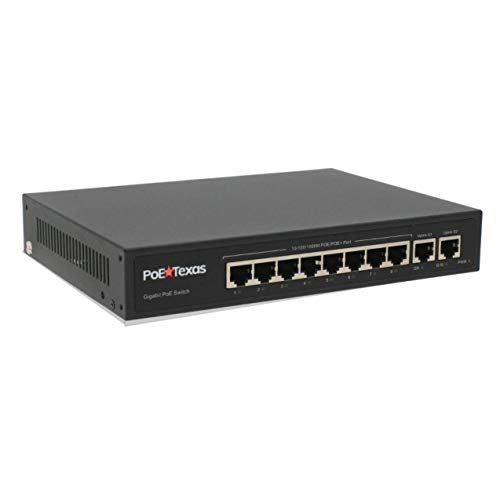
- A network switch: This acts as the central hub for connecting multiple devices, including the security camera, to your network. Choose a switch that supports Power over Ethernet (PoE) if your camera requires it.
- Network cables: These cables are used to connect the security camera to the network switch. Make sure to choose cables that are long enough to reach the desired location.
- Power source: If your security camera does not support Power over Ethernet, you will also need a power source, such as a power adapter or a power over Ethernet injector.
- Mounting hardware: Depending on where you plan to install the security camera, you may need mounting hardware such as brackets or screws.
- Network equipment: Ensure that you have all the necessary network equipment, such as a modem, router, and Ethernet cables, to establish a network connection.
Once you have gathered all the necessary equipment, you will be ready to proceed with the installation process.
Preparing the switch for the camera connection
Before connecting your security camera to a switch, it is important to ensure that the switch is properly configured and ready to accept the camera connection. Follow these steps to prepare the switch:
- Power off the switch and disconnect it from the power source.
- Locate an available Ethernet port on the switch for connecting the camera.
- If required, label the Ethernet port for easy identification.
- Check the switch’s datasheet or manual to determine the power requirements of the camera. Ensure that the switch can provide sufficient power over Ethernet (PoE) to the camera.
- If necessary, connect a power injector or PoE switch to the switch to provide power to the camera.
- If your switch has VLAN capabilities, consider configuring a dedicated VLAN for the security camera to enhance network security and performance.
- Connect the switch to your network using an Ethernet cable.
- Power on the switch and verify that it is functioning correctly.
By completing these preparations, you can ensure that your switch is ready to connect the security camera and provide a reliable network connection for video surveillance.
Mounting and positioning the security camera
When installing a security camera, it’s crucial to choose the right location and mount it properly to ensure optimal surveillance coverage. Here are some steps to follow:

- Identify the area you want to monitor: Before mounting the camera, determine the specific area or areas you want to keep under surveillance. This can include entrances, driveways, or other vulnerable spots.
- Select the mounting location: Look for a spot that provides a clear view of the target area. Make sure there are no obstructions that could block the camera’s line of sight, such as trees or buildings.
- Choose the right height: Mount the camera at a height that captures a wide-angle view while also preventing easy tampering. A recommended height is 8 to 10 feet above the ground.
- Secure the mounting bracket: Use screws or other appropriate hardware to attach the mounting bracket to a wall, ceiling, or other surface. Ensure that the bracket is sturdy enough to support the weight of the camera.
- Connect the camera to the bracket: Most security cameras come with adjustable mounting brackets. Attach the camera to the bracket and adjust its position to achieve the desired angle and range of view.
- Adjust the camera’s position: Fine-tune the camera’s position to eliminate blind spots and enhance its effectiveness. Test the camera’s view by monitoring the footage and making necessary adjustments.
- Ensure proper wiring: Once the camera is securely mounted, run the necessary cables through the walls or conduits to connect it to the switch or recording device. Conceal the wiring to prevent tampering or accidental damage.
- Test the camera: Before completing the installation, test the camera to ensure it is functioning correctly. Check the video feed on a monitor or the connected device to verify image quality and coverage.
- Regular maintenance: Regularly inspect and clean the camera to maintain optimal performance. Check for any signs of damage or loose connections and address them promptly.
By following these steps, you can properly mount and position your security camera, maximizing its effectiveness in protecting your property.
Running the necessary cables from the camera to the switch
Connecting a security camera to a switch requires running the necessary cables from the camera location to the switch location. This step is crucial for establishing the connection and ensuring a reliable network connection for the camera.
Here are the steps to run the necessary cables:
- Determine the distance between the camera and the switch location. This will help you determine the length of cable required.
- Choose the appropriate type of cable for the installation. Ethernet cables, such as Cat5e or Cat6, are commonly used for connecting security cameras to switches.
- Measure the required length of the cable and cut it accordingly. It is recommended to add a few extra feet to account for any unexpected bends or obstacles.
- Ensure that the camera and switch are powered off before proceeding with the cable installation.
- Run the cable from the camera location to the switch location. This may involve drilling holes, using cable clips, or utilizing existing infrastructure such as conduit or cable trays.
- Secure the cable as you run it to prevent it from getting tangled or damaged.
- Once the cable is in place, connect one end of the cable to the camera, taking note of the appropriate ports or connectors.
- At the switch location, connect the other end of the cable to an available port on the switch, ensuring a secure connection.
- Power on the camera and switch.
Once the cables are properly connected, the security camera will be able to transmit video data to the switch, allowing for remote viewing, recording, and monitoring. It is important to ensure that all connections are secure and properly configured to ensure optimal performance.
Configuring the switch settings for the camera
Once you have connected your security camera to the switch, you will need to configure the switch settings to ensure proper communication and functionality. This involves assigning an IP address to the camera, setting up VLANs if needed, and configuring any necessary port settings. Follow the steps below to configure the switch settings for the camera.

Step 1: Access the switch’s administration interface
Open a web browser on a computer connected to the same network as the switch. Enter the IP address of the switch into the browser’s address bar and press Enter. You may need to enter a username and password to access the administration interface.
Step 2: Assign an IP address to the camera
In the administration interface, navigate to the network settings or DHCP settings section. Locate the connected port or MAC address of the camera and assign a static IP address to it. Make sure to use an IP address that is within the same subnet as your network.
Step 3: Configure VLANs (if needed)
If your network uses VLANs to separate traffic, you may need to configure the switch to assign the camera to the correct VLAN. In the administration interface, navigate to the VLAN settings section. Create a new VLAN if necessary, and assign the camera’s port or MAC address to the desired VLAN.
Step 4: Configure port settings
In the administration interface, navigate to the port settings section. Find the port to which the camera is connected and configure any necessary settings, such as PoE (Power over Ethernet) if your camera requires it. Enable any features or protocols that are required for the camera to communicate properly.
Once you have configured the switch settings for the camera, save the changes and exit the administration interface. The camera should now be properly connected and configured on the network, allowing you to access it and view the security footage.

Note: The specific steps and options for configuring the switch settings may vary depending on the make and model of your switch. Refer to the manufacturer’s documentation for detailed instructions specific to your switch.
Testing the camera connection and video feed
Once the security camera is connected to the switch, it is important to test the connection and ensure that the video feed is working properly. Here are the steps to test the camera connection and video feed:
- Ensure that the camera is properly powered on and connected to the switch.
- Access the switch’s configuration settings using a computer connected to the same network as the switch.
- Check the switch’s interface configuration to ensure that the port to which the camera is connected is enabled and operational.
- Open a web browser on the computer and enter the IP address of the camera to access its web interface.
- Within the camera’s web interface, check the video feed and ensure that it is displaying properly.
- If the video feed is not displaying, double-check the configuration settings of the camera and switch to ensure they are properly configured.
- If the video feed is still not working, try connecting the camera to a different port on the switch or try a different Ethernet cable to rule out any potential hardware issues.
- If all else fails, consult the camera’s user manual or contact the manufacturer for further assistance.
By following these steps, you can ensure that the camera connection is established correctly and the video feed is working as expected.
Setting up remote access and monitoring
Once you have connected your security camera to the switch, it is important to set up remote access and monitoring so that you can view the camera footage from anywhere. Here are the steps to follow:
- Assign a static IP address to the security camera: Log in to the switch’s administrative interface and navigate to the network settings. Locate the security camera and assign a static IP address to ensure that it remains accessible even if the network changes.
- Configure port forwarding on your router: Access your router’s settings interface and look for the port forwarding section. Add a new port forwarding rule that maps the external port of your choice to the static IP address of the security camera.
- Set up a Dynamic DNS (DDNS) service: Most residential internet connections have dynamic IP addresses, which can change over time. To ensure that you can always access your security camera, sign up for a DDNS service and enter the provided hostname or domain into your router’s DDNS settings. This allows the service to automatically update the IP address associated with the hostname whenever it changes.
- Configure the security camera’s remote access settings: Access the security camera’s settings interface either through a web browser or a dedicated software provided by the manufacturer. Enable remote access and enter the DDNS hostname or domain, along with the port number you configured for port forwarding, into the appropriate fields. Save the settings.
- Access the security camera remotely: Open a web browser on any device, enter the DDNS hostname or domain in the address bar, followed by the port number you configured for port forwarding. You should now be able to access and view the security camera’s live feed from anywhere with an internet connection.
By following these steps, you can easily set up remote access and monitoring for your security camera, allowing you to keep an eye on your property or monitor important areas even when you are away.
Maintaining and troubleshooting the camera and switch connection
Once you have successfully connected your security camera to a switch, it is important to regularly maintain and troubleshoot the connection to ensure continuous and reliable monitoring. Here are some tips to help you with that:
1. Regularly check the physical connections:
Inspect the Ethernet cables connecting the camera to the switch to ensure they are securely plugged in. Look for any signs of damage, such as frayed or bent cables, and replace them if necessary. Additionally, make sure the camera and switch are securely mounted and positioned correctly.
2. Monitor network and power status:
Use network monitoring tools or the camera’s web interface to check the network and power status. Ensure that the camera is receiving sufficient power, and that it is connected to the correct network. If there are any network connectivity issues, troubleshoot them by checking the switch’s configuration and network settings.
3. Update firmware and software:
Regularly check for firmware and software updates for both the camera and the switch. Manufacturers often release updates to improve performance, add new features, and fix any security vulnerabilities. Follow the manufacturer’s instructions to safely update the firmware and software.
4. Test and adjust camera settings:
Periodically test the camera’s video feed and adjust its settings if necessary. Check for any image quality issues, such as blurry or pixelated video, and adjust settings like resolution, frame rate, and exposure accordingly. This will help ensure that the camera is capturing clear and usable footage.
5. Monitor storage and backups:
Regularly monitor the storage capacity of the camera’s recording device (such as a DVR or NVR) and ensure that backups are being created successfully. If the storage is nearing its capacity, consider increasing it or implementing a regular deletion policy to free up space for new recordings.
Conclusion:
Maintaining and troubleshooting the connection between your security camera and switch is essential for ensuring uninterrupted surveillance. By regularly checking physical connections, monitoring network and power status, updating firmware and software, testing and adjusting camera settings, and monitoring storage and backups, you can keep your security system operating optimally and address any issues that may arise promptly.
FAQ,
What is a security camera?
A security camera is a device that captures video footage of a specific area to monitor and record activities for security purposes.
Why would I want to connect a security camera to a switch?
Connecting a security camera to a switch allows you to integrate it into your network infrastructure, enabling remote access to the camera’s footage and simplifying its management.
How do I connect a security camera to a switch?
To connect a security camera to a switch, you will need an Ethernet cable. Simply plug one end of the cable into the camera’s Ethernet port and the other end into an available port on the switch. Make sure the camera and switch are on the same network.
Do all security cameras support connection to a switch?
No, not all security cameras support connection to a switch. Some cameras may have limited connectivity options and may only support direct connections to a recording device or a network video recorder (NVR).
What are the advantages of connecting a security camera to a switch?
Connecting a security camera to a switch provides several advantages. It allows for easier management and access to the camera’s footage from multiple devices on the network. It also enables the camera to integrate with other network devices and systems, such as an NVR or video management software.


