If you’re looking to enhance the security of your home or office, installing a security camera is a great step in the right direction. Altec Lansing offers a range of high-quality security cameras that provide peace of mind and keep your property safe. In this article, we’ll guide you through the process of connecting your Altec Lansing security camera so you can start monitoring your space.
Step 1: Choose the Right Location
Before you begin the installation process, take some time to determine the best location for your security camera. Consider areas that provide a wide field of view and cover all the crucial spots. You may also want to consider weatherproofing options if you plan to install the camera outdoors.
Step 2: Mount the Camera
Once you have chosen the perfect location, it’s time to mount your Altec Lansing security camera. This step may require drilling holes to secure the mounting bracket, so make sure you have the necessary tools and take all safety precautions. Follow the specific instructions provided by Altec Lansing for your camera model to ensure a secure installation.
Step 3: Connect the Camera to Power
After mounting the camera, you’ll need to connect it to a power source. Altec Lansing security cameras typically come with a power adapter that needs to be plugged into a nearby electrical outlet. Make sure there is a power source within reach of the camera and secure the cable to prevent accidental disconnection.
Step 4: Connect to the Internet
To access the live feed and recordings from your Altec Lansing security camera, you’ll need to connect it to the internet. Most models support a wireless connection, allowing you to connect the camera to your Wi-Fi network. Follow the instructions provided with your camera to input the necessary network details and complete the connection process.
With these simple steps, you’ll be able to connect your Altec Lansing security camera and start monitoring your property. Remember to regularly check the camera’s position, review the footage, and maintain the system to ensure everything is working optimally.

Step-by-step guide to connecting an Altec Lansing security camera
Installing a security camera is an effective way to enhance the safety and security of your home or business. Altec Lansing offers a range of high-quality security cameras that provide clear and reliable surveillance footage. In this step-by-step guide, we will walk you through the process of connecting an Altec Lansing security camera.
Step 1: Prepare the necessary equipment
Before beginning the installation process, make sure you have all the necessary equipment. This typically includes the Altec Lansing security camera, a power adapter, Ethernet cables, and a computer or mobile device for setup.
Step 2: Choose the optimal location
Select a location for your security camera that provides a clear view of the desired area. Consider factors such as line of sight, lighting conditions, and potential obstructions. It is also important to ensure that the camera is located within range of your Wi-Fi network, if applicable.
Step 3: Mount the camera
Using the provided mounting hardware, securely attach the camera to the chosen location. Make sure the camera is stable and positioned at the desired angle for optimal surveillance coverage.
Step 4: Connect the camera to power
Plug the power adapter into a nearby power outlet and connect it to the camera. Ensure that there is a stable power supply and that all connections are secure.

Step 5: Connect the camera to your network
If your Altec Lansing security camera supports Wi-Fi connectivity, connect it to your network using the provided instructions. This typically involves accessing the camera’s settings through a computer or mobile device and entering your Wi-Fi network details. Follow the on-screen prompts to complete the connection process.
Step 6: Install the necessary software
Depending on the model of your Altec Lansing security camera, you may need to install additional software or apps on your computer or mobile device. Follow the manufacturer’s instructions to download and install the required software to access the camera’s live feed and configure settings.
Step 7: Test the camera
Once the camera is connected and the software is installed, perform a test to ensure everything is functioning correctly. Access the live feed through the software or app and verify that the camera is capturing clear footage. Make any necessary adjustments to the camera’s positioning or settings based on your requirements.
By following these step-by-step instructions, you can easily connect an Altec Lansing security camera to enhance the security and surveillance capabilities of your home or business.
Prepare your equipment before installation
Before you begin installing your Altec Lansing security camera, it’s important to gather all the necessary equipment and ensure everything is in working order. Here are some steps to follow:

- Check the contents of the package: Open the box and verify that you have received all the components listed in the user manual. This typically includes the camera, mounting brackets, cables, power adapter, and any other accessories.
- Inspect the camera: Take a close look at the camera to make sure there are no visible damages. Check for any signs of wear or defects that may affect its performance. If you notice any issues, contact the manufacturer for assistance.
- Choose the ideal mounting location: Determine where you want to install the camera and ensure there is a suitable surface or bracket to mount it securely. Consider factors such as the camera’s field of view, the location’s accessibility, and the presence of power outlets or Ethernet connections.
- Ensure a stable internet connection: Since Altec Lansing security cameras often utilize Wi-Fi or Ethernet connections, it’s important to have a stable and reliable internet connection in the area where you plan to install the camera. Test the connectivity in advance to avoid any connection issues later on.
- Prepare power sources: Ensure that you have access to a power outlet or a power source nearby so that the camera can be connected and powered. If using a power adapter, make sure it is compatible with the camera’s power requirements.
- Set up your viewing device: Determine how you will be accessing the camera’s live feed and recordings. This could be through a mobile app, a web browser, or a dedicated monitoring system. Make sure your device is compatible and that you have the necessary login credentials or software installed.
By following these steps and preparing your equipment properly, you’ll be ready to install your Altec Lansing security camera with confidence and ensure a smooth setup process.
Find the optimal location for your security camera
When setting up your Altec Lansing Security Camera, it is important to find the optimal location for installation. By selecting the right position, you can maximize the camera’s effectiveness in monitoring your property. Here are some tips to help you find the best location:
1. Assess the vulnerable areas
Start by assessing the vulnerable areas of your property that you want to monitor. These could include entry points, driveways, garages, or outdoor spaces where valuable items are stored. Identifying these areas will help you determine where to place your security camera.
2. Consider the camera’s field of view
Each Altec Lansing security camera has a specific field of view, which determines the area it can cover. Consider this when choosing the location. Ensure that the camera is positioned to cover the desired area and minimize blind spots.
3. Check for obstructions
Avoid obstructing the camera’s view with objects such as trees, bushes, or fences. Make sure there are no objects that could block the camera’s line of sight or create shadows that may interfere with the camera’s image quality.
4. Optimize camera placement
Mount the security camera at a height that provides a good angle for capturing the desired area without compromising the camera’s safety. It should be high enough to prevent tampering but low enough to capture clear images and videos.
5. Consider lighting conditions
Take into account the lighting conditions of the area you want to monitor. Ensure that the camera is positioned to avoid glare, direct sunlight, or other sources of bright light that may affect the camera’s image quality. If necessary, consider investing in a camera with night vision capabilities for monitoring low-light areas.
By following these tips, you can find the optimal location for your Altec Lansing Security Camera, ensuring maximum surveillance coverage and peace of mind for your property.
Mount the camera securely
Properly mounting your Altec Lansing security camera is crucial for optimal performance and functionality. Follow these steps to securely mount your camera:
1. Choose the mounting location: Select a location that provides a clear view of the area you want to monitor. Consider factors such as visibility, accessibility, and height. Ensure that the mounting surface is strong and stable.
2. Gather the necessary tools: You will need a drill, screws, wall anchors, and a screwdriver.
3. Prepare the camera: Ensure that the camera is turned off and disconnected from the power source before mounting. This will prevent any accidents during the installation process.
4. Mark the drill holes: Hold the camera against the mounting surface and mark the drill holes with a pencil. Double-check the alignment and make any necessary adjustments.
5. Drill the holes: Use a drill to create holes at the marked spots. Be sure to use the appropriate drill bit size for your specific mounting screws.
6. Install wall anchors (if necessary): If you are mounting the camera on a surface that requires extra support, insert wall anchors into the drilled holes. This will provide added stability.

7. Attach the camera: Line up the camera with the drilled holes and use screws to secure it to the mounting surface. Ensure that the camera is level and tightly fastened.
8. Adjust the angle: Once the camera is securely mounted, adjust the angle to ensure proper coverage of the desired area. This can usually be done by loosening the camera’s bracket and repositioning it as needed.
9. Connect the camera: After the camera is securely mounted, follow the manufacturer’s instructions to connect it to your chosen monitoring system or network.
10. Test the camera: After installation, test the camera to ensure it is functioning correctly. Check the video feed, motion detection, and any other features to ensure everything is working as expected.
By following these steps, you can securely mount your Altec Lansing security camera and optimize its performance for monitoring your desired area.
Connect the camera to a power source
Before you can start using your Altec Lansing security camera, you need to connect it to a power source. Follow these steps to ensure a proper power connection:
- Locate the power adapter that came with your camera. It should have a specific output voltage and current rating that matches the requirements of the camera.
- Make sure the camera is turned off before proceeding.
- Connect the power adapter to the designated power input port on the camera. The port is usually located on the back or bottom of the device and is labeled with a power symbol or “DC IN”.
- Plug the other end of the power adapter into a nearby power outlet. Ensure that the outlet is a reliable source of power and is easily accessible.
- Switch on the power outlet and check if the camera’s LED indicator lights up. This indicates that the camera is receiving power.
- Wait for a few moments until the camera fully powers up. You may see a startup sequence or hear audible signals confirming the camera is ready to be connected.
Note: It is vital to use the provided power adapter and not substitute it with a different one, as using an incompatible adapter may damage the camera or pose a safety risk.
By properly connecting your Altec Lansing security camera to a power source, you ensure that it can perform its intended functions and provide you with reliable monitoring and surveillance capabilities.
Set up the camera’s wireless connection
Setting up the wireless connection for your Altec Lansing security camera is a straightforward process. Follow these steps to get started:
- Power on the camera and make sure it is connected to a power source.
- Locate the Wi-Fi setup button on the camera. This button may be labeled as “Wi-Fi” or have a similar symbol.
- Press and hold the Wi-Fi setup button for a few seconds until the camera’s Wi-Fi indicator starts blinking.
- On your smartphone or computer, navigate to the Wi-Fi settings and connect to the camera’s network. The network name (SSID) should be something like “AltecLansingCamera-XXXX” where XXXX represents a unique identification number.
- Once connected to the camera’s network, open a web browser and enter the camera’s IP address. The IP address should be printed on the camera or can be found in the camera’s user manual.
- Follow the on-screen instructions to complete the wireless setup. This may involve entering your home Wi-Fi network details, such as the SSID and password.
- After completing the setup process, the camera will disconnect from its own network and connect to your home Wi-Fi network. The Wi-Fi indicator on the camera should become solid or turn off, indicating a successful connection.
- You can now access and control your Altec Lansing security camera using the manufacturer’s mobile app or any compatible web browser.
Ensuring a stable and secure network connection is essential for your security camera to function properly. Make sure your home Wi-Fi network has a strong signal and a reliable internet connection for optimal performance.
Download and install the Altec Lansing mobile app
To connect your Altec Lansing security camera, you will need to download and install the Altec Lansing mobile app on your smartphone or tablet. The app allows you to control and manage your camera’s settings, view live footage, and receive real-time notifications.
Step 1: Check compatibility
Before downloading the app, make sure that your device is compatible with the Altec Lansing mobile app. The app is available for both Android and iOS devices. Visit the Google Play Store or the Apple App Store to check if your device is supported.
Step 2: Download the app
Once you have verified compatibility, go to the respective app store for your device. Search for “Altec Lansing” in the search bar and look for the official Altec Lansing mobile app. Tap on the app’s icon when you find it.
- If you are using an Android device, tap on the “Install” button to download and install the app.
- If you are using an iOS device, tap on the “Get” button followed by the “Install” button to download and install the app.
Step 3: Launch the app
Once the app is installed, tap on the app’s icon on your device’s home screen to launch it.
During the first launch, you will be prompted to sign in or create a new account. Follow the on-screen instructions to set up your account and complete the registration process.
Once you have successfully signed in, you will be able to access all the features and functionalities of the Altec Lansing mobile app.
Connect the camera to the app
To connect your Altec Lansing security camera to the app, follow these steps:
Step 1: Download the app
Start by downloading and installing the Altec Lansing security camera app from the App Store or Google Play Store. Make sure to search for the official Altec Lansing app to ensure compatibility with your camera.
Step 2: Create an account
Once you have the app installed, open it and create a new account. Follow the on-screen prompts to enter your details and create a username and password. This account will be used to log in to the app and access your camera’s footage.
Step 3: Connect the camera to Wi-Fi
Next, you’ll need to connect your Altec Lansing security camera to your Wi-Fi network. Check the camera’s user manual for specific instructions on how to do this, as it may vary depending on the model. In general, you’ll need to use the app to scan a QR code or enter the Wi-Fi credentials manually.
Step 4: Add the camera to the app
After connecting the camera to Wi-Fi, open the Altec Lansing app and log in with your account credentials. From the main screen, tap on the “Add Device” button and follow the prompts to add your camera to the app. This typically involves scanning a QR code or entering a unique device ID.
Once the camera is successfully added to the app, you’ll be able to access its live feed, view recordings, and adjust settings all from the convenience of your smartphone or tablet.
| Tip | Troubleshooting |
|---|---|
| Make sure your camera and smartphone/tablet are connected to the same Wi-Fi network. | If you are having trouble connecting the camera to the app, try restarting both the camera and your smartphone/tablet, and ensure you are following the correct steps outlined in the user manual. |
| Keep your camera firmware up to date to ensure optimal performance and security. | If you continue to experience issues, consider reaching out to Altec Lansing customer support for further assistance. |
Adjust camera settings for optimal surveillance
Once you have successfully connected your Altec Lansing security camera, it is important to adjust the camera settings for optimal surveillance. These settings will ensure that your camera is functioning correctly and capturing high-quality video footage.
Here are some key camera settings that you should consider adjusting:
- Resolution: Set the resolution to a level that provides clear and detailed images. Higher resolution settings will require more storage space, so choose the resolution that best suits your needs.
- Frame Rate: Adjust the frame rate to determine how many frames per second your camera will record. A higher frame rate will result in smoother video, but will also require more storage space.
- Exposure: Adjust the exposure settings to ensure that the camera captures the right amount of light. This will prevent overexposed or underexposed footage.
- Focus: Check the focus of your camera and adjust it if necessary to ensure that objects are clear and in focus. You may need to manually focus the lens using the lens focus ring.
- Motion Detection: Enable the motion detection feature and adjust the sensitivity settings to ensure that the camera captures any movement in its field of view. This will help you identify any suspicious activity.
It is recommended to consult the camera’s user manual for specific instructions on adjusting these settings. Once you have made the necessary adjustments, regularly test the camera to ensure that it is functioning properly and capturing the desired footage.
Test the Camera and Ensure It Is Functioning Properly
Once you have successfully connected your Altec Lansing security camera to your desired device, it is important to test the camera to ensure it is functioning properly. Follow these steps to test the camera:
1. Open the camera’s live feed on your device, whether it is a smartphone, tablet, or computer. This can usually be done by launching the camera’s dedicated app or accessing the camera’s IP address through a web browser.
2. Check if the camera is displaying a clear and sharp image. Make sure the image is not blurry or distorted in any way. Adjust the camera’s position or focus if necessary to enhance the image quality.
3. Test the camera’s pan, tilt, and zoom functionalities if applicable. Move the camera left and right, up and down, and utilize the zoom feature to ensure smooth and accurate movements. If you encounter any issues, consult the camera’s user manual for troubleshooting steps.
4. Enable any additional features that your Altec Lansing security camera may offer, such as motion detection or night vision. Test these features to ensure they are working correctly. For motion detection, walk in front of the camera’s field of view and check if it triggers the motion alerts or recordings. For night vision, test the camera in low light conditions to see if the night vision mode activates and provides a clear image.
5. Test the two-way audio feature if your camera supports it. Speak into the app or device’s microphone and listen for the audio output from the camera. Ensure that the sound is clear and not distorted.
6. Check the camera’s connection stability and video streaming quality. Look for any buffering or lagging issues during the live feed and ensure a smooth and consistent video streaming experience.
By following these steps and thoroughly testing your Altec Lansing security camera, you can ensure that it is functioning properly and providing the optimal surveillance experience. If you encounter any issues during the testing process, refer to the camera’s user manual or contact Altec Lansing customer support for further assistance.
FAQ,
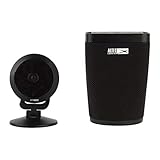
What is Altec Lansing security camera?
Altec Lansing security camera is a surveillance device that is designed to capture and record video footage for security purposes. It is equipped with features such as motion detection, night vision, and remote access, allowing users to monitor their property from anywhere at any time.
Can I connect multiple Altec Lansing security cameras to the same app?
Yes, you can connect multiple Altec Lansing security cameras to the same app. The app supports the connection of multiple cameras, allowing you to view the feeds from all the cameras on a single screen. To connect multiple cameras, simply follow the same steps as you did for the first camera, and they will all be accessible through the app.
Is it possible to access my Altec Lansing security camera remotely?
Yes, it is possible to access your Altec Lansing security camera remotely. Once you have connected the camera to your home network and set up the app on your smartphone or tablet, you will be able to access the camera’s live feed and control its settings from anywhere with an internet connection. This allows you to keep an eye on your property and receive instant alerts in case of any suspicious activity.


