
MacBooks are widely known for their powerful performance and excellent display quality, which is why many photographers and videographers choose these devices for their work. However, while the built-in MacBook cameras are decent, they may not always offer the desired level of quality and functionality for professional-level projects. This is where connecting an external DSLR camera to a MacBook comes in handy.
By connecting your DSLR camera to your MacBook, you can take advantage of the superior image and video quality produced by DSLRs, along with their extensive range of features and controls. Whether you want to edit your shots in real-time or stream a live event, connecting a DSLR camera to your MacBook opens up a world of possibilities.
To connect your DSLR camera to your MacBook, you will need a USB cable compatible with your camera model. Most DSLR cameras come with a USB cable in the box, but if you don’t have one, you can easily find a compatible cable online or at a local electronics store. Once you have the USB cable, follow these steps to connect your camera to your MacBook:
Step 1: Turn off both your DSLR camera and your MacBook.
Step 2: Locate the USB port on your camera and connect one end of the USB cable to it.

Step 3: Locate the USB port on your MacBook and connect the other end of the USB cable to it.
Once the camera is connected to the MacBook, turn on both devices. Your MacBook should recognize the camera and automatically open the Photos app or any other photo management software you have installed. From there, you can import, edit, and save your photos and videos directly on your MacBook.
Remember to always safely eject your camera from your MacBook before disconnecting the USB cable to avoid any potential data loss or damage to your devices. Now you can enjoy the benefits of using a DSLR camera with the convenience and power of your MacBook for all your photography and videography needs.
Connecting External DSLR Camera to MacBook: A Step-by-Step Guide
If you own a DSLR camera and wish to connect it to your MacBook for easy file transfer and editing, you’re in luck. With a few simple steps, you can establish a connection between your external camera and your MacBook. Follow this step-by-step guide to get started:
Step 1: Check Compatibility

Make sure your DSLR camera is compatible with your MacBook. Check the user manual or the manufacturer’s website for specific details on compatibility and supported operating systems.
Step 2: Install Necessary Software
Before connecting your camera, ensure that you have the necessary software installed on your MacBook. Most cameras come with a CD that includes the required drivers. Insert the CD into your MacBook and follow the on-screen instructions to install the software.
Step 3: Connect Your Camera to MacBook
Using the USB cable that came with your camera, connect the USB port of your camera to one of the USB ports on your MacBook.

Step 4: Turn on Your Camera
Power on your DSLR camera and set it to the appropriate mode for data transfer. This mode may vary depending on the make and model of your camera. Consult the user manual if you’re unsure.
Step 5: Open Software
Launch the software you installed in Step 2 on your MacBook. The software should detect your connected camera automatically.
Step 6: Import Files

Once your camera is detected by the software, you can choose to import all the files or select specific ones for transfer. Follow the prompts and select the desired destination folder on your MacBook to save the imported files.
Step 7: Safely Eject Your Camera
Before disconnecting your camera, make sure to properly eject the device from your MacBook. This ensures that files are saved correctly and prevents any potential data loss.
That’s it! You have successfully connected your external DSLR camera to your MacBook. Now you can easily transfer and edit your photos and videos without any hassle.
Choosing the Right Cable
When connecting an external DSLR camera to your MacBook, it is important to choose the right cable that is compatible with both devices. Here are a few factors to consider when selecting the cable:

- Camera model: Different camera models may have different cable requirements. Check the specifications of your camera to determine the type of cable it requires.
- Connection type: There are various connection types to consider, such as USB, HDMI, and Ethernet. Ensure that your MacBook has the necessary ports to connect with the camera.
- Cable length: Depending on your needs and setup, consider the length of the cable. Ensure that it is long enough to easily connect your camera to your MacBook without any strain or limitation.
- Data transfer speed: If you plan to transfer large files or use your camera for live streaming or video recording, make sure to choose a cable that supports high-speed data transfer to ensure smooth performance.
- Quality and durability: Invest in a high-quality cable that is built to last. Look for cables with reinforced connectors and shielding to prevent interference and improve signal quality.
By considering these factors and selecting the right cable, you can easily connect your external DSLR camera to your MacBook and enjoy seamless data transfer and functionality.
Preparing Your Camera
Before connecting your external DSLR camera to your Macbook, there are a few steps you can take to ensure a smooth setup process. These steps will help you prepare your camera for the connection.
- Ensure that your DSLR camera is powered on and in the correct mode for connecting to a computer. Refer to your camera’s manual for instructions on how to enable the computer connection mode.
- Check if your camera requires a specific type of USB cable for connecting to a computer. If so, make sure you have the appropriate cable available.
- Verify that your camera’s battery is adequately charged or connected to a power source. A fully charged battery or a reliable power source is essential to prevent any interruptions during the connection process.
- Consider installing any necessary camera drivers or software provided by the camera manufacturer. Check the manufacturer’s website for any available updates or downloads specific to your camera model.
- Clean the camera’s USB port, if necessary, using an appropriate cleaning tool. This will ensure a secure and reliable connection between your camera and the Macbook.
- Remove any unnecessary memory cards from the camera to prevent any potential conflicts or confusion during the connection process.
- Finally, familiarize yourself with the camera’s settings and options related to connecting to a computer. This will help you navigate the camera’s menus and options when establishing the connection.
By following these steps and properly preparing your camera, you can ensure a successful connection between your external DSLR camera and your Macbook.
Connecting the Camera to Your MacBook
When it comes to connecting an external DSLR camera to your MacBook, there are a few steps you need to follow. Here is a simple guide to help you get started:
| Step | Description |
|---|---|
| 1 | Check your camera’s ports: |
| Before connecting your camera, make sure it has the necessary ports for connection. Most DSLR cameras come with a USB port or an HDMI port. | |
| 2 | Choose the appropriate cable: |
| Depending on the ports available on your camera and MacBook, choose the appropriate cable. If your camera has a USB port, you can use a standard USB cable. If it has an HDMI port, you will need an HDMI-to-USB adapter. | |
| 3 | Connect the camera to your MacBook: |
| Connect one end of the cable to the camera’s port and the other end to an available USB port on your MacBook. If you are using an HDMI-to-USB adapter, connect the HDMI end to the camera and the USB end to your MacBook. | |
| 4 | Configure camera settings: |
| Once the camera is connected to your MacBook, you may need to adjust some camera settings. Refer to your camera’s user manual for instructions on how to do this. | |
| 5 | Launch photography software: |
| To transfer and manage your photos/videos, launch a photography software application on your MacBook that is compatible with your camera. Some popular options include Adobe Lightroom, Capture One, and Apple Photos. | |
| 6 | Import and manage your files: |
| Within the photography software application, you can now import your files from the camera to your MacBook and manage them as desired. Follow the software’s instructions for this process. |
With these simple steps, you can easily connect your external DSLR camera to your MacBook and start transferring and working with your photos and videos.
Installing Camera Software
Before connecting your DSLR camera to your MacBook, you will need to install the necessary camera software on your computer. This software allows you to control your camera settings, import and view your photos, and perform other camera-related functions.
To install the camera software:
- Check compatibility: Before downloading the software, make sure it is compatible with both your DSLR camera model and your MacBook’s operating system. Visit the manufacturer’s website to find the appropriate software version for your specific camera model.
- Download the software: Once you have determined the correct software version, download it from the manufacturer’s website. Follow the provided instructions to save the software installer file to your MacBook.
- Run the software installer: Locate the downloaded installer file on your MacBook and double-click on it to run the installation process. Follow the on-screen prompts to complete the installation.
- Connect your camera: After the software installation is complete, connect your DSLR camera to your MacBook using a USB cable or any other recommended connection method.
- Launch the camera software: Once your camera is connected, launch the camera software on your MacBook. The software should detect your camera automatically and display its controls and settings on the screen.
Now that the camera software is installed on your MacBook, you can start using it to control your DSLR camera and manage your photos effectively.
Configuring Camera Settings
Once you have connected your external DSLR camera to your MacBook, you may need to configure some camera settings to ensure proper functionality and compatibility. Here are the steps to follow:
Step 1: Open Camera Software
Make sure that the camera software is installed on your MacBook. If it is not, visit the manufacturer’s website and download the software for your specific camera model. Once installed, open the camera software.

Step 2: Connect Camera
Connect your DSLR camera to your MacBook using the appropriate USB cable. Check that the connection is secure.
Step 3: Power on Camera
Power on your DSLR camera. Ensure that the camera battery is sufficiently charged to prevent any issues during the configuration process.
Step 4: Access Camera Settings
In the camera software, locate the settings menu or options that allow you to configure camera settings. This may be found in the file menu, settings menu, or a dedicated configuration interface.
Step 5: Adjust Settings
Within the camera settings, you may need to configure options such as image resolution, white balance, autofocus mode, shooting mode, and exposure settings. Depending on your camera model, the available settings and their locations may vary.
Step 6: Test Configuration
Make sure to test the camera settings configuration by taking a test photo or capturing a short video. Check if the settings provide the desired image quality and functionality.
Step 7: Save Settings
If you are satisfied with the camera settings, save them in the camera software. This will ensure that the settings are applied each time you connect the camera to your MacBook.
By following these steps, you should be able to successfully configure the camera settings of your external DSLR camera when connected to your MacBook. Remember to consult your camera’s user manual or support resources for specific guidance on configuring settings for your particular model.
Transferring Photos and Videos
Once your DSLR camera is connected to your MacBook, you can easily transfer photos and videos from the camera to your computer. Here are the steps to do so:
- Open the Photos app on your MacBook.
- Select your DSLR camera from the left-hand sidebar.
- Choose the photos and videos you want to transfer from the camera.
- Click the “Import Selected” button.
- Alternatively, you can click the “Import All New Items” button to transfer all the photos and videos from the camera.
- Wait for the transfer process to complete. The Photos app will show a progress bar indicating the transfer status.
- Once the transfer is finished, you can find your photos and videos in the “Imports” section of the Photos app.
It is recommended to keep a backup of your photos and videos on an external hard drive or cloud storage to ensure their safety and availability.
Troubleshooting Tips
If you’re having trouble connecting your external DSLR camera to your MacBook, try these troubleshooting tips below:
| Problem | Solution |
| No connection between camera and MacBook |
1. Make sure your camera is turned on and in the appropriate mode for connecting to a computer. 2. Ensure that the USB cable is securely plugged into both the camera and the MacBook. 3. Check if the USB cable is working properly by testing it with another device. 4. Restart your MacBook and try connecting the camera again. 5. If all else fails, try using a different USB cable or a different USB port on your MacBook. |
| Camera is recognized by MacBook, but unable to import photos |
1. Update your camera’s firmware to the latest version. Check the manufacturer’s website for specific instructions. 2. Ensure that the camera’s memory card is properly inserted and not locked. 3. Check if the memory card has enough free space to import photos. 4. Try importing the photos using a different software, such as Adobe Lightroom or Image Capture. 5. Make sure your MacBook has enough storage space to accommodate the imported photos. |
| Imported photos are blurry or low quality |
1. Check the camera’s settings for quality and resolution. Ensure they are set to the desired levels. 2. Clean the camera’s lens thoroughly with a lens cleaning solution and a microfiber cloth. 3. Avoid using digital zoom as it can reduce image quality. 4. Make sure the camera is stable or use a tripod to prevent camera shake. |
Question-answer:
Do I need to install any software to connect a DSLR camera to a MacBook?
Typically, you don’t need to install any additional software to connect a DSLR camera to a MacBook. MacBooks usually come with built-in photo applications like Photos that can recognize and import media files from a connected camera. However, if you prefer to use a different software for managing your files, you may need to install the appropriate software provided by the camera manufacturer.
Can I transfer both photos and videos from the DSLR camera to my MacBook?
Yes, you can transfer both photos and videos from a DSLR camera to your MacBook. When you connect the camera to your MacBook, the default photo application should give you the option to import both photos and videos. Simply select the media files you want to transfer and follow the on-screen instructions to complete the import process.
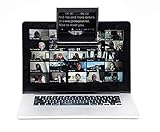
Is it possible to use a DSLR camera as a webcam on a MacBook?
Yes, it is possible to use a DSLR camera as a webcam on a MacBook. However, it requires additional hardware and software. You will need a capture card or video capture device to connect your DSLR camera to your MacBook. Additionally, you’ll need software like Camo or Ecamm Live that allows you to use your DSLR camera as a webcam. These applications provide better image quality and more flexibility compared to built-in webcams.


