If you’re in need of a webcam for your online meetings or video chats but don’t have one readily available, you may be able to repurpose your digital camera as a webcam. This can be a cost-effective solution that allows you to use the high-quality camera you already have instead of purchasing additional hardware.
Connecting a digital camera to act as a webcam involves a few simple steps, and in this article, we’ll guide you through the process so you can start using your camera as a webcam in no time.
First, you’ll need to check if your digital camera supports being used as a webcam. Not all cameras have this capability, so it’s important to consult the user manual or visit the manufacturer’s website to determine if your camera has this functionality. If your camera does not have a built-in webcam feature, you may still be able to use it as a webcam by using third-party software.
Once you’ve determined that your camera can be used as a webcam, you’ll need to connect it to your computer. Most digital cameras will come with a USB cable that you can use for this purpose. Simply plug one end of the cable into your camera and the other end into a free USB port on your computer. Make sure your camera is powered on.
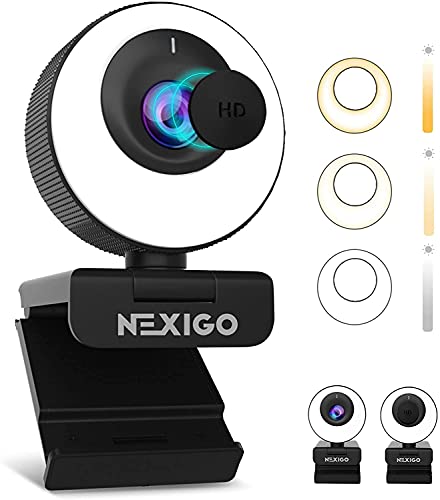
![NexiGo N620E Webcam with Light, 1080P 60FPS AutoFocus, ePTZ 2X Digital Zoom, Plug and Play, [Software Included], FHD Streaming Web Camera, Dual Stereo Mics, for Zoom Skype Teams, PC Mac Laptop Desktop](https://m.media-amazon.com/images/I/41PYTlaM-SL._SL160_.jpg)
Check camera compatibility
Before attempting to connect your digital camera to use it as a webcam, it is important to ensure that your camera is compatible with this functionality. Here are some steps to check camera compatibility:
- Refer to the camera’s user manual or specifications: Look for any mention of webcam functionality or streaming capabilities in the documentation that came with your camera. This will indicate whether your camera can be used as a webcam or not.
- Visit the camera manufacturer’s website: Go to the official website of the camera manufacturer and search for your camera model. Look for any information or updates regarding webcam functionality. Some manufacturers may provide software or firmware updates that enable the use of a camera as a webcam.
- Check the camera’s connectivity options: Look at the available ports and connectivity options on your camera. Most cameras that can be used as webcams will have a USB port or an HDMI port. If your camera only has proprietary ports or lacks the necessary connectivity options, it may not be compatible with webcam usage.
- Search online forums and resources: Look for online forums or communities where camera enthusiasts discuss their experiences. You may find users who have successfully used your camera model as a webcam or those who have encountered compatibility issues.
By following these steps, you can determine whether your digital camera is compatible with being used as a webcam. If your camera is not compatible, you may need to consider alternative solutions, such as purchasing a dedicated webcam.
Install necessary software
In order to connect your digital camera and use it as a webcam, you will need to install some necessary software. This software will enable your computer to recognize your camera as a webcam and allow you to use it for video conferencing, live streaming, or other applications that require webcam functionality.
Step 1: Check camera compatibility
Before installing any software, it’s important to check if your digital camera is compatible with this functionality. Some cameras come with built-in webcam features, while others may require additional software or drivers to be installed.
Step 2: Download camera drivers
If your camera requires additional software or drivers, visit the manufacturer’s website and navigate to the support or downloads section. Look for the drivers or software specifically designed for using your camera as a webcam. Download the appropriate files for your camera model and operating system.

Step 3: Install camera drivers
Once you have downloaded the necessary software or drivers, locate the downloaded files on your computer and run the installation program. Follow the on-screen instructions to install the drivers or software for your camera. Restart your computer if prompted.
Step 4: Connect your camera
After the software installation is complete, connect your digital camera to your computer using a USB cable. Make sure your camera is powered on and set to the correct mode for webcam functionality. Your computer should recognize the camera as a webcam and automatically configure it for use.
Step 5: Test your camera
Once your camera is connected and recognized by your computer, open your preferred video conferencing or streaming application and test the webcam functionality. Ensure that the camera is selected as the video input device in the application’s settings. Perform a test call or recording to ensure that the camera is working properly.
By following these steps and installing the necessary software, you can easily connect your digital camera and use it as a webcam, expanding its functionality and enhancing your video communication experiences.
| Benefits of using a digital camera as a webcam: | Considerations when using a digital camera as a webcam: |
|---|---|
| – Higher image quality compared to most built-in webcams | – Some older cameras may not be compatible with webcam functionality |
| – More versatile and adjustable lens options | – Camera battery life may be drained quickly |
| – Ability to use professional-grade audio and video equipment | – Limited camera control options compared to dedicated webcams |
| – Additional features like manual focus and exposure control | – Camera positioning may require additional accessories |
Connect camera to computer
If you want to use your digital camera as a webcam, you’ll need to connect it to your computer. Here are the steps to follow:
Step 1: Check camera compatibility
Before connecting your camera, make sure it supports being used as a webcam. Check the camera’s user manual or visit the manufacturer’s website for information on webcam compatibility.
Step 2: Install necessary software
Some cameras might require specific software to be installed on your computer for webcam functionality. Check the manufacturer’s website for any available software or drivers that you need to download and install.
Step 3: Connect camera to computer
Connect your camera to the computer using the appropriate cable. Most cameras will either use a USB cable or an HDMI cable. Ensure that the camera is powered on and in the appropriate mode for webcam functionality.
If you’re using a USB cable, simply connect one end to the camera and the other end to an available USB port on your computer. If you’re using an HDMI cable, connect one end to the camera and the other end to an available HDMI input on your computer or a compatible video capture device.
Step 4: Adjust camera settings
Once your camera is connected, you may need to adjust some settings to enable webcam mode. This can usually be done through the camera’s menu system or settings. Refer to the camera’s user manual for instructions on putting it into webcam mode and adjusting any necessary settings.

It’s worth noting that not all cameras have a dedicated webcam mode, and some may require additional software or third-party applications to function as a webcam. Make sure to follow the manufacturer’s instructions for setting up your specific camera as a webcam.
Once the camera is connected and the necessary settings are configured, you should be able to use it as a webcam for video conferencing, live streaming, or any other applications that require a webcam.
Adjust camera settings
Once you have connected your digital camera to your computer and set it up as a webcam, you may need to adjust some camera settings to optimize its performance as a webcam.
1. Resolution: Check the resolution settings on your camera. Higher resolution may provide a clearer image, but it can also require more bandwidth and processing power. Adjust the resolution to a level that balances image quality and performance.
2. Frame rate: The frame rate determines how many frames per second your camera captures. A higher frame rate can result in smoother video, but it may also require more processing power. Experiment with different frame rates to find the optimal balance.

3. Exposure and white balance: Make sure the exposure and white balance settings are suitable for your webcam setup. These settings can affect the brightness and color accuracy of your video. Adjust them accordingly for the best results.
4. Focus: Ensure that your camera is focused properly for the distance between you and your screen. Some cameras have autofocus features, while others may require manual adjustment. Make sure you are in focus to avoid blurry or unclear video.
5. Audio: If your camera has a built-in microphone, check the audio settings to make sure it is enabled and the volume is appropriate. You can also consider using an external microphone for better audio quality.
By adjusting these camera settings, you can enhance the overall quality of your webcam experience and ensure that you are presenting yourself in the best possible way during video calls or livestreams.
Test camera connection
Once you have connected your digital camera to your computer and set it up as a webcam, it’s important to test the connection to ensure that everything is functioning correctly. Here’s how you can test your camera connection:
- Open your favorite video conferencing or streaming application on your computer.
- Navigate to the settings or preferences section of the application.
- Select the camera option and choose your digital camera from the list of available devices.
- Check if your camera’s video feed appears in the preview window or on the screen.
- Move around or make gestures to see if the camera captures your movements accurately.
- Adjust the camera settings or positioning if needed.
- If the video is clear and the camera is tracking your movements properly, the connection is successful.
- You can now start using your digital camera as a webcam for video conferences, live streaming, or any other applications that require a webcam.
Remember to test your camera connection regularly to ensure that it continues to work properly and to troubleshoot any issues that may arise.
Open webcam software
In order to use your digital camera as a webcam, you will need to install a webcam software on your computer. This software will allow you to access the camera and use it for video calls, live streaming, or any other application that requires a webcam.
There are several webcam software options available, both free and paid. Here are a few popular ones:
-
ManyCam:
ManyCam is a versatile webcam software that allows you to use your camera with different applications simultaneously. It offers various effects, filters, and transitions to enhance your video calls.
-
Logitech Capture:
Logitech Capture is a powerful software designed to work specifically with Logitech webcams. It allows you to adjust camera settings, add text overlays, and customize your video feed.
-
Open Broadcaster Software (OBS):
OBS is a free and open-source software that offers advanced features for live streaming and video recording. It supports a wide range of cameras and allows you to customize your video settings.
-
SparkoCam:
SparkoCam is a webcam software that not only allows you to use your digital camera as a webcam, but also offers additional features such as green screening, face tracking, and virtual webcam effects.
Before installing any webcam software, make sure to check if it is compatible with your camera model. Once you have chosen the software that suits your needs, simply follow the installation instructions provided by the software vendor. After installation, you will be able to connect your digital camera to your computer and use it as a webcam.
Select camera as video source
To connect your digital camera as a webcam, you need to select it as the video source on your computer. Follow the steps below to do that:
Step 1: Connect your camera
Connect your digital camera to your computer using a USB cable. Make sure the camera is turned on and set to the appropriate mode for video streaming.
Step 2: Install necessary software (if required)
In some cases, you may need to install specific software provided by the camera manufacturer to use your camera as a webcam. Check the camera’s manual or visit the manufacturer’s website to see if any software is needed.
Step 3: Access camera settings
Open the software or application you want to use the camera with (e.g., Zoom, Skype, or OBS Studio). Look for the settings or preferences section.
Step 4: Choose video source
In the settings or preferences section, locate the video settings option. Here, you should see a dropdown menu that lets you select the video source.
Note: The exact location and wording of the video settings option may vary depending on the software or application you are using.

Step 5: Select your camera
From the dropdown menu, choose your digital camera as the video source. It might be listed by its model name or as a generic video device. Select the appropriate option.
Tip: If you have multiple cameras connected to your computer, make sure to select the correct one that you want to use as a webcam.
Once you have selected your camera as the video source, the software or application should start using the camera to capture video. You may need to adjust additional settings such as resolution or frame rate depending on your preferences.
That’s it! Now you can use your digital camera as a webcam and enjoy high-quality video during your online meetings, video calls, or live streaming sessions.
Adjust video settings
Once you have connected your digital camera to use it as a webcam, it is important to adjust the video settings to ensure optimal performance. Here are some steps to help you adjust the video settings on your camera:
1. Camera settings
- Access the menu on your camera by pressing the menu button.
- Scroll through the menu options using the arrow buttons and look for the video settings.
- Once you find the video settings, select it using the OK button.
- Adjust the resolution, frame rate, and other video settings according to your preference.
- Save and exit the menu to apply the changes.
2. Computer settings
- Open the software or application you are using to access your camera as a webcam.
- Go to the video settings within the software or application.
- Adjust the video settings such as brightness, contrast, and saturation to enhance the quality.
- Make sure to select the correct camera source if you have multiple cameras connected.
- Save and apply the changes to see the updated video settings.
By adjusting the video settings on both your camera and computer, you can enhance the quality and performance of your digital camera as a webcam. Experiment with different settings to find the configurations that work best for your needs.
Start using digital camera as webcam
Using a digital camera as a webcam can be a great way to enhance the quality of your video calls and live streams. By connecting your digital camera to your computer, you can take advantage of the high-resolution images and advanced features that your camera offers. Here’s how you can start using your digital camera as a webcam:
1. Check your camera’s compatibility
Before you begin, make sure that your digital camera is compatible with being used as a webcam. Check the camera’s user manual or manufacturer’s website to see if it supports webcam functionality.
2. Install any necessary drivers or software
In order to use your digital camera as a webcam, you may need to install certain drivers or software. Check the manufacturer’s website for any updates or downloads that are specifically designed to enable webcam functionality for your camera model.
3. Connect your camera to your computer
Once you have the necessary drivers or software installed, connect your digital camera to your computer using a USB cable. Make sure that your camera is in the correct mode for webcam use.
4. Configure your video conferencing software
Next, open your preferred video conferencing software and go to the settings or preferences menu. Look for the option to select your webcam device, and choose your connected digital camera from the list.
5. Adjust the camera settings
After selecting your camera, you may want to adjust the settings to optimize the video quality. This can include adjusting the resolution, frame rate, focus, exposure, and other camera-specific settings. Refer to your camera’s user manual for guidance on adjusting these settings.
6. Test your setup
Once you have configured your camera settings, test your setup by making a video call or streaming a live video. Check the quality of the video and audio to ensure that everything is working properly. If you encounter any issues, refer to the troubleshooting guides provided by your camera’s manufacturer.
By following these steps, you can start using your digital camera as a webcam and enjoy high-quality video calls and live streams. Make sure to regularly check for driver and software updates to ensure that you have the latest features and improvements for your camera.
Question-answer:
What equipment do I need to connect my digital camera to my computer as a webcam?
To connect your digital camera to your computer as a webcam, you will need a USB cable that is compatible with your camera model and a computer with a USB port. Additionally, you may need software drivers for your camera, which can usually be downloaded from the manufacturer’s website.
Can I use any digital camera as a webcam?
Not all digital cameras can be used as webcams. To use your digital camera as a webcam, it needs to have a “live view” or “webcam” mode. Check the user manual or specifications of your camera to see if it supports this feature. If not, you may need to consider purchasing a separate webcam.


