Using a tripod is a great way to ensure stability and sharpness in your photographs. Whether you are a professional photographer or just an enthusiast, connecting your digital camera to a tripod can make a significant difference in the quality of your images.
Firstly, it is essential to check if your digital camera has a tripod socket. This socket is typically located on the bottom of the camera and is used to attach the camera to the tripod. Look for a threaded hole with a metal ring around it – this indicates the presence of a tripod socket.
Once you have identified the tripod socket, align it with the mounting screw on the tripod head. The mounting screw is usually located on the quick release plate, which is attached to the top of the tripod. Insert the mounting screw into the tripod socket and ensure it is securely tightened.
After connecting the camera to the tripod, it is crucial to test its stability. Gently push the camera in different directions to ensure it is firmly attached. If your camera feels loose, readjust the mounting screw until it is secure. This step is particularly important to prevent any accidental damage to your camera.
By connecting your digital camera to a tripod, you can capture clear, steady shots without the risk of camera shake. This is especially useful in low-light situations or when photographing subjects that require longer exposure times. Remember to always check the stability of your camera before shooting to avoid any unwanted movement.
Choosing the right tripod for your digital camera
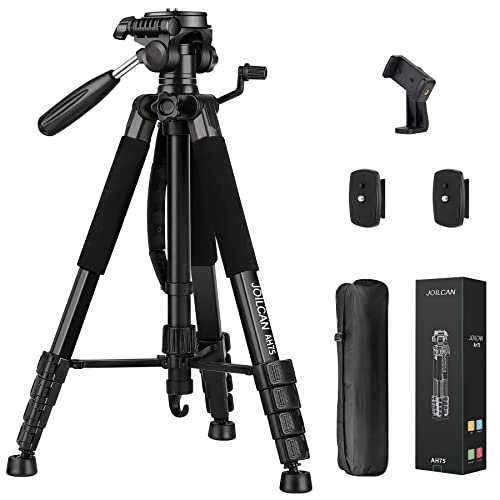
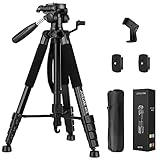
When it comes to using a digital camera, having a stable and reliable tripod can make all the difference. Whether you are a professional photographer or an amateur enthusiast, choosing the right tripod for your digital camera is essential to achieving sharp and high-quality images. Here are some key factors to consider when selecting a tripod:
1. Weight: Your tripod should be able to support the weight of your digital camera and any additional equipment you may be using, such as lenses or flashes. Make sure to check the maximum load capacity of the tripod before making a purchase.
2. Height: Consider the height range of the tripod. It is important to choose one that can be adjusted to your preferred shooting height, whether it’s low-angle shots or shooting from a standing position. Look for tripods with adjustable legs and center columns.
3. Stability: Stability is crucial for sharp images. Look for a tripod with sturdy legs and a strong locking mechanism to prevent any movement or shaking. Tripods with wider legs or a hook for adding weight can offer better stability, especially in windy conditions.
4. Durability: A durable tripod will withstand regular use without wear and tear. Look for materials like aluminum or carbon fiber, which are both lightweight and sturdy. Additionally, consider the build quality of the tripod’s joints and connections to ensure longevity.
5. Portability: If you plan on traveling with your digital camera, a portable tripod is essential. Look for one that is lightweight and compact, making it easy to carry and store. Some tripods even come with a travel bag for added convenience.
6. Functionality: Consider the features and attachments that come with the tripod. Some tripods offer a quick-release plate for easy camera attachment, while others may have a built-in level for aligning your shots. Think about the specific needs of your photography style and choose accordingly.
7. Budget: Finally, consider your budget. Tripods can range in price, and while it’s important to invest in a quality tripod, there are options available for every budget. Do your research, read reviews, and compare different options to find the best tripod that fits within your price range.
By considering these factors, you can confidently choose a tripod that will provide the stability and support your digital camera needs, allowing you to capture stunning and professional-looking photographs.
Understanding the different tripod mounting options
When it comes to connecting a digital camera to a tripod, there are several mounting options available. Understanding these options can help you choose the right tripod and ensure a secure and stable setup for your camera.

1. Standard 1/4-inch screw mount
The most common tripod mounting option is the standard 1/4-inch screw mount. This type of mount features a small screw that attaches the camera to the tripod plate. It is compatible with most digital cameras and provides a secure connection.
2. Quick release plates
Quick release plates are convenient accessories that allow for easy and quick attachment and detachment of the camera from the tripod. These plates typically feature a 1/4-inch screw that connects to the camera and a mechanism that locks the plate onto the tripod head. They provide a secure mounting option and are especially useful for photographers who frequently need to switch between handheld and tripod shooting.
It’s important to note that not all tripods come with quick release plate systems, so if this feature is important to you, make sure to check the tripod specifications before purchasing.
3. L-brackets and L-plates
L-brackets and L-plates are specialized mounting accessories that provide versatility in camera positioning. These brackets have a unique L-shaped design that allows the camera to be mounted vertically and horizontally on the tripod. By using an L-bracket or L-plate, photographers can quickly switch between landscape and portrait orientations without having to adjust the tripod setup. These accessories are particularly popular among professional photographers.
| MOUNTING OPTION | DESCRIPTION |
|---|---|
| Standard 1/4-inch screw mount | Common tripod mounting option with a small screw that attaches the camera to the tripod plate. |
| Quick release plates | Convenient plates that allow for easy attachment and detachment of the camera from the tripod. |
| L-brackets and L-plates | Specialized accessories that provide versatility in camera positioning and allow for quick switches between landscape and portrait orientations. |
By understanding the different tripod mounting options, you can make an informed decision when selecting a tripod and ensure that your camera is securely attached for stable and steady shots.

Attaching your digital camera to the tripod
Attaching your digital camera to a tripod is a simple and essential step to ensure steady and high-quality photos. Here’s a step-by-step guide on how to securely attach your camera to the tripod:
Step 1: Start by locating the mounting hole on the bottom of your camera. The mounting hole is usually located near the center or slightly off-center.
Step 2: Once the mounting hole is located, screw the tripod plate or quick release plate onto the camera’s mounting hole. Make sure to align the plate’s screw with the hole to ensure a snug fit.
Step 3: Secure the tripod plate by tightening the screw using a coin or the provided screwdriver. Ensure the plate is firmly attached to the camera to prevent any movement or wobbling.
Step 4: Now, locate the tripod’s mounting platform or quick release system. Depending on your tripod, it may have a plate or a lever mechanism.

Step 5: Attach the camera to the tripod by aligning the tripod plate or quick release plate with the tripod’s mounting platform. Insert the plate into the platform or slide it onto the lever mechanism.
Step 6: Once the plate is inserted, securely tighten the locking mechanism or lever to ensure a stable connection between the camera and the tripod. Double-check that the camera is securely attached and there is no movement or wobbling.
Step 7: Adjust the position and angle of the camera as needed by using the tripod’s built-in adjustment knobs or levers. This will allow you to capture your desired shot with ease and stability.
Step 8: Before capturing any photos, test the stability of the camera by gently nudging it. If there is any movement or wobbling, adjust the connection by tightening the screws or levers accordingly.
Remember, a stable camera connection to the tripod is crucial to avoid blurry images and ensure professional-quality shots. Take your time to properly attach the camera to the tripod and regularly check its stability during use.

Adjusting the tripod for proper stability
Properly adjusting your tripod is essential to ensure stability and prevent camera shake while shooting. Follow these steps to properly adjust the tripod:
- Place the tripod on a flat, even surface. This will provide a stable base for your camera.
- Extend the tripod legs by loosening the leg locks and pulling the legs to the desired height. Make sure each leg is fully extended and the leg locks are tightened securely.
- Spread the tripod legs apart to create a wide base of support. This helps to increase stability and prevent the tripod from toppling over.
- Check the level of the tripod using the built-in bubble level or a separate tripod spirit level. Adjust the tripod legs as needed to ensure it is perfectly level.
- Tighten the tripod head securely. The head is the part of the tripod that holds your camera. Make sure it is tightened enough to hold your camera in place without any wobbling or movement.
- Attach your camera to the tripod using the mounting plate or quick release system provided. Make sure it is properly secured to prevent any accidents.
By following these steps and adjusting your tripod correctly, you can achieve optimal stability and eliminate camera shake, resulting in sharp and clear images.
Tips for shooting with a tripod
1. Find a stable surface: When using a tripod, it’s important to set it up on a stable surface. Look for a level area or use the adjustable legs on the tripod to ensure that it is secure and won’t tip over during your shoot.
2. Adjust the height: Most tripods offer adjustable legs, allowing you to change the height. Choose a height that is comfortable for you and suits the composition you’re aiming for. Avoid extending the center column too much, as it may introduce instability.
3. Lock everything in place: Before you start shooting, make sure all the tripod components are locked in place. This includes the legs, the center column, and the camera mount. This will help prevent any accidental movements while shooting.

4. Use a remote shutter release: To avoid any camera shake, especially when capturing long exposures or using slow shutter speeds, consider using a remote shutter release. This will allow you to trigger the camera without touching it, resulting in sharper images.
5. Experiment with different angles: One of the great advantages of using a tripod is the ability to experiment with different angles and compositions. Take advantage of this stability and try shooting from low angles, high angles, or even capturing unique perspectives.
6. Utilize the tripod’s built-in level: Many tripods come with a built-in level to help you ensure that your camera is perfectly straight. Take advantage of this feature to avoid tilted horizons or skewed compositions.
7. Consider using a quick-release plate: If your tripod supports it, consider using a quick-release plate. These plates allow you to easily attach and detach your camera from the tripod, allowing for quick setup and adjustments.
8. Take your time: Shooting with a tripod allows you to slow down and carefully consider your composition. Take your time to frame your shot, adjust your settings, and experiment with different options. This will help you capture more thoughtful and precise images.

9. Pack your tripod properly: When you’re finished shooting, make sure to pack your tripod properly to protect it during transport. Collapse the legs, secure any loose components, and use a carrying case or bag to keep it safe.
10. Practice and experiment: Finally, the best way to improve your skills in shooting with a tripod is to practice and experiment. Try different techniques, settings, and subjects to find what works best for you and your creative vision.
Removing your digital camera from the tripod
When you have finished using your digital camera on the tripod, it is important to follow the correct steps to safely remove it. This will help prevent any damage to your camera or tripod.
Step 1: Turn off your camera
Before removing your camera from the tripod, ensure that it is turned off. This will avoid any accidental button presses and potential damage.
Step 2: Release the camera attachment plate
Most tripods have a quick-release plate that securely holds your camera in place. Look for the lever or locking mechanism that is holding the plate in place. Gently release this lever or unlock the mechanism to remove the plate.
Step 3: Lift your camera off the tripod
Once the attachment plate is released, you can carefully lift your camera off the tripod. Hold the camera securely with both hands to avoid dropping it or causing any damage.
Step 4: Store your camera and tripod safely
After removing your camera from the tripod, it is important to store them both safely. This may include placing your camera in a protective case and folding up the tripod for storage. Keeping them in a secure location will help prevent any accidental damage or loss.
By following these steps, you can safely remove your digital camera from the tripod without any issues. Remember to always handle your camera with care to ensure its longevity.
Proper maintenance and care for your tripod and digital camera
Taking proper care of your tripod and digital camera is essential for their longevity and optimal performance. Here are some tips on how to maintain and care for them:
1. Keep your tripod clean
Regularly clean your tripod to prevent dust and debris from accumulating on its surface. Use a soft cloth or a brush to gently wipe off any dirt. Avoid using harsh chemicals or abrasive materials that can damage the tripod’s finish.
2. Store your tripod properly
When not in use, store your tripod in a carrying bag or case to protect it from scratches and impact. Make sure to remove any detachable parts, such as the tripod head, and store them separately to prevent damage.
3. Check and tighten the tripod screws
Periodically inspect the screws and fittings on your tripod to ensure they are secure. Use a screwdriver or wrench to tighten any loose screws. Loose screws can affect the stability and safety of your tripod.
4. Use a tripod bag or strap
Invest in a tripod bag or strap to make it easier to carry and transport your tripod. This will help prevent accidental drops or bumps that can damage your tripod or camera.
5. Protect your camera
When attaching your camera to the tripod, make sure it is secure and properly balanced. Use a camera strap or a remote shutter release to reduce vibrations and minimize the risk of accidental falls.
6. Avoid extreme temperatures and humidity
Extreme temperatures and high humidity can damage both your tripod and digital camera. Avoid leaving them in direct sunlight or in areas with excessive moisture. Store them in a cool, dry place when not in use.
By following these maintenance and care tips, you can extend the lifespan of your tripod and ensure that your digital camera remains in excellent condition for years to come.
Question-answer:
What is a tripod?
A tripod is a three-legged stand that is used to support and stabilize a digital camera or other photography equipment.
Why is it important to connect a digital camera to a tripod?
Connecting a digital camera to a tripod is important because it provides stability, reducing camera shake and resulting in sharper images. It also allows for hands-free operation, giving photographers the ability to capture long exposures or take self-portraits with ease.
How do I connect my digital camera to a tripod?
To connect your digital camera to a tripod, first, you need to find the screw mount located on the bottom of your camera. Attach the camera to the tripod by aligning the screw on the tripod head with the screw mount on the camera. Then, tighten the screw to secure the camera in place. Make sure the camera is balanced and secure before releasing it.


