Skype has revolutionized the way we connect with people around the world. Whether it’s for personal or professional use, the ability to have face-to-face conversations with loved ones or conduct meetings remotely has become essential in today’s digital age. However, the built-in webcams on most laptops or computers may not provide the high-quality video and image resolution that you desire. That’s where your DSLR camera comes in.
A DSLR camera, with its superior image and video quality, can be a game-changer when it comes to video conferencing on Skype. By connecting your DSLR camera to Skype, you can take your video calls to the next level, providing crystal-clear image quality and professional-looking video footage. In this article, we will guide you through the process of connecting your DSLR camera to Skype, so you can make a lasting impression during your video calls.
Step 1: Check Your Camera Compatibility
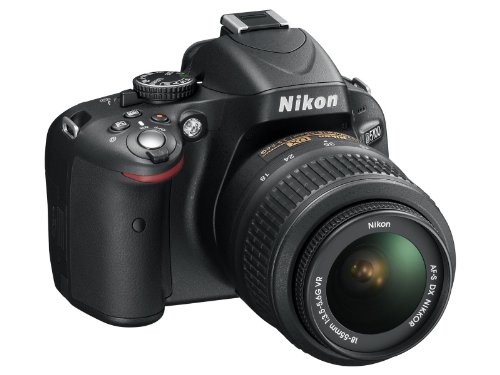
Before you dive into the setup process, it’s crucial to ensure that your DSLR camera is compatible with Skype. Most modern DSLR cameras have a USB port that allows them to connect to a computer, making them compatible with Skype. However, some older models may not have this feature. Check your camera’s user manual or visit the manufacturer’s website to confirm its compatibility.
Note: Connecting your camera to Skype might require additional software or drivers. These can usually be downloaded from the camera manufacturer’s website or included in the camera’s package.
How to Connect DSLR Camera to Skype
Skype is a popular video calling software that allows you to connect with friends, family, and colleagues from anywhere in the world. While webcams are commonly used for video calls, you can also connect your DSLR camera to Skype for higher quality images and professional-looking videos. Here’s how you can do it:
Step 1: Check Compatibility
Before attempting to connect your DSLR camera to Skype, make sure that your camera model is compatible. Keep in mind that not all DSLR cameras have the necessary features to connect to a computer or video calling software. Check the manufacturer’s website to see if your camera supports tethering or video output.
Step 2: Install Camera Software
Next, install the software provided by the camera manufacturer on your computer. This software will allow your camera to communicate with your computer and be recognized as a webcam by Skype. Follow the instructions provided with your camera to install the software correctly.

Step 3: Connect Your Camera
Connect your DSLR camera to your computer using a USB cable. Depending on your camera model, you may need to set it to the correct mode for connecting to a computer. Consult your camera’s manual for instructions on how to do this.
Step 4: Launch Skype
Launch Skype on your computer and go to the settings menu. Look for the “Audio & Video” settings and select your DSLR camera from the camera options. Make sure your camera is recognized and selected as the video input source.
Step 5: Test Your Connection

Make a test call or video call to a friend or family member to ensure that your DSLR camera is working correctly with Skype. Check the video quality and make any necessary adjustments in the camera or Skype settings to improve the image.
Connecting your DSLR camera to Skype can enhance the video quality of your calls and give them a more professional look. Follow these steps to connect your camera and enjoy a high-quality video calling experience.
Choosing the Right Equipment
When it comes to connecting your DSLR camera to Skype, it is important to have the right equipment to ensure a smooth and high-quality connection. Here are some factors to consider when choosing your equipment:
- Camera: Look for a DSLR camera that has a clean HDMI output. This will allow you to connect the camera directly to your computer without the need for additional capture devices.
- HDMI Cable: Invest in a high-quality HDMI cable to ensure stable and reliable transmission of your video signal. A longer cable may be necessary if you need flexibility in camera placement.
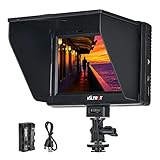
- Camera Stand or Tripod: Use a camera stand or tripod to keep your camera stable during video calls. This will prevent shaky footage and provide a more professional look.
- External Microphone: Consider using an external microphone to improve the audio quality of your video calls. A shotgun or lavalier microphone can help to capture clear and crisp audio.
- Lighting: Good lighting is crucial for a high-quality video call. Use natural light as much as possible and consider adding additional lighting sources, such as softboxes or ring lights, to improve visibility.
By carefully choosing the right equipment, you can enhance your Skype video calls and ensure a professional and polished appearance.
Installing the Necessary Software
In order to connect your DSLR camera to Skype, you will need to install some software that will allow your computer to recognize and communicate with your camera. Here are the steps to install the necessary software:

- Check the manufacturer’s website: Visit the website of your camera’s manufacturer and navigate to the Support or Downloads section. Look for any available software or drivers for your specific camera model that are compatible with your computer’s operating system.
- Download and install the software: Once you have found the appropriate software or drivers, download them to your computer. Follow the instructions provided by the manufacturer to install the software.
- Connect your camera to your computer: Use the USB cable that came with your camera to connect it to your computer. Turn on your camera and make sure it is set to “USB mode” or “PC mode” for it to be recognized by your computer.
- Run the software: After your camera is connected to your computer, launch the software that you installed in the previous step. The software should detect your camera and prompt you to confirm the connection.
- Configure settings: Once the connection is established, you may need to configure some settings within the software. This may include selecting the camera as the video source in Skype or adjusting image quality settings.
By completing these steps, you should be able to successfully connect your DSLR camera to Skype and use it for video calls or streaming. Remember to consult the user manual or support documentation provided by your camera’s manufacturer for any specific instructions or troubleshooting tips.
Connecting the Camera to Your Computer
Before you can connect your DSLR camera to Skype, you need to establish a connection between your camera and your computer. Follow these steps to get started:
Step 1: Check your camera’s compatibility
Make sure your DSLR camera is compatible with your computer. Check the manufacturer’s website for compatibility information and any necessary software or drivers.
Step 2: Connect your camera to the computer
Using the provided USB cable, connect one end to your DSLR camera’s USB port and the other end to an available USB port on your computer. Ensure a secure connection is made.
Step 3: Turn on your camera
Power on your DSLR camera and wait for it to initialize. Some cameras may require you to set it to “PC” or “USB” mode, consult your camera’s manual for specific instructions.

Step 4: Configure camera settings
Access your camera’s settings and navigate to the USB connection options. Select the appropriate mode for connecting to your computer, such as “Mass Storage” or “PC Remote”. Refer to your camera’s manual for detailed instructions on accessing and configuring these settings.
Once you have successfully connected your camera to your computer, you can proceed to the next step of configuring Skype to recognize your camera as a video source.
Adjusting Camera Settings
Before connecting your DSLR camera to Skype, it’s important to make sure that the camera settings are properly adjusted. Here are some steps to follow:
- Access the camera’s menu settings by pressing the corresponding button on the camera body.
- Navigate to the “Settings” or “Setup” menu using the arrow keys or dial.
- Find the “USB Connection” or “USB Mode” option and select it.
- Choose the “PC” or “Mass Storage” option to enable the camera to be recognized by your computer.
- Make sure the camera is set to the appropriate shooting mode, such as “Manual” or “Aperture Priority,” depending on your preference.
- Adjust the camera’s exposure settings, such as ISO, shutter speed, and aperture, according to the lighting conditions of your environment.
- Check if the camera’s white balance setting is suitable for the lighting conditions as well.
- Enable any necessary camera features, such as autofocus or image stabilization, to enhance the quality of your video call.
- Lastly, ensure that your camera’s battery is fully charged or connected to a power source to avoid any interruptions during the call.
By properly adjusting these camera settings, you can optimize the video quality and overall performance when using your DSLR camera with Skype.
Testing the Connection
Once you have connected your DSLR camera to your computer using the appropriate cable, it is important to test the connection before using it with Skype. This will ensure that everything is set up correctly and you can start using your camera for video calls.

Step 1: Preparing the Camera
Make sure your DSLR camera is turned on and properly connected to your computer. Ensure that the camera’s settings are set to allow for a live view or video mode. Check the camera’s user manual for specific instructions on how to set this up.
Step 2: Launching Skype
Open Skype on your computer and go to the settings menu. Select the “Audio & Video” tab and make sure your DSLR camera is selected as the video input device. You should see a live preview from your camera on the screen.
Step 3: Testing the Video
To test the video, make a video call to a friend or family member. Ask them to confirm if they can see the live video feed from your DSLR camera. Adjust the camera’s position or settings if needed to improve the video quality.
If your camera is not showing up as an option in Skype’s settings or if the video feed is not working properly, double-check the connection between your camera and computer. Ensure that the cable is securely plugged in and try restarting both your camera and computer before troubleshooting further.
| Common Issues: | Solutions: |
|---|---|
| No video feed | Check camera settings & cable connection |
| Poor video quality | Adjust camera position & settings |
| Camera not showing up in Skype settings | Restart camera & computer, check connection |
Once you have successfully tested the connection and verified that your DSLR camera is working with Skype, you can start using it for video calls. Enjoy the enhanced video quality and professional look that using a DSLR camera can bring to your Skype conversations!

Troubleshooting Common Issues
When connecting your DSLR camera to Skype, you may encounter several common issues. Here are some troubleshooting tips to help you resolve these problems:
1. Camera Not Recognized: If your camera is not being recognized by Skype, make sure it is properly connected to your computer via a USB cable. Check if the camera is turned on and in the correct mode for connection. Restarting your computer and reconnecting the camera may also help.
2. Camera Not Displaying Properly: If your camera is recognized but not displaying properly on Skype, check your camera settings. Ensure that the correct camera is selected in the Skype settings and that the camera feed is enabled. Also, make sure that your camera’s firmware is up to date.
3. Poor Video Quality: If you are experiencing poor video quality during Skype calls, check your internet connection speed. A slow or unstable internet connection can result in lower video quality. Closing any other bandwidth-intensive applications and restarting your router may improve the video quality.
4. Audio Issues: If you are unable to hear or be heard during Skype calls, check your audio settings. Make sure that the correct microphone and speakers are selected in Skype settings. Test your microphone and speakers using Skype’s audio settings to ensure they are working properly. Updating your audio drivers may also help resolve audio issues.
5. Compatibility Issues: Make sure that your DSLR camera is compatible with Skype. Some older camera models may not be supported by the software. Check the Skype website or contact their support for a list of compatible cameras and any necessary software updates.
By following these troubleshooting tips, you should be able to resolve common issues when connecting your DSLR camera to Skype. Enjoy high-quality video calls with your professional camera!
Optimizing the Camera Settings
Once you have successfully connected your DSLR camera to Skype, it is essential to optimize the camera settings to ensure the best quality video calls. Here are some tips to help you enhance your video experience:
- Resolution: Set the camera’s resolution to the highest possible value supported by your camera. This can be done through the camera’s settings menu. Higher resolution will result in a clearer and more detailed video feed.
- Frame Rate: Adjust the frame rate setting to a value that provides smooth video playback. Generally, a frame rate of 30 frames per second (fps) is recommended for video conferencing.
- Exposure: Make sure the camera’s exposure is set correctly. You may need to adjust the exposure settings manually based on the lighting conditions in your environment. Test different exposure levels to find the optimal one for your video calls.
- Focus: Ensure that the camera is focused correctly to avoid blurry or out-of-focus video. Most DSLR cameras have autofocus capabilities, but you may also adjust the focus manually if needed.
- White Balance: Set the white balance setting according to the lighting conditions in your environment. This will help avoid color casts and ensure more accurate color representation in your video feed.
- Audio: Although this section is about optimizing camera settings, it is important to remember that audio quality is equally important in video calls. Ensure that your camera’s built-in microphone is enabled and positioned correctly for the best audio reception.
By optimizing these camera settings, you can significantly improve the quality of your Skype video calls and ensure a more professional and enjoyable experience for all participants.
Enhancing Video and Audio Quality
When connecting a DSLR camera to Skype, it’s important to ensure that the video and audio quality is as good as possible for a smooth and professional conversation. Here are some tips to enhance the video and audio quality:
Video Quality
1. Use a high-quality DSLR camera: Invest in a DSLR camera that has a high-resolution sensor and good low-light performance. This will ensure sharp and clear video feed.
2. Connect the camera via HDMI: For the best video quality, connect your DSLR camera to your computer using an HDMI cable. This will allow for uncompressed video transfer.
3. Adjust camera settings: Experiment with different camera settings such as exposure, white balance, and focus to achieve the best video quality. Make sure the camera is set to manual mode for better control.
Audio Quality
1. Use an external microphone: DSLR cameras usually have built-in microphones, but they may not provide the best audio quality. Consider using an external microphone to capture clearer and more professional sound.
2. Position the microphone correctly: Place the microphone close to the speaker or subject to capture clear audio without any interference or background noise.
3. Test audio levels: Adjust the microphone input levels on your computer to avoid distortion or low audio levels. Use the built-in audio settings or third-party software to fine-tune the audio.
| Issue | Solution |
|---|---|
| Poor video quality | Check camera settings, lighting conditions, and make sure the camera is connected properly. |
| Poor audio quality | Check microphone placement, adjust audio levels, and consider using an external microphone if necessary. |
| Video or audio lag | Check internet connection speed, close any unnecessary applications, and consider using a wired internet connection. |
Applying Effects and Filters
Adding effects and filters to your DSLR camera feed in Skype can enhance the visual experience for your viewers. Here’s how you can apply effects and filters:
- Open Skype on your computer and navigate to the settings menu.
- Select “Audio & Video” from the sidebar menu.
- In the “Camera” section, choose your DSLR camera from the drop-down menu.
- Click on the “Video Settings” button.
- A new window will open, displaying your DSLR camera feed.
- Look for the “Effects and Filters” button and click on it.
- A list of available effects and filters will appear.
- Select the effect or filter you want to apply to your camera feed.
- Adjust the settings of the effect or filter as necessary.
- Click on the “Apply” button to confirm the changes.
Some popular effects and filters that you can try out include black and white, sepia, vintage, and grayscale. Experiment with different effects to find the one that best suits your style and preference.
Remember to preview the changes before applying them to ensure that you are satisfied with the result. Applying effects and filters to your DSLR camera feed can add a creative touch to your Skype video calls and make them more engaging for your audience.
Tips for a Great DSLR Camera Skype Experience
Skype is a widely used platform for video calls, and if you want to enhance your video quality, using a DSLR camera can be a game changer. Here are some tips to ensure you have a great DSLR camera Skype experience:
1. Check compatibility
Make sure your DSLR camera is compatible with your computer and Skype. Check the specifications of your camera and ensure that it can be used as a webcam. You may need to install specific software or drivers provided by the camera manufacturer.
2. Connect your camera
Connect your DSLR camera to your computer using the appropriate cable. Depending on your camera, this may be a USB cable or an HDMI cable. Ensure that the camera is set to the appropriate mode for video streaming.
3. Adjust camera settings
Before starting your Skype call, adjust the settings on your DSLR camera to optimize the video quality. Set the resolution to a high value to ensure crisp and clear video. Adjust the white balance, exposure, and focus settings to ensure that you look your best on camera.
4. Lighting is key
Good lighting can make a huge difference in video quality. Position yourself in a well-lit area, preferably facing a natural light source such as a window. Avoid strong backlighting or harsh shadows that can make your image appear washed out or poorly lit.
5. Use a tripod or stabilizer
For a steady image, consider using a tripod or stabilizer to hold your DSLR camera. This will prevent shaky footage during your Skype call and help maintain a professional appearance.
6. Test your setup
Before your important Skype call, take some time to test your setup. Make a call to a friend or family member and ask for feedback on the audio and video quality. This will allow you to make any necessary adjustments before your actual call.
By following these tips, you can ensure a great DSLR camera Skype experience and enjoy high-quality video calls with your contacts. Remember to always check your camera’s compatibility and adjust the settings to optimize your video quality.
Question-answer:
What is the best way to connect a DSLR camera to Skype?
The best way to connect a DSLR camera to Skype is by using a capture card or a USB video capture device. This will allow you to connect your DSLR camera to your computer and use it as a webcam during Skype calls. Make sure to check if your camera is compatible with the capture card or video capture device you choose.
Can I use my DSLR camera as a webcam for Skype without using any additional equipment?
Yes, it is possible to use your DSLR camera as a webcam for Skype without using any additional equipment. Some DSLR cameras have a feature called “live view” or “clean HDMI output” that allows you to connect it directly to your computer using an HDMI cable. However, not all DSLR cameras have this feature, so make sure to check if your camera supports it.
Are there any software options available to connect a DSLR camera to Skype?
Yes, there are software options available to connect a DSLR camera to Skype. One popular software is called SparkoCam, which allows you to use your DSLR camera as a webcam by installing a virtual webcam driver on your computer. This software also provides additional features such as live effects, green screen, and face tracking.
Is it possible to connect a DSLR camera to Skype on a Mac computer?
Yes, it is possible to connect a DSLR camera to Skype on a Mac computer. The process is similar to connecting a DSLR camera to Skype on a Windows computer. You can either use a capture card or USB video capture device, or use software like SparkoCam that is compatible with Mac operating systems. Just make sure to check the compatibility of the equipment or software with your specific camera model and Mac version.