
Facebook Live has become a popular tool for individuals and businesses to connect with their audience in real-time. While most people use their smartphones or webcams to stream live videos, you might be wondering if there is a way to use a DSLR camera for a higher quality stream. The good news is that it is indeed possible to connect your DSLR camera with Facebook Live and provide your audience with a professional-looking video experience.
Why use a DSLR camera for Facebook Live?
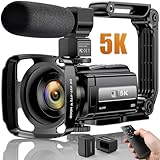
DSLR cameras offer several advantages over smartphones or webcams when it comes to streaming live videos. Firstly, DSLR cameras have larger sensors and better image processors, which result in higher image quality and greater control over the look of your video. Additionally, DSLR cameras offer interchangeable lenses, allowing you to achieve different perspectives and creative effects. Finally, DSLR cameras often have better low-light performance, meaning your Facebook Live videos will look crisp and clear even in dimly lit environments.
Connecting your DSLR camera with Facebook Live
Connecting a DSLR camera with Facebook Live requires a few additional tools and setup. Here is a step-by-step guide on how to do it:
Step 1: Purchase a video capture device that can connect your camera to your computer. There are several options available, such as the Elgato Cam Link or the Blackmagic Design UltraStudio Mini Recorder.
Step 2: Install the necessary software drivers for your video capture device.
Step 3: Connect your DSLR camera to your computer using an HDMI cable and the video capture device. Make sure your camera is set to video mode and that the HDMI output is enabled.
Step 4: Open the Facebook Live platform on your computer and click on “Create Live Video” or “Go Live”.
Step 5: In the streaming settings, select your video capture device as the video source.

Step 6: Set up your video frame, title, and any additional settings for your Facebook Live video.
Step 7: Click on “Go Live” to start streaming your DSLR camera’s video feed to Facebook Live!
By following these steps, you can connect your DSLR camera with Facebook Live and take your live video streaming to the next level. Whether you’re a content creator, a business owner, or simply someone who wants to share high-quality videos with your friends and followers, using a DSLR camera for Facebook Live can help you achieve professional results.
Setting up DSLR camera for Facebook Live streaming
Facebook Live streaming is a popular way to share live videos with friends, family, and followers. While smartphone cameras are convenient for this purpose, using a DSLR camera can greatly improve the quality of your live streams. Here’s how you can connect your DSLR camera to Facebook Live:
1. Choose a compatible DSLR camera: Not all DSLR cameras support live streaming, so it’s crucial to check if your camera has this feature. Look for cameras that have a built-in Wi-Fi or HDMI output option.

2. Connect your camera to a computer: To stream live video from your DSLR camera, you’ll need to connect it to a computer. Use a USB cable to connect your camera to your computer’s USB port.
3. Install encoding software: To stream your DSLR camera’s video to Facebook Live, you’ll need encoding software. There are several options available, such as OBS Studio or vMix. Install the software on your computer and familiarize yourself with its settings.
4. Configure your camera settings: Access your camera’s settings menu and choose the appropriate output settings. For Wi-Fi-enabled cameras, ensure that the Wi-Fi functionality is enabled. If using an HDMI connection, set the output to “Live View” or “Monitoring” mode.
5. Open the encoding software: Launch the encoding software you installed earlier. Configure the software to recognize your DSLR camera as the video source. Check the software’s documentation for detailed instructions on how to set up your camera as the video source.
6. Set up your Facebook Live stream: Open Facebook Live on your web browser or mobile app. Start a new live video and configure your privacy settings. You can choose to broadcast to your friends, a specific group, or the public.

7. Begin streaming: Once everything is set up, click the “Start Streaming” or “Go Live” button on your encoding software to start sending the video feed from your DSLR camera to Facebook Live. Your live stream will appear in the designated broadcasting area on Facebook.
Remember to ensure that your camera’s battery is fully charged and that you have a stable internet connection before starting your Facebook Live stream. With the right setup and a DSLR camera, you can make your live streams stand out with professional-quality video and audio.
Choosing the right DSLR camera for live streaming
When it comes to live streaming on Facebook, having a DSLR camera that can deliver high-quality video is essential. Here are some factors to consider when choosing the right DSLR camera for live streaming:
| 1. Resolution: | Look for a camera that can shoot in at least 1080p resolution to ensure crisp and clear video quality. |
| 2. Autofocus: | An autofocus feature is crucial for live streaming, as it will help keep your video sharp and in focus even if you’re moving around. |
| 3. Low-light performance: | Consider a camera with good low-light performance so that you can live stream even in dimly lit environments without sacrificing video quality. |
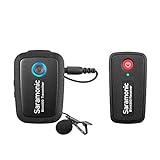
| 4. Audio quality: | While many DSLR cameras have built-in microphones, using an external microphone can greatly improve the audio quality of your live stream. |
| 5. Connectivity options: | Ensure that the camera you choose has the necessary connectivity options, such as HDMI or USB, to connect it to your computer or encoding device for live streaming. |
| 6. Battery life: | Live streaming can drain your camera’s battery quickly, so it’s important to choose a camera with a long battery life or the ability to connect to an external power source. |
By considering these factors, you can find a DSLR camera that suits your live streaming needs and ensures that your Facebook live videos are of the highest quality.
Checking the compatibility of your DSLR camera
Before connecting your DSLR camera to Facebook Live, it is important to ensure that your camera is compatible with the necessary requirements. Here are a few steps you can follow to check the compatibility of your DSLR camera:
1. Check the manufacturer’s website: Visit the website of your camera’s manufacturer and look for information specifically related to livestreaming or broadcasting capabilities. Some manufacturers provide a list of compatible models or specific instructions on how to connect your camera to livestreaming platforms.
2. Read the camera’s manual: Refer to the manual that came with your camera and look for any references to livestreaming or connecting to external devices. Make sure to check the specifications section to see if livestreaming capabilities are mentioned.
3. Check the camera’s HDMI output: Livestreaming a DSLR camera usually involves connecting it to a computer or an external device using an HDMI cable. Ensure that your camera has an HDMI output port. Additionally, check if the output resolution and format is compatible with the livestreaming software or platform you plan to use.
4. Look for compatibility with capture cards: In some cases, you may need to use a capture card to connect your DSLR camera to a computer for livestreaming. Check if your camera manufacturer or the livestreaming software provider recommends any specific capture card models for your camera. Make sure the capture card is compatible with your camera’s output and the livestreaming software or platform.
5. Check software compatibility: Livestreaming from a DSLR camera often requires specific software or plugins. Ensure that the software you plan to use supports your camera model. You can often find information about software compatibility on the manufacturer’s website or in the software documentation.

By following these steps, you can determine if your DSLR camera is compatible with livestreaming on Facebook and ensure that you have the necessary equipment and software to connect your camera successfully.
Installing the necessary software and drivers
Before you can connect your DSLR camera with Facebook Live, you will need to install the required software and drivers on your computer. This will ensure that your camera is recognized and can be used for live streaming purposes.
Here are the steps to install the necessary software and drivers:
| Step 1: | Visit the official website of your DSLR camera’s manufacturer. |
| Step 2: | Navigate to the “Support” or “Downloads” section of the website. |
| Step 3: | Search for the software and drivers specific to your camera model and operating system. |
| Step 4: | Download the software and drivers to your computer. |
| Step 5: | Locate the downloaded file on your computer and double-click to start the installation process. |
| Step 6: | Follow the on-screen instructions to complete the installation. |
Once the software and drivers are successfully installed, you can proceed to connect your DSLR camera with Facebook Live and start live streaming your photos and videos to your audience.
Connecting your DSLR camera to your computer
To connect your DSLR camera to your computer, you will need a USB cable that is compatible with your camera model. This cable is typically provided with your camera when you purchase it. If you don’t have one, you can purchase it separately.

Once you have the USB cable, follow these steps to connect your DSLR camera to your computer:
- Insert one end of the USB cable into the USB port on your DSLR camera.
- Insert the other end of the USB cable into an available USB port on your computer.
- Turn on your DSLR camera.
- Your computer should recognize the DSLR camera as a connected device. If prompted, install any necessary drivers or software.
- You can now transfer photos and videos from your DSLR camera to your computer using the software provided by the camera manufacturer or a third-party software.
Using the software provided by the camera manufacturer
Most DSLR cameras come with software that allows you to transfer and manage your photos and videos. Check the manual or the manufacturer’s website for instructions on how to install and use the software.
Using third-party software
If you prefer to use third-party software, there are several options available such as Adobe Lightroom, Capture One, and Darktable. These software programs offer advanced photo management and editing capabilities. You can download and install them from their respective websites.
After connecting your DSLR camera to your computer, you can also use it for other purposes such as live streaming on platforms like Facebook Live. To do this, you will need additional hardware and software that allows you to capture the camera feed and stream it online.
| Additional hardware | Additional software |
|---|---|
| Video capture device | Streaming software |
| A video capture device such as an HDMI capture card or a USB capture device is required to connect your DSLR camera’s HDMI output to your computer. This device captures the video feed from your camera and sends it to your computer. | Once the video feed is captured by your computer, you will need streaming software to broadcast it online. There are several options available such as OBS Studio, XSplit Broadcaster, and Wirecast. These software programs allow you to configure your stream settings and stream to platforms like Facebook Live. |
By following these steps and using the necessary hardware and software, you can easily connect your DSLR camera to your computer and use it for various purposes, including live streaming on Facebook Live.
Configuring the camera settings for live streaming
When connecting your DSLR camera to Facebook Live, it is important to ensure that your camera settings are configured correctly. These settings will help you achieve the best possible live streaming experience. Here are the key steps to follow:
1. Set the video resolution and frame rate:
First, make sure to set your camera’s video resolution and frame rate to match the requirements of Facebook Live. Facebook recommends using a resolution of 720p or 1080p and a frame rate of 30 frames per second. Adjust these settings in your camera’s menu options.
2. Enable manual exposure control:
For better control over the exposure of your live stream, it is recommended to enable manual exposure control on your camera. This will allow you to adjust the aperture, shutter speed, and ISO according to the lighting conditions. Manual exposure control helps to avoid overexposure or underexposure in your live stream.
3. Choose the appropriate autofocus mode:
When streaming live, it is crucial to have a reliable autofocus system in place. Depending on the situation, you can choose from different autofocus modes such as single autofocus, continuous autofocus, or manual focus. Experiment with these modes before going live to find the one that works best for your needs.
4. Use external microphones for better audio quality:
To enhance the audio quality of your live stream, consider using external microphones instead of relying solely on the camera’s built-in microphone. External microphones offer improved sound capture and can help eliminate background noise, resulting in a more professional-looking live stream.
5. Ensure a stable internet connection:
A stable internet connection is vital for a smooth live streaming experience. Make sure you have a reliable internet connection before going live. It is recommended to use a wired connection whenever possible to avoid any potential disruptions or loss of signal during the stream.
By following these steps and configuring your camera settings accordingly, you will be well-prepared to connect your DSLR camera to Facebook Live and deliver high-quality live streams to your audience.
Setting up your live streaming software
Once you have connected your DSLR camera to your computer, the next step is to set up your live streaming software. There are several options available, including OBS Studio, Wirecast, and vMix. In this guide, we will focus on OBS Studio as it is free and widely used.
Step 1: Download OBS Studio
The first step is to download and install OBS Studio on your computer. You can visit the official OBS Studio website (https://obsproject.com) and click on the “Download” button to get the latest version of the software.
Step 2: Configure your DSLR camera as a video source
Once OBS Studio is installed, open the software and go to the “Sources” section. Click on the “+” button and select “Video Capture Device” from the drop-down menu. Give your camera a name and click “OK”. In the next window, choose your DSLR camera as the device and click “OK” again.
Step 3: Set up your streaming settings
Next, go to the “Settings” section in OBS Studio and select the “Stream” tab. Choose your preferred streaming platform, in this case, Facebook Live, from the “Service” drop-down menu. You will need to obtain a stream key from the Facebook Live platform, which you can find in the settings of your Facebook page or profile.
Copy and paste the stream key into the “Stream key” field in OBS Studio. You can also adjust other settings such as the video bitrate and output resolution to suit your needs. Once you have configured your streaming settings, click “Apply” and then “OK” to save the changes.
Step 4: Start your live stream
Now you are ready to start your live stream! In OBS Studio, click on the “Start Streaming” button, and your DSLR camera feed will be broadcasted live on Facebook Live. You can monitor your stream and interact with your audience through the Facebook Live platform.
Remember to test your setup before going live to ensure that everything is working properly. You can also customize your stream with overlays, graphics, and other features available in OBS Studio to enhance your live streaming experience.
Configuring the streaming settings in your software
Once you have connected your DSLR camera to your computer and installed the necessary software, you will need to configure the streaming settings to ensure a smooth and high-quality Facebook Live broadcast. The specific steps may vary depending on the software you are using, but here are some general guidelines:
Step 1: Open the software
Launch the software that you installed for streaming or video capture. Ensure that your camera is connected and recognized by the software.
Step 2: Locate the streaming settings
Find the settings or preferences section in the software. Look for options related to streaming or broadcasting.
Step 3: Select Facebook Live as the streaming platform
In the streaming settings, you will typically have the option to choose the platform where you want to broadcast. Select Facebook Live from the available options.
Step 4: Enter your Facebook Live streaming key
Facebook provides a streaming key that you will need to enter in your software to establish the connection. Copy the streaming key from your Facebook Live settings and paste it into the appropriate field in your streaming software.
Step 5: Configure the video and audio settings
Adjust the video and audio settings in the software to ensure optimal quality for your Facebook Live stream. This may include selecting the resolution, frame rate, and audio source.
Step 6: Test your settings
Before going live, it is recommended to test your streaming settings. Many streaming software have a preview or testing feature that allows you to see how your stream will look before broadcasting to your Facebook audience.
| Key Settings | Optimal Values |
|---|---|
| Resolution | At least 720p (1280×720) for high-quality streaming |
| Frame Rate | 30 frames per second (fps) for smooth video playback |
| Audio Source | Select the correct audio input source from your DSLR camera |
Once you have successfully configured the streaming settings, you are ready to start your Facebook Live broadcast using your DSLR camera.
Testing your DSLR camera connection
Before going live on Facebook with your DSLR camera, it’s important to test the connection to ensure everything is working properly. Here is a step-by-step guide to help you test your DSLR camera connection:
- Connect your DSLR camera to your computer using a USB cable.
- Make sure your camera is turned on and in the appropriate mode for live streaming.
- Open the live streaming software or application you plan to use for streaming to Facebook.
- Navigate to the settings or preferences section of the software and look for the option to select your camera source.
- Select your DSLR camera from the list of available sources.
- Once your DSLR camera is selected, check the preview window to see if your camera feed is being displayed correctly.
- Adjust the camera settings, such as exposure, focus, and white balance, if necessary.
- If everything looks good in the preview window, you can proceed with testing the audio and video quality.
- Start a test stream to Facebook by clicking the appropriate button or option in the streaming software.
- While the test stream is running, check the Facebook Live page to see if your stream is being displayed correctly.
- Make sure to listen to the audio and watch for any video issues, such as lag or pixelation.
- If everything is working as expected, you are ready to go live on Facebook with your DSLR camera!
Remember to double-check your internet connection speed and ensure you have a stable and reliable connection before going live. It’s also a good idea to test everything well in advance to allow time for any troubleshooting or adjustments that may be needed.
Going live on Facebook with your DSLR camera
Facebook Live has become a popular way to share moments with friends, family, and followers in real-time. While smartphones are convenient for going live, the quality of the video may not always meet your expectations. If you want to step up your live video game, you can connect your DSLR camera to Facebook Live and broadcast high-quality content.
Here are the steps to connect your DSLR camera with Facebook Live:
Step 1: Prepare your equipment
Make sure you have the necessary equipment to connect your DSLR camera to your computer or laptop. You will need a USB cable that is compatible with your camera, as well as a reliable internet connection.
Step 2: Install streaming software
Download and install streaming software on your computer, such as OBS Studio or Wirecast. These software programs allow you to stream your DSLR camera’s video feed to Facebook Live.
Step 3: Connect your camera
Connect your DSLR camera to your computer using the USB cable. Make sure your camera is turned on and set to the appropriate mode for live streaming. Some DSLR cameras have a “Live View” mode specifically for this purpose.
Step 4: Configure the streaming software
Open the streaming software and configure the settings to stream to Facebook Live. This usually involves selecting your DSLR camera as the video source and entering your Facebook Live credentials.
Step 5: Set up your Facebook Live video
Go to Facebook and navigate to the Live Video section. Write a catchy description for your live video and choose the audience you want to share it with. You can also add tags and customize other settings.
Step 6: Start streaming
Once everything is set up, click the “Start Streaming” button in your streaming software. Your DSLR camera’s video feed should now be live on Facebook, and you can interact with your audience in real-time.
Step 7: End the live video
When you’re ready to end the live video, simply stop the streaming in your software and click the “Finish” button on Facebook. The video will be saved on your timeline and can be watched later by your followers.
By following these steps, you can elevate your live video quality and engage your audience with professional-looking content. So grab your DSLR camera, set up the equipment, and start going live on Facebook today!
Tips for a successful DSLR camera live stream on Facebook
To ensure a high-quality and engaging live stream with your DSLR camera on Facebook, there are several tips and best practices to consider:
- Use a stable internet connection: Make sure you have a reliable and fast internet connection to avoid interruptions or buffering during the live stream.
- Invest in a tripod or stabilizer: A tripod or stabilizer will help keep your DSLR camera steady and prevent shaky footage, providing a more professional and enjoyable viewing experience.
- Adjust camera settings: Before going live, check and adjust your camera settings such as exposure, white balance, and focus to ensure optimal image quality.
- Choose an appropriate location: Select a location with good lighting and minimal background distractions. Consider using additional lighting equipment if needed to enhance the visual quality.
- Test audio levels: Ensure that your microphone is connected properly and the audio levels are balanced. Test the sound quality beforehand to avoid any issues during the live stream.
- Create engaging content: Plan your live stream content in advance to keep your audience entertained. Prepare talking points, demonstrations, or even invite guests to make the stream more interactive and engaging.
- Promote your live stream: Spread the word about your live stream in advance to build anticipation and attract more viewers. Make use of social media, email newsletters, or even paid advertising to reach a wider audience.
- Engage with your audience: Encourage viewers to comment, ask questions, and interact during the live stream. Respond to their comments or questions to make them feel involved and valued.
- Monitor and analyze the performance: After the live stream, review the analytics provided by Facebook to understand the engagement and viewership. Learn from the data and make improvements for future live streams.
By following these tips, you can maximize the quality and impact of your DSLR camera live stream on Facebook, creating an enjoyable and memorable experience for your viewers.
Question-answer:
How can I connect my DSLR camera to Facebook Live?
To connect your DSLR camera to Facebook Live, you will need a capture device, such as a capture card or a video converter, that can convert the HDMI output from your camera to a USB signal that can be recognized by your computer. Once you have the capture device, you can connect your camera to it using an HDMI cable. Then, connect the capture device to your computer using a USB cable. Finally, open your preferred streaming software (such as OBS or Wirecast) and select the capture device as your video source. From there, you can sign in to your Facebook account and start streaming live from your DSLR camera.
What kind of capture device do I need to connect my DSLR camera to Facebook Live?
You will need a capture device that can convert the HDMI output from your DSLR camera to a USB signal that can be recognized by your computer. There are several options available on the market, such as capture cards and video converters. Some popular capture cards include the Elgato Cam Link, AVerMedia Live Gamer Portable, and Blackmagic Design Intensity Pro. When choosing a capture device, make sure to check its compatibility with your specific camera model and your computer.
Can I connect my DSLR camera to Facebook Live without a capture device?
No, you cannot directly connect your DSLR camera to Facebook Live without a capture device. DSLR cameras typically have an HDMI output, which needs to be converted to a USB signal that can be recognized by your computer. A capture device, such as a capture card or a video converter, is required to perform this conversion. These devices act as an intermediary between your camera and computer, allowing you to stream your DSLR camera’s video feed to Facebook Live.


