GoPro cameras are renowned for their durability and the ability to capture stunning footage in various extreme conditions. Whether you’re a professional filmmaker or an adventure junkie, connecting your GoPro camera to your computer is essential for transferring and editing your footage. Luckily, the process is relatively straightforward and can be completed in just a few simple steps.
In this article, we will guide you through the process of connecting your GoPro camera to a computer and transferring your footage effortlessly.
Getting Started
To connect your GoPro camera to your computer, follow these easy steps:
Step 1: Check Compatibility
Make sure your GoPro camera is compatible with your computer. Check the GoPro website or user manual to see if your camera model is supported.

Step 2: Connect the Camera
Use the provided USB cable to connect your GoPro camera to your computer. Plug one end of the cable into the camera’s USB port and the other end into a USB port on your computer.
Note: If your computer doesn’t have a built-in USB port, you may need to use a USB adapter or hub.
Step 3: Turn on the Camera
Once your GoPro camera is connected, turn it on and wait for it to be recognized by your computer. This may take a few seconds.
Step 4: Accessing the Camera
Once your computer recognizes the GoPro camera, you can access its files like any other external storage device. You can view, transfer, or delete files as needed.
Congratulations! You have successfully connected your GoPro camera to your computer.
Step 1: Gathering the Necessary Equipment
To connect your GoPro camera to your computer, you will need to gather the necessary equipment. This will ensure a smooth and successful connection. Here are the items you will need:
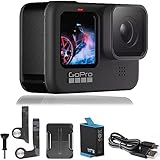
- GoPro camera: Ensure you have your GoPro camera handy. Make sure it is fully charged or has enough battery power to complete the connection process.
- USB cable: Locate the USB cable that came with your GoPro camera. This cable is essential for establishing a physical connection between your camera and computer.
- Computer: You will need a computer that has a USB port available. This USB port will be used to connect your GoPro camera to the computer.
- Compatible software: Install the compatible software on your computer. This software will allow you to transfer files from your GoPro camera to your computer. Check the official GoPro website for the latest software version.
Once you have gathered all the necessary equipment, you will be ready to proceed to the next step of connecting your GoPro camera to your computer.
What you will need to connect your GoPro camera to your computer
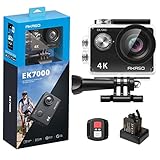
1. GoPro camera: To connect your GoPro camera to your computer, you will, of course, need a GoPro camera. Make sure it is charged and ready to be connected.
2. USB cable: You will need a compatible USB cable that can connect your GoPro camera to your computer. Most GoPro cameras use a USB-C or micro USB cable, so ensure you have the correct cable for your specific model.
3. Computer: You will need a computer with a USB port to connect your GoPro camera. Whether you have a Windows PC or a Mac, ensure that your computer is in working condition and has an available USB port.

4. GoPro App or an SD card reader: If you want to transfer files from your GoPro camera to your computer wirelessly, you will need to download the GoPro App on your computer and pair it with your camera. However, if you prefer a wired connection, you can use an SD card reader to transfer files directly from your camera’s SD card to your computer.
5. GoPro software: To manage and edit your GoPro footage on your computer, you may want to download the GoPro software, such as GoPro Quik or GoPro Studio. These software options provide additional features for editing and organizing your GoPro media.
6. Storage space: Ensure you have enough available storage space on your computer to save the files you want to transfer from your GoPro camera. If necessary, free up some space by deleting unnecessary files or transferring them to an external hard drive.
7. Internet connection: If you plan to download the GoPro software or use the GoPro App, you will need a stable internet connection to complete the download and set-up process.
Note: The process of connecting your GoPro camera to your computer may vary slightly depending on the model and the operating system of your computer. Refer to the GoPro user manual or the official GoPro website for specific instructions for your camera model.

Step 2: Connecting the Camera to the Computer
Now that you have prepared your GoPro camera, it’s time to connect it to your computer. Follow the steps below to establish a connection:
1. Locate the USB Port on the Camera
First, find the USB port on your GoPro camera. The location of the port may vary depending on the model you have. It is usually found on the side or underneath a protective cover.
2. Connect the USB Cable to the Camera
Take the USB cable that came with your camera, and insert one end into the USB port on the camera. Make sure it is securely connected and you feel a click.
3. Connect the USB Cable to the Computer
Next, take the other end of the USB cable and plug it into an available USB port on your computer. Ensure that the connection is secure and tight.
Note: If your computer has multiple USB ports, choose a port that you know is working properly to avoid any potential connection issues.
4. Turn On the Camera
Once the camera is connected to the computer, turn it ON by pressing the power button. Your camera should now be recognized by your computer as a removable storage device.
5. Access the Camera’s Files
Now that the camera is connected and turned on, you can access the files stored on your GoPro camera. Open the file explorer on your computer and look for the GoPro device. It will typically appear as a new drive letter.
Note: If you have an SD card inserted into your camera, you may see it as a separate removable storage device.
6. Transfer or Import Files
You can now transfer or import the files from your GoPro camera to your computer. Simply copy and paste the files from the GoPro device to a location on your computer’s hard drive. You can also use software like GoPro Quik to import and manage your files more efficiently.
| Troubleshooting Tip: |
|---|
| If your computer doesn’t recognize the GoPro camera, try using a different USB cable or connecting to another USB port. Also, make sure the camera is powered on and unlocked. |
How to physically connect your GoPro camera to your computer
Connecting your GoPro camera to your computer is a simple process that allows you to transfer and manage your footage. Here are the steps to physically connect your GoPro camera to your computer:

Step 1: Locate the USB port on your GoPro camera. The USB port is usually located on the side or back of the camera, depending on the model.
Step 2: Take the USB cable that came with your GoPro camera and plug one end of it into the USB port of your camera.
Step 3: Plug the other end of the USB cable into an available USB port on your computer. Make sure the USB port on your computer is compatible with the USB cable you are using.
Step 4: Turn on your GoPro camera. You may need to navigate through the camera’s settings to find the option to enable USB mode or connection.
Step 5: Once your GoPro camera is connected to your computer, you will see a notification or prompt on your computer screen indicating that a new device has been detected.

Step 6: Open your computer’s file explorer or finder and locate the GoPro camera. It should appear as a new storage device or external drive.
Step 7: Double-click on the GoPro camera icon to access the files on your camera. You can now transfer, manage, and edit your footage using various software or applications on your computer.
Note: It is recommended to fully charge your GoPro camera or connect it to a power source while transferring large files to avoid draining the camera’s battery.
By following these simple steps, you can easily physically connect your GoPro camera to your computer and start managing your footage with ease.
Step 3: Setting Up Your Camera
Once your GoPro camera is connected to your computer, you will need to set it up properly to ensure it functions correctly. Here are the steps to do so:

1. Turn on your camera
Press the power button on your GoPro camera to turn it on. Wait for it to fully boot up before proceeding.
2. Navigate camera settings
Using the buttons on your camera, navigate to the settings menu. This is usually indicated by a wrench icon or the word “Settings” on the screen.
3. Select the connection mode
Within the settings menu, look for an option like “Connection” or “USB Mode.” Select this option to choose how your camera will connect to your computer. For connecting your GoPro to a computer, you’ll usually choose the “USB” or “MTP” mode.
4. Confirm connection
After selecting the connection mode, you may see a prompt asking you to confirm the connection to your computer. If prompted, select “Yes” or “OK” to proceed.
5. Configure other settings (optional)
If desired, you can also adjust other camera settings such as video resolution, frame rate, or photo mode. This will depend on your specific GoPro model and your intended use.
6. Set up storage and transfer options
Next, you may want to set up how your camera stores and transfers files when connected to a computer. This could include options like choosing a specific folder to save your files or enabling automatic file transfer upon connection.
It’s important to note that these steps may vary slightly depending on your specific GoPro model and the software you have installed on your computer. Please refer to your camera’s user manual or the manufacturer’s website for more detailed instructions.
Configuring your GoPro camera for computer connectivity
Connecting your GoPro camera to your computer allows you to easily transfer and edit your video and photo files. Before you can do this, you need to configure your GoPro camera for computer connectivity. Follow these steps to ensure your camera is ready:
Step 1: Connect your GoPro camera to power
Before connecting your GoPro camera to your computer, make sure it is fully charged or connected to a power source. This will ensure that your camera stays powered on during the connection process.
Step 2: Update your GoPro camera firmware
It is important to have the latest firmware installed on your GoPro camera to ensure compatibility with your computer. To update the firmware, follow these steps:
- Turn on your GoPro camera
- Connect your camera to the GoPro app on your smartphone or tablet
- Follow the prompts to update the firmware
Once the firmware update is complete, your camera will have the latest features and improvements, making it easier to connect to your computer.
Step 3: Enable Wi-Fi on your GoPro camera
To connect your GoPro camera to your computer, you need to enable Wi-Fi on your camera. Follow these steps to enable Wi-Fi:
- Press the Mode button on your GoPro camera to power it on
- Press the Wi-Fi button on the side of your camera to access the Wi-Fi settings
- Use the Mode button to cycle through the options and find the Wi-Fi icon
- Press the Shutter button to select the Wi-Fi icon
- Use the Mode button to navigate to “Connect Device” and press the Shutter button to select it
- Follow the on-screen instructions to connect your camera to your computer
Once Wi-Fi is enabled, your GoPro camera will be ready to connect to your computer.
By following these steps to configure your GoPro camera for computer connectivity, you will be able to easily transfer and edit your files and enjoy all the features and benefits of your GoPro camera.
Step 4: Transferring Files
Once you have connected your GoPro camera to your computer, you can now transfer files from the camera to your computer.
Here are the steps to transfer files:
- Open the file explorer on your computer.
- Locate the connected GoPro camera under the “Devices” section.
- Double-click on the GoPro camera to open it.
- Navigate to the folder where the files are stored on your GoPro camera.
- Select the files you want to transfer by either clicking on them individually or selecting multiple files at once by holding down the Ctrl key.
- Right-click on the selected files and click “Copy”.
- Navigate to the desired folder on your computer where you want to transfer the files.
- Right-click on the destination folder and click “Paste” to transfer the files from your GoPro camera to your computer.
Wait for the file transfer process to complete. The transfer speed may vary depending on the size of the files and the performance of your computer.
Once the transfer is complete, you can safely disconnect your GoPro camera from your computer by ejecting it using the appropriate option in the file explorer.
Question-answer:
What cables do I need to connect my GoPro camera to my computer?
To connect your GoPro camera to your computer, you will need a USB cable. The specific type of USB cable will depend on the model of your GoPro camera. Most newer GoPro cameras use a USB-C cable, while older models may use a micro USB cable.
Can I connect my GoPro camera to my computer wirelessly?
Yes, you can connect your GoPro camera to your computer wirelessly. To do this, you will need to make sure your computer and GoPro camera are connected to the same Wi-Fi network. You can then use the GoPro App or GoPro Quik for Desktop software to transfer files wirelessly between your camera and computer.
What software do I need to connect my GoPro camera to my computer?
To connect your GoPro camera to your computer, you don’t need any specific software. However, if you want to transfer files, edit videos, or control your camera remotely, you can use the GoPro App or GoPro Quik for Desktop software. These software options are available for free on the GoPro website and are compatible with both Windows and Mac computers.
Is it possible to live stream from my GoPro camera to my computer?
Yes, it is possible to live stream from your GoPro camera to your computer. To do this, you will need to use third-party streaming software such as OBS (Open Broadcaster Software) or XSplit. These software options allow you to capture the video feed from your GoPro camera and stream it live to platforms like YouTube, Twitch, or Facebook Live.