If you own a GoPro Hero 4 and have just purchased a GoPro remote, you may be wondering how to connect the two devices. The GoPro remote allows you to control your Hero 4 camera wirelessly, giving you the freedom to capture shots from a distance and in hard-to-reach places. In this article, we will guide you through the process of connecting the GoPro remote to your camera, so you can start exploring the endless possibilities of remote-controlled photography and videography.
Step 1: Prepare Your Devices
Before you can connect your GoPro remote to your Hero 4 camera, make sure that both devices are fully charged. This will ensure that you have enough power to complete the connection process without interruptions. Additionally, check that your camera’s Wi-Fi is enabled and that both devices are within a reasonable range of each other. It is also a good idea to familiarize yourself with the buttons and settings on both the remote and the camera, as this will make the connection process smoother.
Note: The steps outlined in this guide are specifically for connecting a GoPro remote to a Hero 4 camera. If you have a different GoPro camera model, the process might vary slightly. Refer to the user manual or the official GoPro website for model-specific instructions.
GoPro Remote: How to Connect to Hero 4 Camera
Introduction
The GoPro Remote is a handy accessory that allows you to control your GoPro Hero 4 camera from a distance. Whether you are looking to capture epic action shots or take selfies without holding the camera, the GoPro Remote is the perfect tool for the job. In this guide, we will walk you through the process of connecting the GoPro Remote to your Hero 4 camera.
Step 1: Prepare Your GoPro Remote
Before you can connect the GoPro Remote to your Hero 4 camera, you need to make sure it is turned on and in pairing mode. To do this, simply press and hold the power button on the remote until the LED lights start flashing. This indicates that the remote is ready to be paired with a camera.
Step 2: Enable Wi-Fi on Your Hero 4 Camera
Next, you need to enable Wi-Fi on your GoPro Hero 4 camera. To do this, navigate to the settings menu on your camera and select the Wi-Fi option. Once inside the Wi-Fi settings, you will see an option to enable Wi-Fi. Select this option and wait for the camera to enable its Wi-Fi network.
Step 3: Pair the GoPro Remote with Your Hero 4 Camera
Once the Wi-Fi is enabled on your Hero 4 camera, go back to the settings menu on the camera and select the Remote option. Within the Remote settings, you will find an option to pair with a remote. Select this option and wait for the camera to search for a remote.
Step 4: Connect to the GoPro Remote
Now that your Hero 4 camera is searching for a remote, press and hold the Mode/Power button on the GoPro Remote for about eight seconds. This will initiate the pairing process between the remote and camera. After a few seconds, the camera should detect the remote and show a confirmation message on the screen.

Step 5: Test the Connection
Once the GoPro Remote and Hero 4 camera are successfully paired, you can test the connection by pressing the shutter button on the remote. If the camera responds and takes a photo or starts recording, then the connection is working properly. You can now use the GoPro Remote to control your Hero 4 camera from a distance.
Conclusion
Connecting the GoPro Remote to your Hero 4 camera is a simple process that allows you to have full control over your camera’s settings and capture amazing shots from a distance. By following the steps outlined in this guide, you’ll be able to pair and connect the GoPro Remote to your Hero 4 camera in no time. Now, go out and start capturing epic moments with your newly connected GoPro Remote!
Step 1: Prepare Your GoPro Remote
Before you can connect your GoPro remote to your Hero 4 camera, you need to make sure it is properly prepared. Follow these simple steps:
1. Make sure your GoPro remote is charged: Connect your remote to a power source using the USB cable provided. Once connected, wait until the LED lights on the remote turn green, indicating that it is fully charged.
2. Ensure that the remote and camera are compatible: The GoPro remote is only compatible with certain models, so make sure your Hero 4 camera is compatible. Check the user manual or the GoPro website for compatibility information.

3. Pair your remote with your camera: To pair your remote with your Hero 4 camera, turn on the camera and go to the settings menu. Navigate to the “Wireless Connections” or “Wireless Remote” option, depending on your camera model. Select the option to pair a new remote, and follow the on-screen instructions to complete the pairing process.
4. Check the connection: Once the pairing is complete, double-check that the remote is successfully connected to your Hero 4 camera. You can do this by attempting to control the camera using the buttons on the remote.
By following these steps, you will have your GoPro remote prepared and ready to be connected to your Hero 4 camera. This will allow you to control your camera wirelessly and capture amazing footage without the need to physically touch the camera.
Step 2: Power On Your GoPro Hero 4 Camera
To connect your GoPro remote to your Hero 4 camera, first, make sure that your camera is powered on. Locate the power button on your GoPro, which is usually located on the side or top of the camera. Press and hold this button for a few seconds until the camera powers on.
Once the camera is powered on, you will see the GoPro logo or a small LED light will turn on to indicate that the camera is ready. If the camera does not power on, double-check that the battery is properly inserted and charged.

It is important to note that the camera will automatically power off after a period of inactivity to conserve battery life. So, if you are not using the camera but want to connect the remote, make sure to power it on again before continuing with the connection process.
Now that your GoPro Hero 4 camera is powered on, you are ready to proceed to the next step of connecting your remote.
Step 3: Enable Wi-Fi on Your Hero 4 Camera
To connect the GoPro remote to your Hero 4 camera, you first need to enable Wi-Fi on the camera itself. Follow the steps below to do so:
- Power on your Hero 4 camera by pressing the Power/Mode button on the front of the camera.
- Press the Settings button on the side of the camera (it has an icon that looks like a wrench).
- Use the front and back buttons on the camera to navigate to the Setup menu, which is represented by a gear icon.
- Select the Wi-Fi option by pressing the shutter button on top of the camera. This option is represented by an icon with signal waves.
- In the Wi-Fi menu, select the “On” option to enable Wi-Fi on your Hero 4 camera.
Once you have enabled Wi-Fi on your camera, you can now proceed to the next step of connecting the GoPro remote to your Hero 4 camera.
Step 4: Access the Wi-Fi Connections on Your GoPro Remote
Once you have paired your GoPro remote with your Hero 4 camera, it’s time to access the Wi-Fi connections on your remote. This will allow your remote to communicate with your camera and control its settings.

To access the Wi-Fi connections on your GoPro remote, follow these steps:
1. Power on Your GoPro Remote
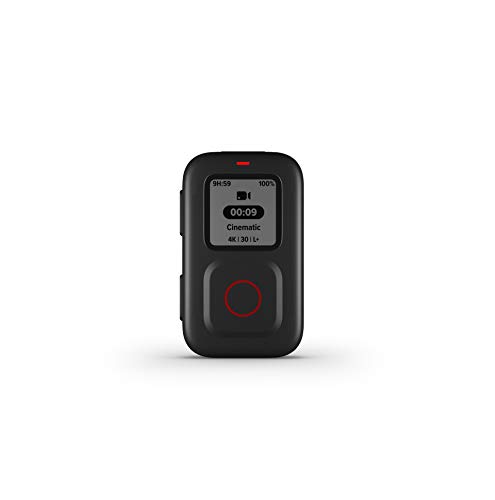
Make sure your GoPro remote is powered on by pressing the power button located on the right side of the remote. The power button is marked with a small circular icon.
2. Navigate to the Wi-Fi Menu
On the screen of your GoPro remote, navigate to the Wi-Fi menu by pressing the mode button located on the left side of the remote. The mode button is marked with an icon that looks like a small wrench.
3. Select the Wi-Fi Connection
Once you are in the Wi-Fi menu, use the arrow buttons located on the front of the remote to scroll through the available Wi-Fi connections. Select the Wi-Fi connection that matches the one on your Hero 4 camera by pressing the shutter button located on the top of the remote. The shutter button is marked with a small circle.
4. Connect to the Wi-Fi
After selecting the correct Wi-Fi connection, your GoPro remote will attempt to connect to the Wi-Fi network of your Hero 4 camera. This process may take a few seconds. Once the connection is established, the Wi-Fi icon on the screen of your remote will change from gray to white, indicating that the connection is successful.

| Wi-Fi Icon | Connection Status |
|---|---|
| Connection not established | |
| Connection established |
Once the connection is established, your GoPro remote is now successfully connected to your Hero 4 camera’s Wi-Fi network. You can now use your remote to control your camera, change its settings, and capture amazing footage.
Step 5: Select and Connect to Your Hero 4 Camera
Once you have turned on your GoPro Remote and Hero 4 Camera, it’s time to select and connect to your camera. Follow the steps below:
1. Navigate to the Settings Menu
Using the navigation buttons on your GoPro Remote, access the main menu of the remote. Look for the “Settings” option and press the corresponding button to enter the settings menu.
2. Select “Connections”
Within the settings menu, scroll or navigate to the “Connections” option. This is where you will find the settings related to connecting your remote to a camera.
3. Choose “Pairing”
Within the “Connections” menu, there should be an option called “Pairing” or “Pair Device”. Select this option to initiate the pairing process with your Hero 4 Camera.

4. Enable Wi-Fi on the Hero 4 Camera
In order for the remote to connect to the camera, you need to make sure that the Hero 4 Camera’s Wi-Fi is turned on. Go to the camera’s settings and enable Wi-Fi if it’s not already enabled.
5. Select the Hero 4 Camera on the Remote
Back on the GoPro Remote, you should see a list of available Hero 4 Cameras. Use the navigation buttons to highlight the desired camera on the list and press the button to select it.
6. Confirm the Connection
Once you have selected the Hero 4 Camera, a prompt or confirmation message should appear on both the remote and the camera’s screen. Follow the instructions on the screen to confirm and finalize the connection.
Once the connection is established, you should be able to control your Hero 4 Camera using the GoPro Remote.
Note: If you encounter any issues during the pairing or connection process, make sure that both the remote and the camera have sufficient battery power and that they are within range of each other. Refer to the user manuals for troubleshooting steps and additional information.
Step 6: Pair Your GoPro Remote with Hero 4 Camera
Once you have turned on your GoPro camera and remote, it’s time to connect them together. This will allow you to control your camera remotely and capture amazing shots without being physically near the camera.
Follow these steps to pair your GoPro remote with your Hero 4 camera:
1. Access the Camera’s Settings
On your Hero 4 camera, navigate to the settings menu by pressing the small power/mode button on the front of the camera. Use the mode button to scroll through the options and select “Settings” by pressing the shutter button on top of the camera.
2. Pairing Mode
In the settings menu, find the option “Pairing” or “Wireless” and select it. This will put your Hero 4 camera into pairing mode, allowing it to search for available remote devices.
Note: The pairing mode will stay active for a limited time (usually around 3 minutes) before automatically turning off. Make sure to complete the pairing process within this timeframe.
3. Activate Your Remote
On your GoPro remote, press and hold the power/mode button until the LED light on the remote starts flashing. This indicates that the remote is in pairing mode and actively searching for devices to connect to.
4. Pairing Successful
Once the remote and camera have successfully connected, you will see a notification on both the remote’s screen and the camera’s screen. It may take a few moments for the connection to be established, so be patient.
After the pairing is complete, you can test the remote’s functionality by using the various buttons to control the camera. Make sure the camera responds accordingly.
Note: In case of any issues during the pairing process, make sure both the camera and the remote have sufficient battery power. Also, double-check that the camera’s firmware is up to date.
Step 7: Start Using Your GoPro Remote with Hero 4 Camera
Now that your GoPro remote is connected to your Hero 4 camera, you can start using it to control your camera wirelessly. Here are a few tips to get you started:

1. Power on both your camera and remote. Make sure they are both turned on and within range of each other.
2. Familiarize yourself with the buttons on your remote. The GoPro remote has various buttons that allow you to navigate through the camera’s menu, start and stop recordings, and capture photos.
3. Navigate through the camera’s settings using the remote. Use the navigation buttons on the remote to access different options and settings on your camera. You can change modes, adjust settings, and even switch between video and photo modes using the remote.
4. Start and stop recordings remotely. With the GoPro remote, you can start and stop recordings without having to physically touch your camera. This can come in handy when you’re in the middle of an action-packed adventure and need to capture the moment quickly.
5. Capture photos remotely. In addition to video recordings, you can also use the GoPro remote to capture photos. Simply press the designated button on the remote to take a photo, and it will be saved to your camera’s memory card.
6. Review and delete content using the remote. The GoPro remote also allows you to review and delete content directly from the remote itself. This can be useful if you want to quickly review your footage or free up space on your memory card.
7. Experiment with different shooting modes and settings. The GoPro remote gives you full control over your camera’s modes and settings, so don’t be afraid to experiment and try out different shooting modes. Whether you’re capturing fast-paced action or stunning landscapes, the remote allows you to easily switch between modes and fine-tune your settings on the go.
With your GoPro remote successfully connected to your Hero 4 camera, you can now enjoy the convenience and flexibility of controlling your camera wirelessly. Whether you’re capturing thrilling adventures or everyday moments, the GoPro remote will make it easier than ever to get the perfect shot.
Question-answer:
Can I connect my GoPro remote to a Hero 4 camera?
Yes, you can connect your GoPro remote to a Hero 4 camera. To do this, first, ensure that the remote and camera are both powered on. Then, on the camera, go to the settings menu and select “Wireless Controls.” From there, select “GoPro Remote” and follow the on-screen instructions to pair the remote with the camera.
What should I do if my GoPro remote is not connecting to my Hero 4 camera?
If your GoPro remote is not connecting to your Hero 4 camera, there are a few steps you can try to troubleshoot the issue. First, make sure that both the remote and the camera have a full battery charge. Next, ensure that the remote and camera are within close range of each other, as they need to be in close proximity to establish a connection. If the issue persists, try resetting both the remote and the camera to their factory settings. If none of these steps work, there may be an issue with either the remote or the camera, and you may need to contact GoPro customer support for further assistance.


