Home security cameras have become an essential component of surveillance systems, providing homeowners with peace of mind and added security. Connecting your home security camera to the internet allows you to access its live video feed remotely, ensuring that you can keep an eye on your property even when you’re away.
Connecting a home security camera to the internet may seem like a daunting task, but it can be easily accomplished with a few simple steps. In this article, we will guide you through the process of connecting your home security camera to the internet and provide you with some useful tips.
The first step in connecting your home security camera to the internet is to ensure that you have a stable internet connection at your property. A reliable internet connection is crucial for accessing and streaming the live video feed from your camera. Make sure that your Wi-Fi network is strong and stable, or consider using a wired connection for a more reliable connection.
Once you have a stable internet connection, you will need to connect your home security camera to your Wi-Fi network. Most modern cameras come with a user-friendly setup wizard that guides you through the process of connecting to your Wi-Fi. Follow the instructions provided by the manufacturer to connect your camera to your Wi-Fi network.
Overview of Home Security Cameras
Home security cameras are an essential component of any comprehensive security system. These cameras allow you to monitor your property remotely and provide peace of mind knowing that your home is secure.

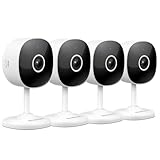
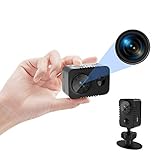
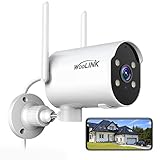
There are various types of home security cameras available on the market. Some are designed for indoor use, while others are specifically made for outdoor surveillance. You can choose between wired cameras that require a physical connection to your internet router or wireless cameras that use Wi-Fi to connect to your network.
Home security cameras come with a range of features and specifications. Resolution is an important factor to consider, as higher resolution cameras provide clearer and more detailed footage. Many cameras also offer night vision capabilities, allowing you to monitor your property even in low-light conditions.
In addition to basic surveillance, some home security cameras offer advanced features such as motion detection, facial recognition, and two-way audio. Motion detection allows the camera to start recording when it detects movement, while facial recognition can help identify specific individuals. With two-way audio, you can communicate with people on your property through the camera’s built-in microphone and speaker.
When choosing a home security camera, it’s essential to consider factors such as your specific monitoring needs, budget, and installation requirements. It’s also important to ensure that the camera you choose is compatible with your existing security system or the software you plan to use for monitoring.
Overall, home security cameras provide an important layer of protection for your property. By investing in a quality camera and setting it up correctly, you can enhance the security of your home and have peace of mind knowing that you can keep an eye on your property at all times.
Benefits of Connecting Home Security Camera to Internet
Connecting your home security camera to the internet offers numerous benefits that enhance the effectiveness and convenience of your surveillance system. By combining advanced technology with internet connectivity, you can take advantage of the following advantages:
1. Remote Access and Monitoring
One of the key advantages of connecting your home security camera to the internet is the ability to access and monitor your camera feeds remotely. Whether you are at work, on vacation, or simply away from home, you can use a smartphone, tablet, or computer with an internet connection to view the live video feeds from your security cameras. This allows you to stay connected to your home and monitor it in real-time, providing peace of mind and added security.
2. Real-time Alerts and Notifications
By connecting your home security camera to the internet, you can receive real-time alerts and notifications on your mobile devices whenever motion is detected or any other activity occurs around your property. These alerts can be sent via email, push notifications, or even text messages, keeping you informed about any potential security breaches or suspicious activities. This feature allows you to take immediate action, such as contacting the authorities, if necessary.
3. Cloud Storage and Backup
Internet-connected security cameras often have the option to store video footage in the cloud. This means that instead of storing the footage locally on a physical device like an SD card or a hard drive, the video is uploaded and stored securely in the cloud. Cloud storage provides several benefits such as easy access to archived footage from anywhere with an internet connection, protection against physical damage or theft of local storage devices, and the ability to automatically back up footage in case of device failure.
4. Integration with Smart Home Devices
Connecting your home security camera to the internet allows for seamless integration with other smart home devices. You can integrate your security camera with voice assistants like Amazon Alexa or Google Assistant to control and view camera feeds using voice commands. Additionally, you can set up automation rules to trigger actions based on camera activity, such as turning on lights or sounding an alarm when motion is detected. This integration adds an extra layer of convenience and security to your home.
| Benefits |
|
Steps to Connect Home Security Camera to Internet
Having a home security camera connected to the internet allows you to monitor your property remotely and receive alerts on your smartphone or computer. Here are the steps to connect your home security camera to the internet:
Step 1: Choose the Right Camera
Start by choosing a home security camera that is compatible with internet connectivity. Look for features like Wi-Fi capability and remote viewing options. This will ensure that you can connect your camera to the internet without any issues.
Step 2: Install the Camera
Once you have chosen the right camera, follow the manufacturer’s instructions to install it in the desired location. Make sure to position it in a way that covers the area you want to monitor.
Step 3: Connect Camera to Power
Next, connect your camera to a power source. Most home security cameras come with a power adapter that needs to be plugged into a wall outlet. Ensure that your camera is receiving power before proceeding.
Step 4: Connect Camera to Network
Now, it’s time to connect your camera to your home network. Check the manufacturer’s instructions to determine the best method for connecting your particular camera. This can usually be done through Wi-Fi or Ethernet.
Step 5: Configure Camera Settings
Once your camera is connected to your home network, access the camera’s settings through a web browser or a dedicated mobile app. Follow the instructions provided to configure your camera’s settings, including setting up access credentials and enabling remote viewing.
Step 6: Test Remote Viewing
After configuring the camera settings, test the remote viewing feature to ensure it is working correctly. Use a smartphone or computer, connect to the internet, and access your camera’s feed using the provided credentials. If everything is set up correctly, you should be able to view the live feed from your camera remotely.
That’s it! Your home security camera is now connected to the internet, allowing you to monitor your property from anywhere. Remember to regularly check the camera’s settings and update the firmware to ensure optimal performance and security.
Choosing the Right Internet Connection for Your Home Security Camera
When it comes to connecting your home security camera to the internet, choosing the right internet connection is crucial. A reliable and secure connection will ensure that your camera operates smoothly and that you have access to your camera’s live feed and recorded footage whenever you need it.
1. Broadband or Wi-Fi?

There are two main options for connecting your home security camera to the internet: broadband and Wi-Fi. If you already have a broadband connection set up in your home, it may be the easiest and most reliable option. Broadband connections typically offer faster speeds and more stable connections, which can be beneficial for streaming live video and accessing your camera remotely.
On the other hand, Wi-Fi connections offer more flexibility and convenience. They allow you to connect wirelessly to your camera, eliminating the need for messy cables. However, Wi-Fi signals can sometimes be weaker or more prone to interference, which can affect the performance of your camera.
2. Internet Speed and Bandwidth
Before connecting your home security camera to the internet, it’s important to consider your internet speed and bandwidth. The speed of your connection will determine how quickly your camera can transmit and stream video. For optimal performance, a minimum internet speed of 2 Mbps is recommended, but it may vary depending on the camera’s resolution and frame rate.
Bandwidth is also an important factor to consider. If you have other devices or users sharing the same internet connection, it’s important to ensure that you have enough bandwidth to support your camera’s needs. Consider investing in a higher bandwidth plan or a separate network for your camera to avoid any buffering or lagging issues.

3. Security Considerations
When setting up your home security camera, security should be a top priority. Choose a strong and unique password for your camera’s login to prevent unauthorized access. Additionally, consider enabling encryption protocols, such as WPA2, to ensure that your camera’s video feed is transmitted securely over the internet.
It’s also important to regularly update your camera’s firmware to protect against any potential vulnerabilities. Check for firmware updates on the manufacturer’s website and follow the instructions to install them.
4. Data Usage and Storage
Streaming and recording video through your home security camera can consume a significant amount of data. Consider choosing an internet plan with unlimited data or a high data cap to avoid any additional charges or potential interruptions in your camera’s functionality.

In addition, it’s important to have sufficient storage capacity for your camera’s recorded footage. This can be achieved through a cloud storage subscription or by using a local storage device, such as an SD card or a hard drive.
By considering these factors and making the right choices for your home security camera’s internet connection, you can ensure that your camera operates smoothly and effectively, providing you with the peace of mind and the security you deserve.
Troubleshooting Tips for Connecting Home Security Camera to Internet
If you are having trouble connecting your home security camera to the internet, check out these troubleshooting tips to get your camera up and running in no time:
1. Check your Wi-Fi connection
Make sure your Wi-Fi connection is stable and strong. Sometimes, the camera may not be able to connect to the internet due to a weak signal or network interference. Try moving your camera closer to the router or use a Wi-Fi range extender to improve the signal strength.
2. Verify camera settings
Double-check the camera settings to ensure that the Wi-Fi network name (SSID) and password are entered correctly. Even a small typo can prevent the camera from connecting to the internet. Make sure the camera is set to the same Wi-Fi network that you want it to connect to.

3. Restart camera and router
Restarting both the camera and the router can often help resolve connection issues. Turn off the camera, unplug it from the power source, and wait for a few seconds. Then, restart your router by unplugging it from the power source as well. After a minute or so, plug both the camera and router back in and wait for them to power up. Try reconnecting the camera to the internet.
4. Update firmware
Check if there are any firmware updates available for your camera. Outdated firmware can sometimes cause connectivity problems. Visit the manufacturer’s website or check the camera’s user manual for instructions on how to update the firmware. Make sure to follow the steps carefully to avoid any issues.
5. Disable firewalls or security software
Sometimes, firewalls or security software on your computer or router can block the camera from accessing the internet. Temporarily disable any firewalls or security software and see if that allows the camera to connect. Just remember to enable them again once the camera is successfully connected.
6. Reset camera
If all else fails, you can try resetting the camera to its factory settings. Keep in mind that resetting the camera will erase all your settings, so you’ll need to set it up again from scratch. Refer to the camera’s user manual for instructions on how to reset it. Once the camera is reset, try connecting it to the internet again.
By following these troubleshooting tips, you can fix most issues preventing your home security camera from connecting to the internet. If you continue to experience problems, it may be helpful to reach out to the camera manufacturer’s support for further assistance.
Best Practices for Securing Your Home Security Camera’s Internet Connection
When it comes to securing your home security camera’s internet connection, there are several best practices to consider. By following these guidelines, you can ensure that your camera is protected from potential security threats:
| 1. Change the default login credentials: | One of the most important steps in securing your camera is to change the default login credentials. Many cameras come with generic usernames and passwords, which can easily be guessed by hackers. By setting a unique and strong password, you can prevent unauthorized access to your camera. |
| 2. Keep your camera’s firmware updated: | Firmware updates often include security patches that address vulnerabilities in the camera’s software. Regularly check for firmware updates and install them as soon as they become available. This will ensure that your camera is protected against the latest threats. |
| 3. Enable two-factor authentication: | Adding an extra layer of security to your camera’s login process can greatly enhance its protection. By enabling two-factor authentication, you will need to provide a second piece of information, such as a unique code sent to your phone, before gaining access to your camera’s feed. |
| 4. Use a secure Wi-Fi network: | Make sure that your camera is connected to a secure Wi-Fi network. Avoid using open or public networks, as they can be easily compromised. Use a strong password for your Wi-Fi network and consider enabling network encryption (such as WPA2) for added security. |
| 5. Disable remote access if not needed: | If you do not require remote access to your camera’s feed, consider disabling this feature. Remote access can introduce additional security risks, so it is best to only enable it if necessary. Check your camera’s settings and disable any features that are not being used. |
| 6. Regularly monitor your camera’s activity: | Keep an eye on your camera’s activity logs and notifications. Unusual or suspicious activity could indicate a security breach. If you notice anything out of the ordinary, take immediate action, such as changing your camera’s password or contacting the manufacturer for support. |
By following these best practices, you can ensure that your home security camera’s internet connection is secure, providing you with peace of mind and protection against potential threats.
FAQ,
How do I connect my home security camera to the internet?
To connect your home security camera to the internet, you first need to make sure you have a compatible camera that supports internet connectivity. Then, you’ll need to connect the camera to your home network either via Wi-Fi or Ethernet cable. Finally, you’ll need to set up the camera using the manufacturer’s app or software to establish a connection to the internet.
Can I connect my security camera to the internet wirelessly?
Yes, most modern security cameras support wireless connectivity, allowing you to connect them to your home network without the need for a physical Ethernet cable. You can connect your camera to the internet wirelessly by following the manufacturer’s instructions and using your home Wi-Fi network.
What if my home network doesn’t have Wi-Fi?
If your home network doesn’t have Wi-Fi, you can still connect your security camera to the internet using a wired Ethernet connection. Simply connect an Ethernet cable from the camera to your router or modem, and then follow the manufacturer’s instructions to set up the camera for internet connectivity.

Do I need a special app to connect my security camera to the internet?
Yes, in most cases, you will need to use the manufacturer’s app or software to connect your security camera to the internet. The app will guide you through the setup process, allowing you to connect the camera to your home network and establish an internet connection. Make sure to download the app from a trusted source, such as the official app store for your device.
Can I access my security camera remotely once it’s connected to the internet?
Yes, once your security camera is connected to the internet, you can typically access it remotely using the manufacturer’s app or software. This allows you to view the camera’s live feed, receive notifications, and control the camera from anywhere with an internet connection. Just make sure to set up remote access and configure any necessary security measures to protect your camera and data.