
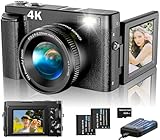
Do you want to capture and share your gaming moments with friends and family? Connecting your PlayStation 4 (PS4) to a digital camera can be a great way to capture high-quality screenshots and videos directly from your gaming console. Whether you want to show off your gaming skills or create content for your YouTube channel, this guide will walk you through the steps to connect your PS4 to a digital camera.
The first thing you need to do is check if your digital camera supports HDMI output. HDMI (High-Definition Multimedia Interface) is a common standard for transmitting uncompressed video and audio data. Most modern digital cameras support HDMI output, so there is a good chance that your camera will work.
Once you have confirmed that your camera supports HDMI output, you will need an HDMI cable. You can easily find HDMI cables at electronics stores or online. Make sure to get a cable with the appropriate length for your setup. It’s also a good idea to get a cable with gold-plated connectors for better signal transmission.
Now it’s time to connect your PS4 to your digital camera. Start by turning off both your PS4 and your camera. Locate the HDMI output port on your camera and plug one end of the HDMI cable into it. Then, plug the other end of the cable into the HDMI input port on your PS4.
Step-by-Step Guide: How to Connect PS4 to Digital Camera
Connecting your PS4 to a digital camera can open up a whole new world of gaming possibilities. Whether you want to use your camera for live streaming purposes or capture high-quality gameplay footage, the process is relatively simple. Here’s a step-by-step guide to help you get started:
Step 1: Check Your Camera’s Compatibility
Before attempting to connect your camera to your PS4, it’s important to ensure that your camera is compatible. Most modern cameras come with an HDMI output port, which is crucial for connecting to your PS4. Additionally, make sure your camera supports a video output mode, as you’ll be using it to transfer the video signal to your console.
Step 2: Gather the Necessary Cables
Once you’ve confirmed your camera’s compatibility, gather the necessary cables. You’ll need an HDMI cable to connect your camera to your PS4. Ensure that the cable is in good condition and long enough to reach both devices comfortably.
Additionally, if your camera has a mini HDMI output port, you may need an HDMI adapter or converter to connect the mini HDMI end of the cable to your camera. Make sure you have the appropriate adapters before proceeding.
Step 3: Connect Your Camera to Your PS4
Now that you have the cables ready, it’s time to connect your camera to your PS4. Start by connecting one end of the HDMI cable to the HDMI output port on your camera. If you’re using an adapter, connect the appropriate end of the adapter to your camera’s mini HDMI port and then connect the HDMI cable to the other end of the adapter.
Next, connect the other end of the HDMI cable to one of the HDMI input ports on your PS4. Your PS4 should have multiple HDMI ports, so choose an available one. Once connected, turn on both your camera and your PS4.

Step 4: Adjust Your PS4 Settings
With both devices powered on and connected, you’ll need to adjust your PS4 settings to recognize and use your camera as a video input source. On your PS4, go to the “Settings” menu and select “Devices” followed by “Video Capture Settings”.
In the “Video Capture Settings” menu, choose the HDMI input option that corresponds to the HDMI port you connected your camera to. Your PS4 should detect the camera and display the video feed on your TV or monitor.
Step 5: Configure Camera Settings (If Necessary)
Once your camera’s video feed is displayed on your TV or monitor, you may need to configure certain camera settings. This step will vary depending on your camera model and desired settings. Refer to your camera’s user manual for specific instructions on adjusting video output settings.
If you plan on live streaming or capturing gameplay footage, you may want to set your camera to manual focus mode for better control. Additionally, ensure that your camera’s settings are optimized for video output to get the best possible image quality on your PS4.
And that’s it! You’ve successfully connected your PS4 to your digital camera. Now you can explore the various gaming applications your camera has to offer. Whether it’s streaming gameplay on platforms like Twitch or capturing stunning footage for your YouTube channel, the possibilities are endless. Have fun!
Required Equipment
Before you can connect your PS4 to a digital camera, you will need the following equipment:
- A digital camera with an HDMI output
- An HDMI cable
- A television or monitor with an HDMI input
- A PS4 console
- A power source for both the camera and the PS4
It’s important to make sure that your camera has an HDMI output port, as not all digital cameras do. You will also need a television or monitor that has an HDMI input so that you can view the camera’s display on a larger screen.
Additionally, make sure you have a power source available for both the camera and the PS4, as they will need to be plugged in to function properly. Once you have gathered all the necessary equipment, you can proceed with connecting your PS4 to your digital camera.
Setting up the Connection
To connect your PS4 to a digital camera, follow these steps:
- Ensure that both the PS4 and the digital camera are turned off.
- Locate the HDMI port on the back of your PS4.
- Take the HDMI cable and connect one end to the HDMI port on the PS4.
- Locate the HDMI port on your digital camera.
- Take the other end of the HDMI cable and connect it to the HDMI port on the digital camera.
- Turn on both the PS4 and the digital camera.
- Using your digital camera’s menu or settings, select the option to output video to an external device.
- On your PS4, go to the Settings menu and select Sound and Screen.
- Select Video Output Settings and choose the appropriate resolution for your camera.
- Once the settings are applied, you should see the output from your digital camera on your PS4 display.
If you encounter any issues during the setup process, refer to the user manuals for both your PS4 and digital camera or consult the manufacturer’s website for further assistance.
Connecting via HDMI
To connect your PS4 to your digital camera using HDMI, follow these steps:
- Turn off both your PS4 and digital camera.
- Locate the HDMI port on your PS4 console and the HDMI port on your digital camera.
- Insert one end of the HDMI cable into the HDMI port on your PS4 console.
- Insert the other end of the HDMI cable into the HDMI port on your digital camera.
- Turn on your PS4 console and digital camera.
- On your digital camera, navigate to the settings menu and select the option to display the HDMI output.
- On your PS4 console, navigate to the settings menu and select the option to enable HDMI output.
- Once both devices are connected and set up, the screen from your digital camera should be displayed on your PS4.
- You can now use your PS4 to control and navigate the functions of your digital camera.
Note: The steps may vary slightly depending on the specific model of your digital camera. Consult your digital camera’s user manual for detailed instructions on connecting via HDMI.
Configuring the Settings
Before connecting your PS4 to a digital camera, you need to make sure the settings on both devices are properly configured.
On the PS4:
- Go to the Settings menu on your PS4.
- Select Devices.
- Choose USB Storage Devices.
- Enable the USB Music Player option.
- Exit the Settings menu.
On the digital camera:

- Turn on your digital camera.
- Access the camera’s menu settings.
- Navigate to the Connectivity or Connection settings.
- Select USB Connection.
- Choose the Mass Storage or Mass Storage Device option.
Once you have configured the settings on both devices, you can proceed to connect your PS4 to the digital camera using a USB cable. Make sure the cable is securely connected to both devices to ensure a stable connection.
Adjusting Display and Audio Settings
To connect your PS4 to a digital camera, it’s important to adjust the display and audio settings to ensure the best gaming experience. These settings can help optimize the image quality and sound output.
Display Settings
1. On your PS4, go to the “Settings” menu.
2. Select “Sound and Screen” from the options.
3. Choose “Video Output Settings” and then “Resolution” to set the desired display resolution.

4. Adjust the “RGB Range” to your preference. This setting can affect the contrast and color accuracy.
5. Enable “Deep Color Output” if your camera supports it. This can enhance the color depth and richness of the image.
Audio Settings
1. In the “Settings” menu, select “Sound and Screen”.
2. Choose “Audio Output Settings” and then “Primary Output Port”.
3. Select “Digital Out (Optical)” if your digital camera has an optical audio output. Otherwise, choose “HDMI” or “AV Multi Out” depending on the available ports.

4. Adjust the “Audio Format” to match your camera’s capabilities. Common options include “Linear PCM” and “Bitstream (Dolby)”.
5. If desired, enable “Audio Output Device” to adjust volume levels from your digital camera directly.
Additional Tips
– Make sure your digital camera supports HDMI or AV connectivity. Not all cameras have these ports.
– Check the camera’s user manual for specific instructions on how to connect it to an external device like a PS4.
– Test your settings and make further adjustments if necessary for optimal gaming performance.

| Display and Audio Settings Summary | |
|---|---|
| Display Settings | Audio Settings |
| – Adjust resolution | – Select primary audio output port |
| – Set RGB range | – Choose audio format |
| – Enable deep color output | – Adjust audio output device (optional) |
Troubleshooting Tips
If you are having trouble connecting your PS4 to your digital camera, here are some troubleshooting tips that may help:
1. Check the connections
Make sure that all cables are securely connected to both your PS4 and digital camera. Check that the HDMI cable is properly plugged into the HDMI ports.
2. Update firmware
Ensure that both your PS4 and digital camera have the latest firmware updates installed. Firmware updates often include bug fixes and improvements that can help resolve compatibility issues.
3. Adjust camera settings
Some digital cameras have specific settings that need to be adjusted for proper connection to external devices like the PS4. Refer to your camera’s user manual for instructions on how to access and modify these settings.
4. Use a compatible camera
It is important to note that not all digital cameras are compatible with the PS4. Check the compatibility list provided by Sony to ensure that your camera is supported.
5. Restart your devices
Try restarting both your PS4 and digital camera. Sometimes a simple reboot can help resolve connection issues.
6. Contact customer support
If you have followed all these troubleshooting tips and still cannot connect your PS4 to your digital camera, it may be necessary to contact the customer support of your camera or PlayStation for further assistance.
Question-answer:
Can I connect any digital camera to a PS4?
No, not all digital cameras can be connected to a PS4. Only digital cameras with HDMI output support can be connected to the PS4. Make sure to check the specifications of your digital camera to see if it has HDMI output before attempting to connect it to the PS4.
Why would I want to connect my PS4 to a digital camera?
There can be several reasons why someone might want to connect their PS4 to a digital camera. One possible reason is to use the digital camera as a screen for playing games, especially if the camera has a larger and better display compared to a regular TV. It can also be useful for recording gameplay footage directly from the camera or using it for livestreaming purposes.

Are there any limitations to connecting a digital camera to a PS4?
Yes, there are some limitations when connecting a digital camera to a PS4. Some digital cameras may not support certain resolutions or display settings, which can result in a lower quality or incompatible display. Additionally, not all digital cameras may have the necessary HDMI output port required to connect to the PS4. Therefore, it is important to check the specifications of both the digital camera and the PS4 before attempting to connect them.


