
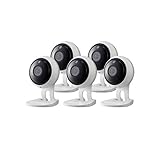
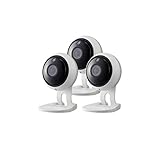
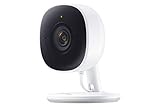
If you are concerned about the safety and security of your home, installing security cameras is a smart choice. Samsung security cameras are known for their reliability and high-quality performance. In this article, we will guide you on how to connect your Samsung security cameras to your home network, so you can monitor your property from anywhere.
Before you begin the process of connecting your Samsung security cameras to your home network, make sure you have the necessary equipment. You will need a stable internet connection, a router with available Ethernet ports, and of course, your Samsung security cameras. It is also essential to have your camera’s user manual handy, as it will provide detailed instructions specific to your model.
The first step in connecting your Samsung security cameras to your home network is to find the IP address of each camera. An IP address is a unique identifier for each device connected to a network. To find the IP address, you can use the Samsung SmartCam app or check the camera’s settings menu. Make a note of the IP address for each camera, as you will need it later in the process.
Once you have the IP addresses, you can proceed to connect the cameras to your home network. Start by connecting the cameras to your router using Ethernet cables. Plug one end of the cable into the camera’s Ethernet port and the other end into an available port on your router. Ensure that the connections are secure.
Step 1: Check Camera Compatibility
Before attempting to connect your Samsung security cameras to your home network, it is essential to ensure that the cameras are compatible with your network setup. This compatibility check will help you determine if the cameras can communicate with your network devices and access the Internet for remote viewing.

1.1 Determine Camera Model
Identify the specific model of your Samsung security camera. This information can usually be found on the camera itself or in the user manual.
1.2 Verify Network Connection Options
Check the network connection options available on your Samsung security cameras. Some common options include Ethernet (RJ45), Wi-Fi, and Power over Ethernet (PoE). Ensure that your home network supports the same connection type as your cameras.
1.3 Review Network Requirements
Review the network requirements for your Samsung security cameras. This may include information such as minimum network speed and security protocols supported. Make sure your home network meets these requirements for optimal camera performance.
By verifying camera compatibility before proceeding with the connection process, you can avoid potential issues and ensure a smooth setup of your Samsung security cameras on your home network.
Step 2: Connect the Camera to Power
Before connecting your Samsung security camera to the home network, you need to ensure that it has a reliable power source.
Here are the steps to connect the camera to power:
- Locate a suitable power outlet near the camera installation point.
- Plug in the power adapter provided with the camera into the power outlet.
- Connect the other end of the power adapter to the camera’s power input port.
- Make sure the power connection is secure and the camera is receiving power.
- Check the camera’s LED indicators to confirm if it is powered on.
It is important to ensure a stable power supply for your camera to function properly. Avoid using power sources that are prone to fluctuations or power outages, as this can affect the camera’s performance and reliability.
Once the camera is successfully powered on, you can proceed to the next step of connecting it to your home network.
Step 3: Connect the Camera to the Router
Once you have set up your Samsung security camera and completed the initial configuration process, the next step is to connect the camera to your home network.
Follow these steps to connect the camera to the router:
- Locate the Ethernet port on the back of the camera. It is usually labelled “LAN”.
- Take one end of the Ethernet cable and insert it into the Ethernet port on the camera.
- Take the other end of the Ethernet cable and insert it into an available Ethernet port on your router.
- Make sure both ends of the cable are securely connected.
- Power on the camera by plugging it into a power source.
- Wait for the camera to establish a connection with the router. This may take a few minutes.
- Once the camera is connected, the LED indicators on the camera should light up or change color.
- To confirm the connection, you can check the network settings on the camera or access the camera’s web interface using its IP address.
By connecting your Samsung security camera to your home network, you will be able to access the camera remotely and view the live feed from your smartphone, tablet, or computer.
Remember, it is important to ensure that your router is configured properly to allow for remote access to the camera. Refer to the camera’s user manual or contact technical support for more information on configuring the router.
Step 4: Configure Camera Settings
After successfully connecting your Samsung security cameras to your home network, you will need to configure the camera settings to ensure optimal performance and functionality. Here are the steps to follow:
1. Access the Camera’s Web Interface
To configure the settings of your Samsung security camera, you will need to access its web interface. Open a web browser on your computer or mobile device and enter the IP address of the camera. You can find the IP address in the camera’s user manual or by using a network scanning tool.
2. Login to the Web Interface
Once you have entered the IP address of the camera, you will be prompted to enter the login credentials. By default, the username is usually “admin” and the password is blank or “admin”. However, it is recommended to change the password for security purposes.

Note: If you have forgotten the login credentials, you may need to reset the camera to its factory settings by pressing the reset button on the back of the camera.
3. Configure Network Settings
Once logged in, navigate to the network settings tab or menu in the camera’s web interface. Here, you can configure the network settings of the camera, such as the IP address, subnet mask, gateway, and DNS server. Make sure to set the network settings according to your home network configuration.
4. Set Video and Image Settings
Next, go to the video and image settings tab or menu to adjust the camera’s video quality, resolution, frame rate, and other settings. You may also configure the image settings, such as brightness, contrast, and saturation, to suit your preferences and requirements.
5. Enable Motion Detection and Alarm Features
If your Samsung security camera supports motion detection and alarm features, enable them in the camera’s settings. This will allow the camera to detect motion and send notifications or trigger alarms when any movement is detected in the camera’s field of view.
By following these steps, you will be able to configure the settings of your Samsung security cameras and optimize their performance according to your preferences and requirements.
Step 5: Install Monitoring Software
After connecting your Samsung security cameras to your home network, the next step is to install monitoring software on your computer or mobile device. This will allow you to access and manage your security cameras remotely.
- First, check the compatibility of your Samsung security camera system with the monitoring software you plan to install. Some monitoring software may only be compatible with certain models or versions of Samsung security cameras.
- Visit the Samsung website or the manufacturer’s website to find the appropriate monitoring software for your specific security cameras.
- Download and install the monitoring software on your computer or mobile device according to the manufacturer’s instructions.
- Once the software is installed, open it and follow the on-screen instructions to set up the connection to your Samsung security cameras.
- You may be prompted to enter the IP address or domain name of your security cameras, as well as any login credentials or authentication methods required.
- After completing the setup process, you should be able to view live video feeds from your Samsung security cameras, as well as access additional features such as video recording, motion detection, and camera settings.
- If you encounter any issues during the installation or setup process, refer to the user manual or contact the manufacturer’s support team for assistance.
Remember to secure your monitoring software with a strong password to prevent unauthorized access to your security cameras. Regularly update the software and firmware to ensure optimal functionality and security.
Step 6: Test the Camera Connection
After completing the previous steps, it is important to test whether the camera is successfully connected to your home network. This will ensure that you can monitor your premises and receive live video footage.
Here are the steps to test the camera connection:
- Open the mobile app or the web interface provided by Samsung for your security camera.
- Login with the credentials you set up during the initial setup process.
- Select the camera you want to test from the list of connected devices.
- Make sure you have a stable internet connection.
- Click on the live view option to check the live video feed from the camera.
- If you can see the live video footage, congratulations! Your camera is successfully connected to your home network.
- If you encounter any issues or the camera does not connect, double-check your network settings and try reconnecting the camera.
It is advisable to test the camera connection periodically to ensure its reliability. Additionally, make sure you keep the camera firmware up to date to benefit from the latest features and security improvements.

FAQ,
Can I connect my Samsung security cameras to my home network?
Yes, you can connect your Samsung security cameras to your home network.
What are the steps to connect Samsung security cameras to a home network?
The steps to connect Samsung security cameras to a home network are as follows:
Do I need any additional equipment to connect Samsung security cameras to my home network?
In most cases, you will need a network video recorder (NVR) or a digital video recorder (DVR) to connect Samsung security cameras to your home network.
Can I access my Samsung security cameras remotely once they are connected to my home network?
Yes, once your Samsung security cameras are connected to your home network, you can access them remotely using a smartphone or a computer.
What are the benefits of connecting Samsung security cameras to a home network?
Some benefits of connecting Samsung security cameras to a home network include easy remote access, real-time monitoring, and the ability to receive alerts on your smartphone or computer.


