
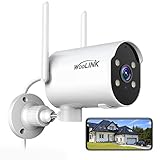
Surveillance cameras are an essential part of any comprehensive home security system. However, sometimes the location of the camera may be far from the Wi-Fi router, resulting in a weak or unreliable connection. In such cases, a Wi-Fi extender can come to the rescue. Wi-Fi extenders, also known as range extenders or repeaters, can amplify the wireless signal and increase its range, ensuring a stable connection between your security camera and the network.
Connecting a security camera to a Wi-Fi extender is a relatively simple process. To begin, make sure that both the camera and the Wi-Fi extender are powered on and functioning properly. Ensure that the Wi-Fi extender is within range of the router and that its signal strength is strong enough. It is recommended to place the Wi-Fi extender in a central location to maximize its coverage.
Next, locate the WPS (Wi-Fi Protected Setup) button on both the camera and the Wi-Fi extender. Press and hold the WPS button on the Wi-Fi extender for a few seconds, until it starts blinking. Then, press and hold the WPS button on the camera. The two devices will establish a secure connection automatically. This process may take a few minutes, so be patient and wait for the connection to complete.
Once the camera and the Wi-Fi extender have successfully connected, you can verify the connection by checking the camera’s settings or using a smartphone or computer to view the live feed. If the connection is stable and the camera is functioning as expected, congratulations! You have successfully connected your security camera to a Wi-Fi extender.
In conclusion, connecting a security camera to a Wi-Fi extender is a convenient solution to ensure a reliable and stable connection, especially when the camera is located far from the router. By following the simple steps outlined above, you can easily connect your camera to a Wi-Fi extender and enjoy enhanced security and peace of mind.

Step-by-Step Guide: Connecting Security Camera to Wi-Fi Extender
If you have a security camera that needs to be connected to a Wi-Fi extender, it can be a bit confusing at first. However, by following these step-by-step instructions, you can easily set up the connection and ensure that your security camera is connected to the extender and working properly.
Step 1: Gather the necessary materials
Before you start the process, make sure you have the following materials:
- Security camera
- Wi-Fi extender
- Smartphone or computer with Wi-Fi capabilities
- Network cables (if required)
Step 2: Position the Wi-Fi extender
Place the Wi-Fi extender in a central location within range of your existing Wi-Fi network. This will ensure that the extender can capture a strong signal from the router and provide a reliable connection for your security camera.
Step 3: Power on the Wi-Fi extender
Plug in the Wi-Fi extender and power it on. Wait for the extender to boot up and establish a connection with the router. This may take a few minutes.
Step 4: Connect your smartphone or computer to the Wi-Fi extender
On your smartphone or computer, navigate to the Wi-Fi settings and search for available networks. Locate the network name of the Wi-Fi extender and select it to connect. Enter the password if prompted.

Step 5: Connect the security camera to the Wi-Fi extender
Refer to the user manual of your security camera for specific instructions on how to connect it to a Wi-Fi network. Generally, the process involves accessing the camera’s settings through a web interface, scanning for available networks, selecting the Wi-Fi extender network, and entering the password if required. Follow the on-screen prompts to complete the connection process.
Step 6: Test the connection
Once the security camera is connected to the Wi-Fi extender, test the connection by accessing the camera’s live feed on your smartphone or computer. Open the camera’s app or login to the camera’s web interface and verify that you can see the live feed without any issues.
By following these steps, you should be able to successfully connect your security camera to a Wi-Fi extender. If you encounter any difficulties, refer to the user manuals of your devices or contact the manufacturers for further assistance.
Understanding the Basics
Before connecting your security camera to a Wi-Fi extender, it’s important to understand the basics of how this process works. A Wi-Fi extender, also known as a range extender, is a device that amplifies your existing Wi-Fi signal and extends its coverage area. This can be helpful in situations where your security camera is located far away from your router and might experience weak or no signal.
When you connect your security camera to a Wi-Fi extender, the extender acts as a bridge between the camera and your existing Wi-Fi network. This means that the camera will still connect to the extender wirelessly, but the extender will be connected to your network via an Ethernet cable or wirelessly, depending on the model.

It’s important to note that the exact steps for connecting your security camera to a Wi-Fi extender may vary depending on the make and model of your camera and extender. However, the basic principles remain the same.
In the next sections, we will guide you through the specific steps you need to follow to connect your security camera to a Wi-Fi extender. Make sure you have the necessary equipment and access to the camera’s settings before proceeding.
Choosing the Right Wi-Fi Extender
When it comes to connecting a security camera to a Wi-Fi extender, it is important to choose the right extender that meets your needs. Here are some factors to consider when selecting a Wi-Fi extender:
1. Range
The range of the extender is crucial in ensuring that your security camera can connect to it. The extender should have enough coverage to reach the location of your camera. Consider factors such as walls, floors, and other obstacles that might affect the signal strength.
2. Compatibility
Ensure that the Wi-Fi extender is compatible with your security camera system. Check the specifications provided by the manufacturer to ensure that it supports the necessary protocols and frequencies required by your camera.

3. Speed and Bandwidth
If you plan on streaming video footage from your security camera, make sure that the extender can provide fast and reliable connection speeds. Look for extenders that support the latest Wi-Fi standards, such as 802.11ac, to ensure optimal performance. Additionally, consider the bandwidth requirements of your camera system to avoid any issues with buffering or lag.
4. Security Features
Security is important, especially when dealing with surveillance cameras. Look for Wi-Fi extenders that offer features such as encryption, firewall protection, and guest network options. These features will help ensure that your camera footage and network are safe from unauthorized access.
5. Ease of Installation
Consider the ease of installation and setup. Look for extenders that come with user-friendly interfaces and clear instructions. Some extenders also offer mobile apps that allow for easy management of the network settings.
By considering these factors, you can choose the right Wi-Fi extender that will provide a stable and reliable connection for your security camera system. Remember to consult the manufacturer’s specifications and recommendations for the best results.
| Factor | Considerations |
|---|---|
| Range | Consider obstacles that may affect coverage. |
| Compatibility | Ensure the extender supports the necessary protocols for your camera. |
| Speed and Bandwidth | Look for fast connection speeds and consider camera system requirements. |
| Security Features | Ensure the extender offers encryption and protection against unauthorized access. |
| Ease of Installation | Choose an extender with user-friendly setup and management options. |
Setting Up the Wi-Fi Extender
Installing a Wi-Fi extender can help improve the range and connectivity of your security camera by extending your Wi-Fi network signal. Here are the steps to set up your Wi-Fi extender:

1. Placement: Find a suitable location for your Wi-Fi extender. It should be placed within the range of your existing Wi-Fi network and close to the security camera.
Tip: Avoid placing the extender near metal objects, walls, or other devices that can interfere with the signal.
2. Power On: Connect the Wi-Fi extender to a power source and turn it on. Wait for the indicator lights to stabilize.
3. Connect to the Extender: On your computer or smartphone, go to the Wi-Fi settings and connect to the Wi-Fi network of the extender. The network name and password can be found on the back or side of the extender.
Tip: Make sure to connect to the correct Wi-Fi network and not your main Wi-Fi network.

4. Access the Setup Page: Open a web browser and enter the IP address of the extender. This can usually be found in the user manual or on the manufacturer’s website.
5. Configure the Extender: Follow the on-screen instructions to configure the Wi-Fi extender. You may need to select your existing Wi-Fi network and enter the password to connect the extender to your network.
Tip: Some Wi-Fi extenders have a WPS button that allows for quick and easy setup. Consult the user manual for instructions on using the WPS feature.
6. Test the Connection: Once the configuration is complete, disconnect from the extender’s Wi-Fi network and connect back to your main Wi-Fi network. Ensure that your security camera is now connected to the extended network and check if it has a stable connection.
Tip: You may need to restart your security camera to establish a connection with the new Wi-Fi network.

You have now successfully set up your Wi-Fi extender and connected your security camera to it. Enjoy improved range and stability for your security camera’s Wi-Fi connection!
Preparing the Security Camera
Before connecting your security camera to a Wi-Fi extender, there are a few steps you need to take to ensure the camera is ready for setup:
1. Find a suitable location: Choose a location for your security camera where it has a clear view of the area you want to monitor. Make sure the camera is within range of your Wi-Fi extender signal.
2. Power the camera: Connect the power adapter to the security camera and plug it into a power outlet. Ensure that the camera receives the necessary power supply to function properly.
3. Connect the camera to your router: Use an Ethernet cable to connect the security camera to your router. This will provide the camera with a stable and reliable network connection during the setup process.

4. Configure camera settings: Access the camera’s settings interface through the manufacturer’s provided software or app. Set up the camera’s Wi-Fi settings, including choosing the option to connect to a Wi-Fi network and entering the network’s SSID (name) and password.
5. Test the camera: Make sure the camera is functioning correctly by accessing the live feed and checking the image quality. Adjust any settings as needed to achieve the desired results.
6. Disconnect the Ethernet cable: Once you have successfully connected and tested the camera, you can disconnect the Ethernet cable from the camera and the router. Your security camera is now ready to be connected to the Wi-Fi extender.
Connecting the Security Camera to the Wi-Fi Extender
When setting up your security camera system, it is essential to ensure a stable and reliable connection to your Wi-Fi network. If the camera is too far from the Wi-Fi router or experiences weak signals, a Wi-Fi extender can be a useful solution to boost the signal strength and expand the coverage area.
To connect your security camera to the Wi-Fi extender, follow these steps:
- Ensure that your Wi-Fi extender is properly set up and connected to your Wi-Fi network.
- Place the Wi-Fi extender within range of your security camera. Check the user manual for the recommended range.
- Power on your security camera and wait for it to initialize.
- Access the camera’s settings through the provided mobile app or web interface.
- Navigate to the Wi-Fi settings or network settings within the camera’s interface.
- Search for available Wi-Fi networks and select the network name of your Wi-Fi extender.
- Enter the Wi-Fi password for your extender’s network, if prompted.
- Wait for the camera to establish a connection with the Wi-Fi extender.
- Once connected, verify the connection status and signal strength in the camera’s settings.
It is recommended to place the Wi-Fi extender and security camera in an open area with minimal obstructions for the best signal quality. Test the camera’s live feed and remote access capabilities to ensure a successful connection.
By following these steps, you can easily connect your security camera to a Wi-Fi extender and enjoy a reliable and extended wireless coverage for enhanced security monitoring.
Configuring the Security Camera Settings
Once you have successfully connected your security camera to the Wi-Fi extender, the next step is to configure its settings to ensure optimal performance and security. Follow these steps to configure the security camera settings:
Step 1: Access the Camera’s Web Interface
To configure the security camera settings, you will need to access its web interface. Open a web browser on your computer and type the IP address of the camera in the address bar. Press Enter to load the camera’s login page.
Step 2: Enter the Login Credentials
Enter the login credentials provided with the camera. This typically includes a username and password. If you haven’t changed the default login credentials, refer to the camera’s documentation for the default credentials.
Step 3: Navigate to the Settings Menu
Once logged in, navigate to the settings menu or configuration page of the camera. The exact location and terminology may vary depending on the camera’s make and model.
Step 4: Configure Wi-Fi Settings
Locate the Wi-Fi settings section and select the option to connect to a Wi-Fi network. Enter the SSID (Wi-Fi network name) and password for your Wi-Fi extender. Save the settings to establish a connection between the camera and the extender.
Step 5: Adjust Camera Parameters
Explore the camera settings menu to adjust parameters such as resolution, frame rate, motion detection sensitivity, and recording options. These settings allow you to customize the camera’s behavior based on your specific surveillance needs.
Step 6: Enable Security Features
Enable any available security features provided by the camera, such as encryption, authentication, and remote access restrictions. These features help protect your camera’s feed from unauthorized access and ensure the privacy of your surveillance system.
Step 7: Save and Apply Settings
After configuring all the desired settings, click on the “Save” or “Apply” button to save the changes. The camera will then restart to apply the new settings.
By following these steps, you can easily configure the settings of your security camera connected to a Wi-Fi extender. Ensure you consult the camera’s documentation for detailed instructions specific to your camera model.
Testing the Connection
Once you have successfully connected your security camera to the Wi-Fi extender, it is important to test the connection to ensure everything is working properly. Here are the steps to follow:
1. Access the Camera’s Settings
First, access the settings of your security camera either through the camera’s mobile app or by typing the camera’s IP address into your web browser.
2. Check the Wi-Fi Signal Strength
Within the camera’s settings, look for an option to check the Wi-Fi signal strength. This will show you the strength of the connection between the camera and the Wi-Fi extender. Ideally, you want a strong signal for optimal performance.
3. Test Video Playback
Next, test the video playback. Open the live video feed on your mobile app or web browser and check if the video is smooth and without interruptions. Move around the area the camera is monitoring to verify that the video is being transmitted consistently.
4. Check for Any Delay
While testing the video playback, also be aware of any noticeable delay between the camera capturing the video and it being displayed on your mobile app or web browser. A minimal delay is expected, but any significant delay may indicate a weak signal or other issues with the connection.
5. Verify Motion Detection and Alerts
If your security camera has motion detection capabilities, test them by intentionally walking in front of the camera and verifying that you receive alerts on your mobile app or via email. This will ensure that the camera is properly detecting motion and notifying you as expected.
If you encounter any issues during the testing phase, you may need to adjust the positioning of the Wi-Fi extender or security camera, or consider using additional Wi-Fi extenders or alternative solutions to strengthen the connection.
Troubleshooting Common Issues
While connecting your security camera to a Wi-Fi extender may seem straightforward, you may encounter some common issues. Here are a few troubleshooting tips to help you resolve them:
1. Weak Signal Strength
If you are experiencing weak signal strength between your camera and Wi-Fi extender, you may encounter connection issues or poor video quality. Try these steps to improve the signal:
- Make sure that the camera and Wi-Fi extender are within the recommended range for a strong signal.
- Position the Wi-Fi extender closer to the camera, and ensure there are no physical obstructions blocking the signal.
- Consider upgrading to a more powerful Wi-Fi extender to increase the signal strength.
2. Incorrect Wi-Fi Password
If you are unable to connect your security camera to the Wi-Fi extender, double-check the Wi-Fi password you entered. Sometimes, a simple typo can prevent a successful connection. Make sure to enter the password correctly and check for any spaces or capitalization errors.
3. Network Congestion
If you experience frequent disconnections or slow video streaming, network congestion may be the cause. Try these steps to reduce network congestion:
- Limit the number of devices connected to the Wi-Fi network. More devices connected can lead to slower speeds.
- Consider upgrading your internet plan to a higher speed or contacting your internet service provider to address any network capacity issues.
- Restart your Wi-Fi extender and security camera to refresh the connection.
By following these troubleshooting tips, you can resolve common issues that may arise when connecting your security camera to a Wi-Fi extender. If the issues persist, consider contacting the manufacturer for further assistance.
FAQ,
Do I need a separate Wi-Fi extender for each security camera?
No, you do not necessarily need a separate Wi-Fi extender for each security camera. If you have multiple security cameras that are within range of a single Wi-Fi extender, you can connect them all to that extender. However, it is important to consider the bandwidth and signal strength of your Wi-Fi extender. If you have multiple cameras that require a lot of bandwidth, it may be necessary to use multiple Wi-Fi extenders to ensure a stable and reliable connection for each camera. Additionally, if your cameras are located in different areas of your property and are not within range of a single extender, you will need to use multiple extenders to provide coverage for all of your cameras.


