Sharper Image drones have become increasingly popular for their innovative features and user-friendly designs. One of the most sought-after features is the ability to connect the drone to your phone, allowing you to control and monitor the drone’s flight from the convenience of your mobile device. If you’re wondering how to connect your Sharper Image drone to your phone, you’re in the right place. In this article, we will guide you through the step-by-step process of connecting your drone to your phone and provide you with some useful tips and troubleshooting advice.
Before we dive into the details, it’s important to note that the specific steps may vary depending on the model of your Sharper Image drone and the type of phone you are using. However, the general principles and guidelines should apply to most models. If you’re unsure about any steps or encountering difficulties, we recommend consulting the user manual that came with your drone or reaching out to the Sharper Image customer support for assistance.
To connect your Sharper Image drone to your phone, you will typically need to follow these steps:
- Step 1: Power on your Sharper Image drone and your phone.
- Step 2: Open the Wi-Fi settings on your phone and look for the Wi-Fi network name associated with your drone. It is usually indicated on the packaging or in the user manual.
- Step 3: Select the Wi-Fi network of your drone on your phone and enter the password if prompted. The password can also be found in the user manual or on the drone itself.
- Step 4: Once connected, launch the dedicated app for your Sharper Image drone on your phone. If you haven’t installed the app yet, you can find it in the app store by searching for the drone model or Sharper Image.
- Step 5: Follow the on-screen instructions in the app to establish a connection between your drone and the app. This may involve scanning a QR code, entering a pairing code, or selecting the drone from a list of available devices.
- Step 6: Once the connection is established, you should have full control of your Sharper Image drone through the app on your phone. You will be able to access features such as live video feed, flight settings, and capturing photos or videos.
It’s worth mentioning that some Sharper Image drones also support advanced features like GPS navigation, automatic flight modes, and virtual reality (VR) compatibility. These features may require additional setup or installation procedures. Again, referring to the user manual or contacting Sharper Image customer support will provide you with the specific instructions for your drone model.
In conclusion, connecting your Sharper Image drone to your phone opens up a world of possibilities in terms of control and convenience. By following the steps outlined in this article and referring to the specific instructions for your drone model, you’ll be able to enjoy a seamless connection between your drone and your phone. Whether you’re a beginner or an experienced drone pilot, this feature will undoubtedly enhance your flying experience and allow you to capture breathtaking aerial footage effortlessly.
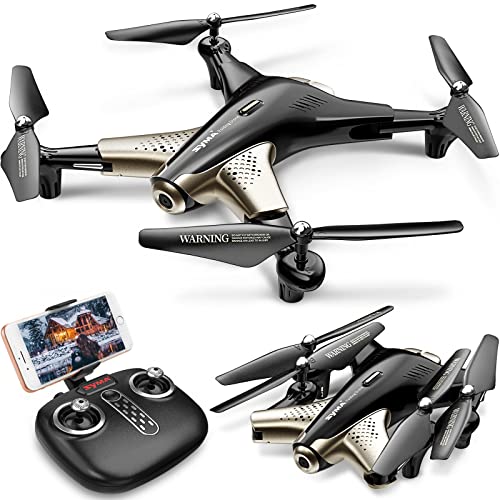
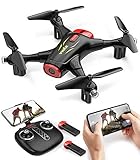
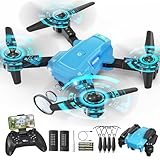
Understanding the Sharper Image Drone
The Sharper Image Drone is a high-tech device that allows you to capture stunning aerial footage and experience the thrill of flying from a whole new perspective. Whether you are a photography enthusiast or just looking for a fun toy to play with, this drone offers a range of exciting features and functionalities.
Key Features
The Sharper Image Drone comes equipped with advanced GPS tracking capabilities, which allow you to keep a close eye on the drone’s location at all times. This feature is particularly helpful if you are using the drone for professional photography or videography, as it ensures that you can accurately track and frame your shots.
In addition to the GPS tracking, the drone also features a high-resolution camera that can capture stunning 4K videos and 12-megapixel photos. The camera is mounted on a stabilizing gimbal, which ensures smooth and stable footage even in windy conditions.
Furthermore, the drone is equipped with intelligent flight modes, such as Follow Me and Waypoint Navigation. With the Follow Me mode, the drone can autonomously follow you and capture your movements from a unique aerial perspective. The Waypoint Navigation mode allows you to pre-program a flight route, and the drone will follow it precisely, freeing you to concentrate on capturing the perfect shot.
Connecting the Drone to Your Phone
To connect your Sharper Image Drone to your phone, you will need to download the dedicated app from the App Store or Google Play Store. Once downloaded, open the app and follow the instructions to pair your phone with the drone.
Make sure that both your phone and the drone’s Wi-Fi are enabled, and connect to the drone’s Wi-Fi network from your phone’s Wi-Fi settings. Once connected, open the app and you should see a live feed from the drone’s camera on your phone’s screen.
From the app, you can access various settings and flight modes, control the camera angle, and even initiate automatic takeoff and landing. The app also allows you to save and share your photos and videos directly from your phone.
It’s important to note that the specific steps to connect your Sharper Image Drone to your phone may vary depending on the model you have. Always refer to the user manual or contact the manufacturer for detailed instructions.
Now that you understand the key features of the Sharper Image Drone and how to connect it to your phone, you are ready to begin your aerial adventure and capture stunning footage from above.
Connecting the Drone to Your Phone
To connect your Sharper Image drone to your phone, you will need to follow a few simple steps.
Step 1: Download the App
The first thing you need to do is download the Sharper Image drone app onto your phone. This app is available for both iOS and Android devices and can be found in the app store.
Step 2: Power on the Drone
Make sure that your drone is powered on and ready to connect. Check that the battery is fully charged and that the drone is in the correct mode for connection.
Step 3: Enable Wi-Fi on Your Phone
Next, enable the Wi-Fi on your phone. Go to the settings menu and select Wi-Fi. Find the network name that matches your drone and connect to it.
Step 4: Open the App
Once connected to the drone’s Wi-Fi network, open the Sharper Image drone app on your phone. You should see a screen with options for connection.
Step 5: Connect to the Drone
Follow the prompts on the app to connect to your drone. This usually involves selecting the correct model and confirming the connection. Once connected, you should be able to control and monitor your drone from your phone.
Note: Some drones may require additional steps for connection, such as entering a password or scanning a QR code. Refer to the drone’s instructions or user manual for specific details.
Now that your drone is connected to your phone, you can enjoy the benefits of controlling and capturing footage directly from your device.
Step 1: Installing the App
To connect your Sharper Image drone to your phone, you will need to install the appropriate app on your device. Follow the steps below to install the app:
- Go to the app store on your phone.
- Search for “Sharper Image drone app” in the search bar.
- Once you find the app, tap on it to open the app’s page.
- Tap on the “Install” button to start the download and installation process.
- Wait for the app to be downloaded and installed on your device.
- Once the installation is complete, you can find the app on your home screen or in your app drawer.
Now that you have successfully installed the app, you can move on to the next step of connecting your Sharper Image drone to your phone.
Step 2: Connecting via Wi-Fi
Once your Sharper Image drone is powered on and ready to fly, you can connect it to your phone using the Wi-Fi feature. Here’s how:

- On your phone, go to the settings and enable Wi-Fi.
- Look for the Wi-Fi network name that starts with “SharperImage” followed by a series of numbers or letters.
- Select the Wi-Fi network and enter the password if prompted. The default password is usually provided in the drone’s user manual.
- Once connected, open the Sharper Image drone app on your phone.
- In the app, you may need to go to the settings and select the connected drone model.
- Follow the on-screen instructions in the app to establish a successful connection between the drone and your phone.
- Once connected, you will be able to control the drone using your phone and access its camera feed if available.
Make sure to keep your phone and drone within the Wi-Fi range to maintain a stable connection throughout your flight.
Step 3: Pairing the Drone and Phone
Once you have successfully connected your smartphone to the drone’s Wi-Fi network, the next step is to pair the drone and your phone. Follow the steps below to complete the pairing process:
1. Open the Drone App
Launch the app on your smartphone that is specifically designed for your Sharper Image drone. If you haven’t installed the app yet, you can download it from the App Store (for iOS devices) or Google Play Store (for Android devices).
2. Select the Drone Model
After opening the app, you may be prompted to select your drone model from a list. Choose the appropriate model that corresponds to the drone you are connecting.
3. Enable Bluetooth
Make sure Bluetooth is enabled on your phone. This will allow the drone to establish a connection with your smartphone. You can usually find the Bluetooth setting in the settings menu of your device.

4. Connect the Drone
Once you have selected the drone model and enabled Bluetooth, the app should automatically detect the drone. Tap the “Connect” button or a similar option to start the pairing process.
If the pairing process is successful, you should see a notification or indicator on both your phone and the drone confirming the connection.
Keep in mind that the specific steps may vary depending on the model of your Sharper Image drone and the app you are using. Refer to the user manual or instructions provided by the manufacturer for detailed information.
| Troubleshooting: |
|---|
| If you are unable to pair the drone and phone, try the following: |
| – Restart both the drone and your phone. |
| – Make sure the app is up to date. |
| – Verify that you are using the correct Wi-Fi network and that it is within range. |
| – If you have previously paired the drone with another device, make sure to disconnect it before attempting to pair with your current phone. |
Troubleshooting Connection Issues
If you are experiencing difficulties connecting your Sharper Image drone to your phone, there are several troubleshooting steps you can try to resolve the issue:
1. Check Compatibility
Make sure that your phone is compatible with the Sharper Image drone. Check the specifications of the drone and compare them with your phone’s specifications to ensure compatibility.
2. Restart Devices
Restart both your phone and the drone. Sometimes, simply restarting the devices can fix connection issues.
3. Check Wi-Fi Connection
Ensure that both your phone and the drone are connected to the same Wi-Fi network. If they are not, connect them to the same network and try again.
4. Update Firmware
Check if there are any firmware updates available for your drone. Updating the firmware can often resolve connection problems.
5. Reinstall App
If the problem persists, try uninstalling and reinstalling the app that is used to control the drone. This can help fix any issues related to the app itself.
6. Reset Drone
If none of the above steps work, you may need to reset the drone to its factory settings. Refer to the user manual of your drone for instructions on how to perform a reset.
If you are still unable to connect your Sharper Image drone to your phone after trying these troubleshooting steps, it is recommended to contact the manufacturer or seek professional assistance for further support.
Question-answer:
Can I connect my sharper image drone to my phone?
Yes, you can connect your sharper image drone to your phone. To do this, you will need to follow a few steps.
What is the process to connect a sharper image drone to my phone?
The process to connect a sharper image drone to your phone involves a few simple steps. First, ensure that both your drone and your phone are fully charged. Then, turn on your drone and open the settings on your phone. Look for the Wi-Fi settings and find the network name of your drone. Connect your phone to the drone’s network and open the drone’s app. Follow the instructions on the app to complete the connection process. Once connected, you will be able to control your drone using your phone.
Is it possible to control a sharper image drone using a phone?
Yes, it is possible to control a sharper image drone using a phone. To do this, you will need to connect your phone to the drone using the drone’s app. Once connected, you will have access to the drone’s controls and be able to fly, take photos, and record videos using your phone.