Connecting your Sky Rider drone to the controller is an essential step in getting your drone ready for flight. Using a controller allows you to have precise control over your drone’s movements, making it easier to navigate and capture stunning aerial footage.
Before you can connect your Sky Rider drone to the controller, make sure you have all the necessary equipment. This includes the drone itself, the controller, and the instructions manual that came with your drone. Familiarizing yourself with these instructions will ensure a smooth connection process.
Start by turning on both the drone and the controller. Look for the power buttons or switches on both devices and press them to turn them on. Be patient as it may take a few seconds for them to power up and establish a connection. Once they are turned on, they will begin searching for each other’s signals.
Next, locate the signal button on the controller. This button is usually marked with an antenna or a signal icon. Press and hold this button until you see the LED indicators on the controller start to flash. This indicates that the controller is now in pairing mode and ready to connect to the drone.
Finally, find the corresponding signal button on the drone. This button is typically located on the drone’s body and is also marked with an antenna or a signal icon. Press and hold this button until the LED indicators on the drone start to flash. The flashing lights indicate that the drone is now searching for a compatible controller to connect to.

Once the LED indicators on both the drone and the controller are flashing, it means they are trying to establish a connection. Give them a few moments to sync, and soon you will notice that the LED indicators on both devices become steady or stop flashing. This means that your Sky Rider drone is now successfully connected to the controller, and you are ready to take to the skies!
Sky Rider Drone Controller Connection: Step-by-Step Guide
Connecting a controller to your Sky Rider Drone is a crucial step to take before you can start flying. Follow these simple steps to ensure a successful connection.
Step 1: Turn on the drone
Start by turning on your Sky Rider Drone. Ensure that it is fully charged and the power switch is in the “on” position.
Step 2: Power on the controller
Next, power on the controller by pressing the power button located on the side or top. Make sure that the controller also has sufficient battery life.
Step 3: Activate the controller connection
On the controller, locate the “Connect” button or a similar button with a wireless icon. Press and hold this button until the controller’s LED light starts flashing. This means the controller is in pairing mode and ready to connect.
Step 4: Connect your drone to the controller
Now, locate the Wi-Fi settings on your smartphone. Connect your smartphone to the Wi-Fi network named “SkyRider-XXXX” (XXXX represents the model number of your drone). Enter the default password provided in your drone’s user manual.
Step 5: Select the drone in the controller app
Once connected to the drone’s Wi-Fi network, open the controller app on your smartphone. Look for the option to connect a drone and select your Sky Rider Drone model from the list. Confirm the connection.
Step 6: Test the connection
After successfully connecting, you should see a live feed from your drone’s camera on the smartphone screen. Make sure the control sticks on the controller are responsive and monitor the drone’s status indicators for a stable connection.
| Frequently Asked Questions (FAQs) | Answers |
|---|---|
| Q: How do I know if my drone is successfully connected to the controller? | A: Once the connection is established, the LED light on the controller will stop flashing and remain solid. You’ll also see the live feed from the drone’s camera on your smartphone screen. |
| Q: What if I can’t find the Wi-Fi network “SkyRider-XXXX”? | A: Make sure your drone is powered on and in close proximity to your smartphone. Restart both the drone and your smartphone, and try again. If the issue persists, consult the drone’s user manual for troubleshooting steps. |
| Q: Can I connect multiple drones to a single controller? | A: It depends on the controller model and its capabilities. Refer to the controller’s user manual for information on connecting multiple drones. |
Understanding the Components of Sky Rider Drone and Controller
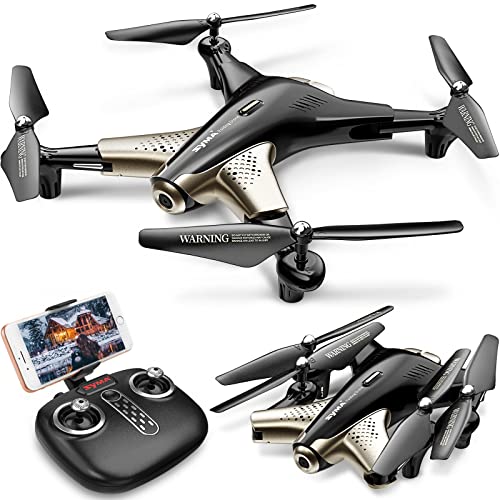
The Sky Rider drone is an advanced remote-controlled aerial vehicle that allows users to capture stunning aerial footage and explore their surroundings from a whole new perspective. To fully understand how to connect the drone to its controller, it is important to first familiarize yourself with the different components of both the drone and the controller.
1. Sky Rider Drone Components
The Sky Rider drone consists of several key components that work together to ensure smooth flight and functionality. Here are the main components:

| Component | Description |
|---|---|
| 1. Drone Body | The main structure of the drone that houses all the other components. |
| 2. Propellers | The rotating blades that provide lift and maneuverability to the drone. |
| 3. Motor | The electrical motor that powers the propellers to generate thrust. |
| 4. Battery | The power source that supplies electricity to the motor and other electronic components. |
| 5. Camera | An optional component that allows users to capture aerial photos and videos. |
| 6. GPS Module | A module that provides location data and enables functions like waypoint navigation. |
2. Controller Components
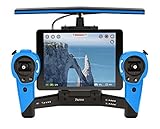
The controller is the handheld device that allows users to operate and control the Sky Rider drone. It is equipped with various buttons, joysticks, and switches to perform different functions. Here are the main components of the controller:
| Component | Description |
|---|---|
| 1. Power Button | A button that turns the controller on or off. |
| 2. Control Sticks | Two joysticks that control the drone’s movement in different directions. |
| 3. Function Buttons | Additional buttons that can be programmed to perform specific functions, such as taking photos or activating various flight modes. |
| 4. LCD Screen | A screen that displays important information, such as battery level, signal strength, and GPS coordinates. |
| 5. Antenna | An antenna that enables wireless communication between the controller and the drone. |
| 6. Battery Compartment | A compartment that holds batteries to power the controller. |
By understanding the different components of both the Sky Rider drone and its controller, you will be better equipped to connect the two devices and operate the drone effectively.
Preparing the Sky Rider Drone for Controller Connection
Before you can connect your Sky Rider drone to a controller, there are a few steps that you need to take to prepare the drone.
1. Check Battery Level
Make sure that the drone’s battery is fully charged. A low battery can interfere with the connection process and may cause a loss of control during flight. If the battery level is low, charge it fully before proceeding.
2. Power on the Drone
Turn on the drone by pressing the power button located on the body of the drone. Wait for the drone’s lights to stabilize, indicating that it is ready to establish a connection with the controller.

3. Activate the Controller
Ensure that the controller is fully charged and powered on. Some controllers need to be activated before they can establish a connection with the drone. Check the controller’s user manual for instructions on how to activate it.
4. Establish a Connection
Once both the drone and the controller are powered on, it’s time to establish a connection. Follow the specific instructions provided by the manufacturer for your particular model of Sky Rider drone and controller. Usually, this involves pressing a button on the drone and then on the controller to initiate pairing.
After successfully establishing a connection, you should see a confirmation message, or the drone’s lights will indicate that it is now connected to the controller.
5. Test the Connection
Before taking off, it’s a good idea to test the connection between the drone and the controller. Make sure that the controller is responsive to your commands, and the drone is reacting accordingly. Check the user manual for instructions on how to perform a pre-flight check.
Once you have successfully prepared your Sky Rider drone for controller connection, you are ready to take it for a flight and enjoy the experience of piloting your drone!

Connecting the Sky Rider Drone to the Controller
Connecting your Sky Rider Drone to the controller is a simple process that can be done in a few easy steps. Follow the instructions below to ensure a successful connection:
First, make sure that both the drone and the controller are fully charged and turned on.
Next, locate the power button on the drone and press it to turn it on. You should see the drone’s LED lights start to blink, indicating that it is ready for pairing.
Take the controller and turn it on by pressing and holding the power button. The controller’s LED lights will also start blinking, indicating that it is in pairing mode.
Now, on the controller, locate the “Pair” button and press it. The LED lights on both the controller and the drone should blink rapidly, indicating that they are attempting to establish a connection.

Once the drone and the controller are connected, the blinking LED lights should stabilize, indicating a successful connection. You can now control the drone using the controller.
If for some reason the connection is not established, you may need to repeat the process or consult the instruction manual for troubleshooting tips.
Remember to always connect the drone and the controller in an open area and away from any potential sources of interference, such as Wi-Fi routers or other electronic devices.
Troubleshooting Tips for Connecting Sky Rider Drone to Controller
If you are having trouble connecting your Sky Rider Drone to its controller, here are some troubleshooting tips that may help:
1. Check the Batteries: Make sure both the drone and the controller have fully charged batteries. Low battery power can affect the signal and prevent a successful connection.

2. Verify Signal Range: Ensure that you are within the recommended range for the drone and controller to establish a stable connection. Interference from other devices or obstacles may weaken the signal.
3. Ensure Proper Binding: Ensure that the drone and the controller are properly bound together. Consult the instruction manual for specific steps on how to bind them correctly.
4. Calibrate the Gyroscope: If the drone seems unresponsive or uncontrollable, try calibrating the gyroscope. Follow the instructions in the manual to perform a gyroscope calibration.
5. Check for Firmware Updates: Visit the manufacturer’s website to check for any available firmware updates for the drone and controller. Updating the firmware can sometimes resolve connectivity issues.
6. Reset the Drone and Controller: If all else fails, try resetting both the drone and the controller to their default factory settings. This can help clear any previous configurations that might be causing connection problems.
7. Contact Customer Support: If none of the above tips work, contact the customer support team of the drone manufacturer for further assistance. They may have additional troubleshooting steps or be able to provide a solution for your specific issue.
By following these troubleshooting tips, you should be able to resolve any issues you are experiencing with connecting your Sky Rider Drone to its controller.
Enjoying a Seamless Flying Experience with Sky Rider Drone and Controller
The Sky Rider Drone is a cutting-edge drone that offers an exhilarating and immersive flying experience. However, to fully enjoy all the features that this amazing drone has to offer, it is important to connect it to a compatible controller. This guide will walk you through the steps to connect your Sky Rider Drone to its controller effortlessly.
Step 1: Prepare the Sky Rider Drone and Controller
Before attempting to connect the drone to its controller, make sure both devices are fully charged and turned on. It is also recommended to clear the surrounding area of any obstacles that could interfere with the drone’s flight.
Step 2: Establish a Connection
1. Locate the power button on both the drone and the controller. Press and hold the power button on the drone until the lights start flashing.
2. Press and hold the power button on the controller until it powers up and the LED lights start blinking.
3. Once the LED lights on both devices start blinking, they are ready to establish a connection.
Step 3: Sync the Sky Rider Drone with the Controller
1. On the controller, locate the “Sync” button. It is usually a small button located near the power button.
2. Press and hold the “Sync” button until the LED lights on both the drone and the controller stop blinking and remain solid. This indicates that the devices are successfully synced.
Step 4: Calibration and Test Flight
1. After the connection is established, it is recommended to calibrate the drone’s gyroscope to ensure stable flight performance. Refer to the instruction manual for detailed calibration steps.
2. Once the calibration is complete, you are ready for your first test flight! Use the controller’s joysticks to navigate the drone and explore its features.
Enjoy the thrill of flying your Sky Rider Drone with its controller, and don’t forget to follow the safety guidelines and regulations set by your local authorities.
Note: Always keep in mind that proper maintenance and regular firmware updates are crucial to ensure the optimal performance and longevity of your Sky Rider Drone and controller.
Happy flying!
Question-answer:
What is the Sky Rider drone?
The Sky Rider drone is a remote-controlled flying device that allows users to capture aerial footage and explore the sky.