Swann security cameras are a popular choice among homeowners and business owners for their reliable and high-quality surveillance capabilities. If you are wondering how to connect your Swann security camera to your computer, you have come to the right place. In this article, we will guide you through the process step by step.
Step 1: Check the Compatibility
Before attempting to connect your Swann security camera to your computer, you need to ensure that they are compatible. Most Swann security cameras come with an ethernet port, which allows for a direct connection to your computer. Additionally, you will need to make sure that your computer meets the necessary system requirements and has the appropriate software installed.
Step 2: Connect the Camera to the Computer
Once you have confirmed the compatibility, you can proceed to connect your Swann security camera to your computer. Start by locating the ethernet port on the camera and on your computer. Use an ethernet cable to connect the camera to the computer, ensuring a secure and stable connection.

Step 3: Configure the Camera Settings
After establishing the physical connection between the camera and the computer, you will need to configure the camera settings. Open the camera software on your computer and follow the on-screen instructions to set up the camera. This may involve creating a unique username and password, adjusting the camera angle and resolution, and enabling any desired features or functionalities.
Step 4: Access the Camera Footage
Once you have successfully connected and configured your Swann security camera to your computer, you can now access the camera footage. Launch the camera software on your computer and navigate to the live view or recorded footage section. From there, you will be able to monitor your camera’s feed, review past recordings, and adjust any settings as needed.
Connecting your Swann security camera to your computer allows for convenient surveillance monitoring and easy access to camera footage. By following the steps outlined in this article, you can successfully connect your camera and start enhancing the security of your home or business.

Step-by-Step Guide: How to Connect Swann Security Camera to Computer
If you want to keep an eye on your home or office, connecting your Swann security camera to your computer can provide you with a convenient and effective surveillance solution. In this guide, we will walk you through the process of connecting your Swann security camera to your computer step-by-step.
Step 1: Determine Camera Compatibility
Before attempting to connect your Swann security camera to your computer, you need to ensure that your camera model is compatible with computer connections. Check the camera’s manual or Swann’s official website for compatibility information.
Step 2: Install Necessary Software
To connect your Swann security camera to your computer, you may need to install the necessary software. Check the camera’s manual or Swann’s official website for any required software downloads or updates. Install the software on your computer according to the provided instructions.
Step 3: Connect the Camera
Once the software is installed, connect your Swann security camera to your computer using the appropriate cables. Most Swann cameras use a USB connection, so connect one end of the USB cable to the camera and the other end to an available USB port on your computer.
Step 4: Power On the Camera
After connecting the camera, make sure it is powered on. If your camera requires an external power source, connect it to a power outlet as well. Check the camera’s manual for specific power requirements and instructions.

Step 5: Launch the Software
Once the camera is connected and powered on, launch the software that you installed in step 2. The software should automatically detect the camera and display the live video feed on your computer screen.
Step 6: Adjust Settings
After the live video feed is displayed, you may need to adjust some settings to optimize the camera’s performance. Use the software’s interface to access the camera’s settings options. You can adjust parameters such as resolution, frame rate, motion detection, and more.
Step 7: Test the Connection
To ensure that the camera is connected properly and functioning correctly, perform a test by monitoring the live video feed on your computer. Check if the video quality is clear and if the camera responds to any changes in settings or movements within its field of view.
Step 8: Mount the Camera (Optional)
If you plan to have a permanent surveillance setup, you can mount the Swann security camera in a desired location. Follow the camera’s manual or Swann’s official website for guidance on how to properly mount the camera to ensure optimal performance.
By following these step-by-step instructions, you can successfully connect your Swann security camera to your computer. Enjoy the convenience of monitoring your property directly from your computer screen!

Check Compatibility:
Before connecting your Swann security camera to your computer, it is important to ensure that they are compatible with each other. Here are a few things to consider:
1. Camera Model:
Make sure that your Swann security camera model supports computer connectivity. Some older models may not have this feature, so it’s essential to check the specifications or user manual of your camera.
2. Operating System:
Verify that your computer’s operating system is compatible with the Swann camera software. Most Swann security cameras are compatible with both Windows and macOS, but it’s always good to double-check for any specific requirements.
3. System Requirements:
Check the system requirements for the Swann camera software. Ensure that your computer meets the minimum specifications recommended by Swann. This may include the processor speed, memory, and available storage space.
Note: It’s advisable to keep your computer’s operating system and camera software up to date to ensure optimal compatibility and performance.
If your Swann security camera and computer are compatible, you can proceed with the connection process. However, if there are any compatibility issues or if you’re unsure about the compatibility, it’s recommended to reach out to Swann’s customer support for further assistance.
Install Software:
To connect your Swann security camera to your computer, you will need to install the necessary software. Follow these steps:
- Insert the installation CD that came with your Swann security camera into your computer’s CD drive.
- If the installation CD doesn’t automatically launch, navigate to the CD drive on your computer and double-click on the setup.exe file.
- Follow the on-screen instructions to install the software. Make sure to read and accept the software license agreement.
- Once the installation is complete, you may be prompted to restart your computer. If so, click on the “Restart Now” button.
- After your computer restarts, launch the Swann software by double-clicking on the desktop icon or searching for the software in your computer’s start menu.
- When the software opens, you will need to set up a new system. Follow the prompts to add your Swann security camera to the software.
- Depending on your camera model, you may need to connect the camera to your computer using a USB cable or network cable. Refer to your camera’s user manual for specific instructions.
- Once your camera is successfully connected to the software, you should be able to view and manage your camera’s footage from your computer.
Congratulations! You have successfully installed the software and connected your Swann security camera to your computer.
Connect Camera to Computer:
To connect your Swann security camera to your computer, follow these steps:
Step 1: Install the necessary software
Before connecting your camera, make sure you have the necessary software installed on your computer. Most Swann cameras come with their own software, which you can find on the Swann website or on the installation CD that came with your camera. Download and install the software according to the instructions provided.

Step 2: Connect the camera to your computer
Once the software is installed, connect your Swann security camera to your computer using the provided USB cable or network cable. The type of cable you use will depend on the model of your camera. If you’re using a USB cable, plug one end of the cable into the camera and the other end into an available USB port on your computer. If you’re using a network cable, connect one end of the cable to the camera and the other end to your computer’s network port.
Step 3: Configure the camera settings
After connecting the camera, open the software on your computer and follow the on-screen instructions to configure the camera settings. You may need to enter the camera’s IP address or login credentials, which can usually be found in the camera’s user manual or on the Swann website. Once the settings are configured, you should be able to view the camera’s live feed on your computer.
Note: If you’re using a wireless Swann camera, you’ll need to connect it to your home Wi-Fi network before attempting to connect it to your computer. Refer to the camera’s user manual for instructions on how to connect it to your Wi-Fi network.
In conclusion, connecting your Swann security camera to your computer is a straightforward process. By installing the necessary software, connecting the camera using the provided cable, and configuring the camera settings, you’ll be able to access and monitor your camera’s live feed on your computer.
Configure Camera Settings:
Once you have connected your Swann security camera to your computer, you will need to configure the camera settings to ensure optimal performance and security. Follow these steps to configure the camera settings:

Step 1: Access the Camera Configuration Menu
Open the Swann camera management software on your computer, and log in using your username and password. Once logged in, navigate to the camera configuration menu.
Step 2: Adjust Camera Parameters
In the camera configuration menu, you will find various parameters that you can adjust according to your preferences. These parameters may include:
| Parameter | Description |
|---|---|
| Brightness | Adjust the brightness level of the camera’s video feed. |
| Contrast | Adjust the contrast level of the camera’s video feed. |
| Resolution | Select the desired resolution for the camera’s video feed. |
| Frame Rate | Adjust the frame rate at which the camera records video. |
| Recording Mode | Select the recording mode for the camera, such as continuous recording or motion detection. |
| Storage Settings | Configure the storage settings for the camera, including the location and size of the storage device. |
Make the necessary adjustments to these parameters based on your requirements.
Step 3: Enable Security Features
Most Swann security cameras offer additional security features that you can enable to enhance the protection of your property. These features may include:
Motion Detection: Enable motion detection to trigger recording only when motion is detected in the camera’s field of view. This helps conserve storage space.
Privacy Masking: Use privacy masking to block out certain areas within the camera’s field of view to protect privacy.
Enable and configure these security features based on your needs.
Once you have made all the necessary adjustments, save the camera settings. Your camera is now configured and ready to provide you with reliable security surveillance.
Set up Remote Access:
To connect your Swann security camera to your computer and enable remote access, follow these steps:
1. Connect your security camera to your network:
Make sure your security camera is connected to the same network as your computer. Use an Ethernet cable to connect your camera to your router or switch. Check that the camera’s power supply is connected and turned on.
2. Configure your camera’s IP address:
Access the camera’s settings by typing its IP address into a web browser. This IP address is typically found on the camera itself or in the user manual. Once you’ve accessed the camera’s settings, assign a unique IP address to the camera that is within the same IP range as your network. Save the settings.
3. Enable port forwarding on your router:
Access your router’s settings by typing its IP address into a web browser. Look for the port forwarding or virtual server settings. Create a new port forwarding rule for your camera by specifying the camera’s IP address and the port number used for remote access (commonly port 80 or 8080). Save the settings and restart your router if required.
4. Set up dynamic DNS:
Most home networks have dynamic IP addresses that can change over time. To ensure you can always access your security camera remotely, set up a dynamic DNS service. Register for a dynamic DNS account and follow the instructions provided by the service to link your camera’s IP address to a domain name. This will allow you to access your camera using a consistent web address.
5. Access your camera remotely:
Open a web browser on your computer and enter your camera’s dynamic DNS address. You should be prompted to enter your camera’s username and password. After successful authentication, you will be able to view and control your Swann security camera remotely.
Test Connectivity:
Before connecting your Swann security camera to your computer, it is important to test the connectivity to ensure a smooth setup process. Follow the steps below to perform the connectivity test:
- Make sure your security camera is properly connected to a power source and turned on. Check the power cable and make sure it is securely plugged in.
- Connect your Swann security camera to your computer using the appropriate cable or connection method. This can be a USB cable, Ethernet cable, or wireless connection depending on the camera model.
- Open the camera viewing software on your computer. This may be a dedicated software provided by Swann or a third-party software compatible with Swann cameras.
- Once the software is open, check if the camera is detected and connected. Look for the camera name or model in the software interface.
- If the camera is not detected, double-check the connections and ensure they are properly secured. Try using a different cable or connection method if available.
- If the camera is still not detected, restart both your computer and the camera. Sometimes a simple restart can resolve connectivity issues.
- If the camera is detected and connected, test the video streaming by clicking on the camera feed or accessing the live view option. Check if the video is displayed properly without any glitches or delays.
- If the video streaming is not smooth or there are issues with the display, check your internet connection or network settings. Slow internet speeds or network congestion can affect video quality.
- Consider adjusting the camera settings or checking for firmware updates to enhance performance and optimize connectivity.
By performing the connectivity test, you can ensure that your Swann security camera is properly connected to your computer and ready for use. If you encounter any issues during the test, refer to the camera’s user manual or contact Swann support for further assistance.
Enable Motion Detection:
Enabling motion detection on your Swann security camera is an important feature that allows you to be notified of any movement detected in the camera’s field of view. To enable motion detection, follow these steps:
- Ensure that your Swann security camera is properly connected to your computer.
- Open the Swann security camera software on your computer.
- Navigate to the settings or options menu within the software.
- Look for the “Motion Detection” or “Detection Settings” option.
- Click on the option to access the motion detection settings.
- Adjust the sensitivity of the motion detection according to your preferences.
- Select the areas within the camera’s field of view where you want motion detection to be enabled.
- Save your settings and exit the menu.
Once motion detection is enabled, your Swann security camera will start monitoring the specified areas for any movement. When motion is detected, you will receive notifications on your computer, alerting you of the activity. By enabling motion detection, you can enhance the security and surveillance capabilities of your Swann security camera.
Adjust Camera Angle:
Once you have successfully connected your Swann security camera to your computer, you may need to adjust the camera angle to achieve the best viewing position. Follow these steps to adjust the camera angle:
- Make sure the camera is securely mounted in the desired location. Use the included screws and mounting brackets to fix the camera in place.
- Ensure that the camera lens is facing the area you want to monitor. You can use the camera’s built-in pan and tilt features to adjust the camera angle horizontally and vertically.
- To adjust the camera’s pan, use the control options available in the Swann camera interface on your computer. These controls will allow you to move the camera left or right to adjust the horizontal angle.
- To adjust the camera’s tilt, use the camera interface to move the camera up or down to achieve the desired vertical angle.
- Take time to test the camera angle by monitoring the video feed on your computer and making adjustments as needed. Consider different lighting conditions and the specific area you want to monitor to ensure optimal positioning.
- Once you are satisfied with the camera angle, tighten any loose mounting screws and ensure the camera is secure in its position.
Remember, adjusting the camera angle may require additional adjustments to the camera’s focus and zoom settings. Refer to the camera’s user manual for instructions on how to make these adjustments using the Swann camera interface on your computer.
With the camera properly positioned and adjusted, you can now enjoy the peace of mind that comes with a Swann security camera connected to your computer.
Monitor Camera Feed:
To monitor the camera feed from your Swann security camera on your computer, you will need to use software provided by Swann or a compatible third-party software. Here are the steps to connect your Swann security camera to your computer and monitor the camera feed:
Step 1: Install the Swann security camera software on your computer. You can download the software from the Swann website or use the installation CD that came with your camera.
Step 2: Connect the Swann security camera to your computer using the provided USB cable. Make sure both the camera and the computer are powered on.
Step 3: Launch the Swann security camera software on your computer. You may need to open the software from the desktop shortcut or through the Start menu.
Step 4: Follow the on-screen instructions to configure the software and set up the camera feed. You may need to enter the camera’s IP address or serial number to establish a connection between the camera and the software.
Step 5: Once the software is successfully connected to the camera, you should be able to see the camera feed on your computer screen. The software may offer additional features such as recording, motion detection, and remote access.
Step 6: To view the camera feed, navigate through the software’s interface and select the camera you want to monitor. You may be able to view a live feed or access recorded footage, depending on the capabilities of the software.
Note: The steps mentioned above may vary depending on the specific Swann camera model and software version you are using. Refer to the camera’s user manual or the software documentation for detailed instructions.
Troubleshooting Tips:
If you are unable to connect your Swann security camera to your computer, here are some troubleshooting tips to help you resolve the issue:
1. Check the Power
Make sure that your security camera is properly powered. Check if the power cable is securely connected to both the camera and the power outlet. If the camera is battery-powered, ensure that the batteries are fully charged.
2. Verify the Network Connection
Ensure that your computer is connected to the same network as the security camera. If you are using a wired connection, check if the Ethernet cable is properly plugged into both the computer and the camera. If you are using a wireless connection, check if your computer is connected to the correct Wi-Fi network.
3. Verify IP Address and Port
Check the IP address and port number of your security camera. You can usually find this information in the camera’s settings or documentation. Make sure that the IP address and port are correctly entered in the computer’s web browser or viewing software.
4. Firewall and Antivirus Settings
Disable any firewall or antivirus software temporarily to see if it is blocking the connection between the camera and the computer. If the camera connects successfully after disabling the software, adjust the settings to allow the camera’s IP address and port.
5. Update Firmware and Software
Ensure that both your security camera’s firmware and your computer’s software are up to date. Manufacturers often release updates to fix bugs and improve compatibility. Check the manufacturer’s website for any available updates and follow their instructions to install them correctly.
If you have tried these troubleshooting tips and are still unable to connect your Swann security camera to your computer, you may need to contact the manufacturer’s support for further assistance. They will be able to provide specific guidance based on your camera model and computer setup.
FAQ,
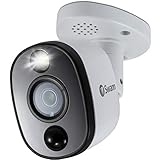
What is a Swann security camera?
A Swann security camera is a type of surveillance camera that is manufactured by Swann Communications. It is designed to provide security and monitoring for homes and businesses.
Can I connect a Swann security camera to my computer?
Yes, you can connect a Swann security camera to your computer. There are several ways to do this, depending on the model of your camera and the features it supports. You can connect the camera directly to your computer using an Ethernet cable or Wi-Fi connection, or you can connect it to a network video recorder (NVR) and access the camera footage through your computer over the network.