
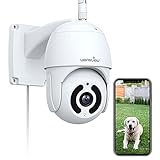
Setting up a security camera is an essential step in ensuring the safety and security of your home or office. Voger security cameras provide reliable surveillance and peace of mind. Whether you’re a tech-savvy individual or a beginner, connecting a Voger security camera can be a hassle-free experience.
Step 1: Prepare the Camera
Before you begin the setup process, make sure you have all the necessary equipment. This includes the Voger security camera, power adapter, Ethernet cable (if applicable), and a compatible mobile device. It is advisable to read the user manual thoroughly to familiarize yourself with the camera’s features and functions.
Step 2: Power On the Camera
Connect the power adapter to the camera and plug it into a power outlet. Wait for the camera to power on. You may notice a series of LED lights indicating that the camera is initializing. This process should only take a few seconds.

Step 3: Download the Voger App
To connect and control your Voger security camera, you will need to download the Voger App on your mobile device. The Voger App is available for both Android and iOS devices. Visit the App Store or Google Play Store and search for “Voger App.” Download and install the app on your mobile device.
Step 4: Connect to Wi-Fi
Using your mobile device, open the Voger App. Follow the on-screen instructions to create an account and sign in. Once signed in, select the option to add a new device. Make sure your mobile device is connected to the same Wi-Fi network that you want your Voger security camera to connect to. The app will guide you through the process of connecting the camera to your Wi-Fi network.
Step 5: Scan the QR Code

After connecting to your Wi-Fi network, you will be prompted to scan the QR code on the camera or enter the camera’s serial number. This step is crucial for identifying and linking the camera to your mobile device. The app will guide you through the scanning process, ensuring a successful connection.
Step 6: Configure Camera Settings
Once the camera is successfully connected, you can customize its settings according to your preferences. These settings may include motion detection, video recording, and push notifications. Explore the Voger App to access and adjust these settings to suit your security needs.
By following these simple steps, you can easily connect your Voger security camera and start enjoying the benefits of enhanced surveillance and peace of mind. Remember to regularly check the camera’s firmware updates to ensure optimal performance and security.
Steps to connect voger security camera
Step 1: Ensure that your voger security camera is properly installed and positioned according to the manufacturer’s instructions.

Step 2: Connect the power adapter to the camera and plug it into a power outlet.
Step 3: Download the voger security camera app from the App Store or Google Play Store on your smartphone or tablet.
Step 4: Open the voger security camera app and create a new account or log in if you already have one.
Step 5: Follow the on-screen instructions to add your camera to the app. This usually involves scanning a QR code or entering the camera’s serial number.
Step 6: Connect your smartphone or tablet to the same Wi-Fi network that the camera is connected to.
Step 7: Once the camera is successfully connected to the app, you will be able to view live video feeds from the camera, adjust settings, and receive notifications on your smartphone or tablet.
Step 8: If desired, you can also set up additional features such as motion detection, two-way audio, and cloud storage for recorded footage.
Note: The exact steps may vary slightly depending on the specific model of voger security camera you are using. Always refer to the manufacturer’s instructions for detailed setup and connection steps.
Check the requirements
Before you begin setting up your Voger security camera, it’s important to ensure that you have all the necessary requirements. In order to connect and use the camera effectively, make sure to check the following:
- Stable Internet connection: Ensure that you have a reliable and stable internet connection at the location where you plan to install the camera. A strong Wi-Fi signal is essential for the camera to function properly.
- Power supply: Make sure that you have access to a power outlet near the location where you want to install the camera. The camera will need to be connected to a power source in order to operate.
- Compatible device: Ensure that you have a compatible device to connect with and manage the camera. This could be a smartphone, tablet, or computer that meets the minimum system requirements specified by Voger.
- Voger app: Download and install the Voger app on your device from the App Store (for iOS) or Google Play Store (for Android). This app will be used to control and manage the camera.
- Camera placement: Take some time to determine the ideal location for your security camera. Consider factors such as the camera’s field of view, the area you want to monitor, and any potential obstructions that may impact the camera’s performance.
By ensuring that you have all the necessary requirements in place, you’ll be better prepared to successfully connect and set up your Voger security camera.

Choose the Suitable Location
When setting up your Voger security camera, it’s essential to choose a suitable location to maximize its effectiveness. Here are some factors to consider:
1. Coverage area: Determine the area you want the camera to cover. This could include your front door, backyard, or any other specific area you want to monitor.
2. Line of sight: Ensure that there are no obstructions in the line of sight between the camera and the area you want to monitor. This will prevent any potential blind spots and ensure clear footage.
3. Mounting options: Consider if you want to mount the camera on a wall, ceiling, or any other surface. Ensure that the chosen location provides a stable and secure mount for the camera.
4. Power source: Ensure that the chosen location has access to a power source, especially if your Voger security camera requires a direct power connection.

5. Weather conditions: Take into account the weather conditions in your area. If you live in an area with extreme temperature variations or frequent rain, choose a location that can withstand these conditions or consider purchasing a weatherproof camera.
6. Privacy concerns: Respect the privacy of others when positioning your security camera. Avoid pointing it towards areas where privacy is expected, such as neighboring windows or private spaces.
Considering these factors will help you choose the most suitable location for your Voger security camera, maximizing its effectiveness and ensuring your peace of mind.
Mount the camera
Once you have your Voger security camera, the next step is to mount it in the desired location. Follow these steps to properly mount your camera:
-
Choose a suitable location
Select a location for your camera that provides the best view of the area you intend to monitor. Make sure it is within the range of your Wi-Fi network signal for optimal performance. Consider factors such as height, visibility, and weather conditions.
-
Prepare the camera’s mounting bracket
Most Voger security cameras come with a mounting bracket included. Ensure the mounting bracket is securely attached to the camera and that it is aligned correctly to provide the desired camera angle.
-
Find a stable surface
Identify a stable surface, such as a wall, ceiling, or flat horizontal surface to mount the camera. Make sure it can support the weight of the camera and is suitable for drilling or attaching mounting screws if necessary.
-
Install the camera
Determine the appropriate method for installing the camera based on the type of mounting bracket included. This may involve screwing the bracket into the surface or using adhesive pads. Carefully follow the instructions provided by Voger for your specific camera model.
-
Adjust the camera angle
Once the camera is securely mounted, adjust the angle to capture the desired view. Some cameras may offer pan and tilt functionality, allowing you to adjust the position remotely using the associated mobile app.
By following these steps, you can effectively mount your Voger security camera and ensure it is positioned correctly to monitor the desired area. Good mounting placement is essential for optimal camera performance and overall security.

Connect the camera to power
Before you can begin connecting your Voger security camera, you will need to ensure that it is properly powered. Follow the steps below to connect the camera to power:
- Locate the power adapter that came with your Voger security camera.
- Connect one end of the power adapter to the power port on the camera.
- Plug the other end of the power adapter into a nearby electrical outlet.
- Ensure that the power outlet is working by plugging in a different device.
- Once the camera is connected to power, you should see an indicator light or LED illuminate on the camera.
- This indicates that the camera is receiving power and will begin the setup process.
After connecting the camera to power, you can move on to the next steps in the setup process, which may include connecting the camera to your Wi-Fi network and installing any necessary software or apps.
Set up the camera’s Wi-Fi connection
To connect your voger security camera to your Wi-Fi network, follow these steps:
- Plug in the camera into a power source using the provided power adapter.
- Open the Voger app on your smartphone or tablet.
- Create an account or log in to your existing account.
- Tap the “Add Device” or “+ Add” button in the app.
- Select “Security Camera” as the device type.
- Follow the on-screen instructions to put the camera in pairing mode.
- On your smartphone or tablet, go to the Wi-Fi settings and connect to the camera’s Wi-Fi network (usually named “Voger-XXXX”).
- Go back to the Voger app and wait for the camera to be detected.
- Once the camera is detected, tap on it to connect and enter your home Wi-Fi network’s SSID and password.
- Wait for the camera to connect to your home Wi-Fi network. This may take a few minutes.
- Once the camera is connected, you can customize its settings and access live video feeds from the Voger app.
Make sure to place the camera within range of your Wi-Fi network for a stable connection. It is recommended to test the camera’s Wi-Fi signal strength before mounting it permanently.
If you encounter any issues during the setup process, refer to the camera’s user manual or contact Voger customer support for assistance.
Download and install the app
To connect your Voger security camera to your smartphone or tablet, you need to download and install the Voger app. Follow the steps below to complete the process:
Step 1: Open the app store
On your device, open the app store. If you’re using an iPhone or iPad, open the Apple App Store. For Android devices, open the Google Play Store.
Step 2: Search for the Voger app
In the search bar of the app store, type “Voger” and press enter. Look for the official Voger app in the search results. Make sure to download the correct app developed by Voger Security.
Step 3: Download and install
Tap on the “Install” or “Get” button to start downloading the app to your device. Once the download is complete, the app will automatically install on your device.
Step 4: Launch the app
After the installation is complete, locate the Voger app on your device’s home screen or app drawer. Tap on the app icon to launch it.
Now that you have successfully downloaded and installed the Voger app, you can proceed with setting up your Voger security camera. Follow the instructions provided in the app to connect your camera to your Wi-Fi network and start monitoring your property.
| Device | App Store |
|---|---|
| iPhone or iPad | Apple App Store |
| Android | Google Play Store |
Connect the camera to the app
Connecting your voger security camera to the app is a simple and straightforward process. Follow the steps below to get started:
Step 1: Download the app
Before you can connect your camera to the app, you need to download and install the voger security camera app on your smartphone or tablet. You can find the app on the App Store for iOS devices or the Google Play Store for Android devices.
Step 2: Create an account
Once you have downloaded the app, open it and create a new account. You will need to provide your email address and create a password. Make sure to choose a strong password to ensure the security of your account.
Step 3: Connect the camera
Now that you have an account, it’s time to connect your voger security camera to the app. Make sure that your camera is powered on and within range of your Wi-Fi network.
Open the app and tap on the “Add Device” button. Follow the on-screen instructions to connect your camera to the app. You may be asked to input your Wi-Fi network’s name and password to complete the setup process.
Once the camera is successfully connected to the app, you will be able to view live video footage, receive motion detection alerts, and control the camera’s settings directly from your smartphone or tablet.
Note: If you encounter any issues during the setup process, refer to the user manual that came with your voger security camera or contact voger customer support for assistance.
With your voger security camera connected to the app, you can now monitor your home or office remotely and ensure the safety and security of your property at all times.
FAQ,
What is a voger security camera?
Voger security camera is a type of surveillance camera that is used to monitor and protect your home or business. It provides real-time video footage and can be accessed remotely through a smartphone or computer.
Can I connect multiple voger security cameras to one app?
Yes, you can connect multiple voger security cameras to one app. The voger camera app allows you to add and manage multiple cameras in the same account. To connect additional cameras, simply follow the same steps as you did for the first camera. You will be able to access all the cameras’ live video feeds from the app.


