
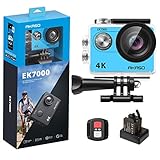
WiFi action cameras are becoming increasingly popular for sports enthusiasts, adventurers, and those who love capturing their outdoor activities. With the ability to connect to your iPhone via WiFi, you can easily transfer and view your photos and videos. However, connecting your WiFi action camera to your iPhone may seem like a daunting task for some. In this guide, we will walk you through the steps to connect your WiFi action camera to your iPhone.
Step 1: Download the App
The first step is to download the app for your WiFi action camera on your iPhone. The app will allow you to connect your camera to your iPhone and control it remotely. You can find the app in the App Store by searching for the name of your camera model.
Step 2: Enable WiFi on Your Camera
Next, you will need to turn on the WiFi feature on your camera. This can usually be done through the camera’s settings menu. Once WiFi is enabled, your camera will create its own network that you can connect to from your iPhone.

Step 3: Connect to Your Camera’s WiFi Network
On your iPhone, go to the Settings app and select the Wi-Fi option. Look for the network name or SSID of your camera, which should be displayed on the camera’s screen. Tap on the camera’s network name to connect to it. You may be prompted to enter a password, so make sure to enter the correct one.
Step 4: Open the App and Connect
Now that your iPhone is connected to your camera’s WiFi network, open the app that you downloaded in Step 1. The app should automatically detect your camera and establish a connection. If not, look for an option in the app’s settings to manually connect to your camera.
Step 5: Enjoy Your Connection
Once the app has successfully connected to your camera, you can now enjoy the benefits of having your camera connected to your iPhone. You can use the app to preview and remotely control your camera, transfer photos and videos to your iPhone, and even share them directly to social media.
Connecting your WiFi action camera to your iPhone is a simple process that can greatly enhance your photography and videography experience. By following these steps, you will be able to seamlessly connect your camera to your iPhone and take full advantage of its features.
Step-by-step guide to connect wifi action camera to iPhone
Having a wifi action camera allows you to capture your adventures and share them with ease. If you’re wondering how to connect your wifi action camera to an iPhone, follow these simple steps:
Step 1: Download the Camera App
First, you need to download the dedicated camera app for your wifi action camera. Visit the App Store on your iPhone and search for the app specific to your camera model. Download and install it.
Step 2: Enable Camera’s Wi-Fi
Once the app is installed, power on your wifi action camera and access its settings menu. Look for the Wi-Fi option and enable it.

Step 3: Connect iPhone to Camera’s Wi-Fi
Go to the Settings app on your iPhone and select Wi-Fi from the list. You should see the wifi network name of your camera listed there. Tap on it to connect.
Step 4: Launch the Camera App
After the connection is established, go back to your home screen and launch the camera app that you downloaded earlier.
Step 5: Pair the Devices
Within the camera app, you will find an option to pair or connect the camera. Tap on it and wait for the app to recognize the camera.
Step 6: Start Capturing
Once the camera is connected, you can start capturing photos or videos using your iPhone as a remote control for the wifi action camera. Explore the app settings for additional features and customization options.
Remember to check your camera’s user manual for any specific instructions related to connecting it to an iPhone. Enjoy capturing and sharing your adventures with your wifi action camera!

Prepare your devices
Before you can connect your WiFi action camera to your iPhone, there are a few things you’ll need to do to ensure both devices are ready.
1. Check your WiFi action camera
- Make sure your WiFi action camera is fully charged or connected to a power source. This will prevent it from running out of battery during the connection process.
- Ensure that your WiFi action camera is turned on and in the correct mode for WiFi connectivity. Refer to your camera’s user manual for instructions on how to enable WiFi.
2. Prepare your iPhone
Ensure that your iPhone is running the latest version of iOS. You can check for software updates by going to Settings > General > Software Update on your iPhone.
Make sure that the WiFi feature on your iPhone is enabled. You can do this by going to Settings > WiFi and toggling the WiFi switch to the on position.
It may also be helpful to restart your iPhone before attempting to connect to your WiFi action camera.
Download the app
To connect your wifi action camera to your iPhone, you will need to download a dedicated app. This app will allow you to control and view your camera’s footage directly on your iPhone.

First, open the App Store on your iPhone. The App Store is represented by a blue icon with a white letter “A” inside.
Next, tap on the search tab at the bottom right corner of the screen. It is represented by a magnifying glass icon.
Then, type the name of the app in the search bar at the top of the screen. The app name might vary depending on the brand of your wifi action camera, but it is usually something like “Camera Connect” or “Camera Control.”
Once the app appears in the search results, tap on it to open its app page.
On the app page, tap on the “Get” or “Install” button. It is usually located on the right side of the app name.

If prompted, enter your Apple ID password or use Touch ID or Face ID to authenticate the download.
The app will now start downloading and installing on your iPhone. This process may take a few seconds or minutes, depending on your internet connection speed.
Once the app is successfully installed, you can find its icon on your iPhone’s home screen. It is usually located on the last page of apps or in a folder named “Utilities” or “Tools.”
Tap on the app icon to open it. You may be prompted to grant permissions to the app, such as access to your camera, microphone, or location. It is important to allow these permissions for the app to function properly.
Now that you have downloaded the app, you are ready to connect your wifi action camera to your iPhone and start using it!

Power on your action camera
Before you can connect your action camera to your iPhone, you need to make sure it is powered on. Follow these steps to turn on your action camera:
Step 1: Check the battery
Ensure that your action camera has sufficient battery power. If the battery is low, charge it using the provided USB cable and power adapter.
Step 2: Locate the power button
Look for the power button on your action camera. It is usually located on the front or side of the device. The power button is often marked with a symbol or text that indicates power.
Step 3: Press and hold the power button
Press and hold the power button for a few seconds until the camera’s LED indicators start flashing or the camera’s screen turns on. This indicates that your action camera is turning on.
Once your action camera is powered on, you can proceed to the next step of connecting it to your iPhone. Make sure to follow the instructions specific to your action camera model in the user manual for any additional steps or features.
Connect to the camera’s wifi network
To connect your action camera to your iPhone, you will need to first connect to the camera’s wifi network. Follow these steps:
Step 1: Turn on the camera
Make sure your action camera is turned on and in wifi mode. Some cameras have a dedicated wifi button, while others may require you to access the wifi settings in the camera’s menu.
Step 2: Enable wifi on your iPhone
Go to the settings on your iPhone and tap on “Wi-Fi”. Make sure the wifi is enabled.
Step 3: Find the camera’s wifi network
In the available networks list on your iPhone, you should see a network name that starts with the camera’s brand or model name. Tap on it to connect.
Note: If you don’t see the camera’s wifi network, make sure you are close enough to the camera and there are no obstructions.
Step 4: Enter the password
If prompted, enter the password for the camera’s wifi network. The default password is usually printed on a sticker on the camera or mentioned in the camera’s user manual. Enter the password and tap “Join” to connect.
Once you have successfully connected to the camera’s wifi network, you can open the action camera app on your iPhone and access the camera’s features and settings wirelessly.
Open the app on your iPhone
Once you have successfully connected your WiFi action camera to your iPhone, you will need to open the app on your device. Look for the app icon on your home screen and tap on it to launch the application.
The app may have a specific name depending on the brand or model of your action camera. Common names for the app include “Action Cam”, “Camera Control”, or the brand name followed by “Camera”. If you are unsure which app to use, refer to the instruction manual or the manufacturer’s website for more information.
Once the app is open, you may be prompted to sign in or create an account. Follow the on-screen instructions to complete this process. Some apps may require you to grant permissions, such as access to your camera roll or location, in order to function properly.
Once you have accessed the app, you will be able to view the live feed from your action camera on your iPhone’s screen. Depending on the app, you may also have access to additional features and settings, such as adjusting camera settings, capturing photos or videos, and sharing your media directly from the app.
Remember to refer to the app’s user guide or help section if you need assistance navigating through the app or accessing specific features. Enjoy capturing and sharing your adventures with your action camera and iPhone!
Pair your camera with the app
Before you can connect your WiFi action camera to your iPhone, you’ll need to pair the camera with the app.
Follow these steps to pair your camera:
| Step 1: | Turn on your camera and make sure the WiFi is enabled. |
| Step 2: | Open the app on your iPhone. |
| Step 3: | Navigate to the settings menu in the app. |
| Step 4: | Select the option to pair your camera. |
| Step 5: | Your camera will display a WiFi network name and password. Note down this information. |
| Step 6: | Go to the WiFi settings on your iPhone and select the network name provided by your camera. |
| Step 7: | Enter the password provided by your camera. |
| Step 8: | Your iPhone will now be connected to the camera’s WiFi network. |
| Step 9: | Return to the app and you should see the camera listed as connected. |
Once you have successfully paired your camera with the app, you can now use your iPhone to control and transfer files to and from the camera.
Question-answer:
What if I can’t find the Wi-Fi network of my action camera on my iPhone?
If you can’t find the Wi-Fi network of your action camera on your iPhone, make sure that the Wi-Fi is enabled on your action camera and that it is in range of your iPhone. You may also want to check if there is any interference or other Wi-Fi networks nearby that could be causing connectivity issues. If the issue persists, consult the user manual of your action camera for further instructions or troubleshooting steps.
Do I need to download a specific app on my iPhone to connect it to my action camera?
Yes, in most cases, you will need to download a specific app on your iPhone to connect it to your action camera. The app is usually provided by the manufacturer of your action camera and is required for pairing the devices and accessing the camera’s settings and features. You can usually find the app by searching for the name of your action camera in the App Store.
Can I connect multiple action cameras to my iPhone at the same time?
No, you can only connect one action camera to your iPhone at a time. When you connect a new action camera, it will replace the connection to the previous one. If you want to connect multiple action cameras, you may need to use a separate device or switch between the connections manually.
What are some compatible apps for connecting an action camera to an iPhone?
There are several compatible apps available for connecting an action camera to an iPhone. Some popular options include GoPro App, DJI Osmo Action App, Sony Action Cam App, and AKASO DV App. These apps allow you to control your action camera, preview and transfer files, and access additional features and settings. You can find these apps and more by searching for the name of your action camera in the App Store.


