Wi-Fi connectivity is a convenient feature that allows you to easily transfer photos and videos from your DSLR camera to your smartphone, tablet, or computer without the need for cables. It provides a seamless workflow for photographers, enabling them to instantly share their shots on social media or back them up to cloud storage.
Step 1: Check if your DSLR camera has built-in Wi-Fi capabilities. Most modern models come with this feature, but if your camera doesn’t have it, there are external Wi-Fi adapters available that you can purchase.
Step 2: Activate the Wi-Fi function on your DSLR camera. The location of the Wi-Fi settings may vary depending on the brand and model, so refer to your camera’s user manual for specific instructions. Typically, you can find the Wi-Fi option in the settings menu or the wireless communications section.
Step 3: Connect your smartphone, tablet, or computer to the Wi-Fi network created by your DSLR camera. This network will appear in the list of available networks on your devices. Select the camera’s network and enter the password if prompted.
Step 4: Launch the camera’s dedicated app on your smartphone, tablet, or computer. Many camera manufacturers offer their own apps for remote control and wireless file transfer. Download and install the app from your device’s app store or the manufacturer’s website.

Step 5: Follow the on-screen instructions on the app to establish a Wi-Fi connection with your DSLR camera. Once connected, you can remotely control your camera, adjust settings, and transfer files wirelessly.
In conclusion, Wi-Fi connectivity greatly enhances the functionality of DSLR cameras, allowing photographers to streamline their workflow and share their creative work effortlessly. By following these steps, you can easily connect Wi-Fi in your DSLR camera and unlock a world of wireless possibilities.
Steps to Connect WiFi in DSLR Camera
Connecting your DSLR camera to a WiFi network is a convenient way to transfer your photos and videos wirelessly. Here are the steps to connect WiFi in your DSLR camera:
- Make sure your DSLR camera supports WiFi connectivity. Check the product manual or specifications to ensure WiFi capability.
- Power on your DSLR camera and navigate to the settings menu.
- Look for the WiFi settings option in the menu and select it.
- Your camera will start scanning for available WiFi networks.
- Select your desired WiFi network from the list of available networks.
- If the network is secured, enter the WiFi password using the camera’s interface.
- After entering the password, confirm the connection. Your camera will now connect to the WiFi network.
- Once the connection is established, you can start transferring your photos and videos wirelessly to your preferred devices.
It is important to note that the steps may vary slightly depending on the make and model of your DSLR camera. If you encounter any difficulties, refer to the camera’s manual for detailed instructions specific to your device.
Check Camera Compatibility
Before you can connect your DSLR camera to a Wi-Fi network, it is important to check if your camera model is compatible with Wi-Fi connectivity. Not all DSLR cameras have built-in Wi-Fi capabilities, so it is crucial to verify the specifications of your camera.

To determine if your camera can connect to Wi-Fi, you can refer to the user manual or visit the manufacturer’s official website for detailed information. Look for specifications such as “Wi-Fi compatible” or “Wireless LAN enabled”.
Additionally, you may also find compatibility information on camera review websites or forums where users share their experiences with different camera models.
If your camera is not Wi-Fi compatible, you may still have options to connect it to a wireless network using external accessories, such as a Wi-Fi adapter or a wireless memory card. These accessories can add Wi-Fi capabilities to your camera, allowing you to transfer photos wirelessly.
Remember to check for any firmware updates for your camera, as manufacturers may release updates that add Wi-Fi functionality to older camera models.
Once you have confirmed that your camera is Wi-Fi compatible, you can proceed to connect it to a Wi-Fi network following the instructions provided by the manufacturer or in the user manual.

| Pros | Cons |
|---|---|
|
|
Enable WiFi Function
To connect your DSLR camera to WiFi, you need to enable the WiFi function on your camera. The process may vary slightly depending on the make and model of your camera, but here are general steps to follow:
Step 1: Access the Camera Menu
First, turn on your camera and navigate to the menu screen. Use the arrow buttons or the touch screen, if available, to scroll through the menu options.
Step 2: Locate the WiFi Settings
Look for the WiFi settings option in the camera menu. It is often denoted by an icon or the word “WiFi.” Select this option to open the WiFi settings submenu.
Step 3: Enable WiFi
Within the WiFi settings submenu, you will usually find an option to enable or disable the WiFi function. Select the enable option to turn on WiFi on your camera.
Step 4: Configure WiFi Settings
Once you have enabled the WiFi function, you will need to configure the WiFi settings. This typically involves selecting your WiFi network from a list of available networks and entering the network password, if required. Use the camera controls to navigate through the options and input the necessary information.

Step 5: Connect to WiFi
After configuring the WiFi settings, you can proceed to connect your camera to the WiFi network. Usually, there will be an option to connect or search for networks. Select this option and wait for the camera to establish a connection with the WiFi network.
Once connected, you will be able to use the WiFi-enabled features of your camera, such as transferring photos wirelessly or remotely controlling your camera from a smartphone or computer.
Note: For specific instructions on enabling the WiFi function on your camera, refer to the camera’s user manual or the manufacturer’s website.
| Steps | Description |
|---|---|
| Step 1 | Access the Camera Menu |
| Step 2 | Locate the WiFi Settings |
| Step 3 | Enable WiFi |
| Step 4 | Configure WiFi Settings |
| Step 5 | Connect to WiFi |
Connect to a WiFi Network
To connect your DSLR camera to a WiFi network, you need to follow these steps:
1. Turn on your DSLR camera and navigate to the menu settings.
2. Look for the WiFi settings option in the menu and select it.
3. Choose the option to connect to a new network.
4. The camera will scan for available networks. Wait for the camera to complete the scan.
5. Once the available networks are listed, select the network you want to connect to.
6. If the network is password protected, enter the password using the on-screen keyboard.
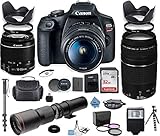
![Canon DSLR Camera [EOS 90D] with Built-in Wi-Fi, Bluetooth, DIGIC 8 Image Processor, 4K Video, Dual Pixel CMOS AF, and 3.0 Inch Vari-Angle Touch LCD Screen, [Body Only], Black](https://m.media-amazon.com/images/I/41JtOF3xVBL._SL160_.jpg)
7. Double-check the entered password to ensure accuracy.
8. Confirm the network selection and wait for the camera to establish a connection.
9. Once the connection is established, you will see a confirmation message or icon on the camera’s display.
10. Test the connection by browsing through the camera’s WiFi features or transferring a test image wirelessly.
11. To disconnect from the WiFi network, go back to the WiFi settings menu and choose the option to disconnect or turn off the camera.

By following these steps, you can easily connect your DSLR camera to a WiFi network and enjoy the convenience of wireless functionality.
Enter Network Credentials
When connecting your DSLR camera to a WiFi network, you may be prompted to enter network credentials. This is a security measure to ensure that only authorized users can access the network. Here is how you can enter your network credentials:
- On your camera, navigate to the wireless settings or network settings menu. This can usually be found in the settings or setup menu.
- Select the option to connect to a network or establish a WiFi connection. This may be labeled as “WiFi”, “Network”, or something similar.
- A list of available WiFi networks will be displayed. Select the network you want to connect to.
- If the network you selected is secured, you will be prompted to enter the network credentials. This usually consists of a username and password.
- Use the camera’s interface, which may be a touch screen or buttons, to enter the network credentials. Take care to enter the information correctly, paying attention to uppercase and lowercase letters.
- Once you have entered the network credentials, select the option to connect or join the network.
- Your camera will attempt to connect to the WiFi network using the provided credentials. If the credentials are correct, your camera will successfully connect to the network.
It is important to note that the process for entering network credentials may vary slightly depending on the make and model of your DSLR camera. Consult your camera’s user manual for specific instructions on connecting to a WiFi network.
Establish Connection
To connect your DSLR camera to a WiFi network, you will first need to establish a connection. Follow these steps to successfully connect your camera:
- Turn on your camera: Ensure that your DSLR camera is turned on and ready for use.
- Access the menu: Navigate to the menu settings on your camera. This is typically done through a dedicated button or a touch screen interface.
- Find the WiFi settings: Look for the WiFi settings option in the camera menu. It may be labeled as “Wireless Settings” or “Network Settings”.
- Select your network: Once you have accessed the WiFi settings, you will be presented with a list of available networks. Select the desired network that you want to connect to.
- Enter the password: If the network you selected is password-protected, you will be prompted to enter the password. Use the camera’s controls to input the password correctly.
- Establish the connection: After entering the correct password, the camera will attempt to establish a connection with the selected network. This may take a few moments. Ensure that the camera and the network are within range of each other.
- Confirm the connection: Once the connection is established, the camera will display a confirmation message or indicator. You can now proceed to use WiFi features and functionalities offered by your DSLR camera, such as remote control or wireless file transfer.
Note: The exact steps and options may vary depending on the model and brand of your DSLR camera. Refer to the camera’s user manual for specific instructions related to WiFi connectivity.
Test Connection and Troubleshoot
After connecting your DSLR camera to the Wi-Fi network, it is crucial to test the connection to ensure that it is working properly. Here are some steps to follow:
- Check Wi-Fi Signal Strength: Make sure that your camera is within the range of the Wi-Fi network. Weak Wi-Fi signals can cause connection issues, so consider moving closer to the router if needed.
- Verify Wi-Fi Credentials: Double-check the Wi-Fi network name (SSID) and password entered in the camera settings. Ensure that there are no typos or errors.
- Restart the Camera: Sometimes, restarting the camera can resolve minor connectivity issues. Power off your DSLR camera, wait for a few seconds, and then turn it back on.
- Power Cycle the Router: If the camera still does not connect to the Wi-Fi network, try power cycling the router. Switch off the router, wait for a minute, and then turn it back on. This may clear any temporary network issues.
- Update Camera Firmware: Check for any available firmware updates for your DSLR camera. Updating the firmware can improve Wi-Fi connectivity and fix any bugs or compatibility issues.
- Reset Camera Settings: If all else fails, you can perform a factory reset on your camera to revert all settings back to the default. However, note that this will erase any customized settings you had previously made.
If you are still experiencing difficulties connecting your DSLR camera to the Wi-Fi network, refer to the camera’s user manual or contact the manufacturer’s customer support for further assistance.
Question-answer:
How do I connect my DSLR camera to WiFi?
To connect your DSLR camera to WiFi, you need to check if your camera has built-in WiFi capability. If it does, you can usually find the WiFi settings in the camera’s menu. From there, you can scan for available WiFi networks and select the one you want to connect to. Enter the password if required, and you should be connected.
Can I connect my Nikon DSLR camera to WiFi?
Yes, many Nikon DSLR cameras have built-in WiFi capability. To connect your Nikon DSLR camera to WiFi, go to the camera’s menu and navigate to the WiFi settings. From there, you can scan for available networks, choose the one you want to connect to, and enter the password if needed. Once connected, you can use the camera’s WiFi functionality for remote shooting, transferring photos wirelessly, or controlling the camera using a smartphone app.
What if my DSLR camera doesn’t have built-in WiFi?
If your DSLR camera doesn’t have built-in WiFi, you can still connect it to WiFi using an external WiFi adapter or a wireless memory card. These devices can be plugged into the camera’s USB port or SD card slot, respectively, and provide WiFi connectivity. Once connected, you can follow the same steps as with a camera that has built-in WiFi to connect to a wireless network and enjoy the benefits of wireless functionality.
Are there any limitations when connecting a DSLR camera to WiFi?
There may be some limitations when connecting a DSLR camera to WiFi. These can vary depending on the camera model and brand. Some cameras may have limited WiFi functionality, allowing only for transferring photos wirelessly, while others may offer more advanced features like remote shooting and camera control through smartphone apps. Additionally, the range of the WiFi signal may be limited, and the camera may need to be in close proximity to the WiFi router for a stable connection.