For those who are concerned about the security of their homes or businesses, installing a WiFi security camera system is a popular choice. These cameras are equipped with WiFi capability, allowing users to monitor their property remotely from their smartphones, tablets, or computers. However, many people are not aware that it is possible to connect a WiFi security camera to a hard drive for recording purposes. This article will guide you through the process of connecting your camera to a hard drive, ensuring that you have a reliable and long-term storage solution for your surveillance footage.
Before we begin, it is important to note that not all WiFi security cameras support direct connection to a hard drive. Some cameras rely on cloud storage or SD cards for recording. Therefore, it is essential to check the specifications of your camera to confirm whether it has the capability to connect to a hard drive. If it does, you can proceed with the following steps.
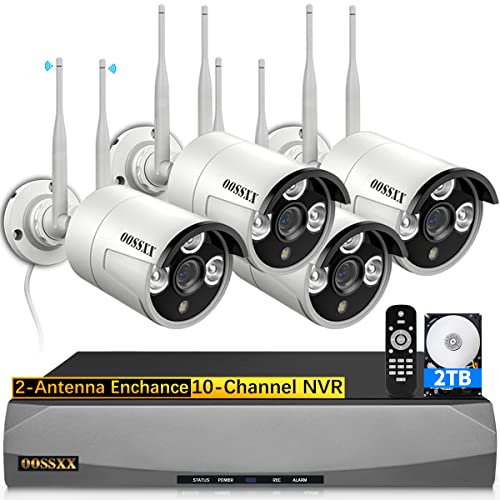
To connect your WiFi security camera to a hard drive, you will need a few essential items. These include a compatible camera, a hard drive with sufficient storage capacity, a network video recorder (NVR), and Ethernet cables for establishing a wired connection. It is recommended to choose a hard drive with a large capacity and reliable performance, as this will ensure that you have enough storage space for your surveillance footage and that the recorded videos are of high quality.
Once you have gathered all the necessary equipment, the next step is to establish a wired connection between your WiFi security camera and the NVR. This can be done by connecting one end of an Ethernet cable to the LAN port of the camera and the other end to the LAN port of the NVR. This wired connection is crucial for transferring the video data from the camera to the hard drive, ensuring a stable and uninterrupted recording process.
After the wired connection is established, you can proceed with setting up the network video recorder. This involves connecting the NVR to a monitor or TV using an HDMI cable, configuring the NVR settings, and formatting the hard drive for recording. Once these steps are completed, your WiFi security camera will be successfully connected to the hard drive, ready to record and store surveillance footage.

Required Equipment for Connecting WiFi Security Camera to Hard Drive
When connecting a WiFi security camera to a hard drive, there are certain equipment that you will need in order to successfully complete the process. Having the necessary equipment on hand will ensure a smooth and hassle-free installation.
1. WiFi Security Camera
The first and most obvious piece of equipment you will need is a WiFi security camera. There are many options available on the market, so make sure to choose one that suits your specific needs and preferences. Look for a camera that supports wireless connectivity and is compatible with the hard drive you plan to use.
2. Hard Drive
A hard drive is essential for storing the video footage captured by the WiFi security camera. Make sure to choose a hard drive with sufficient storage capacity to accommodate your recording needs. Consider factors such as the maximum resolution and frame rate of the camera to determine the amount of storage space required.
3. Network Video Recorder (NVR)
A Network Video Recorder (NVR) acts as the central hub for managing and recording video footage from the WiFi security camera. It is responsible for connecting the camera to the hard drive and facilitating the recording process. Make sure to choose an NVR that is compatible with your camera and hard drive.
4. Ethernet Cable
An Ethernet cable is needed to connect the NVR to your router or modem. This allows the NVR to access the internet and communicate with the WiFi security camera. Make sure to use a high-quality Ethernet cable to ensure a stable and reliable connection.
![[Expandable 10CH,2K] Hiseeu Wireless Security Camera System with 1TB Hard Drive with One-Way Audio,10 Channel NVR 4Pcs 1296P 3MP Night Vision WiFi Security Surveillance Cameras DC Power Home Outdoor](https://m.media-amazon.com/images/I/41xwoP7QcpL._SL160_.jpg)
By having these equipment ready, you will be fully prepared to connect your WiFi security camera to a hard drive and begin recording and storing video footage. It is important to check the compatibility of the equipment and follow the manufacturer’s instructions for optimal performance and functionality.
| Equipment | Description |
|---|---|
| WiFi Security Camera | A wireless camera that captures video footage. |
| Hard Drive | Storage device for recording and storing video footage. |
| Network Video Recorder (NVR) | Central hub for managing and recording video footage. |
| Ethernet Cable | Cable for connecting the NVR to the router or modem. |
Step 1: Setting Up the WiFi Security Camera
Before connecting your WiFi security camera to a hard drive, you need to set it up and configure the necessary settings. Follow these steps to get started:
1. Choose the Right Location
Select an appropriate location for your WiFi security camera. It should provide a good vantage point to monitor the desired area and have a power source nearby.
2. Mount the Camera
Use the mounting hardware that came with your WiFi security camera to securely attach it to the chosen location. Ensure that it is properly aligned to capture the desired field of view.
3. Connect the Camera to Power
Plug the power adapter into an electrical outlet and connect the other end to the power port of your WiFi security camera. Make sure the camera receives a stable power supply.

4. Install the Mobile App
Search for the mobile app specific to your WiFi security camera brand in the app store. Download and install the app on your smartphone or tablet.
5. Create an Account
Open the app and create a new account using your email address. Follow the on-screen instructions to complete the account setup process.
6. Connect the Camera to WiFi
Launch the app and follow the in-app instructions to connect your WiFi security camera to your home WiFi network. Make sure to enter the correct WiFi password.
7. Configure Camera Settings
Once the camera is connected to WiFi, access the settings menu in the app to configure various options like video quality, motion detection settings, and storage preferences.
8. Test the Camera and App
Make sure to test the camera’s live streaming functionality and other features through the app to ensure everything is working properly. Adjust settings as needed.
![[3MP HD,Audio] SMONET WiFi Security Camera System,1TB Hard Drive,8CH Home Surveillance NVR Kit,4 Packs Outdoor Indoor IP Cameras Set,IP66 Waterproof,Free Phone APP,Night Vision,24/7 Video Recording](https://m.media-amazon.com/images/I/4198DsI4wdL._SL160_.jpg)
| Note | Refer to your WiFi security camera’s user manual for detailed instructions specific to your camera model. |
|---|
Step 2: Configuring the WiFi Settings
Before connecting your WiFi security camera to a hard drive, you need to configure its WiFi settings. Follow these steps:
1. Power on the camera and wait for it to boot up.
2. Use your computer or mobile device to connect to the WiFi network provided by the camera. Usually, the network name and password can be found on the camera or in the user manual.
3. Once connected to the camera’s WiFi network, open a web browser and enter the camera’s IP address to access its settings page. The IP address can also be found on the camera or in the user manual.
4. On the settings page, navigate to the WiFi settings section.

5. Scan for available WiFi networks and select your home WiFi network from the list.
6. Enter your home WiFi network’s password and click “Save” or “Apply” to save the settings.
7. Wait for the camera to reconnect to your home WiFi network.
8. Once the camera is connected to your home WiFi network, disconnect your computer or mobile device from the camera’s WiFi network and reconnect it to your home WiFi network.
Now that you have configured the WiFi settings of your WiFi security camera, you can proceed to connect it to your hard drive for storage.
![[5MP HD,Audio] SMONET WiFi Security Camera System,3TB Hard Drive,8CH Home Surveillance DVR Kits,8 Packs Outdoor Indoor IP Cameras Set,IP66 Waterproof,Free Phone APP,Night Vision,24/7 Video Recording](https://m.media-amazon.com/images/I/41zuaOPtJdL._SL160_.jpg)
Step 3: Connecting the WiFi Security Camera to your Home Network
After setting up the hardware and installing the necessary software, you are now ready to connect your WiFi security camera to your home network. Follow these steps to establish the connection:
| Step | Description |
|---|---|
| 1 | Power on the WiFi security camera and ensure that it is properly connected to a power source. |
| 2 | Access the camera’s settings or configuration page. This can usually be done by typing the camera’s IP address into a web browser. |
| 3 | Locate the wireless network settings in the camera’s configuration page. |
| 4 | Select your home network from the available list of networks. |
| 5 | Enter your home network’s password or security key when prompted. |
| 6 | Confirm the connection by clicking the “Connect” or “Save” button. |
| 7 | Wait for the camera to establish a connection with your home network. This may take a few moments. |
| 8 | Once the connection is established, you can disconnect the camera from the computer and place it in its desired location. |
Once the WiFi security camera is connected to your home network, you can access it remotely from any device connected to the same network. This will allow you to view the camera’s live feed and access its recording features.
It is important to ensure that your home network has a strong and stable WiFi signal, as this will ensure optimal performance and reliability of the WiFi security camera.
Step 4: Choosing a Suitable Hard Drive for Storage
When connecting a WiFi security camera to a hard drive, it is essential to choose a suitable storage device for storing the camera’s footage. Here are a few factors to consider when selecting a hard drive:
1. Storage Capacity:
First and foremost, consider the amount of storage capacity required for your needs. The storage capacity will depend on various factors such as the camera’s image quality, the number of cameras connected, and the length of time you wish to store the footage. High-resolution cameras and longer retention periods will require larger storage capacities. It is essential to estimate the amount of space needed to ensure adequate storage and prevent running out of storage space.

2. Type of Hard Drive:
Next, consider the type of hard drive suitable for your setup. There are two main types of hard drives commonly used for security camera storage:
a. Internal Hard Drive: An internal hard drive is installed directly into the camera system or a separate DVR/NVR device. It provides a dedicated storage solution but requires physical installation. It is a good option for those who prefer a more compact and integrated setup.
b. External Hard Drive: An external hard drive is connected to the camera system or DVR/NVR device via USB or other connectivity options. It offers the advantage of easy installation and flexibility, allowing you to connect and disconnect the hard drive as needed. It is a suitable option if you require portable storage or want to expand your storage capacity easily.
3. Drive Speed and Reliability:
Consider the speed and reliability of the hard drive. Look for hard drives that offer sufficient read/write speeds to handle the camera’s video stream. Additionally, prioritize hard drives with lower failure rates to ensure long-term reliability and prevent data loss. Researching and reading reviews about different hard drive models can help you choose a reliable option.
Note: It is worth mentioning that some WiFi security cameras come with built-in storage options, such as built-in SD card slots. In such cases, you may not need an additional hard drive for storage.

By considering these factors, you can choose a suitable hard drive for connecting your WiFi security camera and ensure efficient and reliable storage of your camera footage.
Step 5: Connecting the Hard Drive to the WiFi Security Camera
After setting up your WiFi security camera, the next step is to connect the hard drive. This will allow you to store the recorded video footage from the camera, ensuring that you have a backup of all the recorded activities.
Here are the steps to connect the hard drive to your WiFi security camera:
- Power off the camera: Before connecting the hard drive, make sure to power off the WiFi security camera. This will prevent any potential damage to the device during the connection process.
- Locate the hard drive ports: The WiFi security camera should have ports specifically designed for connecting a hard drive. These ports are typically labeled as “HDD” or “Storage”. Consult the camera’s user manual or instructions to locate these ports.
- Connect the hard drive: Take the USB cable that came with your hard drive and plug one end into the hard drive itself. Then, insert the other end into the corresponding port on the WiFi security camera. Make sure the connection is secure and snug.
- Power on the camera: Once the hard drive is connected, power on the WiFi security camera. It will recognize the presence of the hard drive and start configuring it for video storage.
- Format the hard drive: In order for the camera to use the hard drive for video storage, it needs to be formatted in a compatible file system. Access the camera’s settings menu and navigate to the storage options. Select the connected hard drive and follow the on-screen instructions to format it.
- Set up recording settings: Once the hard drive is successfully connected and formatted, you can customize the recording settings according to your preferences. This may include adjusting the video resolution, setting up motion detection, or scheduling specific recording times.
- Test the connection: To ensure that the connection between the hard drive and the WiFi security camera is working properly, perform a test recording. Confirm that the recorded video footage is being stored on the hard drive.
Once you have successfully connected the hard drive to your WiFi security camera, you can have peace of mind knowing that all the recorded video footage is securely stored and easily accessible whenever needed.
Step 6: Formatting the Hard Drive
Now that your Wi-Fi security camera is connected to the hard drive, the next step is to format the hard drive to make it compatible with the camera’s recording system. Formatting the hard drive will erase all the data on it, so make sure you have backed up any important files before proceeding.
Here are the steps to format the hard drive:
1. Access the camera’s settings
Open the camera’s app or web interface and navigate to the settings menu. Look for an option related to storage or hard drive settings.
2. Select the hard drive
Once you have accessed the settings menu, locate the option to select the hard drive. This option may be labeled as “Format” or “Initialize”.
3. Format the hard drive
Select the hard drive and choose the format option. The camera will start the formatting process, which may take some time depending on the size of the hard drive.
Note: During the formatting process, do not turn off the camera or disconnect the hard drive, as it may result in data loss or damage to the hard drive.
![[3MP HD,Audio] SMONET WiFi Security Camera System,2TB Hard Drive,8CH Home Surveillance NVR Kit,4 Packs Outdoor Indoor IP Cameras Set,IP66 Waterproof,Free Phone APP,Night Vision,24/7 Video Recording](https://m.media-amazon.com/images/I/41aWCaR9QuL._SL160_.jpg)
4. Wait for the formatting to complete
Once the formatting process is initiated, wait for it to complete. The camera will notify you when the formatting is done.
5. Test the hard drive
After the formatting is complete, test the hard drive by recording a short video clip and checking if it is saved successfully to the hard drive.
Tip: It is recommended to regularly format the hard drive to maintain optimal performance and prevent any potential issues with data corruption or errors.
By following these steps, you have successfully formatted the hard drive connected to your Wi-Fi security camera. Now you can start recording and storing your surveillance footage without any worries.
Step 7: Setting Up Recording Parameters
Once you have successfully connected your WiFi security camera to the hard drive, it’s time to set up the recording parameters. This will determine how the camera records and stores the footage.
1. Open the camera’s software or app and navigate to the settings menu.
2. Look for the recording settings or storage settings option and click on it.
3. Choose the desired recording mode. This can include continuous recording, motion detection recording, or scheduled recording. Select the option that best suits your needs.
4. Set the video resolution and frame rate. Higher resolutions and frame rates will result in better quality footage but will also require more storage space.
5. Select the storage location. Choose the hard drive you have connected to the camera as the storage location for the recorded footage.
6. Adjust the recording length. Decide how long each recording file should be. This can vary depending on your preferences and the available storage space.
7. Enable or disable audio recording. Some WiFi security cameras have built-in microphones that can capture audio along with video. Decide whether you want to enable or disable this feature.
8. Save the changes and exit the settings menu.
By setting up the recording parameters, you can ensure that your WiFi security camera is capturing and storing footage according to your preferences. This will enable you to review any events or incidents that may occur on your property.
Step 8: Testing the Connection and Storage
Once you have successfully connected your Wi-Fi security camera to the hard drive, it is essential to test the connection and verify that the storage is functioning correctly. Follow the instructions below to ensure everything is working as expected:
- Check the camera feed: Open the camera monitoring software or app on your device and verify that you can see the live feed from the security camera. Make sure the image is clear and there are no disruptions.
- Test the recording function: Initiate a test recording by triggering the camera’s motion detection or recording manually. Check if the camera is storing the recorded footage on the hard drive. You can do this by accessing the recording location on your computer or using the camera monitoring software.
- Playback the recorded footage: Retrieve the recorded footage from the hard drive and play it back to ensure that the recording quality is good and the videos are accessible. Use the playback feature in your camera monitoring software or search for the recorded files on your computer.
- Test remote access: If you plan to access the camera feeds and recordings remotely, make sure to test this functionality. Use a different device or network to access the camera monitoring software or app and verify that you can view the live feed and playback the recorded footage without any issues.
By following these steps and performing the necessary tests, you can ensure that your Wi-Fi security camera is successfully connected to the hard drive and functioning correctly. This will allow you to securely store and access your surveillance recordings as needed.
Troubleshooting Tips for Connecting WiFi Security Camera to Hard Drive
If you are experiencing difficulties connecting your WiFi security camera to a hard drive, there are a few troubleshooting tips to help you resolve the issue. Follow these steps to ensure a successful connection:
1. Check the camera’s compatibility: Ensure that your WiFi security camera is compatible with the hard drive you are trying to connect it to. Refer to the camera and hard drive’s user manuals or specifications to confirm compatibility.
2. Verify the camera’s network connection: Make sure your camera is properly connected to your WiFi network. Check the camera’s settings and ensure it is connected to the correct network. Restart both the camera and your WiFi router if necessary.
3. Confirm the hard drive’s compatibility: Check that your hard drive is compatible with the camera’s firmware and specifications. Some cameras may only support specific hard drive models or formats.
4. Format the hard drive: If your hard drive is not recognized by your camera, try formatting it using the camera’s built-in formatting tool. Be aware that formatting will erase all data on the hard drive, so make sure to backup any important files before proceeding.
5. Update camera firmware: Ensure that your camera’s firmware is up to date. Manufacturers often release firmware updates to improve compatibility and fix bugs. Check the camera manufacturer’s website for any available updates and follow their instructions to update the firmware.
6. Reset camera to factory settings: If all else fails, try resetting your camera to its factory settings. This can be done by accessing the camera’s settings menu and selecting the reset option. Note that this will erase all settings and configurations, so you will need to set up the camera again from scratch.
7. Seek technical support: If the above steps do not resolve the issue, contact the camera manufacturer’s technical support for further assistance. They may be able to provide specific troubleshooting steps or identify if there is a known issue with your camera model.
By following these troubleshooting tips, you should be able to successfully connect your WiFi security camera to a hard drive and start recording and storing footage with ease.
FAQ,
Can I connect multiple wifi security cameras to one hard drive?
Yes, it is possible to connect multiple wifi security cameras to one hard drive. To do so, you will need to ensure that your hard drive has enough storage capacity to handle the recordings from all the cameras. Additionally, you may need to configure the settings on each camera to specify that they should save recordings to the hard drive. Consult the user manual or online documentation for your specific brand and model of wifi security cameras for detailed instructions on how to connect multiple cameras to one hard drive.
What is the purpose of connecting a wifi security camera to a hard drive?
Connecting a wifi security camera to a hard drive allows you to store and access recordings from the camera. This can be useful for a variety of reasons. By saving recordings to a hard drive, you can free up space on your camera’s internal storage or memory card, allowing it to continue recording without interruption. Additionally, having recordings saved on a hard drive provides a convenient way to review footage and can be helpful for investigating any security incidents or suspicious activity that may have occurred. Storing recordings on a hard drive also allows for easy backup and archiving of footage.


