
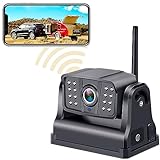
Welcome to the world of smart home security! WiFi smart net cameras offer a convenient and effective way to monitor your home or office remotely using your iPhone. With just a few simple steps, you can easily connect your WiFi smart net camera to your iPhone and gain peace of mind knowing that your property is secure.
To connect your WiFi smart net camera to your iPhone, you will need to follow these easy instructions:
Step 1: Download the App
The first thing you need to do is download the dedicated app for your WiFi smart net camera from the App Store. Make sure to search for the app that is specifically designed for your camera model. Once you have found the app, tap “Download” and wait for it to install on your iPhone.
Step 2: Power On the Camera

Next, connect your WiFi smart net camera to a power source and make sure it is turned on. Most cameras come with an indicator light that will start blinking once it is powered on.
Step 3: Connect to WiFi
Open the settings on your iPhone and go to the WiFi menu. Look for your camera’s WiFi network in the list of available networks and tap on it to connect. You may be prompted to enter a password, which can usually be found in the user manual or on the camera itself. Once connected, the indicator light on the camera will stop blinking and remain lit.
Step 4: Launch the App
Launch the app you downloaded in Step 1 and follow the on-screen instructions to set up your WiFi smart net camera. This typically involves creating an account, naming your camera, and selecting your desired settings.

Once the setup is complete, you should be able to view the live feed from your WiFi smart net camera directly on your iPhone. You can also access additional features such as recording footage, receiving alerts, and controlling the camera’s pan and tilt functions, all from the convenience of your iPhone.
Now you are ready to enjoy the benefits of having a WiFi smart net camera connected to your iPhone. Whether you want to keep an eye on your home while you’re away or monitor your office when you’re out of the office, this simple guide will help you get started. Stay connected and stay secure!
Preparing the camera and iPhone
Before you begin the process of connecting your WiFi smart net camera to your iPhone, it is important to ensure that both the camera and your iPhone are prepared for the setup.
1. Check camera compatibility
Make sure that your camera is compatible with iPhone. Check the camera’s user manual or the manufacturer’s website for a list of supported devices, including iPhone models.
2. Update camera firmware
Before starting the setup, ensure that the camera’s firmware is up to date. Manufacturers often release firmware updates to add new features and enhance compatibility. Check the camera’s user manual or the manufacturer’s website for instructions on how to update the firmware.

3. Charge the camera
Ensure that your camera has enough battery to complete the setup process. If necessary, charge the camera fully using the provided charger or via USB connection.
4. Connect the camera to a power source
Connect the camera to a power source using the provided power adapter. Make sure the power source is stable and reliable to avoid interruptions during the setup process.
5. Connect iPhone to a stable WiFi network
Before proceeding, ensure that your iPhone is connected to a stable WiFi network. This is necessary for both the camera setup and connecting the camera to your iPhone later on. Follow your iPhone’s settings or preferences to connect to a WiFi network.
6. Download and install the camera app
On your iPhone, go to the App Store and search for the camera’s official app. Download and install the app on your iPhone. This app will be used to connect and control your WiFi smart net camera.
By preparing both your camera and iPhone adequately, you can ensure a smoother setup process and avoid any compatibility issues or interruptions during the connection process.

Installing the camera app
Before you can connect your wifi smart net camera to your iPhone, you will need to install the camera app. Follow the steps below to install the app:
Step 1: Open the App Store
To begin, open the App Store on your iPhone. You can find the App Store application on your home screen. It is represented by a blue icon with a white letter “A” inside a white circle.
Step 2: Search for the camera app
Once you have opened the App Store, tap on the search tab located at the bottom right corner of the screen. In the search bar at the top of the screen, type in the name of the camera app. Make sure to search for the official app developed by the manufacturer of your wifi smart net camera.
Step 3: Select and download the camera app
After searching for the camera app, you will see a list of results. Look for the app that matches your camera model and has good reviews. Tap on the app to view more details. Verify that the app is compatible with your iPhone and has good ratings and reviews. Once you are satisfied, tap on the “Get” or “Download” button to begin downloading the app.
Note: Depending on your internet connection, the download may take a few seconds to a few minutes.

Step 4: Launch the camera app
Once the camera app has finished downloading, you can locate it on your home screen. Look for the app icon and tap on it to launch the app. The app icon may vary depending on the developer, but it is usually represented by a camera or an icon related to the camera’s functionality.
Congratulations! You have successfully installed the camera app on your iPhone. You are now ready to connect your wifi smart net camera to your iPhone and start using its features and functionalities.
Connecting the camera to the iPhone
Once you have purchased and installed your WiFi smart net camera, you will need to connect it to your iPhone in order to monitor and control it remotely. Follow the steps below to complete the setup:
Step 1: Download the App
Open the App Store on your iPhone and search for the app that is recommended for your specific camera model. Download and install the app on your device.
Step 2: Launch the App
Once the app is installed, tap on the app icon to open it.
Step 3: Create an Account
Some camera apps may require you to create an account before you can proceed. Follow the on-screen instructions to create a new account if needed.
Step 4: Connect the Camera to the WiFi Network
Make sure your camera is connected to a power source and within range of your WiFi network. Use the instructions provided with your camera to connect it to your WiFi network. This typically involves opening the camera’s settings, selecting the WiFi network, and entering the network password.
Step 5: Add the Camera to the App
In the app, look for an option to add a new camera or device. Tap on this option and follow the prompts to add your camera to the app.
Step 6: Connect the Camera to your iPhone
Once the camera is added to the app, you will need to connect it to your iPhone. This can usually be done by selecting the camera from the app’s device list and following the on-screen instructions to establish the connection.
| Troubleshooting Tip: |
|---|
| If you are having trouble connecting the camera to your iPhone, make sure that both the camera and your iPhone are connected to the same WiFi network. If you are still experiencing issues, try restarting both devices and retrying the setup process. |
Configuring the camera settings
Once you have successfully connected your wifi smart net camera to your iPhone, it is essential to configure the camera settings to ensure optimal performance and functionality. Here are the steps to configure your camera settings:

1. Open the camera’s app on your iPhone.
2. Go to the settings menu.
3. Navigate to the camera settings section.
4. Adjust the resolution settings to your desired level. Higher resolutions offer better image quality but may require more storage space.
5. Set up the motion detection feature. This enables the camera to notify you whenever any movement is detected within its field of view.
6. Configure the night vision settings if your camera supports this feature. Night vision enhances visibility in low light conditions.
7. Enable audio recording if you want to capture sounds along with the video footage.
8. Set up the camera’s schedule. This allows you to specify the time frames during which the camera should be active and start recording.
9. Adjust the sensitivity settings for motion detection to avoid false alerts. Fine-tune the sensitivity levels to optimize the camera’s performance.
10. Set up the storage options. Choose between local storage or cloud storage to store your camera’s footage.
11. Verify that all other necessary settings, such as date and time, are accurate.
12. Save the configured settings and exit the camera settings menu.
By following these steps, you can customize your wifi smart net camera to suit your specific requirements and ensure a seamless user experience.
Testing the connection
Once you have successfully connected your Wi-Fi smart net camera to your iPhone, it is important to test the connection to ensure that everything is working properly. Here are a few steps you can follow to test the connection:
1. Open the app on your iPhone that is associated with your Wi-Fi smart net camera.
2. Navigate to the live streaming or viewing section of the app.
3. Make sure that your camera is powered on and connected to the Wi-Fi network.
4. Check the video feed on your iPhone to see if you can see a live view from the camera.
5. If the video feed is not displaying, try restarting both your iPhone and the Wi-Fi smart net camera, and then repeat steps 1-4.
6. If you still cannot establish a connection, check the Wi-Fi signal strength on both your iPhone and the camera, and make sure they are in range of each other.
7. If you are still experiencing issues, consult the user manual or contact the manufacturer for further assistance.
By following these steps, you will be able to test the connection between your Wi-Fi smart net camera and your iPhone, ensuring that you can monitor your camera feed effectively.
Troubleshooting tips
If you are experiencing difficulties connecting your wifi smart net camera to your iPhone, here are some troubleshooting tips to help you resolve the issue:
1. Check your Wi-Fi connection
Make sure your iPhone is connected to a stable Wi-Fi network. Check the signal strength and ensure that you are within range of the router.
2. Verify camera settings
Ensure that the camera is properly set up and configured. Check the camera’s manual or manufacturer’s website for specific instructions.
3. Restart your devices
Try restarting both your iPhone and the camera. Sometimes a simple restart can resolve connectivity issues.
4. Update firmware
Check if there are any firmware updates available for your camera. Updating the firmware can sometimes fix compatibility issues and improve performance.
5. Reset camera
If none of the above steps work, you can try resetting the camera to its factory settings. Refer to the camera’s manual for instructions on how to reset.
6. Contact customer support
If you have tried all of the above troubleshooting tips and are still unable to connect your wifi smart net camera to your iPhone, it is recommended to contact the camera’s customer support for further assistance.
Question-answer:
Can you guide me on how to connect a wifi smart net camera to my iPhone?
Sure! To connect a wifi smart net camera to your iPhone, you need to follow these steps:
What are the requirements to connect a wifi smart net camera to an iPhone?
To connect a wifi smart net camera to an iPhone, you will need a compatible wifi smart net camera, an iPhone with the latest iOS version, a stable wifi network, and the camera’s user manual.
Do I need any additional apps to connect a wifi smart net camera to my iPhone?
Yes, most wifi smart net cameras require you to download a dedicated app from the App Store to connect and control the camera from your iPhone.
How can I find the wifi network name and password for my wifi smart net camera?
The wifi network name and password can usually be found on the back or bottom of the wifi smart net camera itself. You can also refer to the camera’s user manual for more information.
What should I do if I’m having trouble connecting my wifi smart net camera to my iPhone?
If you’re experiencing difficulties connecting your wifi smart net camera to your iPhone, make sure that you are following the correct setup instructions provided by the camera’s manufacturer. Additionally, check if your wifi network is stable and try restarting both your camera and iPhone.


