Having a home surveillance camera system can provide you with peace of mind, knowing that your property is being monitored even when you’re not there. But wouldn’t it be even better if you could access those camera feeds directly from your iPhone?
Fortunately, connecting your iPhone to your home surveillance camera is easier than you might think. With just a few simple steps, you’ll be able to keep an eye on your home, children, or pets from anywhere in the world.
First, you’ll need to ensure that your home surveillance camera system is compatible with your iPhone. Many modern surveillance systems come with their own apps that can be downloaded from the App Store. These apps allow you to connect your iPhone to the cameras and view the live feeds in real-time.
In most cases, all you need to do is download the app, create an account, and follow the on-screen instructions to connect your iPhone to the surveillance system. Some apps may require you to enter the IP address or unique identification number of each camera, so make sure you have that information handy.
Once your iPhone is connected to the surveillance system, you’ll be able to view the camera feeds from anywhere with an internet connection. This means you can keep an eye on your home while you’re at work, on vacation, or even when you’re just in another room of your house.

Remember to keep your login information secure and change it regularly to prevent unauthorized access to your surveillance system.
In conclusion, connecting your iPhone to your home surveillance camera system is a simple process that can provide you with added security and peace of mind. By following the steps outlined above, you’ll be able to access your camera feeds from anywhere in the world, right from the palm of your hand. So why not take advantage of the technology available and make your home surveillance system even more convenient?
Why Connect Your iPhone to Home Surveillance Camera
Connecting your iPhone to your home surveillance camera has numerous advantages. With the advancements in technology, home security has become more accessible and convenient for homeowners. By using your iPhone as a mobile viewing device for your home surveillance camera, you can monitor your property from anywhere in the world.
1. Remote Monitoring
One of the main benefits of connecting your iPhone to your home surveillance camera is the ability to remotely monitor your property. Whether you are at work, on vacation, or simply away from home, you can easily keep an eye on your home using your iPhone. This provides peace of mind and allows you to respond quickly to any suspicious activities.
2. Real-time Notifications
By connecting your iPhone to your home surveillance camera, you can receive real-time notifications on your device. These notifications can alert you to any motion detection or security breaches detected by your surveillance system. This feature ensures that you are always aware of what is happening on your property, even if you are not actively monitoring the camera feed.

| Benefits | Explanation |
|---|---|
| Convenience | Being able to monitor your home from your iPhone provides convenience and flexibility. |
| Enhanced Security | Having access to real-time monitoring and notifications enhances the security of your home. |
| Peace of Mind | Knowing that you can monitor your property at any time gives you peace of mind. |
In conclusion, connecting your iPhone to your home surveillance camera offers convenience, enhanced security, and peace of mind. With remote monitoring and real-time notifications, you can ensure the safety of your home and loved ones. Make sure to choose a compatible surveillance system and follow the necessary setup instructions to enjoy the benefits of iPhone connectivity.
Benefits of Connecting iPhone to Home Surveillance Camera
Connecting your iPhone to your home surveillance camera can provide numerous benefits. Here are some of the key advantages:
Remote Monitoring: By connecting your iPhone to your home surveillance camera, you can remotely monitor your home and property from anywhere in the world. This allows you to keep an eye on things even when you’re not at home, providing you with peace of mind and added security.
Live Video Feed: With your iPhone connected to your home surveillance camera, you can receive a live video feed of what’s happening in and around your home. This allows you to instantly see any activity or potential threats, making it easier to take appropriate action if necessary.
Notifications: When your iPhone is connected to your home surveillance camera, you can receive notifications on your device whenever motion is detected or a specific event occurs. This ensures that you’re promptly informed of any activity, giving you the opportunity to respond quickly.

Playback Options: Connecting your iPhone to your home surveillance camera allows you to access recorded footage and playback options directly on your device. This means that you can review past events and incidents at your convenience, making it easier to identify any issues or incidents that may have occurred.
Home Automation Integration: By integrating your iPhone with your home surveillance camera, you can enhance your overall home automation system. This allows you to control and manage your surveillance camera alongside other smart home devices, making it easier to create a comprehensive and integrated home security solution.
Overall, connecting your iPhone to your home surveillance camera provides convenience, flexibility, and additional security. It allows you to monitor your home in real-time, access recorded footage, and receive instant notifications, all from the palm of your hand.
Choose the Right Home Surveillance Camera for Your iPhone
When it comes to setting up a home surveillance system, one of the most important decisions you’ll need to make is choosing the right camera. With the wide range of options available in the market today, it’s essential to select a camera that is compatible with your iPhone. Here are some factors to consider when making your decision:
- Compatibility: Ensure that the surveillance camera you choose is compatible with your iPhone. Look for cameras that have dedicated apps or are compatible with popular surveillance apps available on the iPhone.
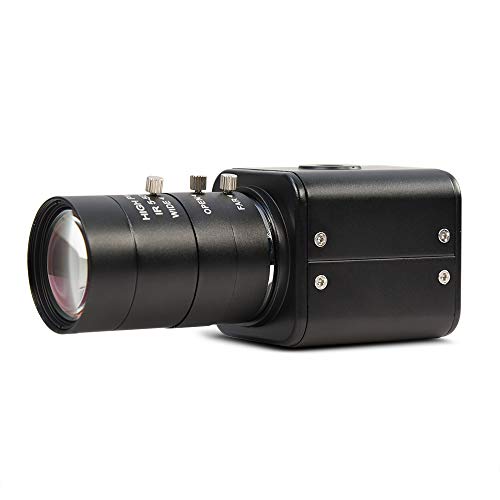
- Video Quality: The video quality of the camera is crucial for capturing clear and detailed footage. Look for cameras with high-resolution capabilities, such as 1080p or 4K, to ensure that you can see every detail.
- Night Vision: If you want your camera to monitor your property at night, make sure it has night vision capabilities. Look for cameras with infrared LEDs that provide clear visibility even in complete darkness.
- Motion Detection: Cameras with motion detection capabilities can send alerts to your iPhone whenever they detect any movement. This feature can help you quickly respond to any suspicious activity and view the footage in real-time.
- Two-Way Audio: Some surveillance cameras come with built-in microphones and speakers that enable two-way audio communication. This feature can be useful for speaking to visitors or potential intruders from your iPhone.
- Storage Options: Consider the storage options available for the camera’s footage. Some cameras offer local storage through SD cards, while others provide cloud storage services. Determine which option is more convenient for you.
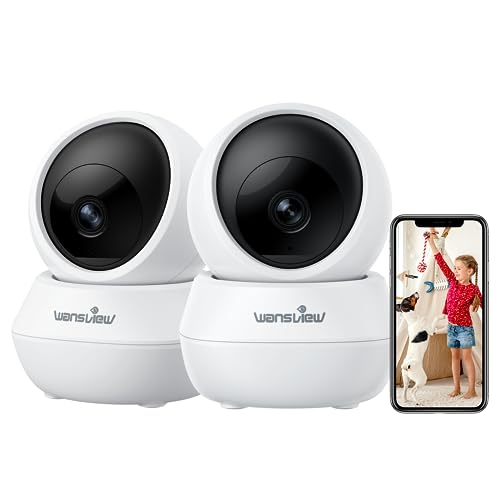
- Installation: Look for surveillance cameras that are easy to install and set up. Wireless cameras, in particular, are convenient as they eliminate the need for extensive wiring and can be placed anywhere within the Wi-Fi range.
By considering these factors, you can choose a home surveillance camera that not only works seamlessly with your iPhone but also meets your specific surveillance needs. Ensure that you compare different models and read customer reviews before making your final decision.

Setting Up Your Home Surveillance Camera with iPhone
If you want to keep an eye on your home while you’re away, setting up a surveillance camera can provide extra security and peace of mind. With your iPhone, you can easily connect to and monitor your home surveillance camera, ensuring that your property is protected at all times.
Here are the steps to follow to set up your home surveillance camera with your iPhone:
| Step 1: | Choose a suitable home surveillance camera that is compatible with your iPhone. Look for a camera that offers a mobile app or web-based interface for remote access. |
| Step 2: | Connect the surveillance camera to your home Wi-Fi network. Follow the manufacturer’s instructions to properly set up the camera and connect it to your network. |
| Step 3: | Download the mobile app or access the web-based interface provided by the surveillance camera manufacturer. |
| Step 4: | Open the app or access the web interface on your iPhone. |
| Step 5: | Follow the app’s instructions to add the surveillance camera to your account. This may involve scanning a QR code or manually entering a unique camera ID. |
| Step 6: | Once the camera is added to your account, you should be able to view the camera’s live feed on your iPhone. You may also have access to additional features such as motion detection and two-way audio. |
| Step 7: | Adjust the camera’s settings to suit your preferences. This may include adjusting the camera’s field of view, enabling notifications for motion detection events, or scheduling recording times. |
| Step 8: | Place the surveillance camera in a suitable location in your home, ensuring that it captures the desired areas and angles. |
| Step 9: | Test the camera’s functionality by monitoring the live feed on your iPhone and checking if the notifications are working as expected. |
| Step 10: | Enjoy the added security and peace of mind knowing that you can monitor your home surveillance camera from your iPhone, no matter where you are. |
By following these steps, you can easily set up your home surveillance camera with your iPhone and ensure that your property is protected at all times. Take advantage of the convenience and accessibility provided by modern technology and keep an eye on what matters most to you.
Connecting iPhone to Wi-Fi for Home Surveillance Camera
If you want to connect your iPhone to a Wi-Fi network for home surveillance camera access, follow these steps:
- Open Settings: Tap on the Settings icon on your iPhone’s home screen to access the device’s settings.
- Select Wi-Fi: In the settings menu, scroll down and tap on the Wi-Fi option.
- Enable Wi-Fi: Make sure the Wi-Fi toggle is switched on to enable your iPhone’s Wi-Fi connection.
- Choose a Network: Under the Wi-Fi option, you should see a list of available networks. Select your home Wi-Fi network from the list.
- Enter Password: If prompted, enter the password for your Wi-Fi network. Make sure to enter it correctly.
- Connect: Tap the Connect button to establish a connection to your home Wi-Fi network.
- Check Connection: After connecting to the Wi-Fi network, you can test the connection by opening a web browser or any online app on your iPhone.
By following these simple steps, you can connect your iPhone to your home Wi-Fi network and gain access to your home surveillance camera.

Note: It is important to ensure that your home surveillance camera is also connected to the same Wi-Fi network for proper functionality.
Downloading and Configuring the Surveillance Camera App
Connecting your iPhone to a home surveillance camera is made possible through the use of dedicated surveillance camera apps. These apps allow you to remotely access and control your home security system using your iPhone.
Step 1: Download the App
The first step is to download a surveillance camera app onto your iPhone. You can find a variety of options available on the App Store. Look for apps that are compatible with the brand and model of your surveillance camera system.
Step 2: Install and Launch the App
Once you have chosen the app that best suits your needs, install it on your iPhone. After installation, locate the app’s icon on your home screen and tap on it to launch the app.
Step 3: Connect to Your Surveillance Camera
Follow the on-screen instructions provided by the app to connect your iPhone to your home surveillance camera. This typically involves entering the camera’s IP address or scanning a QR code provided by the camera system.

It’s worth noting that some surveillance camera apps may require you to create an account or sign in with your existing account credentials in order to access your camera system remotely.
Step 4: Configure App Settings
Once connected, you may need to adjust certain settings within the app to customize your experience. This can include setting up motion detection alerts, adjusting camera angles or resolution, and configuring recording schedules.
Take the time to explore the app’s features and settings to ensure that your surveillance camera system is optimized for your specific needs and preferences.
Note: It is highly recommended to consult your camera system’s user manual or manufacturer’s website for specific instructions on configuring the surveillance camera app.
By downloading and configuring the surveillance camera app on your iPhone, you can conveniently monitor and control your home security system from anywhere with an internet connection. Stay connected and keep an eye on your home’s safety with the power of your iPhone.

Viewing Live Footage on Your iPhone
To view live footage from your home surveillance camera on your iPhone, you will need to download and install the corresponding app provided by the camera manufacturer. Follow these steps to get started:
- Open the App Store on your iPhone.
- Search for the app by typing in the name of the camera manufacturer or the specific app name.
- Select the app from the search results.
- Download and install the app on your iPhone by tapping the “Get” button.
- Once the app is installed, open it and follow the on-screen instructions to connect it to your home surveillance camera.
- Make sure your iPhone is connected to the same Wi-Fi network as your home surveillance camera.
- After successfully connecting the app to your camera, you should be able to view live footage on your iPhone.
- Depending on the app and camera features, you may be able to control the camera’s movement, switch between different cameras, adjust settings, and even record footage directly on your iPhone.
It is important to note that some camera models may require additional setup and configuration before you can view the live footage on your iPhone. Refer to the camera’s user manual or contact the manufacturer for detailed instructions specific to your camera model.
With the ability to view live footage on your iPhone, you can easily monitor your home surveillance camera from anywhere, providing you with peace of mind and enhanced security.
Remote Access and Control of Home Surveillance Camera
One of the most important features of a home surveillance camera is the ability to remotely access and control it. This allows you to monitor your home from anywhere, using your iPhone or other mobile devices.
To set up remote access, you first need to make sure that your surveillance camera is connected to your home network. This usually involves connecting the camera to your Wi-Fi network or using an Ethernet cable to connect it to your router.
Once your camera is connected to the network, you can use a mobile app or a web browser on your iPhone to access and control it. Many surveillance camera manufacturers provide their own apps that can be downloaded from the App Store.
After installing the app on your iPhone, you will typically need to create an account and login. Once logged in, you can add your camera to the app by scanning a QR code or entering the camera’s IP address. The app will then connect to the camera and give you access to its live feed.
With remote access, you can view the live feed from your surveillance camera, as well as access recorded footage and adjust camera settings. Some apps even allow you to pan, tilt, and zoom the camera remotely, giving you full control over what you see.
Remote access also enables you to receive notifications and alerts on your iPhone when motion is detected by the camera. This can be especially useful for monitoring your home while you’re away or sleeping.
Conclusion: Remote access and control of your home surveillance camera from your iPhone provides you with peace of mind and the ability to monitor your home’s security at all times.
Additional Features and Integrations with Home Surveillance Camera
In addition to connecting your iPhone to a home surveillance camera, there are several additional features and integrations that can enhance the functionality and convenience of your system.
Email and Push Notifications
Many home surveillance cameras offer the ability to send email or push notifications to your iPhone when motion is detected. This means that you will be immediately alerted if someone enters your property or if there is any suspicious activity. You can set up custom rules to determine when these notifications are sent, ensuring you are only alerted when necessary.
Two-Way Audio
Some surveillance cameras have built-in microphones and speakers, allowing you to communicate directly with anyone on your property. From your iPhone, you can have a two-way conversation with whoever is near the camera, whether it’s a family member, delivery person, or unexpected visitor. This adds an extra layer of security and convenience.
Integration with Smart Home Devices
If you have other smart home devices, such as smart door locks, lights, or thermostats, you may be able to integrate them with your home surveillance camera. This integration allows you to create custom automation rules and triggers. For example, you can set your lights to turn on automatically when motion is detected, or have your camera start recording when your smart door lock is engaged.
Cloud Storage
Cloud storage services are becoming more popular for home surveillance systems. These services allow you to store video footage from your camera securely in the cloud, accessible from anywhere using your iPhone. With cloud storage, you don’t have to worry about running out of local storage on your device or losing video evidence in the event of a camera theft or damage.
Integration with Voice Assistants
If you have a voice assistant device like Amazon Echo or Google Home, you may be able to integrate it with your home surveillance camera. This integration allows you to control your camera using voice commands. You can ask your voice assistant to show you the live feed from your camera on your iPhone or to switch between different camera views.
By taking advantage of these additional features and integrations, you can enhance the capabilities of your home surveillance camera system and have more control and convenience right from your iPhone.
Question-answer:
Can I connect multiple surveillance cameras to my iPhone?
Yes, you can connect multiple surveillance cameras to your iPhone. Most home surveillance camera systems allow you to add multiple cameras to the same mobile app. Each camera will have its own feed and you can switch between them within the app. Make sure to check the camera’s compatibility and the mobile app’s capabilities before purchasing a camera system.
Are there any specific requirements for my iPhone to connect to a home surveillance camera?
There are generally no specific requirements for your iPhone to connect to a home surveillance camera. However, it is recommended to have the latest version of the camera’s mobile app installed on your iPhone for optimal performance. Additionally, make sure your iPhone is connected to a stable Wi-Fi network to ensure a smooth connection with the camera.
Is it possible to view the surveillance camera recordings on my iPhone?
Yes, it is possible to view surveillance camera recordings on your iPhone. Most camera apps allow you to access the recorded footage through the mobile app. You may be able to view both live feeds and recordings from the same app. However, the availability of this feature may vary depending on the specific camera system and its mobile app.
Can I control the surveillance camera functions through my iPhone?
Yes, in most cases, you can control the surveillance camera functions through your iPhone. The mobile app associated with the camera usually offers options to control features such as pan, tilt, zoom, motion detection settings, and more. You can access these functions through the app’s interface on your iPhone. Keep in mind that the availability of certain functions may depend on the specific camera model and the capabilities of the app.