
Home security is a top priority for many individuals and families today. With the advancements in technology, it has become easier to monitor and protect our homes through the use of security cameras. One of the most popular methods of accessing and viewing security camera footage is through the convenience of a smartphone, such as an iPhone. In this article, we will guide you through the process of connecting your security camera to your iPhone, ensuring that you can keep an eye on your home from anywhere.
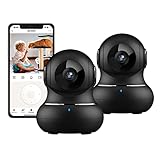
Before we dive into the technicalities, it is crucial to have the correct security camera set up in your home. There are various types and brands of security cameras available on the market, so it is essential to choose one that is compatible with your iPhone. Make sure to consider factors such as video quality, night vision capabilities, and remote access options.
Once you have chosen the perfect security camera, the next step is to establish a connection between the camera and your iPhone. This can be done through a variety of methods, such as using a dedicated app provided by the camera manufacturer or utilizing third-party software. Depending on your camera’s specifications, you may need to connect it to your home’s Wi-Fi network or use other alternative means.
Once the connection has been established, you can now access your security camera’s live feed and recorded footage directly from your iPhone. This allows you to monitor your home in real-time and receive notifications on any suspicious activities or events. Additionally, you can conveniently review past recordings and save important footage for future reference.
Connecting your security camera to your iPhone provides you with peace of mind and a sense of security, knowing that you can keep a watchful eye on your home at all times. Follow the steps outlined in this article, and you will be well on your way to ensuring the safety of your home and loved ones.
Step-by-Step Guide
Connecting your security camera to your iPhone can provide you with peace of mind and the ability to monitor your home or office from anywhere. Follow these simple steps to set up the connection:
| Step 1: | Download the security camera app from the App Store onto your iPhone. |
| Step 2: | Open the app and create an account if necessary. Sign in using your credentials. |
| Step 3: | Ensure your security camera is properly installed and connected to your Wi-Fi network. |
| Step 4: | On your iPhone, go to the Settings app and navigate to the Wi-Fi section. |
| Step 5: | Look for the Wi-Fi network name associated with your security camera and select it. |
| Step 6: | Once connected to the camera’s network, return to the security camera app. |
| Step 7: | In the app, locate the “Add Camera” or “Connect Camera” option and select it. |
| Step 8: | Follow the on-screen prompts to connect your security camera to your iPhone. |
| Step 9: | Once the connection is established, you should be able to view live video footage from your security camera on your iPhone. |
| Step 10: | Explore the app’s features to customize notifications, set up motion detection, and access recorded footage. |
By following these step-by-step instructions, you will be able to seamlessly connect your security camera to your iPhone and enjoy the benefits of remote monitoring and surveillance.
Choose a compatible security camera
When selecting a security camera to connect to your iPhone, it’s important to choose one that is compatible with the device. Here are some factors to consider:
- Compatibility with your iPhone model: Ensure that the security camera you choose is compatible with your specific iPhone model. Check the camera’s specifications or consult with the manufacturer to verify compatibility.
- Connectivity options: Consider the different options available for connecting the camera to your iPhone. Some cameras may offer Wi-Fi connectivity, while others may require a wired connection. Choose the option that best suits your needs and preferences.
- Mobile app support: Check if the security camera has a dedicated mobile app that is compatible with iPhones. A mobile app can provide you with convenient access to live video feeds, motion alerts, and other camera settings.
- Video resolution and quality: Consider the camera’s video resolution and quality to ensure clear and detailed footage. Higher-resolution cameras can provide sharper images and videos, allowing for better overall surveillance.
- Additional features: Look for any additional features that may be important to you, such as night vision, motion detection, two-way audio, and cloud storage options. These features can enhance the functionality and effectiveness of the security camera.
By considering these factors and doing some research, you can choose a security camera that is compatible with your iPhone and meets your specific needs for surveillance and security.
Install the security camera
To connect your security camera to your iPhone, you first need to install the camera in the desired location. Before getting started, make sure you have a clear idea of where you want to position the camera to maximize its effectiveness.

Here are the steps to install your security camera:
- Choose the location: Select a spot for your camera that provides a clear view of the area you want to monitor. It’s essential to place the camera at a height that captures the desired field of view while keeping it discreet.
- Mount the camera: Use the mounting hardware provided with your camera to attach it securely to a wall, ceiling, or other suitable surface. Ensure that the camera is positioned correctly and tightly secured to prevent any movement or tampering.
- Connect power source: If your camera requires a power source, plug it in using the power adapter provided. Make sure the power supply is reliable and accessible.
- Set up Wi-Fi (if applicable): If your security camera supports Wi-Fi connectivity, follow the manufacturer’s instructions to connect it to your home network. This step typically involves downloading a mobile app and following the setup wizard.
- Adjust camera settings: Once the camera is installed and powered on, use the mobile app or the camera’s web interface to configure the settings. You may need to set up motion detection, adjust image quality, or define recording schedules.
- Test and optimize: After setting up the camera, check its functionality by viewing the live feed on your iPhone. Make any necessary adjustments to the camera’s position or settings to optimize its performance and ensure the desired coverage.
By following these installation steps, you can connect your security camera to your iPhone and have peace of mind knowing that you can monitor your property from anywhere at any time.
Download the camera’s app
To connect your security camera to your iPhone, the first step is to download the dedicated app for your camera. Most security camera brands have their own apps that allow you to remotely access and control your camera. These apps are usually available for free on the App Store.
Follow these steps to download the camera app:
- Open the App Store on your iPhone.
- Tap on the search tab at the bottom of the screen.
- Type in the name of the camera’s brand or model.
- Tap on the search button.
- Look for the official app developed by the camera brand and tap on it.
- Tap on the “Get” or “Install” button to begin downloading the app.
- Wait for the app to download and install on your iPhone.
- Once the app is installed, tap on the app icon to launch it.
After downloading the app, you may need to create an account or sign in with your existing account to access the camera’s features. Make sure to follow the instructions provided by the app to complete the setup and connect your security camera to your iPhone.

Connect your iPhone to the same network
In order to connect your security camera to your iPhone, you need to make sure that both devices are connected to the same network. This is important for the camera and your iPhone to communicate with each other and for you to be able to access the camera’s live feed and recordings.
Steps to connect your iPhone to the same network:
- Ensure that your iPhone is connected to a Wi-Fi network.
- Go to the Settings app on your iPhone.
- Scroll down and tap on “Wi-Fi”.
- You will see a list of available Wi-Fi networks. Tap on the network that your security camera is connected to.
- Enter the password for the network if prompted.
- Wait for your iPhone to connect to the network.
- Once your iPhone is connected to the same network as your security camera, you can proceed with the next steps to set up the camera on your iPhone.
By ensuring that both your security camera and iPhone are connected to the same network, you will be able to seamlessly access your camera’s live feed and recordings on your iPhone’s security camera app.
Pair your camera with your iPhone
Before you can connect your security camera to your iPhone, you need to pair the camera with your device. Here’s how to do it:
- Ensure that your security camera is powered on and connected to the same Wi-Fi network as your iPhone.
- Open the app provided by your camera’s manufacturer on your iPhone.
- Select the option to add a new camera or device.
- Follow the on-screen instructions to put your camera in pairing mode. This may involve pressing a button on the camera or scanning a QR code.
- Once your camera is in pairing mode, your iPhone will scan for available cameras. Select your camera from the list of detected devices.
- Enter the necessary credentials or information requested by the app to complete the pairing process.
- Wait for the app to establish a connection between your camera and your iPhone. This may take a few minutes.
Once the pairing process is complete, you should be able to view the live feed from your security camera on your iPhone. You may also have access to additional features and settings depending on the app and camera model.
Adjust camera settings
Once you have successfully connected your security camera to your iPhone, you may want to adjust its settings to optimize your surveillance experience. Most security cameras come with a dedicated mobile app that allows you to control and customize various camera settings on your iPhone.

Here are some common camera settings you can adjust:
- Camera angle: You can change the camera angle to ensure it covers the desired area. Experiment with different angles to find the best view.
- Video quality: Adjust the video quality settings to optimize the balance between video clarity and storage space. Higher quality videos may consume more space.
- Motion detection: Enable or customize the motion detection feature to receive notifications whenever motion is detected in the camera’s view. This can help you stay informed about any possible intrusions.
- Night vision: If your security camera has night vision capabilities, you can adjust the night vision settings to enhance visibility in low-light conditions.
- Recording options: Some security cameras allow you to choose the recording options, such as continuous recording or recording only when motion is detected. Select the option that suits your needs and saves storage space.
- Audio settings: If your security camera has a built-in microphone, you can adjust the audio settings to enable or disable audio recording.
- Cloud storage: Depending on the camera model, you may have the option to enable cloud storage for storing recorded footage. This can provide an extra layer of security to your data.
Remember to save any changes you make to the camera settings for them to take effect. Experiment with different settings and find the configuration that works best for your specific surveillance needs.
View your security camera footage on iPhone
If you have installed a security camera system and want to view the footage on your iPhone, you can easily do so by following these simple steps:
1. Install the security camera app: Search for and download a security camera app from the App Store. There are many options available, including popular ones like “iCamViewer” or “Foscam.” Make sure to choose an app that is compatible with your specific camera system.
2. Configure the app: Once the app is downloaded, open it and follow the on-screen instructions to configure it. You will need to enter the IP address, username, and password for your security camera system. You can usually find this information in the user manual or on the camera system itself.

3. Connect your iPhone to your security camera system: Make sure that your iPhone is connected to the same Wi-Fi network as your security camera system. This is important for establishing a connection between your iPhone and the cameras. If you are not on the same network, you may need to connect to a VPN (Virtual Private Network) to access the cameras remotely.
4. View the camera footage: Once your iPhone is connected to the security camera system, you can start viewing the camera footage. Open the app and navigate through the interface to find the cameras you want to view. You may be able to view multiple cameras simultaneously or switch between them.
5. Control the cameras: Most security camera apps allow you to control the cameras remotely. Depending on the features of your specific app, you may be able to zoom in and out, pan left and right, tilt up and down, or even activate certain camera settings.
By following these steps, you will be able to conveniently view your security camera footage on your iPhone, giving you peace of mind and ensuring the safety of your property.
Question-answer:

Can I connect multiple security cameras to my iPhone?
Yes, you can connect multiple security cameras to your iPhone. Most camera apps support the ability to add and manage multiple cameras within the same app. You can simply repeat the process of adding a camera for each additional camera you want to connect. Once added, you will be able to view all the camera feeds simultaneously or switch between them in the app, giving you complete control and monitoring capability over all your cameras from a single device.


