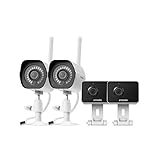
If you have a Zmodo camera and want to connect it to your iPhone, you’re in the right place. Zmodo cameras offer a range of features and functionalities that can enhance the security of your home or workplace. By connecting your Zmodo camera to your iPhone, you can easily monitor live video feeds, receive motion detection alerts, and even communicate with people at your camera’s location.
Connecting your Zmodo camera to your iPhone is a straightforward process that can be done in a few simple steps. First, you’ll need to download and install the Zmodo app from the App Store. Once the app is installed, open it on your iPhone and create a Zmodo account if you don’t already have one.
Next, you’ll need to connect your camera to your Wi-Fi network. This can usually be done through the camera’s settings menu or by pressing a reset button on the camera itself. Follow the instructions provided by Zmodo to successfully connect your camera to your Wi-Fi network. Once your camera is connected, open the Zmodo app on your iPhone and log in to your Zmodo account.
After logging in, you should see your camera listed in the app. Tap on the camera’s name to view the live video feed. From here, you can access additional features such as motion detection alerts, two-way audio communication, and video recording. You can also customize settings and preferences to fit your specific needs.
With your Zmodo camera successfully connected to your iPhone, you can now enjoy the benefits of remote monitoring and increased security. Whether you’re at home, in the office, or on the go, you’ll have peace of mind knowing that you can keep an eye on your property from the convenience of your iPhone. So, go ahead and connect your Zmodo camera to your iPhone today!
Step-by-Step Guide: How to Connect Zmodo Camera to iPhone
Connecting your Zmodo camera to your iPhone is a straightforward process that allows you to monitor your home or office from anywhere. Follow these simple steps to get started:
Step 1: Download and Install the Zmodo App
The first step is to download and install the Zmodo app on your iPhone. You can find the app in the App Store by searching for “Zmodo”. Once you find the app, tap on the “Get” or “Install” button to start the download. Wait for the app to install on your device.
Step 2: Create a Zmodo Account
After installing the Zmodo app, open it and click on “Sign Up” to create a new Zmodo account. Enter your email address, create a strong password, and click on “Sign Up” to complete the registration process. If you already have a Zmodo account, simply log in using your credentials.
Step 3: Add your Camera
Once you have logged in to the Zmodo app, tap on the “+” icon or “Add Device” button to add your Zmodo camera. You will need to follow the on-screen instructions to put your camera into pairing mode. This typically involves pressing a reset button or scanning a QR code on the camera.
Step 4: Connect your Camera to Wi-Fi
After putting your camera into pairing mode, the Zmodo app will search for the camera and display it on the screen. Tap on the camera’s name and enter your Wi-Fi network credentials to connect the camera to your home or office network. Wait for the camera to connect to the Wi-Fi network.

Step 5: Name your Camera
Once your camera is successfully connected to Wi-Fi, you will be prompted to name your camera. Choose a descriptive name that will help you identify the camera easily. For example, you can name it “Front Door” or “Living Room”. Tap on “Save” to complete the camera setup process.
That’s it! Now your Zmodo camera is successfully connected to your iPhone. You can access the live video feed, view recorded footage, and manage your camera settings through the Zmodo app. Make sure to keep the app updated to take advantage of any new features.
Download Zmodo App
If you want to connect your Zmodo camera to your iPhone, you will need to download the Zmodo App, which is available for free from the App Store. The Zmodo App allows you to easily set up and manage your Zmodo camera from your iPhone.
Step 1: Open the App Store
On your iPhone, tap on the App Store icon to open it.
Step 2: Search for Zmodo App
In the App Store, tap on the search bar and enter “Zmodo App” to search for it.
Step 3: Download and Install
Once you find the Zmodo App in the search results, tap on it to open the app page. Then, tap on the “Get” button next to the app icon to download and install it on your iPhone.
After the installation is complete, the Zmodo App icon will appear on your iPhone’s home screen.
Note:
You will need to have an Apple ID and be signed in to the App Store in order to download apps.
Make sure to check the system requirements for the Zmodo App to ensure compatibility with your iPhone model and operating system version.
By following these steps and downloading the Zmodo App, you will be ready to connect your Zmodo camera to your iPhone and start monitoring your home or business premises.
Create a Zmodo Account
In order to connect your Zmodo camera to your iPhone, you will first need to create a Zmodo account. Follow the steps below to create your account:
- Download and install the Zmodo app from the App Store on your iPhone.
- Open the Zmodo app and tap on the “Sign Up” button.
- Enter your email address and create a password for your account.
- Review and accept the terms of service and privacy policy.
- Complete the additional information fields, such as your first and last name, phone number, and address.
- Tap on the “Sign Up” button to create your account.
- Check your email inbox for a verification email from Zmodo.
- Click on the verification link in the email to verify your account.
Once you have created and verified your Zmodo account, you will be able to connect your Zmodo camera to your iPhone and access its live video feed and other features through the Zmodo app.
Power On the Zmodo Camera
Before connecting your Zmodo camera to your iPhone, make sure to properly power it on. Follow these steps:
| Step 1: | Find an appropriate location for your Zmodo camera where it can be plugged into a power outlet. |
| Step 2: | Take the power adapter that came with your Zmodo camera and insert it into the power input port on the camera. |
| Step 3: | Plug the other end of the power adapter into a nearby power outlet. |
| Step 4: | Wait a few moments for the camera to power on. You may see a light or hear a sound indicating that it is starting up. |
| Step 5: | Once the camera is powered on, you’re ready to connect it to your iPhone. |
By following these steps, you’ll ensure that your Zmodo camera has the necessary power to establish a connection with your iPhone.
Connect the Zmodo Camera to Wi-Fi
To connect your Zmodo camera to your iPhone, you first need to make sure that the camera is connected to your Wi-Fi network. Follow these steps to connect your Zmodo camera to Wi-Fi:
- Make sure your Wi-Fi network is up and running.
- On your Zmodo camera, locate the setup button. This button is usually located on the back or bottom of the camera.
- Press and hold the setup button until you hear a beep. This will activate the Wi-Fi pairing mode on your camera.
- On your iPhone, go to the Settings app and tap on Wi-Fi.
- In the list of available Wi-Fi networks, look for the network name that starts with “ZMD_SAP”. This is the network created by your Zmodo camera.
- Tap on the ZMD_SAP network to connect to it.
- Once you are connected to the ZMD_SAP network, go back to the Settings app and tap on the Zmodo app.
- Follow the on-screen instructions to complete the setup process. You will be asked to enter your Wi-Fi network name and password.
- After entering the Wi-Fi network name and password, tap on the “Connect” button.
- Your Zmodo camera will now connect to your Wi-Fi network. This may take a few minutes.
- Once the connection is successful, you will see a message on your iPhone confirming the connection.
- You can now open the Zmodo app on your iPhone to view and control your Zmodo camera.
By following these steps, you can easily connect your Zmodo camera to your Wi-Fi network and start using it with your iPhone.
Add Zmodo Camera to the App
To connect your Zmodo camera to your iPhone, you can follow these simple steps:
Step 1: Download the Zmodo app from the App Store on your iPhone. Make sure you have a stable internet connection before proceeding.
Step 2: Launch the Zmodo app on your iPhone and create a new account if you haven’t already. If you already have an account, simply login with your credentials.

Step 3: Once logged in, tap on the “+” icon in the top-right corner of the app’s home screen to add a new device.
Step 4: Select “Add Device” and then choose “Zmodo Camera” from the list of available options.
Step 5: Now, plug in your Zmodo camera and make sure it is in setup mode. This is usually indicated by a blinking green status light.
Step 6: Follow the on-screen instructions in the app to connect your Zmodo camera to your iPhone. This will typically involve scanning a QR code on the camera or manually entering the camera’s serial number.
Step 7: Once the camera is successfully connected, you can customize its settings and view the live feed from your iPhone using the Zmodo app.

Note: It is important to note that the exact steps may vary slightly depending on the model of your Zmodo camera and the version of the Zmodo app you are using. However, the general process should be similar.
Enable Push Notifications
To ensure that you receive instant notifications on your iPhone whenever there is any activity detected by your Zmodo camera, you need to enable push notifications. Here are the steps to do it:
Step 1: Install the Zmodo App
If you haven’t already, download and install the Zmodo app from the App Store on your iPhone.
Step 2: Open the Zmodo App
Open the Zmodo app on your iPhone by tapping on its icon.
Step 3: Log In to Your Account
Enter your Zmodo account credentials and log in to your account. If you don’t have an account, create one by tapping on the “Sign Up” button and following the on-screen instructions.

Step 4: Access Device Settings
Once you are logged in, tap on the menu icon (usually represented by three horizontal lines) located in the top-left corner of the app’s main screen. From the menu, select “Devices” to access your Zmodo camera’s settings.
Step 5: Select Your Camera
In the “Devices” screen, locate and select the Zmodo camera that you want to enable push notifications for.
Step 6: Enable Push Notifications
In your camera’s settings, scroll down to the “Notifications” section. Toggle the switch next to “Push Notifications” to enable it.
| Note: | If the switch is already enabled, you don’t need to do anything. Push notifications are already enabled for your camera. |
Step 7: Customize Notification Settings (Optional)
If you want to customize the notifications you receive, you can tap on the “Customize” button in the “Notifications” section. From there, you can choose the types of events you want to be notified about, such as motion detection or sound alerts.
That’s it! You have successfully enabled push notifications for your Zmodo camera on your iPhone. Now, whenever there is any activity detected by your camera, you will receive instant notifications on your device.
Access Live View on Your iPhone
Here are the steps to connect your Zmodo camera to your iPhone and access the live view:
- Download and install the Zmodo app from the App Store on your iPhone.
- Launch the Zmodo app and create a new account or log in to your existing account.
- Once logged in, tap the “+” button to add a new device.
- Select “Add Camera” and choose the method of adding the camera: either by scanning the QR code on the camera or by entering its serial number manually.
- Follow the on-screen instructions to complete the camera setup process.
- Once the camera is successfully added, go back to the app’s home screen.
- Tap on the camera’s thumbnail or name to access the live view.
- Wait for the app to establish a connection with the camera. This may take a few moments.
- Once the connection is established, you will be able to see the live view from your Zmodo camera on your iPhone.
Now you can monitor your camera’s feed and access the live view whenever you want using your iPhone and the Zmodo app.
Troubleshooting Tips
- Make sure your iPhone is connected to a stable Wi-Fi or cellular network.
- Ensure that the camera is connected to a power source and turned on.
- Double-check that you entered the correct serial number or scanned the QR code accurately during the camera setup.
- If you are still unable to access the live view, try restarting both your iPhone and the camera, then repeat the setup process.
Conclusion
By following these simple steps, you can easily connect your Zmodo camera to your iPhone and access the live view through the Zmodo app. Enjoy monitoring your camera’s feed from your iPhone at any time, from anywhere.
Question-answer:
What is Zmodo camera?
Zmodo camera is a home surveillance camera that allows you to monitor and record activities in and around your home.
How do I connect Zmodo camera to iPhone?
To connect Zmodo camera to iPhone, you need to download the Zmodo app from the App Store. Once downloaded, open the app and create an account. Then, follow the on-screen instructions to add the camera to your account. Once the camera is successfully added, you can access it from your iPhone.

Can I view my Zmodo camera remotely on my iPhone?
Yes, you can view your Zmodo camera remotely on your iPhone. As long as your iPhone is connected to the internet, you can access the Zmodo app and see the live video feed from your camera from anywhere.