GoPro is a popular brand of action cameras known for their compact size and high-quality footage. With the advancements in technology, it is now possible to control a GoPro camera using a Raspberry Pi.
Raspberry Pi is a credit card-sized computer that can be used for various projects, including home automation, robotics, and now, controlling a GoPro camera. By connecting the Raspberry Pi to the GoPro camera, we can send commands to control the camera’s settings, take pictures, or record videos.
This article will guide you through the process of setting up your Raspberry Pi to control a GoPro camera, allowing you to remotely operate the camera and capture stunning footage without physically touching the camera.
Requirements:
- Raspberry Pi (any model)
- GoPro camera (compatible with Wi-Fi)
- Wi-Fi dongle or built-in Wi-Fi on Raspberry Pi
- MicroSD card
- USB power supply for Raspberry Pi
Before we begin, make sure your Raspberry Pi is up and running with the latest version of Raspbian installed. Additionally, ensure that your GoPro camera is connected to the same Wi-Fi network as your Raspberry Pi.
Note: The following steps are based on using a Raspberry Pi with Raspbian OS. If you are using a different operating system, the steps might vary slightly.
What is GoPro Camera
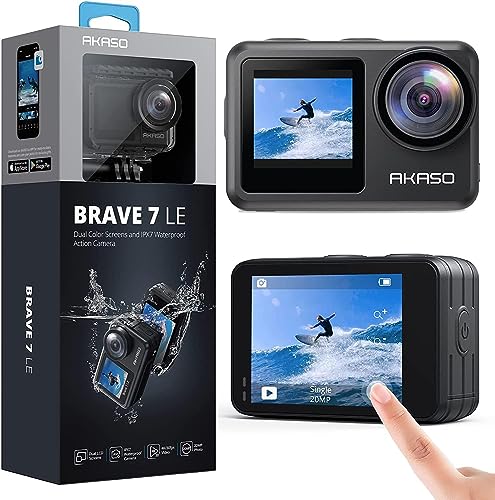
The GoPro Camera is a popular high-definition camera used for capturing action-packed moments in extreme sports and adventurous activities. It is a compact and durable camera that is known for its wide-angle lens and rugged design, allowing users to capture stunning footage in various outdoor and challenging environments.
The GoPro Camera was first introduced in 2004 and has since gained widespread popularity among athletes, filmmakers, and outdoor enthusiasts. It is equipped with advanced features such as waterproofing, image stabilization, and voice control, making it highly versatile and suitable for capturing high-quality videos and photos in various situations.
The camera is known for its ability to record in stunning 4K resolution, providing users with exceptional clarity and detail. It also offers different shooting modes and customizable settings, allowing users to capture their desired footage with ease.
Additionally, the GoPro Camera comes with a mobile app and desktop software that enable users to control the camera remotely, preview footage, and edit videos directly on their smartphones or computers. This feature makes it convenient for users to share their captured moments with friends and family instantly.

Key Features of GoPro Camera:
- Wide-angle lens: The GoPro Camera is equipped with a wide-angle lens that allows users to capture a larger field of view, making it ideal for action-packed shots and scenic landscapes.
- Rugged design: The camera is designed to withstand extreme environments and is built with a durable housing that is waterproof and shockproof. This makes it ideal for outdoor adventures and underwater activities.
- 4K resolution: The GoPro Camera can capture videos in stunning 4K resolution, providing users with ultra-high-definition footage with excellent clarity and detail.
- Image stabilization: It features advanced image stabilization technology that helps reduce camera shake and ensures smooth and steady footage even in challenging conditions.
- Voice control: The camera supports voice commands, allowing users to control the camera hands-free. This feature is particularly useful when capturing footage in situations where manual control is not possible.
Overall, the GoPro Camera is a versatile and reliable camera that is designed to capture moments of adventure and excitement. Its compact size, advanced features, and rugged design make it an excellent choice for anyone looking to capture high-quality footage in extreme conditions.
What is Raspberry Pi
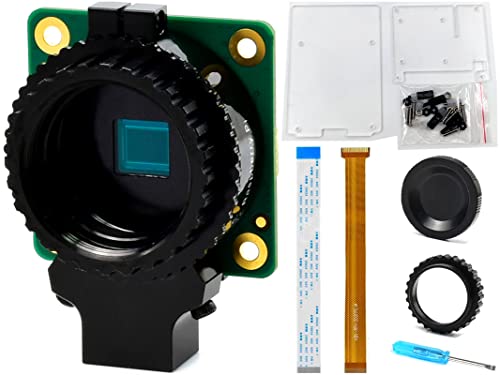
Raspberry Pi is a small, single-board computer that was created to encourage and support the teaching of basic computer science in schools. It was developed by the Raspberry Pi Foundation, a UK-based charity, with the goal of making computing more accessible and affordable for people of all ages and backgrounds.
The Raspberry Pi board is about the size of a credit card and has all the essential components of a computer, including a CPU, memory, and inputs/outputs. It is capable of running a full operating system, such as Linux, and can be connected to a monitor, keyboard, and mouse, just like a traditional desktop computer.
One of the key features of Raspberry Pi is its GPIO (General Purpose Input/Output) pins, which allow users to connect and control external devices, such as sensors, motors, and cameras. This makes Raspberry Pi a popular choice for projects involving robotics, home automation, and Internet of Things (IoT).
Raspberry Pi has gained a large and active community of users and developers, who share their knowledge and projects through online forums and websites. This community has contributed to the development of various software and hardware add-ons, expanding the capabilities of Raspberry Pi and making it even more versatile.

| Key Features: |
| Small, affordable, and portable |
| Capable of running an operating system |
| GPIO pins for connecting external devices |
| Supports a wide range of programming languages |
| Large and active community |
How to Connect GoPro Camera to Raspberry Pi
If you want to control your GoPro camera using a Raspberry Pi, you’re in luck! With a few simple steps, you can connect these two powerful devices and unleash a whole new range of possibilities.
Step 1: Gather the necessary components
Before you begin, make sure you have all the required components:
- Raspberry Pi board
- GoPro camera
- Micro USB cable
- Micro HDMI cable
- SD card for Raspberry Pi
Step 2: Set up the Raspberry Pi
First, insert the SD card into your Raspberry Pi and connect it to a power source using a micro USB cable. Connect the Raspberry Pi to a monitor or TV using the micro HDMI cable.
Step 3: Connect the GoPro camera
To connect the GoPro camera to the Raspberry Pi, you’ll need a USB cable. Connect one end of the USB cable to the USB port on the GoPro camera, and the other end to one of the available USB ports on the Raspberry Pi.
Step 4: Install required software
Next, you’ll need to install the necessary software on your Raspberry Pi. Open the terminal and run the following commands:

- Update the Raspberry Pi:
sudo apt-get update && sudo apt-get upgrade -y - Install the GoPro Python library:
sudo pip install gopro
Step 5: Control the GoPro camera
Now that your GoPro camera is connected to the Raspberry Pi and the required software is installed, you can start controlling the camera. Use the GoPro Python library documentation to learn how to take photos, record videos, and change camera settings.
With the camera connected to the Raspberry Pi, the possibilities are endless. You can use the Raspberry Pi’s GPIO pins to trigger the camera remotely, create time-lapse videos, or even build a robot that uses the GoPro camera for vision.
Enjoy exploring the potential of your GoPro camera and Raspberry Pi together!
Hardware Requirements
To control a GoPro camera with a Raspberry Pi, you will need the following hardware:
1. Raspberry Pi: The heart of your project, a Raspberry Pi is a small, single-board computer that will serve as the brain for controlling your GoPro camera.

2. GoPro Camera: You will need a GoPro camera to capture photos and videos. Ensure that your camera is compatible with the GoPro Developer API and supports Wi-Fi connectivity.
3. microSD Card: You will need a microSD card to install the operating system, software, and code for your Raspberry Pi. Make sure to choose a card with sufficient storage capacity.
4. Power Supply: A power supply is required to provide power to your Raspberry Pi. Make sure to use a power supply that is compatible with your Raspberry Pi model.
5. Wi-Fi Dongle: If your Raspberry Pi model does not have built-in Wi-Fi, you will need a Wi-Fi dongle to establish a wireless connection with your GoPro camera.
6. USB Cable: You will need a USB cable to connect your Raspberry Pi with your GoPro camera. Ensure that the USB cable is compatible with both your Raspberry Pi and GoPro camera.

With these hardware components, you will have everything you need to start controlling your GoPro camera with your Raspberry Pi.
Software Configuration
Before we can start controlling the GoPro camera with Raspberry Pi, we need to install and configure the necessary software.
First, make sure that your Raspberry Pi is up to date by running the following commands:
sudo apt-get update
sudo apt-get upgrade
Next, we need to install the GoPro API Python library. Open a terminal on your Raspberry Pi and run the following commands:

git clone https://github.com/KonradIT/gopro-py-api.git
cd gopro-py-api
sudo python setup.py install
Once the installation is complete, we need to enable the Wi-Fi on the GoPro camera. To do this, turn on your GoPro camera and navigate to the Settings menu. Then, go to Connectivity and select Wi-Fi. Enable the Wi-Fi and connect your Raspberry Pi to the Wi-Fi network of the GoPro camera.
Now, we can test the connection between the Raspberry Pi and the GoPro camera by running a simple script. Open a new Python file and enter the following code:
import re
from goprocam import GoProCamera
gopro = GoProCamera.GoPro()
print(gopro.getInfoCamera())
Save the file and run it. If everything is set up correctly, you should see the camera information printed in the terminal.
With the software properly installed and configured, we are now ready to start controlling the GoPro camera using the Raspberry Pi.
How to Control GoPro Camera with Raspberry Pi
If you have a GoPro camera and a Raspberry Pi board, you can combine them to create a powerful remote control system. Controlling your GoPro camera using a Raspberry Pi opens up a world of possibilities for automation and remote operation.
Requirements:
To control your GoPro camera with Raspberry Pi, you will need:
- Raspberry Pi board
- GoPro camera
- Micro HDMI cable
- Micro USB cable
Step 1: Connect Raspberry Pi to GoPro Camera
First, connect your GoPro camera to the Raspberry Pi board using the micro HDMI cable. This will allow you to view the camera’s live feed on the Raspberry Pi’s display.
Next, connect the GoPro camera to the Raspberry Pi using the micro USB cable. This will provide power to the camera from the Raspberry Pi.
Step 2: Install Dependencies
Before you can start controlling your GoPro camera with Raspberry Pi, you need to install the necessary dependencies. Open the terminal on your Raspberry Pi and run the following commands:
sudo apt-get update
sudo apt-get install python3
sudo apt-get install libusb-1.0-0-dev
sudo apt-get install libglfw3-dev
These commands will update your system, install Python 3, and install the required libraries for interacting with the GoPro camera.
Step 3: Set Up the GoPro API
The next step is to set up the GoPro API on your Raspberry Pi. This API allows you to send commands to the GoPro camera and receive information from it.
Clone the GoPro API repository by running the following command in the terminal:
git clone https://github.com/KonradIT/gopro-py-api.gitOnce the repository is cloned, navigate to the “gopro-py-api” directory:
cd gopro-py-apiInstall the required Python packages by running:
pip install -r requirements.txtAfter the installation is complete, you can test the GoPro API by running the example script:
python example.pyThis script should connect to your GoPro camera and print out information about it.
Step 4: Control Your GoPro Camera
Now that everything is set up, you can start controlling your GoPro camera with Raspberry Pi. By using the GoPro API, you can take photos, record videos, change camera settings, and more.
Write your own Python script or modify the example script to implement the desired functionality. You can find the documentation for the GoPro API in the “examples” directory of the “gopro-py-api” repository.
With the power of Raspberry Pi and the flexibility of the GoPro API, you can unleash your creativity and build amazing projects. Whether it’s creating a time-lapse video, capturing footage from a remote location, or automating camera control, the possibilities are endless.
Note: Make sure to handle your GoPro camera with care and follow the safety guidelines provided by GoPro. Always be aware of your surroundings and ensure proper usage of the camera.
Now you know how to control a GoPro camera with Raspberry Pi. It’s time to start experimenting and creating your own projects. Have fun!
Setting up the Wi-Fi Connection
In order to control your GoPro camera with your Raspberry Pi, you will need to set up a Wi-Fi connection between the two devices. This will allow you to send commands and receive data from the camera using the Pi. Here are the steps to set up the Wi-Fi connection:
Step 1: Check your hardware
Make sure that you have a Wi-Fi dongle or a Raspberry Pi with built-in Wi-Fi capabilities. If you don’t have one, you will need to purchase a compatible Wi-Fi dongle and connect it to your Pi.
Step 2: Install the necessary software
Next, you will need to install the necessary software on your Raspberry Pi to enable Wi-Fi communication with your GoPro camera. One popular software option is the gopro-wifi-web-api library, which provides a Python interface for controlling the camera over Wi-Fi. You can install this library by running the following command in the terminal:
pip install gopro-wifi-web-apiStep 3: Connect to the GoPro Wi-Fi network
Now, turn on your GoPro camera and navigate to the Wi-Fi settings. Enable the Wi-Fi network and note down the network name and password. On your Raspberry Pi, open the Wi-Fi settings and connect to the GoPro Wi-Fi network using the network name and password.
Step 4: Test the connection
Once you are connected to the GoPro Wi-Fi network, you can test the connection by running a simple Python script. Open a new terminal window, navigate to the directory where you have installed the gopro-wifi-web-api library, and run the following command:
python test_connection.pyIf the connection is successful, you should see a message indicating that the connection to the GoPro camera was established. You can now proceed to control the camera using your Raspberry Pi.
Establishing Communication with GoPro Camera
In order to control your GoPro camera using a Raspberry Pi, you first need to establish a communication link between the two devices. This can be done using the GoPro WiFi API.
The GoPro WiFi API allows you to send commands to the camera and retrieve information from it. To establish a connection, you need to connect your Raspberry Pi to the GoPro camera’s WiFi network. This can be done by configuring your Raspberry Pi to connect to the camera’s network using the SSID and password provided by GoPro.
Once you have successfully connected your Raspberry Pi to the GoPro camera’s WiFi network, you can start sending commands to the camera. The GoPro WiFi API provides a list of available commands that you can use to control various aspects of the camera, such as starting and stopping recordings, taking photos, and changing camera settings.
Sending Commands
To send a command to the GoPro camera, you need to use the GoPro WiFi API’s command URL. This URL specifies the command you want to send and any additional parameters that may be required.
For example, to start recording a video, you can send the following command:
http://10.5.5.9/gp/gpControl/command/shutter?p=1This command will instruct the camera to start recording. The “p” parameter is set to “1” to indicate that the command is to start recording. You can find a list of available commands and their parameters in the GoPro WiFi API documentation.
Retrieving Information
In addition to sending commands, you can also retrieve information from the GoPro camera using the GoPro WiFi API. This allows you to get details about the camera’s current status, such as the battery level, remaining recording time, and the current camera mode.
To retrieve information, you can use the GoPro WiFi API’s status URL. This URL will return a JSON response containing the requested information. For example, to retrieve the camera’s current mode, you can send the following command:
http://10.5.5.9/gp/gpControl/statusThis command will return a JSON response that includes the camera’s current mode, such as “video” or “photo”. You can parse this response to extract the information you need.
By establishing communication with the GoPro camera using the GoPro WiFi API, you can have full control over the camera’s features and retrieve important information. This allows you to integrate the GoPro camera into your Raspberry Pi projects and automate various tasks.
Question-answer:
What is GoPro camera?
GoPro is a brand of action cameras that are widely used for capturing high-quality videos and photos in extreme conditions. These cameras are known for their durability and compact size, making them popular among adventurers, athletes, and vloggers.
What is Raspberry Pi?
Raspberry Pi is a small, single-board computer that can be used for various DIY projects and as a platform for learning about coding and electronics. It has become popular due to its affordability, versatility, and community support.