Converting a reel camera to digital is a process that many photographers and enthusiasts are interested in. Reel cameras, also known as film cameras, were widely used in the past to capture images on film. However, with the advancements in technology, digital cameras have become the norm.
Converting a reel camera to digital can be a great way to preserve your old film photos and make them accessible in the digital age. It allows you to easily share your images online, edit them digitally, and store them more conveniently on various devices.
There are several ways to convert a reel camera to digital. One option is to use a film scanner. Film scanners can scan your film negatives or slides and convert them into digital files. This method preserves the original image quality and allows for further editing in digital software.
Another option to convert a reel camera to digital is by using a digital camera with a macro lens or a camera scanning adapter. With this method, you take a picture of the photo or film negative using the digital camera, and then transfer the image to your computer for further processing.
Converting a reel camera to digital is a rewarding process that allows you to revive old memories and give them new life in the digital world. Whether you choose to use a film scanner or a digital camera, the end result will be a collection of digital images that can be easily shared and enjoyed for years to come.

Transition from Analogue to Digital
Introduction
As technology continues to advance, the transition from analogue to digital has become inevitable. This shift has had a significant impact on various industries, including photography. In this article, we will explore the process of converting a reel camera to a digital format.
Benefits of Going Digital
The transition from analogue to digital photography offers several advantages. Firstly, digital cameras provide instant feedback, allowing photographers to review their shots immediately. This eliminates the need to wait for film processing, saving both time and money.
Additionally, digital images can be easily edited, enhancing their quality and making them more appealing. With the ability to manipulate settings such as exposure, contrast, and saturation, photographers have greater control over the final result.

Furthermore, digital cameras offer the convenience of storing numerous images on a memory card, eliminating the need for physical film rolls. This not only reduces the cost of purchasing film but also allows photographers to capture an unlimited number of photos without worrying about running out of film.
Converting a Reel Camera to Digital
Converting a reel camera to digital involves several steps. The first step is to find a suitable digital camera with features that match your needs and preferences. Consider factors such as image quality, resolution, and the ability to interchange lenses.
Once you have chosen a digital camera, you will need to connect it to your reel camera using an adapter. This allows the digital camera to capture the image projected onto the reel camera’s film plane. Ensure that the adapter is compatible with both cameras to ensure a seamless transition.
Once the digital camera is attached, familiarize yourself with its settings and controls. Adjusting settings such as ISO, aperture, and shutter speed will allow you to achieve the desired exposure and depth of field.

After capturing the image, transfer it to a computer or storage device for further editing and processing. This is where you can take advantage of various software applications to enhance the image, adjust colors, and even remove any imperfections.
Conclusion
The transition from analogue to digital photography opens up a world of possibilities for photographers. The ability to instantly review and edit photos, along with the convenience of digital storage, makes the process more efficient and cost-effective. By following the steps outlined in this article, you can successfully convert your reel camera to a digital format and embrace the advantages of digital photography.
Historical Background on Reel Cameras
The development of reel cameras marked a significant milestone in the history of photography. Prior to the advent of reel cameras, photographers used traditional film cameras that required the use of individual film rolls.
Early Photography

In the early years of photography, cameras were large and cumbersome, with limited capabilities. These cameras relied on metal plates coated with photosensitive emulsion to capture images. The exposure time required for each photograph was lengthy, often lasting several minutes.
Introduction of Film Cameras
The invention of roll film cameras revolutionized photography, making it more accessible and convenient. George Eastman, the founder of Kodak, introduced the concept of flexible film in 1884. Instead of using individual metal plates, photographers could now use a single roll of film that could capture multiple images.
Evolution of Reel Cameras
In the early 20th century, advancements in technology led to the development of reel cameras. These cameras used reels to hold the film, allowing for easier loading and reloading. Additionally, reel cameras incorporated mechanisms for advancing the film, enabling photographers to take continuous shots without manual intervention.

Benefits of Reel Cameras
The transition from traditional film cameras to reel cameras brought numerous benefits. Reel cameras offered increased flexibility and convenience, allowing photographers to capture more images without the need for frequent film changes. The ability to take continuous shots also opened up new possibilities for photographers, enabling them to capture dynamic moments.
Transition to Digital
As technology continued to advance, the digital revolution took place in the late 20th century. Digital cameras replaced reel cameras, offering even greater convenience and flexibility. With digital cameras, photographers could instantly review and delete photos, eliminating the need for film development. This transition marked a significant shift in the world of photography, paving the way for modern-day digital photography.
Conclusion
The historical background of reel cameras showcases the evolution of photography and the impact of technological advancements. Reel cameras played a crucial role in making photography more accessible and convenient. While reel cameras are no longer widely used today, their contribution to the field of photography should not be overlooked.

Advantages of Digital Cameras
Digital cameras have revolutionized the way we capture and store photographs. Here are some of the key advantages of digital cameras:
1. Instant Preview
One of the biggest advantages of digital cameras is the ability to preview and review your photos instantly. With a digital camera, there’s no need to wait to see the results of your shot. You can review the image immediately on the camera’s LCD screen and make any necessary adjustments, such as composition or exposure, before taking another shot.
2. Easy Sharing and Storing
Digital cameras make it incredibly easy to share and store your photos. Once you’ve taken a photo, you can easily transfer it to your computer or other devices via a USB cable or wireless connection. From there, you can upload your images to social media platforms, email them to friends and family, or save them on cloud storage services, ensuring that your memories are safe and easily accessible.
| Advantages of Digital Cameras |
|---|
| Instant Preview |
| Easy Sharing and Storing |
3. Editing and Enhancements
Digital cameras allow for easy editing and enhancements. With photo editing software, you can easily crop, resize, and adjust colors and exposure levels to get the perfect image. You can also apply filters and special effects to add a creative touch to your photos.
4. Cost and Convenience
While the initial cost of a digital camera may be higher than a film camera, digital cameras can save you money in the long run. With digital cameras, there’s no need to buy film or pay for developing and printing. Additionally, digital cameras are more convenient as you don’t have to worry about running out of film or finding a place to develop your photos.

In conclusion, digital cameras offer many advantages over traditional reel cameras. The instant preview, easy sharing and storing, editing capabilities, and cost and convenience make digital cameras a popular choice for photography enthusiasts and professionals alike.
Converting Reel Camera to Digital: Step-by-Step Guide
If you have an old reel camera lying around, you may be wondering how to convert it to digital. Luckily, with a few simple steps, you can give new life to your vintage camera and start capturing memories in the digital age.
Step 1: Assess the Camera:
Before you start the conversion process, it’s important to assess the condition of your reel camera. Check if it is still functional and whether any repairs or cleaning is needed. Determine if the camera uses film in a standard format or if it requires specialized cartridges.
Step 2: Gather the Required Equipment:
To convert your reel camera to digital, you will need the following equipment:
– A digital camera or a camera-equipped smartphone
– A tripod or a stable surface to mount your camera
– A macro lens (optional but recommended for better image quality)
– A cable or adapter to connect your reel camera to the digital camera or smartphone
Step 3: Set Up the Shooting Environment:
Find a well-lit area with a neutral background to set up your shooting environment. Make sure there is enough space to position your reel camera and digital camera or smartphone securely.
Step 4: Mount the Reel Camera:
Using a tripod or a stable surface, mount your reel camera in a way that ensures stability throughout the conversion process. Position it at a suitable height and angle for capturing the images or videos.
Step 5: Connect the Cameras:
Connect your reel camera to the digital camera or smartphone using the appropriate cable or adapter. Ensure a secure connection to prevent any disruptions during the conversion process. Follow the manufacturer’s instructions for your specific cameras if available.
Step 6: Focusing and Adjustments:
Using the digital camera or smartphone, manually focus the lens on the image or subject you want to capture. Adjust the camera settings, such as ISO, aperture, and shutter speed, to achieve optimal image quality. Experiment with different settings to achieve the desired results.
Step 7: Capture and Save:
Once everything is set up, start capturing images or videos using your digital camera or smartphone. Make sure to save the files in the desired format and location, such as a memory card or computer. Review the captured footage to ensure the quality meets your expectations.
Step 8: Post-Processing (Optional):
If desired, you can post-process the captured images or videos using photo or video editing software. This step allows you to enhance the colors, adjust the exposure, and make other modifications to achieve the desired final results.
Step 9: Share and Enjoy:
Now that you have successfully converted your reel camera to digital, you can share and enjoy your newly captured memories with friends and family. Consider printing your favorite images or creating a digital album to preserve them for years to come.
Remember, converting a reel camera to digital requires patience and attention to detail. Take your time, follow the steps carefully, and enjoy the process of breathing new life into a nostalgic piece of technology.
Necessary Equipment for Conversion
Converting a reel camera to digital requires a few essential pieces of equipment to ensure a successful transformation. Here are the necessary tools and devices you will need:
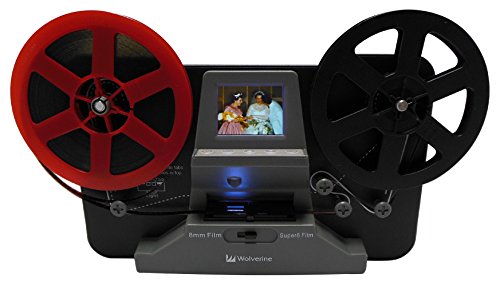
1. Film Scanner
A film scanner is a crucial tool in the conversion process. It allows you to digitize your reel camera footage by scanning the film frame by frame and converting it into a digital format. Make sure to choose a high-quality film scanner that can handle the type of film you are working with, whether it’s 8mm, 16mm, or Super 8.
2. Computer or Laptop
A computer or laptop is needed to process and store the digital files created during the conversion. You will need sufficient storage space to accommodate the large file sizes of the digitized footage. Additionally, a powerful processor and ample memory will help speed up the conversion process.
3. Video Editing Software
Once your reel camera footage is digitized, you may want to edit and enhance the videos. Video editing software provides the necessary tools to trim, crop, add effects, and improve the overall quality of your footage. There are many professional and user-friendly video editing software options available, so choose the one that best suits your needs and skill level.
By having these necessary equipment on hand, you will be well-equipped to successfully convert your reel camera to digital and preserve your precious memories for years to come.
Tips and Tricks for Successful Conversion
Converting a reel camera to digital can be a challenging task, but with the right techniques and information, it is definitely achievable. Here are some tips and tricks that can help you successfully convert your reel camera to digital:
1. Choose the Right Equipment
When it comes to converting your reel camera to digital, the first step is to choose the right equipment. Look for a high-quality film scanner that is compatible with your specific reel camera model. Make sure to do thorough research and read reviews to find the best equipment that suits your needs and budget.
2. Clean and Prepare the Reel Camera
Prior to converting your reel camera, it is important to clean and prepare it properly. Remove any dust, dirt, or debris from the camera body, lens, and other components. Use a soft, lint-free cloth and a gentle cleaning solution to avoid damaging the camera. This step will help ensure that your digital conversion process goes smoothly and produces the best possible results.
3. Adjust the Settings
When converting your reel camera to digital, it is crucial to adjust the settings on your film scanner to get the desired output. Experiment with different settings such as resolution, color balance, and contrast to achieve the best results. Take test scans and compare them to your original reels to ensure that the digital images closely match the original film.
4. Scan in Batches
If you have a large number of reels to convert, it can be helpful to scan them in batches. This approach will help you organize your scanning process and ensure that you stay on track. Create a labeling system to keep track of scanned reels and their corresponding digital files.
5. Backup Your Digital Files
Once you have converted your reel camera to digital, it is crucial to back up your digital files. Store your files on multiple devices or in cloud storage to ensure their safety. Consider creating multiple copies and storing them in different locations to avoid losing your precious memories.
By following these tips and tricks, you can successfully convert your reel camera to digital and preserve your cherished memories for years to come. Remember to take your time, be patient, and enjoy the process!
Frequently Asked Questions (FAQ) for Converting Reel Camera to Digital
Q: What is a reel camera?
A reel camera, also known as a film camera, is a type of camera that records images and videos onto reels of film.
Q: Why should I convert my reel camera to digital?
Converting your reel camera to digital allows you to preserve and easily access your old film footage in a modern format. It also eliminates the need for film development and provides the ability to edit and share your footage digitally.
Q: How can I convert my reel camera to digital?
There are a few methods you can use to convert your reel camera to digital. One option is to use a film scanner, which scans each frame of your film and converts it to a digital file. Another option is to use a professional conversion service, where experts will handle the process for you.
Q: What equipment do I need for reel camera to digital conversion?
To convert your reel camera to digital, you will need a film scanner or a digital camera with a macro lens. You may also need a computer with video editing software to edit and store your digital files.
Q: Can I convert any type of reel camera to digital?
Most types of reel cameras can be converted to digital, including 8mm, Super 8, and 16mm cameras. However, the specific method and equipment required may vary depending on the type of camera you have.
Q: Will converting my reel camera to digital affect the quality of my footage?
The quality of your footage may be affected during the conversion process. It is important to choose a high-quality film scanner or professional conversion service to minimize any loss in quality.
Q: How long does the reel camera to digital conversion process take?
The time it takes to convert your reel camera to digital depends on various factors, such as the length of your film and the method of conversion used. It can range from a few hours to several days.
Q: Can I edit my digital footage after converting from a reel camera?
Yes, one of the benefits of converting your reel camera to digital is the ability to edit your footage using video editing software. You can enhance the visual quality, adjust colors, and add effects to your digital files.
Q: Can I share my digital footage online?
Yes, once your reel camera footage is converted to digital, you can easily share it online. You can upload your videos to video sharing platforms, social media, or your own website.
Q: How should I store my digital footage after conversion?
After converting your reel camera footage to digital, it is important to store it properly to ensure its longevity. You can store your digital files on external hard drives, cloud storage services, or burn them onto DVDs for backup.
*Disclaimer: The information provided in this FAQ is for educational purposes only. It is recommended to consult professionals or experts for specific advice related to converting reel camera to digital.
Question-answer:
What is a reel camera?
A reel camera is a type of camera that uses a reel of film to capture images and videos.
Why would someone want to convert a reel camera to digital?
There are several reasons why someone might want to convert a reel camera to digital. One reason is that digital cameras offer greater convenience, as the images can be instantly previewed and transferred to a computer or other devices. Additionally, converting to digital allows for easier editing and sharing of images and videos.
Can any reel camera be converted to digital?
Not all reel cameras can be easily converted to digital. The feasibility of conversion depends on the specific camera model and its compatibility with digital components. Some reel cameras may require significant modifications or custom-made parts to convert them to digital.
What are the basic steps to convert a reel camera to digital?
The basic steps to convert a reel camera to digital include disassembling the camera, removing the film reel mechanism, installing a digital image sensor, connecting it to a digital processing unit, and integrating a digital display. This process may require advanced technical skills and knowledge of camera mechanics.
Are there any professionals who can convert reel cameras to digital?
Yes, there are professionals and companies that specialize in converting reel cameras to digital. They have the expertise and equipment needed to perform the necessary modifications and ensure optimal functionality. Hiring a professional can save time and ensure a high-quality conversion.


