If you have a stack of old 35mm slides sitting in a box somewhere, it’s time to bring those memories back to life. With a digital camera and a few simple techniques, you can easily convert your slides into digital images. This guide will walk you through the step-by-step process of copying 35mm slides using a digital camera.
The first thing you’ll need is a digital camera with a macro lens. Macro lenses are designed for close-up photography and are ideal for capturing the details on your slides. Make sure your camera is fully charged and has enough storage space for all the images you’ll be capturing.
Next, set up a clean and well-lit workspace. You’ll want to eliminate any dust, dirt, or fingerprints from your slides before photographing them. Use a microfiber cloth or compressed air to gently clean the slides, and make sure your hands are clean and oil-free.
Now it’s time to position your camera. Place your slides on a light table or a well-lit surface with a white background. This will help to enhance the colors and details in your images. Position your camera directly above the slides, ensuring that it is perfectly level and centered.
Once your camera is positioned, set it to manual mode. This will give you more control over the settings and ensure consistent results. Adjust the ISO, aperture, and shutter speed to get the desired exposure. You may need to experiment with these settings to find the optimal combination for your lighting conditions.

When you’re ready to start, zoom in as much as possible without losing image quality. Use the camera’s autofocus or manual focus function to ensure the slides are sharp and in focus. Take a test shot and review the image on your camera’s LCD screen. Make any necessary adjustments to the camera position, focus, or exposure settings.
What are 35mm slides?
35mm slides are small transparent pieces of film typically used for capturing images that can be projected onto a larger screen. They are commonly used in photography, presentations, and educational settings. Often measuring 35mm by 24mm, these slides contain a positive image that represents the original photograph or artwork.
The 35mm format became popular in the early 20th century and quickly became the standard for amateur and professional photography. The small size made it convenient for capturing images and easy to store and transport. The slides were placed into specially designed slide projectors that could display the images onto a screen, making them a popular choice for presentations and sharing visual information.
How are 35mm slides made?
To create a 35mm slide, a photographer shoots a photo using a camera that is loaded with slide film. The film is then developed through a specialized process that produces transparent positives. These positives are mounted into individual frames, creating a strip of slides that can be inserted into a slide projector.
What are the advantages of 35mm slides?
There are several advantages to using 35mm slides. Firstly, the image quality is typically very high, capturing detailed and vibrant colors. Additionally, the small size of the slides allows for easy storage and organization. Slides also have a long lifespan if properly stored, making them a durable option for archiving images. Finally, 35mm slides are versatile and can be easily shared through projectors or viewed directly with a slide viewer.

Why copy 35mm slides with a digital camera?
35mm slides hold cherished memories: Whether it’s old family photos, vacation snapshots, or professional work, 35mm slides are a tangible piece of the past. By copying them with a digital camera, you can preserve those memories and easily share them with family, friends, or colleagues.
Digital cameras offer convenience: Digital cameras are lightweight, portable, and easy to use. They allow you to capture high-quality images of your 35mm slides without the need for specialized equipment or a dedicated scanner. This makes them a convenient option for preserving your slide collection.
Cost-effective solution: Digitizing your 35mm slides with a digital camera can be a cost-effective alternative to professional scanning services. With a one-time investment in a digital camera, you can copy as many slides as you want at your own pace, without having to pay for each individual slide to be scanned.
Preserve and enhance image quality: By copying your 35mm slides with a digital camera, you have the opportunity to enhance the image quality. You can adjust settings such as exposure, contrast, and sharpness to improve the overall appearance of the slides. This can help revive old and faded images, bringing them back to life.
Flexibility with file formats: When copying your 35mm slides with a digital camera, you have the flexibility to choose the file format that best suits your needs. Whether it’s JPEG, TIFF, or RAW, you can select the format that provides optimal compatibility, quality, and storage options for your digitized slides.
Easy editing and sharing: Once your 35mm slides are copied with a digital camera, they can be easily edited and shared digitally. You can crop, rotate, or apply filters to enhance the images further. Additionally, you can effortlessly share the digitized slides via email, social media, or online photo albums, allowing you to relive and celebrate those precious memories with others.
Choosing the right camera
When it comes to copying 35mm slides with a digital camera, choosing the right camera is crucial. Here are some important factors to consider when selecting a camera for this task:
| Resolution | The camera should have a high resolution to ensure that the scanned slides can be reproduced with clarity and detail. |
| Image Sensor Size | A larger image sensor size allows for better image quality and sharper results. Look for cameras with APS-C or full-frame sensors. |
| Macro Capability | A camera with good macro capabilities will allow you to capture small details on the slides, resulting in higher quality copies. |
| Manual Controls | Having manual controls such as aperture, shutter speed, and focus will give you more control over the copy process and allow for better adjustments. |
| RAW Format Support | Consider a camera that supports RAW format as it allows for more flexibility and control during post-processing. |
| Compatibility | Ensure that the camera you choose is compatible with the accessories you might need, such as a macro lens or a slide copier attachment. |
By taking these factors into account, you can choose a camera that will provide the necessary features and capabilities to copy 35mm slides effectively and achieve high-quality digital copies.
Understanding the camera specifications
When it comes to copying 35mm slides with a digital camera, understanding the specifications of your camera is essential. Here are some key specifications to consider:
Resolution: The resolution of your camera determines the level of detail it can capture. Higher resolution cameras will produce sharper images when copying slides.

Megapixels: The number of megapixels in your camera sensor also affects the level of detail in your images. Cameras with higher megapixel counts will generally produce better results when copying slides.
Image sensor: The type and size of the image sensor in your camera play a role in determining image quality. Full-frame sensors tend to perform better in low-light conditions and offer better dynamic range.
Lens quality: The quality of the lens you use is crucial for capturing sharp and accurate images. Look for lenses with high optical quality and low distortion for the best results.
Macro capability: Macro capability refers to the camera’s ability to focus on close-up subjects. When copying slides, it’s important to have a camera with good macro capability to ensure sharp and detailed results.
Manual controls: Having manual control over settings such as aperture, shutter speed, and focus can be beneficial when copying slides. Manual controls allow you to fine-tune your settings for optimal results.

ISO sensitivity: ISO sensitivity determines how sensitive your camera is to light. Higher ISO settings can be useful when copying slides in low-light conditions, but too high of an ISO can introduce noise and reduce image quality.
Image stabilization: Image stabilization helps reduce camera shake, resulting in sharper images. Look for cameras with built-in image stabilization or consider using a tripod when copying slides.
File format: The file format in which your camera saves images can affect image quality and flexibility in post-processing. Most cameras offer options like JPEG and RAW. RAW files retain more information and allow for greater manipulation in editing.
Understanding these camera specifications will help you choose the right camera for copying 35mm slides and achieve the best results.
Best cameras for copying 35mm slides
When it comes to copying 35mm slides with a digital camera, having the right equipment is essential. The quality and resolution of the camera can greatly impact the final result. Here are a few options for the best cameras to use for copying 35mm slides:

1. Nikon D850
The Nikon D850 is a professional-grade camera that offers excellent image quality and high resolution. With its 45.7-megapixel sensor, it can capture fine details and vibrant colors. The camera also has a feature that allows for direct tethering to a computer, making it easy to transfer and save the digitized slides.
2. Canon EOS 5D Mark IV
The Canon EOS 5D Mark IV is another top choice for copying 35mm slides. It has a 30.4-megapixel sensor and can produce sharp and detailed images. The camera also has a built-in Wi-Fi and NFC feature, which allows for easy sharing and transferring of the digitized slides.
These cameras offer the necessary features and capabilities for copying 35mm slides. When choosing a camera, it’s important to consider your budget, desired image quality, and any additional features you may need. With the right camera, you can effectively preserve your 35mm slides in digital format.
Preparing your slides
Before you start the process of copying your 35mm slides using a digital camera, it is important to properly prepare your slides to ensure the best results.
1. Clean your slides
First, make sure your slides are clean and free of dust or any other debris. Use a soft, lint-free cloth or a special slide cleaning brush to gently wipe the surface of each slide. This will help prevent any unwanted artifacts or blemishes from appearing in your digital copies.

2. Organize and sort your slides
Next, organize and sort your slides into the desired order. This will make the copying process much easier and more efficient. You can use slide trays or carousels to keep your slides organized, or simply stack them in the order you want to copy them.
3. Set up a clean workspace
Choose a clean and well-lit area where you can set up your workspace. Make sure there is enough room to comfortably work with your slides and camera equipment. Avoid areas with direct sunlight or strong artificial lighting that could create unwanted glare or reflections on your slides.
It is also a good idea to use a clean, non-reflective surface as a backdrop for your slides. This will help minimize any distractions or reflections that could affect the quality of your copies.
4. Check your camera settings
Before you start copying your slides, double-check your camera settings to ensure they are appropriate for capturing high-quality images. Set your camera to manual mode and adjust the ISO, aperture, and shutter speed settings to achieve the best results.
- ISO: Use a low ISO setting to minimize noise and maximize image quality.
- Aperture: Choose a small aperture (high f-stop number) to increase depth of field and ensure sharp focus across your slide.
- Shutter speed: Use a tripod or other stabilizing device and set a slower shutter speed to prevent camera shake. This will help capture clear and sharp images.
Additionally, make sure your camera lens is clean and free of smudges or dust that could affect the clarity of your images.
Cleaning and organizing your slides
Before you begin copying your 35mm slides with a digital camera, it is important to clean and organize them properly. This will ensure that you get the best quality images and make the process more efficient. Here are some steps you can follow:
- Remove dust and debris: Using a soft, lint-free cloth or a can of compressed air, gently remove any dust or debris from the surface of the slides. This will prevent them from appearing in the final digital images.
- Organize your slides: Sort your slides into categories or themes, depending on your preference. This will make it easier to locate specific slides when you need them.
- Label your slides: Use a fine-tip marker or labels to write a brief description on each slide. This will help you identify the content of the slides without having to view them on a computer.
- Store your slides properly: Invest in slide sleeves or archival storage containers to protect your slides from dust, moisture, and light damage. Store them in a cool, dry place to ensure their longevity.
- Create an index: Consider creating a digital index or catalog of your slides. This can be done by scanning each slide or taking a photograph of it with a digital camera. By organizing your slides digitally, you can easily search for specific slides without having to physically handle all of them.
By following these steps, you can ensure that your 35mm slides are clean, organized, and well-preserved. This will not only improve the quality of the images you capture with your digital camera, but also make it easier for you to find and share your slides in the future.
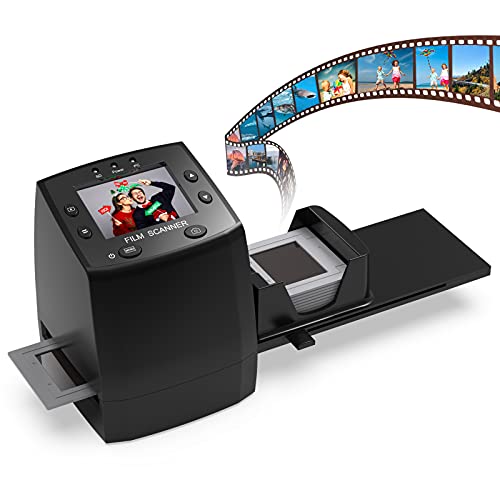
Setting up the slide scanner
Before you can start scanning your 35mm slides with a digital camera, you need to set up the slide scanner. Here are the steps to get you started:
Step 1: Clean the scanner
Make sure the scanner glass is clean and free from dust and smudges. Use a microfiber cloth or a lens cleaning solution to gently wipe the glass surface. This will ensure that your slides are scanned without any blemishes or artifacts.
Step 2: Connect the scanner
Connect the slide scanner to your computer using the provided USB cable. Make sure the scanner is securely plugged in and turned on. Your computer will automatically detect the scanner and install the necessary drivers.
Step 3: Install the scanning software
Insert the installation CD that came with the slide scanner into your computer’s CD drive. Follow the on-screen instructions to install the scanning software onto your computer. If your scanner does not come with a CD, you can download the software from the manufacturer’s website.
Step 4: Calibrate the scanner
Once the software is installed, open it and locate the calibration option. Follow the instructions to calibrate the scanner. This will ensure accurate color reproduction and optimal scanning quality.
After completing these steps, you are now ready to start scanning your 35mm slides with your digital camera. Make sure to familiarize yourself with the software’s features and settings to get the best results.
Copying the slides
Copying your 35mm slides with a digital camera is a relatively simple process. Here are the steps to follow:
|
1. Set up your camera: Make sure your digital camera is fully charged and set to the highest resolution possible. You’ll also need to attach a macro lens or a lens with a macro function to capture the details of the slide. |
|
2. Prepare your workspace: Find a well-lit area to set up your slides and camera. Make sure there are no reflections or glare on the slides, as this can affect the quality of your copies. You may want to use a lightbox or a slide projector to display the slides. |
|
3. Position the slides: Place each slide on a flat surface, such as a lightbox, and position it carefully to ensure it’s in the center of the frame. You can use slide holders or a slide tray to keep the slides in place. |
|
4. Focus and adjust settings: Use the autofocus function or manually adjust the focus to make sure the slide is sharp and clear. You may also need to adjust other settings, such as exposure and white balance, to achieve the desired results. |
|
5. Capture the image: Once everything is set up, take a photo of the slide using your digital camera. Make sure the entire slide is captured within the frame. |
|
6. Review and edit: After capturing the image, review it on your camera’s LCD screen to check for any issues, such as blurriness or exposure problems. If necessary, you can edit the image using photo editing software to enhance its quality. |
|
7. Repeat the process: Continue copying each slide one by one, following the same steps until you’ve copied all the slides you want. |
|
8. Transfer and organize: Transfer the digital copies of the slides to your computer or storage device. Organize them into folders or albums for easy access and future reference. |
By following these steps, you can easily copy your 35mm slides using a digital camera and preserve your cherished memories in a digital format.
How to properly position the slides
Properly positioning the slides is crucial for obtaining clear and high-quality digital copies. Follow these steps to ensure that your slides are correctly positioned:
1. Clean the slides
Before placing the slides on the copying setup, make sure they are clean and free from dust or fingerprints. Use a soft brush or lint-free cloth to gently remove any dirt or debris from the surface of the slides.
2. Use a slide holder
Using a slide holder or tray is recommended as it helps in keeping the slides aligned and prevents them from moving during the copying process. A slide holder also helps in maintaining the proper orientation and positioning of the slides.
3. Place the slides face down
When positioning the slides on the copying setup, ensure that the emulsion side of the slides is facing downwards. The emulsion side is the side with the image and typically has a matte or slightly rough texture compared to the smooth side.
4. Align the slides
Make sure the slides are aligned properly within the slide holder. They should be positioned evenly and not overlapping each other. If there are multiple slides in the holder, ensure that there is enough space between them to avoid any interference during the copying process.
5. Use a backlight
Place a backlight or light table beneath the slides to help illuminate the images and enhance their visibility. This will also assist in capturing the true colors and details of the slides when using a digital camera for copying.
Following these steps will ensure that your slides are properly positioned for copying with a digital camera, resulting in clear and accurate digital copies of your 35mm slides.
Adjusting camera settings for optimal results
When copying 35mm slides with a digital camera, it’s important to adjust the camera settings to achieve the best results. Here are some tips to consider:
1. Choose the right resolution: Set your camera to capture images at the highest possible resolution. This will ensure that the copied slides maintain their quality and detail.
2. Adjust the ISO: The ISO setting determines the sensitivity of your camera’s sensor to light. For slide copying, it’s recommended to use a low ISO setting (e.g. ISO 100 or 200) to minimize noise and produce cleaner images.
3. Use manual mode: Switch your camera to manual mode to have full control over the exposure settings. This is crucial when dealing with slides as they often have varying levels of brightness and contrast.
4. Set the aperture: Adjust the aperture to control the depth of field. A smaller aperture (higher f-number) will result in a larger depth of field, ensuring that both the foreground and background of the slide are in focus.
5. Consider white balance: Slides may have different color casts due to aging or processing methods. Use the appropriate white balance setting (e.g. daylight, tungsten, or custom) to accurately reproduce the colors of the slides.
6. Use a tripod: To minimize camera shake and ensure sharp images, it’s recommended to use a tripod. This will help capture the details of the slides with greater clarity.
7. Experiment and review: Don’t be afraid to experiment with different settings and review the results on your camera’s LCD screen. This will allow you to make adjustments and fine-tune the settings for the best possible outcome.
By adjusting these camera settings, you’ll be able to create high-quality digital copies of your 35mm slides and preserve them for years to come.
Question-answer:
What equipment do I need to copy 35mm slides with a digital camera?
To copy 35mm slides with a digital camera, you will need a digital camera with macro capability, a light source or a lightbox, a slide holder or a slide copier, and a tripod (optional but recommended).
Can I use any digital camera to copy 35mm slides?
While any digital camera can technically be used to copy 35mm slides, it is recommended to use a camera with macro capability for better results. Macro capability allows the camera to capture fine details and produce high-quality images of the slides.
What is a slide holder?
A slide holder is a device that holds the 35mm slide in place, allowing it to be positioned correctly for photographing. It typically has a slot or a frame where you can insert the slide, ensuring it remains stable during the copying process.


