
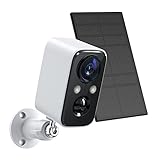
Security cameras are an essential part of keeping your property safe and protected. However, like any other electronic device, they can sometimes encounter technical issues or glitches that may compromise their functionality. To ensure that your security camera is working at its optimal level, it’s important to know how to debug it effectively.
Debugging your security camera involves troubleshooting and identifying the root cause of any problems or malfunctions. This process requires a systematic approach and attention to detail. By following the steps outlined in this article, you will be able to diagnose and fix common issues with your security camera.
Step 1: Check the power supply
One of the most common problems with security cameras is a power issue. Before diving into more complex troubleshooting steps, make sure that your camera is properly connected to a reliable power source. Check the power cable and ensure that it is securely plugged into both the camera and the power outlet. If the camera is battery-powered, replace or recharge the batteries.
Pro tip: To prevent power supply problems in the future, consider using a surge protector or an uninterruptible power supply (UPS) for your security camera setup.

Step 2: Verify the camera’s network connection
If your security camera is connected to a network, ensure that it has a stable and reliable connection. Check the Ethernet cable or Wi-Fi connection to ensure that it is properly connected. If you are using Wi-Fi, test the signal strength and consider relocating the camera or investing in a Wi-Fi range extender if the signal is weak. Additionally, verify that the network settings are correctly configured on the camera.
Pro tip: Changing the Wi-Fi network name/password or upgrading your router may require you to reconfigure your security camera settings.
Step 3: Update the camera’s firmware
Outdated firmware can sometimes cause compatibility issues or software bugs in security cameras. To ensure that your camera is running the latest firmware version, visit the manufacturer’s website and download any available updates. Follow the provided instructions to install the firmware update on your camera.

Pro tip: Regularly checking for firmware updates and keeping your security camera’s software up to date can help prevent potential vulnerabilities.
By following these steps, you should be able to effectively debug and resolve common issues with your security camera. Remember to consult the camera’s user manual or contact the manufacturer’s support team if you encounter any specific problems or if the troubleshooting steps mentioned above do not resolve the issue.
Ensuring that your security camera is in optimal working condition will provide you with peace of mind, knowing that your property is well-protected.
Common security camera issues
Security cameras are an essential part of keeping your property and loved ones safe. However, sometimes they can encounter issues that may hinder their functionality. Here are some common security camera issues you may face and how to troubleshoot them:
- Camera not recording: If your security camera is not recording, check if it has power and if the storage device has enough space. Make sure the camera is set to record and that the settings are properly configured.
- Poor image quality: If the image quality of your security camera is subpar, ensure that the lens is clean and free from any obstruction. Adjust the camera’s focus and check the lighting conditions. Sometimes, image quality issues can also be resolved by updating the camera’s firmware.
- No video feed: If your security camera is not showing any video feed, first check the camera’s power connection and network connection. Ensure that the network cables are properly connected and that the camera has a stable internet connection. Restarting the camera and the accompanying software or app may also help resolve this issue.
- Camera disconnecting frequently: If your security camera keeps disconnecting from the network, try moving it closer to the Wi-Fi router to ensure a stronger signal. You can also try changing the Wi-Fi channel or updating the router’s firmware. If the problem persists, consider using a wired connection or contacting your internet service provider for further assistance.
- False alarms: If your security camera is triggering false alarms, adjust the motion detection settings to reduce sensitivity. Check if there are any moving objects or environmental factors that may be triggering the alarms. Additionally, make sure that the detection zone is properly configured to avoid unnecessary alerts.
By addressing these common security camera issues, you can ensure that your surveillance system is functioning optimally and providing the protection you need.

Troubleshooting the camera connection
If you are experiencing issues with the connection of your security camera, there are a few troubleshooting steps you can take to identify and resolve the problem.
1. Check the power supply:
Make sure that the camera is properly powered. Check if the power adapter is plugged in and if there is power at the outlet. You may want to try using a different power adapter or plugging the camera into a different outlet to rule out any power supply issues.
2. Verify the network connection:
Confirm that your camera is connected to your network. Check if the Ethernet cable is securely connected to the camera and the router. If you are using a wireless connection, ensure that the camera is within range of the Wi-Fi signal and that the Wi-Fi network is functioning properly.

3. Check network settings:
Make sure that the camera’s IP address and network settings are correct. You can check this in the camera’s settings or by accessing the camera’s web interface. Ensure that the camera is assigned a unique IP address and that the subnet mask and default gateway are properly configured.
4. Test the camera connection:
If you are still experiencing issues, try pinging the camera’s IP address from a computer on the same network. This will help determine if the camera is reachable and if there are any network connectivity problems.
5. Update firmware or software:
Check for any available firmware or software updates for your camera. Manufacturers often release updates to address connectivity issues and improve camera performance. Follow the instructions provided by the manufacturer to update the camera’s firmware or software.
6. Contact customer support:
If you have tried all the above steps and are still unable to resolve the camera connection problem, it may be necessary to contact the manufacturer’s customer support for further assistance. They will be able to provide you with additional troubleshooting steps or guide you through the process of repairing or replacing your security camera.
By following these troubleshooting steps, you should be able to identify and resolve most camera connection issues. Remember to consult your camera’s user manual or the manufacturer’s website for specific troubleshooting instructions for your model.
Dealing with blurry or distorted video footage
If you notice that your security camera footage is blurry or distorted, it can greatly hinder the effectiveness of your surveillance system. Blurry or distorted video can make it difficult to identify people or objects captured on camera, reducing the overall security of your premises. There are several steps you can take to address this issue and improve the clarity of your video footage.

1. Check the camera lens
The first thing to do is to check the camera lens for any dirt, dust, or smudges that may be causing the blurriness or distortion. Use a soft, lint-free cloth to gently clean the lens and make sure it is free from any obstructions. Take care not to apply too much pressure which could damage the lens.
2. Adjust camera focus
Another possible reason for blurry or distorted footage is misalignment or improper focus settings. Most surveillance cameras have an adjustable focus feature that allows you to manually adjust the focus point. Refer to the camera’s manual or consult the manufacturer’s website for instructions on how to adjust the focus of your specific camera model.
If your camera has auto-focus capabilities, ensure that this feature is enabled and properly functioning. Auto-focus can help maintain clear images by continuously adjusting the focus point according to the scene being captured.
3. Check camera positioning
Ensure that your camera is properly positioned and securely mounted. A loosely mounted camera or one that has moved over time can result in blurry or distorted footage due to vibrations or changes in the camera angle. Verify that the camera is secured tightly and aligned correctly with the area you want to monitor.
4. Consider the lighting conditions
Poor lighting conditions can also contribute to blurry or distorted video footage. Insufficient lighting or direct light sources shining into the camera lens can cause video quality issues. Adjust the lighting in the area or consider installing additional lighting to improve the overall image quality.

5. Check camera settings and resolution
Review the camera settings and ensure that the resolution is set to the optimal level. Lower resolutions can result in pixelated or blurry footage. Refer to the camera’s manual or the manufacturer’s website for guidance on the recommended settings for your specific camera model.
| Issue | Possible Solution |
|---|---|
| Dirty lens | Clean the lens with a soft, lint-free cloth |
| Improper focus settings | Adjust the focus manually or enable auto-focus |
| Camera positioning | Ensure proper mounting and alignment |
| Poor lighting conditions | Adjust lighting or add additional lighting |
| Incorrect camera settings/resolution | Check and adjust camera settings as needed |
By following these steps and troubleshooting the potential causes of blurry or distorted video footage, you can ensure that your security camera captures clear and reliable images for enhanced security and peace of mind.
Fixing issues with infrared night vision
If you’re experiencing problems with the infrared night vision on your security camera, there are a few steps you can take to fix the issue.
1. Check the placement of the camera: Make sure that the camera is not obstructed by any objects or surfaces that could be blocking the infrared light. Move any obstacles or adjust the camera’s position to allow for a clear line of sight.
2. Clean the camera lens: Dust or dirt on the camera lens can interfere with the infrared night vision. Use a soft, lint-free cloth to gently clean the lens and remove any smudges or fingerprints.
3. Adjust the camera settings: Most security cameras have settings that allow you to adjust the sensitivity of the infrared night vision. Check the camera’s manual or menu options for instructions on how to change these settings and experiment with different levels to see if it improves the quality of the night vision.
4. Install additional infrared lighting: If the built-in infrared lights on your camera are not providing sufficient illumination, you may want to consider installing additional infrared lighting. These lights can be purchased separately and placed near the camera to supplement the existing night vision capabilities.
5. Reset the camera: If none of the above steps work, you may need to reset the camera to its factory settings. This can usually be done by pressing and holding a reset button on the camera or using the camera’s software interface. Keep in mind that resetting the camera will erase any custom settings you have made, so be sure to document any important changes before proceeding.
By following these steps, you should be able to resolve most issues with the infrared night vision on your security camera and ensure that it is functioning properly.
Adjusting camera settings for optimal performance
Security cameras are an essential tool for monitoring and protecting your property. However, to ensure they are working at their best, it’s important to adjust their settings for optimal performance. Here are some key settings to consider:
1. Resolution
One of the most important settings to adjust is the camera’s resolution. Higher resolutions offer clearer and more detailed images, but they also require more bandwidth and storage space. Consider the specific needs of your surveillance area and find a balance between image quality and resource usage.
2. Frame Rate
The frame rate determines how many frames per second the camera captures. Higher frame rates provide smoother video playback but result in larger video files. Depending on your monitoring requirements, you may need to adjust the frame rate accordingly.
3. Exposure
Adjusting the exposure settings can ensure optimal image quality in different lighting conditions. Cameras typically offer options for auto-exposure, where the camera adjusts the exposure automatically, or manual exposure, where you can adjust the settings yourself. Experiment with different exposure levels to find the right balance for your specific environment.
4. White Balance
White balance settings control how the camera handles different lighting conditions and ensure accurate color reproduction. The camera can usually be set to auto white balance, where it adjusts the settings automatically, or manual white balance, where you can set it yourself. Test different white balance settings to find the most natural-looking colors.
5. Motion Detection
Motion detection is a crucial feature that allows the camera to start recording when it detects movement. Adjust the motion detection sensitivity to avoid false alarms from minor movements, such as tree branches or passing cars, while still capturing important events. Additionally, define specific areas for motion detection to focus on the areas of interest.
By adjusting these camera settings, you can optimize the performance of your security camera system and ensure that it meets your specific surveillance needs. It’s also a good idea to consult the camera’s user manual or manufacturer’s website for specific instructions on adjusting settings for your particular model.
Cleaning and maintaining the camera lenses
Keeping your security camera lenses clean and well-maintained is crucial to ensure optimal performance. Regular cleaning can help prevent image distortion and maintain the camera’s effectiveness. Here are some tips on how to clean and maintain your camera lenses:
1. Gather the necessary supplies:
Before you start cleaning the lenses, gather the following supplies:
- A lens cleaning solution specifically designed for camera lenses
- A microfiber cloth or a lens cleaning brush
- A blower or a can of compressed air
2. Turn off the camera:
Before cleaning the lenses, make sure to turn off the camera to avoid accidental damage.
3. Use the blower or compressed air:
Blow away any loose dust or debris from the lens using a blower or a can of compressed air. Hold the camera upside down to prevent debris from falling into the camera body.
4. Apply the lens cleaning solution:
Apply a small amount of lens cleaning solution on a microfiber cloth or lens cleaning brush. Be careful not to use too much solution.
5. Gently clean the lens:
Using the microfiber cloth or lens cleaning brush, gently wipe the lens in a circular motion. Avoid applying too much pressure to prevent scratching the lens surface.
6. Check for smudges or spots:
After cleaning the lens, inspect it for any remaining smudges or spots. If needed, repeat the cleaning process until the lens is completely clean.
7. Dry the lens:
Let the lens air dry or use a clean, dry microfiber cloth to gently remove any remaining moisture.
8. Avoid touching the lens:
Avoid touching the lenses with your fingers as this can leave fingerprints or smudges. If necessary, use gloves or hold the lenses by the edges.
9. Store the camera properly:
When not in use, store the camera in a dust-free environment. Use a camera bag or a protective case to prevent dust and debris from settling on the lens surface.
By following these tips, you can keep your security camera lenses clean and maintained, ensuring clear and high-quality images for your surveillance needs.
Dealing with Power Supply Problems
Power supply problems can be a common cause of issues with security cameras. If your camera is not receiving enough power, it may not function correctly or may fail to work altogether. Here are some steps you can take to deal with power supply problems:
- Check the power source: Ensure that the power source, such as an electrical outlet or battery, is working properly. It is recommended to use a dedicated power outlet for your camera to avoid any potential power fluctuations.
- Inspect the power cable: Examine the power cable for any damages or loose connections. If you notice any frayed wires or loose plugs, it is advisable to replace the cable to ensure a stable power supply.
- Consider using a UPS: A uninterruptible power supply (UPS) can provide backup power to your camera in case of electrical outages or surges. This can help prevent any disruptions in camera functionality due to power fluctuations.
- Investigate voltage issues: If your camera is not receiving the correct voltage, it may fail to operate properly. Use a multimeter to measure the voltage at the power source and compare it to the camera’s required voltage. If there is a significant difference, contact a professional electrician to address the issue.
- Upgrade power supply equipment: If you have multiple cameras or complex security system setups, it may be necessary to upgrade your power supply equipment. Consult with a professional to determine the appropriate power supply solution for your specific needs.
By addressing power supply problems, you can ensure that your security camera functions properly and provides reliable surveillance for your property.
Upgrading or replacing outdated security cameras
Security cameras play a crucial role in ensuring the safety and protection of your property. However, outdated cameras may not provide the level of security you need in today’s rapidly advancing technological landscape. Upgrading or replacing your outdated security cameras is essential to keep up with the latest advancements and maintain optimal security measures.
1. Evaluate the current state of your security cameras
Start by assessing the current condition and capabilities of your existing security cameras. Look for any signs of wear and tear, such as damaged lenses or wiring. Additionally, consider the quality of the video footage and the features provided by your current cameras.
2. Determine your security needs
Think about the specific security needs of your property. Are you looking to enhance surveillance in low-light areas? Do you need cameras with advanced motion detection capabilities? Consider factors such as resolution, night vision, field of view, and weatherproofing to ensure that your upgraded cameras meet your requirements effectively.
3. Research the latest camera technologies
Stay up to date with the latest advancements in security camera technologies. Research the different types of security cameras available in the market, such as IP cameras, wireless cameras, and PTZ (Pan-Tilt-Zoom) cameras. Understand the benefits and limitations of each type and determine which one best suits your needs.
4. Consider professional installation
If you are not familiar with security camera installation, it is advisable to seek professional help. Professional installers have the expertise to properly set up and configure your new cameras, ensuring optimal performance and maximum coverage. Additionally, they can provide valuable insights into camera placement for maximum effectiveness.
5. Budget and future scalability
Consider your budget and the long-term scalability of your security system. Upgrading or replacing your security cameras can be a significant investment, so plan accordingly. Take into account factors like the number of cameras required and any additional features or accessories you may need.
Conclusion
Upgrading or replacing outdated security cameras is crucial to maintain effective surveillance and protect your property. Assess your current camera system, determine your specific security needs, research the latest technologies, consider professional installation, and plan your budget accordingly. By doing so, you can ensure that your security cameras remain up to date and provide the level of protection you need.
Enhancing security camera coverage and positioning
When it comes to securing your property, having the right coverage and positioning for your security cameras is crucial. Here are some tips to enhance your security camera coverage:
- Identify high-risk areas: Start by identifying the areas that are most vulnerable to break-ins or other security threats. These areas could include entry points, parking lots, or any blind spots.
- Strategic placement: Once you have identified the high-risk areas, strategically place security cameras to cover these spots adequately. Mount the cameras at a height where they cannot be easily tampered with or obstructed.
- Overlapping coverage: To ensure comprehensive coverage, consider overlapping the camera views. This will minimize any blind spots and provide a more comprehensive view of the area under surveillance.
- Adjust camera angles: Experiment with different camera angles to maximize coverage. Tilt the cameras slightly downwards to capture facial features and other distinguishing characteristics.
- Lighting considerations: Proper lighting plays a crucial role in security camera effectiveness. Install cameras in well-lit areas or consider installing additional lighting to enhance visibility.
- Regular maintenance: It is essential to regularly clean and maintain your cameras to ensure optimal performance. Dust, dirt, or cobwebs can affect the clarity and coverage of the footage.
- Test the coverage: Periodically review the camera coverage to ensure that there are no blind spots or areas left vulnerable. Walk through the property and evaluate the camera’s field of view.
By following these tips and regularly assessing your security camera coverage, you can enhance the overall security of your property and have peace of mind knowing that it is well-protected.
FAQ,
What are some common issues with security cameras?
Common issues with security cameras include blurry or distorted images, poor video quality, connection problems, and false alarms.
How can I fix blurry or distorted images on my security camera?
To fix blurry or distorted images on your security camera, you can try cleaning the lens, adjusting the focus, or making sure the camera is securely mounted.
What should I do if my security camera has poor video quality?
If your security camera has poor video quality, you can try adjusting the resolution settings, checking the camera’s lighting conditions, or upgrading to a higher quality camera.
What can I do if my security camera keeps losing connection?
If your security camera keeps losing connection, you can try moving the camera closer to the router, resetting the camera’s network settings, or upgrading your internet connection.
How can I prevent false alarms from my security camera?
To prevent false alarms from your security camera, you can adjust the motion detection sensitivity, make sure there are no moving objects in the camera’s field of view, or use advanced features like object recognition to filter out false alarms.


