If you are a photography enthusiast or a film camera lover, developing your own film can be both a rewarding and cost-effective option. Being able to control the entire process from shooting to developing can give you a deeper connection with your images and allow you to achieve the desired results. In this article, we will guide you through the process of developing film camera digital.
Step 1: Gather the necessary equipment. Before you begin developing your film, make sure you have all the required equipment. This includes a film developing tank, a thermometer, film developer chemicals (such as developer, stop bath, and fixer), measuring cylinders, and film clips or a film drying rack. Having the proper equipment will ensure that the process goes smoothly and that your film turns out as expected.
Step 2: Prepare your workspace. Find a clean, dust-free area where you can set up your film developing station. Ideally, this space should be away from direct sunlight to avoid damaging the film. Ensure that all the necessary chemicals are within reach and that you have a well-ventilated area to work in. Additionally, wearing gloves and an apron is recommended to protect yourself from any potential chemical spills.
Step 3: Develop the film. Start by loading the film onto the developing reel in complete darkness, usually in a darkroom or a film changing bag. Once the film is securely loaded onto the reel, place it inside the developing tank and seal it tightly. Follow the instructions on the film developer chemicals to mix them properly and pour them into the tank. Agitate the tank gently to ensure even development of the film, and monitor the temperature throughout the process. When the recommended development time has passed, pour out the chemicals and use the stop bath and fixer to further process the film.
Understanding Film Camera Digital Development
Developing film in the digital age may seem like an uncommon practice, but it can provide unique and artistic results that cannot be easily replicated with digital cameras. While film photography may not be as convenient or popular as digital photography, it still offers a charm and character that many photographers appreciate.

When it comes to developing film camera digital, there are a few essential steps to follow:
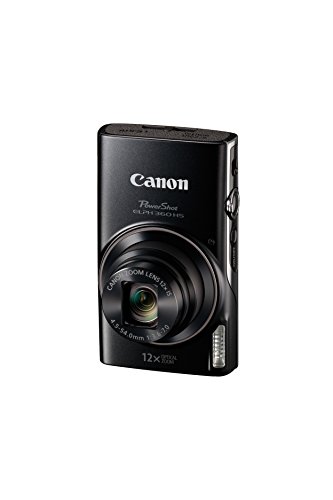
- Acquire the necessary equipment: To develop film camera digital, you will need a film camera, a scanner or a darkroom, and chemicals for film development. Ensure that you have a reliable film camera that suits your specific needs.
- Shoot your film: Take your film camera and capture images on your preferred type of film. Choose different ISOs and film types to experiment with different results and effects.
- Prepare your darkroom or set up your scanner: If you are using a traditional darkroom, make sure it is dark enough to avoid any light leaks. If you prefer using a scanner, set it up according to the manufacturer’s instructions.
- Develop the film: Use the appropriate chemicals and techniques to develop your film. Follow the instructions provided by the film manufacturer or seek guidance from experienced photographers or resources online.
- Dry and inspect the negatives: Once the film has been developed, allow it to dry completely. Inspect the negatives for any defects or inconsistencies that may have occurred during the development process.
- Scan or print your negatives: If you have a scanner, carefully scan your negatives according to the scanner’s specifications. If you prefer, you can also print your negatives using an enlarger and photo paper in a darkroom.
- Editing and post-production: Once you have digitized your negatives, import them into your preferred photo editing software. Make adjustments to exposure, contrast, and other parameters to enhance the final result.
- Share and display your work: Finally, share your digital images with the world. You can upload them to social media platforms or print them for exhibitions and displays.
While developing film camera digital may take more time and effort compared to digital photography, the process can be rewarding and allow you to create unique and expressive images.
Advantages of Film Camera Digital
While digital cameras have become ubiquitous in today’s modern world, there are still some advantages to using a film camera. Here are a few reasons why film camera digital is still a viable option:
|
1. Classic Look Film cameras produce a unique, timeless quality that cannot be replicated by digital cameras. The grainy texture and vibrant colors of film give photos a nostalgic and artistic feel. |
|
2. Dynamic Range Film cameras have a much wider dynamic range compared to digital cameras. This means that the details in both the highlights and shadows of a photograph are preserved, resulting in a more balanced and natural-looking image. |
|
3. Physical Prints With film camera digital, you have the ability to create physical prints of your photos. Holding a tangible photograph in your hands can be a much more immersive and personal experience than simply viewing an image on a screen. |
|
4. Slow Down and Focus Using a film camera digital requires a more deliberate and measured approach to photography. With a limited number of exposures, photographers must take their time to compose the perfect shot, resulting in a more thoughtful and intentional image. |
|
5. Learning Tool Using a film camera can be a great learning tool for photographers, especially beginners. The limited number of exposures forces photographers to think more critically about each shot, helping them to better understand the technical aspects of photography. |

Choosing the Right Film Camera Digital
If you are interested in film photography and want to combine the charm of shooting with the convenience of digital, a film camera digital is the perfect choice for you. However, with so many options available on the market, it can be overwhelming to decide which one to buy. Here are a few factors to consider when choosing the right film camera digital.
1. Compatibility with Your Film Format
Some film camera digitals are designed specifically for certain film formats, such as 35mm or medium format. It’s important to ensure that the camera you choose is compatible with the film format you intend to use. This information can usually be found in the camera’s specifications or product description.

2. Image Quality
The image quality of a film camera digital depends on various factors such as the sensor size, resolution, and lens quality. Higher resolution cameras generally produce sharper and more detailed images. Additionally, cameras with larger sensors tend to perform better in low light conditions and offer better dynamic range.
Tip: Look for cameras that have interchangeable lenses, as this allows you to experiment with different lenses and expand your creative possibilities.
3. User-Friendliness and Controls
Consider how user-friendly the camera is and whether its controls and settings are intuitive for you. Some film camera digitals offer automatic modes which are great for beginners, while others provide more manual control for advanced users. Think about your level of experience and preferences in terms of control and pick a camera that suits your needs.
4. Budget
Lastly, consider your budget when choosing a film camera digital. Prices can vary significantly depending on the brand, features, and condition of the camera. While it’s important to invest in a quality camera, it’s also important to find one that fits within your budget.
In conclusion, choosing the right film camera digital requires considering factors such as compatibility, image quality, user-friendliness, and budget. By taking these factors into account, you can find a camera that will enhance your film photography experience and allow you to capture beautiful digital images with the nostalgia of using film.

Essential Equipment for Film Camera Digital Development
Developing film in a digital format requires some essential equipment to ensure the process is successful. Here are the key tools you need to have:
- Darkroom: A darkroom is a must-have for film camera digital development. It provides a light-sealed space where you can handle and develop film in complete darkness to prevent any light leaks that could ruin the images.
- Film Tank: A film tank is used to hold the film during the development process. It is light-sealed and allows you to immerse the film in the necessary chemicals for proper development.
- Developer, Stop Bath, and Fixer Chemicals: These chemicals are essential for film development. The developer brings out the image on the film, the stop bath halts the development process, and the fixer stabilizes the image and makes it permanent.
- Thermometer: A thermometer is needed to monitor the temperature of the chemicals during the development process. Maintaining the correct temperature is crucial for achieving accurate development results.
- Measuring Cylinder: A measuring cylinder is used to accurately measure the chemicals needed for development. This ensures the correct chemical-to-water ratio, which is essential for achieving optimal results.
- Squeegees and Film Clips: Squeegees and film clips are useful for hanging and drying the film after development. They help prevent water spots and ensure the film is straight and taut during the drying process.
- Water Source: A reliable source of water is needed for rinsing the film after development. It is preferable to use distilled or filtered water to avoid any impurities that could affect the quality of the final image.
- Drying Rack: A drying rack provides a safe and dust-free area to hang the film for drying. It allows the film to dry evenly and prevents any contact with surfaces that could potentially damage the delicate emulsion.
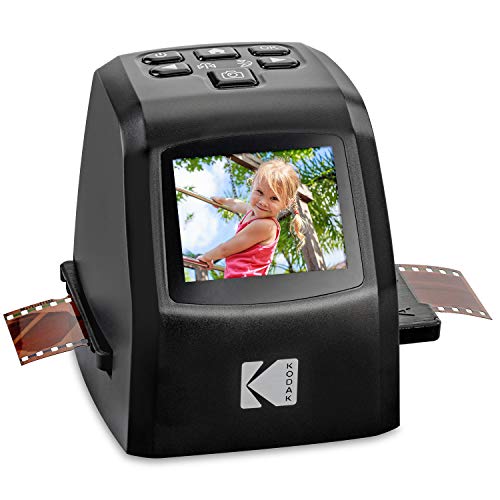
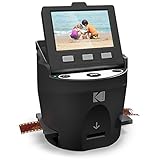
- Light Table or Scanner: Once the film is dry, you will need a light table or a scanner to view and digitize the developed images. A light table allows you to see the negatives, while a scanner helps you convert them into digital files for further editing and sharing.
With these essential equipment pieces, you will be well-equipped to develop film from your film camera in a digital format effectively. Make sure to follow proper handling and safety procedures to protect both yourself and your film during the development process.
Preparing Your Film for Development
Developing film with a digital camera requires careful preparation to ensure the best results. Before you begin the development process, follow these steps to properly prepare your film:
1. Gather Your Supplies
Make sure you have all the necessary supplies for film development, including a film developer, fixer, stop bath, water, a developing tank, and a reel to hold your film. Additionally, you will need a light-tight room or a dark bag to load your film onto the reel.

2. Choose a Development Method
Decide on the development method you will use, such as developing your film manually or using an automated film development machine. Each method has its advantages and disadvantages, so choose the one that best suits your needs.
3. Load Your Film
In a light-tight room or dark bag, carefully load your film onto the reel. Make sure to handle the film with clean hands to avoid any fingerprints or smudges that could affect the final results.
4. Mix Your Chemicals

Follow the instructions provided with your film developer, fixer, and stop bath to mix the chemicals properly. It is crucial to have the correct dilution and temperature for each chemical to ensure accurate and consistent results.
5. Set Up Your Development Area
Prepare a clean and clutter-free area for the film development process. Ensure that you have a stable surface to hold your equipment and a safe space to handle the chemicals.
6. Develop Your Film
Follow the recommended development times and agitation techniques specified by your film manufacturer and the chemical instructions. Keep a close eye on the development process and make any necessary adjustments to ensure optimal results.
7. Fix and Rinse
Once the development process is complete, fix your film in the fixer solution. After fixing, rinse the film thoroughly with water to remove any residual chemicals.
8. Dry Your Film
Allow your film to air dry in a dust-free environment. Ensure that the film is completely dry before handling it to prevent any damage or smudging.
By following these preparation steps, you can ensure that your film is ready for development with your digital camera. Remember to handle your film with care and pay attention to the instructions provided by your film manufacturer and chemical suppliers for the best results.
The Film Development Process
The film development process is a critical step in the production of high-quality photographs with a film camera. It involves several steps that are necessary to convert the exposed film into a visible image.
Here is an overview of the film development process:
| Step | Description |
|---|---|
| 1. Film Extraction | The first step is to carefully extract the film from the camera without exposing it to light. This is usually done in a darkroom to ensure no light leaks onto the film. |
| 2. Film Developing | Once the film is extracted, it is loaded onto a developing reel and placed in a light-tight developing tank. The tank is filled with developer solution, which initiates the chemical reaction necessary to develop the film. |
| 3. Development Time | The film is left in the developer solution for a specific amount of time, depending on factors such as film type and desired level of contrast. The development time can range from a few minutes to over an hour. |
| 4. Stop Bath | After the development time is complete, the film is transferred to a stop bath solution. This solution stops the chemical reaction and prevents further development. The film is agitated in the stop bath for a few minutes. |
| 5. Fixing | The film is then transferred to a fixing solution, which removes the remaining undeveloped silver halide crystals from the emulsion. This step ensures that the image is permanent and not susceptible to further development. |
| 6. Washing | After fixing, the film is thoroughly washed in running water to remove any remaining traces of chemicals. This step is crucial to prevent chemical residue from affecting the quality and longevity of the image. |
| 7. Drying | Once the film is washed, it is carefully hung or placed in a dust-free environment to dry. This can take several hours, depending on the humidity and temperature. |
| 8. Film Inspection | After the film is completely dry, it is inspected for any imperfections or defects. If necessary, the film can be retouched or cleaned before it is ready to be printed or scanned. |
The film development process is a meticulous and delicate process that requires precise attention to detail. Each step plays a crucial role in producing a high-quality image that preserves the captured moments in time.
Developing Film Camera Digital at Home
If you are passionate about photography and want to experiment with film camera photography, developing the film at home can be a rewarding process. Developing film camera digital at home allows you to have complete control over your creative process and enables you to explore different techniques.
To get started with developing film camera digital at home, you will need a few essential items:
- A darkroom or a light-tight space to process the film
- Chemicals for developing, such as developer, stop bath, and fixer
- A film reel and developing tank for loading and processing the film
- A thermometer to monitor the temperature of the chemicals
- A timer to keep track of the development process
- A film scanner or a digital camera for digitizing the developed negatives
Once you have gathered all the necessary equipment, you can start developing your film camera digital at home by following these steps:
- Prepare your workspace by turning off all the lights and ensuring that it is light-tight. Make sure you have all the chemicals and equipment within reach.
- Load the film onto the film reel in complete darkness. This step requires practice and can be challenging at first, but it becomes easier with experience.
- Once the film is loaded onto the reel, place it inside the developing tank and seal it tightly.
- Prepare the chemicals according to the instructions provided with the specific products you are using. Maintain the recommended temperature for each chemical.
- Begin the development process by pouring the developer into the tank and agitating it gently. Follow the recommended development times for the film and developer combination.
- After the developer has been agitated for the required time, pour it out and rinse the tank with water. This step stops the development process.
- Next, pour in the stop bath and agitate it for the recommended time. The stop bath neutralizes the developer and prepares the film for fixing.
- Once the stop bath time is up, pour it out and add the fixer to the tank. Agitate the fixer gently for the recommended time to ensure proper fixing of the film.
- After fixing, rinse the film thoroughly with water to remove any residual chemicals. You can use a film squeegee or a soft cloth to remove excess water.
- Hang the film to dry in a dust-free environment. Avoid exposing the film to direct sunlight or high humidity.
- Once the film is dry, you can use a film scanner or a digital camera with a macro lens to digitize the developed negatives.
Developing film camera digital at home requires practice and patience. It may take a few attempts to achieve the desired results, but with time, you will gain confidence and improve your skills. Remember to keep detailed records of your development process, including film type, developer used, and any adjustments made, to replicate successful results in the future.
With the freedom and creativity that developing film camera digital at home offers, you can truly make your photographs unique and personal. So, grab your film camera, set up your darkroom, and embark on an exciting journey of developing film camera digital at home!
Tips for Successful Film Camera Digital Development
Developing film camera digital images can be a challenging but rewarding process. With the right techniques and tools, you can achieve stunning results that rival those of digital cameras. Here are some tips to help you get the most out of your film camera digital development:
Choose the Right Film Stock
Not all film stocks are created equal, and choosing the right one is crucial for achieving the desired results. Consider factors such as ISO speed, grain size, and color rendition when selecting a film stock. Experiment with different options to find the one that best suits your shooting style and desired aesthetic.
Properly Store and Handle Film
Film is sensitive to heat, moisture, and light, so it’s important to store and handle it properly to avoid damage. Keep your film in a cool, dry place, away from direct sunlight. When loading film into your camera, do it in a dark or dimly lit environment to prevent exposure to light. Handle the film by its edges to avoid fingerprints or smudges.
Use a High-Quality Scanner
To digitize your film images, you’ll need a high-quality scanner that can accurately capture the details and colors of the film. Look for a scanner that offers a high optical resolution and supports your film format. Take the time to learn how to properly calibrate and use the scanner for the best results.
Master the Digital Development Workflow
Developing film camera digital images involves a digital development workflow that includes scanning, editing, and post-processing. Familiarize yourself with the different steps and software involved in the process. Take advantage of tools like Adobe Lightroom or Photoshop to enhance your images while preserving their natural look.
| Tip | Description |
|---|---|
| Adjust Levels and Curves | Use the levels and curves adjustments in your editing software to fine-tune the histogram and tonal range of your images. This can help improve contrast and overall image quality. |
| Dust and Scratch Removal | Scan your film images at a high resolution and use the software’s dust and scratch removal tools to clean up any imperfections. This will ensure a clean and professional-looking final result. |
| Experiment with Presets | Try using different presets or filters in your editing software to achieve different looks and moods in your film camera digital images. This can help you create a unique style and artistic vision. |
| Don’t Overdo It | While it’s tempting to go overboard with editing and post-processing, it’s important to maintain the integrity and natural look of your film images. Avoid excessive manipulation and aim for a balanced and realistic final result. |
By following these tips, you can successfully develop film camera digital images and create stunning visuals that stand out from the crowd. Remember to practice, experiment, and have fun along the way!
Question-answer:
What is film camera digital?
Film camera digital refers to the process of developing digital images shot on a film camera. It involves scanning the film negatives or slides and converting them into digital files.
Why should I develop film camera digital?
Developing film camera digital allows you to preserve the traditional look and feel of film photography while still having the convenience and flexibility of digital files. It also enables you to easily share and edit your images digitally.
What equipment do I need to develop film camera digital?
To develop film camera digital, you will need a film scanner or a flatbed scanner with a film scanning attachment. You will also need a computer with photo editing software to process and edit the digital files.
What is the process of developing film camera digital?
The process of developing film camera digital involves scanning the film negatives or slides using a film scanner. After scanning, you can import the digital files into photo editing software for adjustments, such as adjusting exposure, contrast, and colour balance. Once you are satisfied with the edits, you can save the files as digital images in a format of your choice.