Photogrammetry is a technique that allows you to create accurate 3D models or maps using photographs. It has become increasingly popular in various fields, from archaeology to construction, as it offers a cost-effective and efficient way to capture and analyze data. One of the key tools used in photogrammetry is the drone, which enables you to capture high-resolution aerial photographs from different angles.
If you are interested in exploring the world of photogrammetry with a drone, this article will guide you through the process step by step.
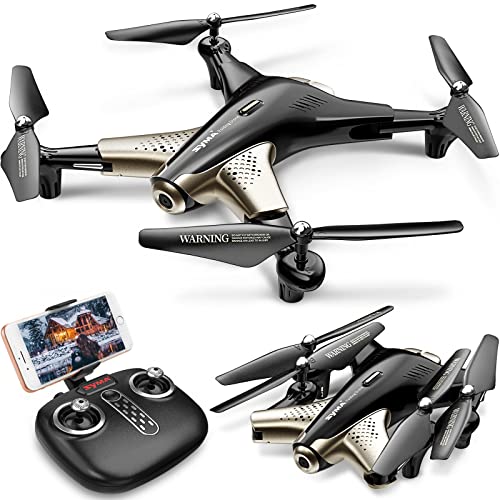
Step 1: Choose the Right Drone
The first step in doing photogrammetry with a drone is to choose the right equipment. Look for a drone that has a high-resolution camera, good flight stability, and a long battery life. It is also essential to consider the payload capacity of the drone, as you will need to attach additional equipment such as a GPS receiver or a light sensor.
Step 2: Plan Your Flight
Before taking your drone to the skies, it is crucial to plan your flight carefully. Determine the area you want to capture, check the weather conditions, and obtain any necessary permissions or permits. You should also consider the altitude, overlap, and angle of your drone’s camera to ensure that you capture enough data for accurate photogrammetry processing.
Step 3: Capture the Images
Once you are ready to fly, make sure to fully charge your drone’s battery and perform a pre-flight check. Fly your drone in a grid-like pattern over the area of interest, taking overlapping images with sufficient overlap to ensure accurate reconstruction. It is recommended to shoot in RAW format to have more flexibility during post-processing.
Step 4: Process the Data
After capturing the images, it is time to process the data using photogrammetry software. There are various software options available, such as Agisoft Metashape and Pix4D, which can reconstruct 3D models from your images. You will need to import the images, calibrate the camera, align the images, and generate the 3D model or map.
Step 5: Analyze and Share
Once you have generated the 3D model or map, you can analyze the data to extract valuable information. You can measure distances, volumes, or areas, identify patterns or anomalies, or even create virtual tours. Finally, you can share your results with others, whether it is for research, documentation, or presentation purposes.
With the right equipment, careful planning, and proper processing, photogrammetry with a drone can provide you with accurate and detailed 3D models or maps. It is a powerful tool that can revolutionize many industries and help in various applications.
What is photogrammetry?
Photogrammetry is a technique used to measure and interpret 3D data from photographs. It is a science and technology that combines photography and surveying to create accurate and detailed 3D models of objects or environments.
The process of photogrammetry involves capturing a series of overlapping photographs, typically from different angles, and using specialized software to analyze and reconstruct the geometry of the subject. By analyzing the position and orientation of each photo, photogrammetry software can determine the distance, size, and shape of objects within the photos.
Photogrammetry has a wide range of applications, including in mapping and surveying, archaeology, architecture, engineering, and entertainment. It is commonly used in industries such as construction, mining, agriculture, and cinematography.
To perform photogrammetry with a drone, you need a drone equipped with a high-resolution camera and specialized software capable of processing the aerial images. The drone is flown over the subject area, capturing a series of photographs from different angles and altitudes. The images are then processed using the photogrammetry software to generate a detailed 3D model of the subject.
Photogrammetry offers numerous advantages over traditional methods of data collection, such as its efficiency, cost-effectiveness, and ability to capture inaccessible or hazardous areas. It provides highly accurate and detailed 3D models that can be used for analysis, visualization, and virtual reality applications.
Types of photogrammetry
There are two main types of photogrammetry: aerial photogrammetry and terrestrial photogrammetry.
Aerial photogrammetry involves capturing photographs from an airborne platform, such as a drone, helicopter, or aircraft. It is commonly used for large-scale mapping and surveying projects, as well as in agriculture and environmental monitoring.
Terrestrial photogrammetry, on the other hand, involves capturing photographs from a ground-based position. This can be done using a handheld camera or a camera mounted on a tripod. Terrestrial photogrammetry is typically used for close-range applications, such as architectural and archaeological documentation, as well as in forensics and industrial measurement.
The photogrammetry process
The photogrammetry process involves several steps:
| Step | Description |
|---|---|
| Image Acquisition | Capturing a series of overlapping photographs from different angles and altitudes. |
| Image Processing | Importing the images into specialized photogrammetry software and aligning them to create a 3D point cloud. |
| Point Cloud Generation | Creating a dense point cloud by identifying and matching corresponding points in the images. |
| Surface Reconstruction | Creating a 3D surface model by connecting the points in the point cloud to form triangles. |
| Texture Mapping | Applying the original images as textures to the 3D model to enhance its visual appearance. |
| Output Generation | Exporting the final 3D model or other output formats, such as orthomosaics, DEMs, or contour maps. |
Why use a drone for photogrammetry?
Using a drone for photogrammetry has numerous advantages that make it a popular choice in the field.
Firstly, drones provide a unique perspective by capturing aerial images from above. This allows for a comprehensive view of large areas, making it easier to gather data and create detailed 3D models.
Secondly, drones offer flexibility and mobility, allowing you to easily navigate and reach areas that are difficult to access on foot. This is particularly useful when mapping rugged terrain or inaccessible locations.
Furthermore, drone-mounted cameras can capture high-resolution images with precise details, ensuring accurate data collection. This level of detail is crucial for creating high-quality and accurate 3D models.
In addition, using a drone for photogrammetry reduces the time and cost required for data collection. Drones can efficiently cover large areas in a shorter time compared to traditional manual methods. This saves both time and resources, making it an efficient solution for various industries.
Moreover, drones can enhance the safety of the data collection process. By using a drone, you can eliminate the need for personnel to physically access hazardous or challenging environments, reducing the risk of accidents and injuries.
Overall, drones offer a variety of benefits for photogrammetry, including a unique aerial perspective, flexibility, high-resolution image capture, time and cost efficiency, as well as improved safety. These advantages make a drone an invaluable tool for professionals in fields such as surveying, construction, agriculture, and more.
Getting Started
If you’re new to photogrammetry with a drone, here are some steps to help you get started:
1. Choose the right drone: Select a drone that is equipped with a high-resolution camera and has the ability to capture images at different angles. This will ensure that you can capture detailed and accurate photos for your photogrammetry projects.
2. Plan your flight: Before you take off, plan your flight path and make sure to include all the areas that you want to capture. Use a flight planning software to determine the optimal altitude and speed for your drone, as well as to ensure that you capture sufficient overlap between your images.
3. Calibrate your camera: Before you start capturing images, it’s important to calibrate your camera settings. Make sure that your camera is set to the highest resolution and that the white balance and exposure settings are properly adjusted for the lighting conditions of your environment.
4. Capture your images: Once you’re in the air, start capturing images of your target area. Make sure to overlap each photo by at least 60% to ensure accurate reconstruction. Fly your drone in a grid or circular pattern to cover the entire area.
5. Process your images: After the flight, download the images to your computer and use photogrammetry software to process them into a 3D model. This software will automatically match the overlapping features in your images and generate a point cloud, which can then be used to create the final 3D model.
By following these steps, you’ll be well on your way to creating accurate and detailed 3D models using photogrammetry with a drone.
Choosing the right drone
When it comes to photogrammetry, selecting the right drone is crucial for achieving accurate and high-quality results. Here are some factors to consider when choosing a drone for photogrammetry:
Flight Performance
The drone’s flight performance is an important aspect to take into account. Look for a drone that has stable flight capabilities, precise controls, and sufficient battery life. It should also have the ability to maintain position and altitude accurately, as any deviations can affect the quality of the captured images.
Camera Quality
The quality of the drone’s camera is a vital consideration. Opt for a drone with a high-resolution camera capable of capturing sharp and detailed images. The camera should ideally have adjustable settings for exposure, shutter speed, and ISO, allowing for flexibility in different lighting conditions.
Additionally, it is advisable to choose a drone with a camera that has a wide field of view, as this will enable you to capture a larger area in a single shot, reducing the number of images required for the photogrammetry process.
Stability and Gimbal
A stable drone is essential for photogrammetry, as it ensures that the camera remains steady during flight, resulting in sharper and more accurate images. Look for a drone with a built-in gimbal, which helps stabilize the camera and reduces any vibrations or movements caused by the drone’s flight.
The gimbal should be able to adjust and compensate for any changes in the drone’s movement, providing smooth and level images. A stabilized camera is particularly important when capturing images from higher altitudes or in windy conditions.
By considering these factors and choosing the right drone, you can enhance the efficiency and quality of your photogrammetry projects, improving the accuracy of your 3D models and maps.
Understanding the basics of photogrammetry
Photogrammetry is a technique used to obtain accurate measurements from photographs. It involves capturing multiple images from different angles and using specialized software to process and analyze these images. Photogrammetry can be done with a variety of cameras, including drones.
Here are the key concepts to understand in photogrammetry:
- Image overlap: When capturing images for photogrammetry, it is important to have sufficient overlap between consecutive images. This allows the software to accurately match points and create a 3D model. Typically, a 60-80% overlap is recommended.
- Ground control points (GCPs): GCPs are physical markers placed on the ground to provide reference points for accurate georeferencing. These points are used to align the photogrammetric data with real-world coordinates.
- Camera calibration: Before using a camera for photogrammetry, it needs to be calibrated. This involves determining the intrinsic parameters such as focal length, lens distortion, and camera sensor size. Calibration allows for accurate measurements and distortion correction in the final output.
- SfM (Structure from Motion): SfM is a technique used in photogrammetry to reconstruct 3D structures from 2D images. It works by identifying common features in the images and calculating their relative positions and orientations in 3D space.
- Dense point cloud: A dense point cloud is a collection of 3D points generated from the SfM process. Each point represents a unique feature identified in multiple images. The point cloud can be used to create detailed 3D models or to extract measurements and other information.
- Orthophoto: An orthophoto is a rectified and georeferenced image produced from the photogrammetric data. It eliminates distortions caused by camera tilting or terrain variations and provides an accurate representation of the captured area.
Understanding these basic concepts is crucial to successfully perform photogrammetry with a drone. By following best practices for image capture, camera calibration, and data processing, one can obtain accurate and reliable results for various applications such as 3D mapping, surveying, and inspection.
Preparing for a photogrammetry mission
Before you embark on a photogrammetry mission with your drone, it is important to properly prepare to ensure a successful outcome. This involves several key steps to consider, such as:
1. Selecting the right equipment
One of the first things you’ll need to do is choose the right equipment for your photogrammetry mission. This includes selecting a suitable drone with a high-resolution camera, as well as any additional accessories or attachments that may be required, such as GPS modules or specialized sensors.
2. Planning your flight path
Planning your flight path is crucial to ensure comprehensive coverage of the area you want to capture. Depending on the size and complexity of the area, you may need to divide it into multiple flight missions or plan your flight path using waypoints or grid patterns. This will help you capture the necessary images from different angles and heights for accurate reconstruction.
3. Checking weather conditions
Before heading out for your photogrammetry mission, it is important to check the weather conditions. Flying a drone in unfavorable weather conditions, such as strong winds or rain, can negatively impact both the safety of the flight and the quality of the captured images. Choose days with calm winds and clear skies for optimal results.
4. Ensuring proper battery and memory card management
Good battery and memory card management is essential for a smooth and uninterrupted photogrammetry mission. Make sure your drone’s batteries are fully charged and have enough capacity to complete the mission. Additionally, ensure that your memory card has enough storage space to store all the captured images.
5. Conducting a site survey
Prior to the mission, it is advisable to conduct a site survey to familiarize yourself with the area. This will help you identify any potential obstacles or hazards that may affect the flight or the quality of the data collected. It is also essential to obtain the necessary permissions or clearances for flying in the designated airspace.
| Summary of steps for preparing a photogrammetry mission: |
|---|
| 1. Select the right equipment |
| 2. Plan the flight path |
| 3. Check weather conditions |
| 4. Manage batteries and memory cards |
| 5. Conduct a site survey |
Planning your flight
Before you start capturing images with your drone for photogrammetry, it’s important to carefully plan your flight. This will ensure that you capture the necessary data and achieve accurate results. Here are some steps to consider when planning your photogrammetry flight:
1. Selecting the area of interest
Identify the specific area that you want to capture in 3D. Consider the size and complexity of the area, as well as any objects or structures that you want to include in your model.
2. Assessing the terrain
Take a close look at the terrain of the area you will be flying over. Observe any slopes, hills, or other features that may impact the flight path or the quality of the images captured.
3. Determining the flight altitude and overlap
Based on the desired level of detail and the capabilities of your drone, determine the optimal flight altitude. Additionally, calculate the required overlap between images to ensure accurate photogrammetric processing.
4. Establishing the flight plan
Using software or apps designed for drone flight planning, establish a flight plan that covers the entire area of interest. This plan should include the planned flight path, waypoints, and any specific areas or angles that you want to capture from.
Tip: Consider flying in a grid or zigzag pattern to ensure full coverage of the area, or use circular flights for capturing objects from multiple angles.
5. Checking regulations and permissions
Before you fly your drone, familiarize yourself with the local regulations and obtain any required permissions or authorizations. Ensure that you comply with any restrictions regarding flight altitude, flight zones, or areas where drones are prohibited.
6. Pre-flight equipment checks
Inspect your drone and all its components to ensure they are in good working condition. Check the battery levels, propellers, and camera settings. Confirm that you have a stable GPS connection and that the remote control is functioning properly.
Note: It’s important to always fly your drone in a safe and responsible manner, respecting the privacy of others and following all aviation regulations.
By carefully planning your photogrammetry flight, you can maximize the quality and accuracy of the data captured. This will result in better outcomes when processing the images into 3D models or maps.
Calibrating your drone and camera
Before you start using your drone for photogrammetry, it’s important to calibrate both your drone and camera to ensure accurate and reliable results. Calibration helps correct any errors or discrepancies that may occur during flight and image capture, improving the overall quality of your photogrammetric data.
1. Drone calibration:
First, make sure your drone is properly calibrated, especially the IMU (Inertial Measurement Unit) and compass. This step is crucial for accurate navigation and positioning, which are essential for photogrammetry. Consult your drone manufacturer’s instructions for specific calibration procedures.
2. Camera settings and calibration:
Next, you need to adjust the camera settings, such as exposure, focus, and ISO, to optimize image quality. Use manual settings whenever possible to maintain consistency throughout the entire photogrammetry process. Additionally, it’s important to calibrate your camera’s internal parameters, such as sensor size, lens distortion, and focal length.
3. Ground control points (GCP) placement:
To further enhance the accuracy of your drone-based photogrammetry, consider using ground control points (GCPs). These are identifiable physical markers placed on the ground, whose precise locations are measured using high-accuracy surveying techniques. By including GCPs in your photogrammetric workflow, you can tie the drone-captured data to a known reference system, reducing the impact of errors and improving the overall accuracy of your final output.
4. Test flights and image capture:
Before conducting your actual photogrammetry missions, it’s advisable to perform test flights to verify the accuracy and reliability of your drone and camera calibration. Capture test images from different altitudes, angles, and flight paths to ensure consistent and high-quality results.
By calibrating your drone and camera, you can significantly improve the quality and accuracy of your photogrammetric data, enabling you to generate more reliable 3D models and maps.
Executing a photogrammetry mission
Once you have properly planned your drone photogrammetry mission, it’s time to execute it. Here are the steps to follow:
1. Pre-flight preparations: Before taking off, make sure you have charged your drone’s batteries and checked that all the necessary equipment is in working order. Also, ensure that you have downloaded the necessary flight planning and data collection software onto your device.
2. Site setup: When you arrive at the survey area, set up any necessary ground control points (GCPs) and mark them on the ground. GCPs are known reference points that help increase the accuracy of the photogrammetry results.
3. Flight planning: Open your flight planning software and input the necessary parameters such as the desired altitude, ground sampling distance, and overlap between images. The software will generate a flight plan for your drone to follow.
4. Safety checks: Before taking off, perform a thorough safety check of your drone. Make sure that the propellers are securely attached and that there are no visible damages. Check the GPS signal and ensure that the drone’s firmware is up to date.
5. Fly the mission: Once you are ready, launch your drone and let it follow the generated flight plan. Monitor the flight to ensure that everything is going smoothly and make any necessary adjustments if needed.
6. Data collection: As the drone flies, it will capture a series of overlapping images of the survey area. The camera settings should be adjusted to capture high-quality images with good resolution and minimal distortion.
7. Post-processing: Once the mission is complete, land the drone safely and download the images from the onboard storage. Use photogrammetry software to process the images and generate a 3D model or orthomosaic of the survey area.
8. Quality control: After the post-processing, carefully review the results to ensure their accuracy and quality. Check for any errors or discrepancies and make any necessary adjustments before finalizing and sharing the photogrammetry outputs.
By following these steps, you can effectively execute a photogrammetry mission with your drone and obtain high-quality results for your mapping and surveying needs.
Flying your drone
When it comes to photogrammetry, flying your drone properly is crucial to capturing accurate and high-quality images.
Here are some important tips to keep in mind:
1. Pre-flight planning:
Before taking off, plan your flight path carefully, considering the area you want to map and any obstacles that may be present. Be aware of any regulations or restrictions in the area you will be flying in.
2. Check weather conditions:
Make sure to check the weather conditions before each flight. Avoid flying in strong winds, rain, or other adverse weather conditions that could affect the stability and maneuverability of your drone.
3. Choose the right altitude:
The altitude at which you fly your drone will depend on the area you want to map and the level of detail you require. Generally, flying at a higher altitude will result in a larger coverage area, but with lower resolution images. Flying at a lower altitude will provide more detailed images but will cover a smaller area.
4. Maintain a consistent speed:
When capturing images for photogrammetry, it is important to maintain a consistent speed while flying your drone. This will ensure that the images have consistent overlap, allowing for better stitching and generating more accurate 3D models.
5. Overlap and grid pattern:
To ensure the best results, it is recommended to fly your drone in an overlapping grid pattern. This means that each image should have a certain amount of overlap with the previous one, both horizontally and vertically. This overlapping will help software to accurately match and stitch the images together during the processing phase.
6. Fly in good lighting conditions:
Optimal lighting conditions can significantly improve the quality of your photogrammetry results. Try to fly your drone during daylight hours when the sun is not directly overhead, as harsh shadows can affect image quality and accuracy.
7. Be mindful of battery life:
Keep track of your drone’s battery life during flight. Plan your flight path in a way that allows you to cover the desired area without draining the battery too quickly. Consider bringing extra batteries if needed.
By following these tips, you will be able to maximize the quality and accuracy of your photogrammetry data while safely flying your drone.
Question-answer:
What is photogrammetry and how does it work?
Photogrammetry is a technique that uses photographs to measure and create 3D models of objects or landscapes. It works by analyzing the overlapping images taken from different angles and using triangulation to calculate the exact position and size of each point in the scene.
Why would I want to use a drone for photogrammetry?
Using a drone for photogrammetry offers several advantages. Drones can capture aerial images, which allows for a more comprehensive view of the area being photographed. Drones also provide the flexibility to easily access hard-to-reach or dangerous locations, making it possible to capture data that would otherwise be impractical or impossible to obtain.
What kind of drone do I need for photogrammetry?
For photogrammetry, you will need a drone with a high-resolution camera, GPS capabilities for precise positioning, and the ability to capture images automatically at specific intervals. It is important to choose a drone that has a stable flight performance and is capable of capturing high-quality images to ensure accurate 3D model creation.
Are there any specific software programs I need to process the photogrammetry data?
Yes, there are several software programs available for processing photogrammetry data. Some popular ones include Pix4D, Agisoft Metashape, and Autodesk ReCap. These software programs utilize algorithms to analyze the photographs and generate accurate 3D models from the captured data.
What are some common applications of photogrammetry with a drone?
Photogrammetry with a drone has numerous applications across industries. It can be used in construction and engineering for site surveying and monitoring progress, in agriculture for crop monitoring and yield estimation, in archaeology for creating detailed maps of archaeological sites, and in filmmaking for aerial cinematography, among many other applications.