Whether you are a graphics designer, a gamer, or a blogger, there are times when you need to capture your computer or phone screen in order to showcase or explain something. Using a digital camera to film your screen is a simple and effective way to do this. In this article, we will provide you with a step-by-step guide on how to film your screen using a digital camera.
Step 1: Prepare your equipment
Before you start filming your screen, it is important to make sure that you have the right equipment. Firstly, you will need a digital camera with a video recording feature. Make sure that the camera is charged and ready to use. Secondly, you will need a stable tripod or support for your camera to avoid shaky footage. Finally, prepare the screen that you want to film by cleaning it and adjusting the brightness and contrast settings for optimal visibility.
Note: If you are filming a computer screen, you can use an HDMI cable to connect your computer to a TV or monitor to get a larger display.
Step 2: Set up the camera

Once you have prepared your equipment, it’s time to set up your camera. Place the camera on the tripod or support in front of the screen, making sure it is stable and at the right height and angle. Adjust the zoom and focus settings of the camera to capture a clear and sharp image of the screen. You can also use the camera’s grid lines feature to ensure that the screen is properly aligned within the frame.
Step 3: Start recording
Now that your camera is set up, it’s time to start recording. Press the record button on the camera to start the video recording. Keep in mind that the length of the recording will depend on what you want to capture on the screen. Make sure to have enough storage space on your camera’s memory card to avoid interruptions and to have a backup memory card if needed. While recording, try to be as steady as possible to avoid shaky footage.
Note: If you are filming a mobile device screen, make sure to turn off notifications and other distractions that may interfere with the recording.
Step 4: Review and edit

Once you have finished recording, take some time to review the footage on your camera. Look for any issues with the image quality, focus, or framing. If needed, you can edit the video using video editing software to improve the overall appearance. You can also add annotations or voiceover to provide additional information or explanations.
By following these steps, you will be able to effectively film your screen using a digital camera. Remember to practice and experiment with different settings to find the best results for your specific needs. Good luck!
What is screen filming
Screen filming, also known as screen recording or screen capture, refers to the process of capturing the activities on a computer or mobile device screen using a digital camera. It allows users to record and save videos of their screen activities for various purposes, such as creating tutorials, sharing gameplay footage, or demonstrating software features.
Screen filming is a useful tool for both personal and professional use. Individuals can use it to create video tutorials or record their gaming sessions to share with friends or upload to video sharing platforms. Businesses and organizations can utilize screen filming to create product demonstrations, software training videos, or presentations.
To film a screen with a digital camera, users need to position the camera in front of the screen and ensure that the camera’s focus is adjusted properly. It is important to minimize any glare or reflections on the screen to ensure clear and high-quality footage. Additionally, using a tripod or stabilizer can help capture steady footage without any shakes or vibrations.
Various digital cameras offer different features and settings for screen filming, such as adjustable exposure, white balance, and frame rate. Users should explore and experiment with these settings to achieve the desired video quality and visual effects.
Screen filming can be a cost-effective alternative to screen capturing software or dedicated screen recording devices. However, it may have limitations in terms of video quality, stability, and flexibility compared to specialized tools. Users should consider their specific requirements and budget while choosing the method of screen filming that suits them best.
Benefits of filming screen with digital camera
Filming a screen with a digital camera has several benefits that make it a popular choice for capturing video content. Whether you are creating a tutorial, recording a presentation, or documenting a digital process, using a digital camera to film your screen can offer these advantages:
1. Flexibility and Mobility
With a digital camera, you have the freedom to move around and film your screen from different angles. This flexibility allows you to capture the content in a way that best suits your needs. You can easily adjust the camera position and settings to get the optimal shot.
2. High-Quality Video
Digital cameras are designed to capture high-quality images and videos. By using a digital camera to film your screen, you can ensure that the recorded video has sharp details, vibrant colors, and excellent clarity. This is especially important if you want to create professional-looking content.

Moreover, digital cameras often have advanced features like manual focus and exposure control, which allow you to fine-tune the settings for optimal results. This level of control ensures that the final video is of the highest quality.
3. Enhanced Audio
In addition to capturing high-quality video, digital cameras also have excellent audio recording capabilities. Most digital cameras come with built-in microphones that can capture clear and crisp audio.
If you are recording a presentation or a tutorial, having good audio quality is crucial for ensuring that your viewers can understand the content without any distractions.
4. Versatility
Using a digital camera to film your screen offers versatility in terms of content creation. You can record not only the screen but also include shots of yourself or other additional elements to enhance the video.
For example, if you are demonstrating a software application, you can film yourself using the application and switch between the screen recording and the footage of yourself. This adds a personal touch and makes the video more engaging.

Overall, filming a screen with a digital camera provides flexibility, high-quality video, enhanced audio, and versatility in content creation. If you want to capture professional-looking video content, using a digital camera is an excellent choice.
Preparation
Before you start filming your screen with a digital camera, it’s important to make sure you have everything you need and that your camera is set up correctly. Here are some steps you can follow to ensure a smooth filming process:
- Gather your equipment: Make sure you have a digital camera that is capable of recording video. Check the camera’s manual or specifications to see if it has this feature. You will also need a tripod or a stable surface to place your camera on.
- Clean the screen: Before you start filming, clean your screen with a microfiber cloth to remove any smudges or fingerprints. This will help ensure that the video footage is clear and free from any distractions.
- Set up the camera: Mount your camera on the tripod or place it on a stable surface. Make sure it is positioned in a way that captures the entire screen without any obstructions. Adjust the camera settings, such as resolution and frame rate, according to your preferences.
- Test the lighting: Check the lighting conditions in the room where you will be filming. Make sure there is enough light to clearly see the screen, but avoid harsh glare or reflections. If needed, you can adjust the positioning of lamps or curtains to achieve better lighting.
- Adjust camera focus: Use the camera’s autofocus function or manual focus to ensure that the screen is sharp and in focus. You can do this by pointing the camera at the screen and pressing the shutter button halfway or following the camera’s instructions for manual focus.
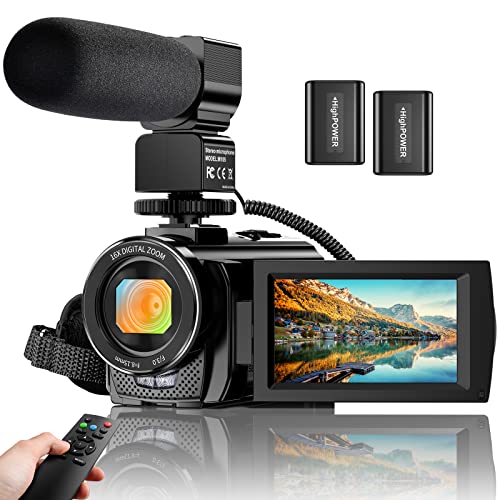
Choosing the right camera
When it comes to filming a screen with a digital camera, choosing the right camera is crucial. Here are a few factors to consider when selecting a camera for this purpose:
|
Resolution One of the most important factors to consider is the camera’s resolution. A higher resolution camera will capture more details and produce clearer and sharper images. Look for a camera with at least 1080p Full HD resolution or even higher for optimal results. |
Low light performance Since filming a screen often involves working in low light conditions, it’s important to choose a camera with good low-light performance. Look for a camera with a wide aperture lens and a larger image sensor, as these features will allow more light to enter the camera and result in brighter and clearer images. |
|
Image stabilization When filming a screen, it’s important to minimize camera shake to avoid blurry footage. Look for a camera with built-in image stabilization technology, which will help reduce camera shake and produce smoother and more stable footage. |
Manual controls Having manual controls on your camera can be beneficial when filming a screen, as it allows you to adjust settings such as exposure, white balance, and focus. This level of control can help you achieve the desired look and ensure accurate color reproduction. |
|
Additional features Consider other features that might be useful for your specific needs. This could include a flip-out LCD screen for easy framing and monitoring, a microphone input for better audio recording, or a remote control for hands-free operation. |
|


By considering these factors and choosing a camera that suits your filming needs, you’ll be able to capture high-quality footage of the screen with your digital camera.
Setting up the screen
Before you start filming the screen with your digital camera, it’s important to set up the screen properly. This will ensure that you capture clear and high-quality footage.
1. Clean the screen
Make sure the screen is clean and free of any dust or smudges. Use a microfiber cloth or a screen cleaning solution to gently remove any dirt or fingerprints. A clean screen will prevent any unwanted distractions or blemishes in your footage.
2. Adjust the screen brightness
Adjust the screen brightness to an optimal level for recording. Too much brightness can result in overexposed footage, while too little brightness can make the content difficult to see. Find a balance that works best for your camera and the content you are filming.
3. Remove any reflective surfaces
Avoid filming in an area with reflective surfaces, such as windows or mirrors, as they can cause unwanted reflections on the screen. These reflections can distort the content and reduce the overall quality of your footage. If possible, position your camera in a way that minimizes any potential reflections.
4. Stabilize the camera
Using a tripod or any other stabilizing equipment will help prevent shaky footage and ensure a steady recording. Unsteady footage can be distracting and make it difficult for viewers to focus on the content. Stabilizing the camera will result in smoother and more professional-looking footage.
By following these steps and setting up the screen correctly, you will be able to capture clear and high-quality footage with your digital camera. Take your time to prepare the screen before starting the recording to achieve the best results.
Camera settings
When filming a screen with a digital camera, it is important to adjust the camera settings to ensure the best possible quality. Here are some tips on the camera settings you should consider:
1. Resolution: Set your camera to the highest resolution possible. This will ensure that you capture all the details and minimize pixelation when zooming in or cropping the footage.
2. Frame rate: Choose a frame rate that matches the screen’s refresh rate. This will help to eliminate or minimize flickering or rolling shutter effects in your video.
3. Exposure: Adjust the exposure settings to prevent overexposure or underexposure. Use the camera’s built-in light meter or histogram to ensure that the brightness and contrast levels are balanced and accurate.
4. Focus: Make sure the camera is focused properly on the screen. You can use the camera’s autofocus feature or manually adjust the focus until the screen appears sharp and clear in the viewfinder or LCD screen.
5. White balance: Set the white balance correctly to ensure accurate colors. Use the camera’s auto white balance feature or manually adjust the white balance settings based on the lighting conditions in the room.
6. Image stabilization: If your camera has image stabilization capabilities, enable this feature to minimize camera shake and ensure smooth footage.
By adjusting these camera settings, you can optimize the quality of your video when filming a screen with a digital camera. Experiment with different settings and make adjustments as needed to achieve the best results.
Adjusting exposure
When filming a screen with a digital camera, adjusting the exposure settings is crucial to ensure the image is neither too bright nor too dark. Here are some tips to help you adjust the exposure correctly:
1. Manual mode
Switch your camera to manual mode so that you have full control over the exposure settings. This will allow you to adjust the shutter speed, aperture, and ISO to suit the lighting conditions.
2. Use a neutral gray card
To determine the correct exposure, you can use a neutral gray card. Hold the gray card in front of the screen and adjust the exposure settings until the gray card appears as an even shade of gray, without any washing out or darkening.
3. Check the histogram
Another way to ensure correct exposure is to check the histogram on your camera. The histogram displays a graphical representation of the tonal range in your image. Adjust the exposure settings until the histogram is spread evenly across the range without any peaks touching the edges.
4. Bracketing
If you’re unsure about the correct exposure, you can use the bracketing technique. This involves taking multiple shots at different exposure settings. Later, you can choose the image with the best exposure or merge them using post-processing software.
Remember, adjusting the exposure may require some trial and error, so don’t be afraid to experiment with different settings and review the results to achieve the desired outcome.
Setting the frame rate
One important setting to consider when filming a screen with a digital camera is the frame rate. The frame rate determines how many frames or images are captured per second, which in turn affects the smoothness of the video playback.
Firstly, it’s crucial to choose a frame rate that is compatible with the device or platform where the video will be viewed. Common frame rates for web and mobile devices include 30 frames per second (fps) and 60 fps. For broadcast or cinema quality, higher frame rates like 24 fps or even 48 fps can be used.
Before setting the frame rate, it is important to consider the content and purpose of the video. If the video contains a lot of motion or fast-paced action, a higher frame rate may be necessary to capture the detail and smoothness of the movement. On the other hand, if the video primarily consists of static images or slow-moving content, a lower frame rate can be used to save storage space and reduce file size.
In most digital cameras, the frame rate can be adjusted in the camera settings. However, it’s important to note that higher frame rates require more processing power and storage space. Therefore, it’s important to have sufficient memory and battery life when shooting at higher frame rates.
When setting the frame rate, it’s also worth considering the intended output format. For example, if the video will be edited and shared on platforms like YouTube or social media, it’s advisable to check their recommended frame rate settings for optimal playback quality.
In conclusion, choosing the right frame rate is essential for filming a screen with a digital camera. By considering factors like device compatibility, content type, and intended output format, it’s possible to capture high-quality videos that are smooth and enjoyable to watch.
Question-answer:
What equipment do I need to film my computer screen with a digital camera?
To film your computer screen with a digital camera, you will need a digital camera capable of recording video, a tripod or stabilizer to keep the camera steady, and proper lighting to ensure a clear image. It is also helpful to have a computer screen recording software installed on your computer to capture the screen activity.
Can I film my phone screen with a digital camera?
Yes, you can film your phone screen with a digital camera. To do this, you will need to position the camera in a stable position, such as using a tripod or holding it steady, and ensure that your phone screen is clear and visible. Additionally, you can use screen recording software on your phone, which may provide a better quality recording compared to using a digital camera.


