
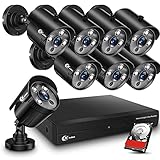
If you own a security camera, you know how crucial it is to have clear and reliable footage, even at night. However, sometimes the night vision on your security camera may not be working as expected, resulting in blurry or grainy images. But don’t worry, there are several steps you can take to fix the night vision on your security camera and ensure your property is properly monitored, day or night.
1. Clean the Camera Lens: The first step in fixing the night vision on your security camera is to clean the camera lens. Over time, dust, dirt, and smudges can accumulate on the lens, obstructing the infrared light that helps capture clear images at night. Use a soft cloth or a lens cleaning solution to gently remove any dirt or smudges.
2. Check the Positioning: Another common issue that can affect the night vision on your security camera is improper positioning. Make sure your camera is correctly positioned and angled towards the area you want to monitor. Avoid placing the camera near reflective surfaces or objects that could interfere with the infrared light, such as windows or metal objects. Adjusting the positioning of the camera can significantly improve the night vision performance.
3. Adjust the Settings: Most security cameras offer adjustable settings that allow you to fine-tune the night vision capabilities. Access the camera’s settings menu and look for options related to night vision or infrared. Experiment with different settings to find the optimal configuration for your specific environment. Keep in mind that the ideal settings may vary depending on factors such as the distance between the camera and the target area.
4. Upgrade the Camera: If the above steps don’t improve the night vision on your security camera, it might be time to consider upgrading your camera. Newer models often feature advanced infrared technology and superior image sensors that can provide better night vision performance. Do some research to find a camera that fits your needs and budget, and consider consulting with a professional for expert advice.

By following these steps, you can enhance the night vision capabilities of your security camera and ensure that your property is effectively monitored, even in low-light conditions. Remember to regularly clean the camera lens and periodically check the positioning and settings to maintain optimal performance. With clear and reliable night vision, you can have peace of mind knowing that your security camera is capturing every detail, day or night.
Tips for improving night vision on security camera
Having a security camera with good night vision capabilities is essential for maintaining the safety and security of your property. However, sometimes the night vision on your security camera may not be functioning at its best. Here are some tips to help you improve the night vision capabilities of your security camera:
1. Clean the camera lens
Over time, dust and dirt can accumulate on the camera lens, causing a decrease in image quality. Regularly clean the lens with a soft, lint-free cloth to remove any smudges or debris that may be obstructing the camera’s night vision functionality.
2. Adjust the infrared (IR) light settings
Most security cameras are equipped with infrared (IR) lights that help capture images in low-light conditions. Adjusting the IR light settings on your camera can enhance its night vision capabilities. Experiment with different settings to find the optimal balance between image quality and distance.
3. Avoid placing the camera near reflective surfaces
Reflective surfaces, such as glass or metal, can cause glare and interfere with the camera’s night vision capabilities. When positioning your security camera, avoid placing it near any reflective surfaces that could affect the quality of the images captured at night.

4. Install additional lighting
If your security camera’s night vision is still not satisfactory after trying the above tips, consider installing additional lighting in the area you want to monitor. Adding external lights can help improve the visibility and image quality captured by the camera at night.
By following these tips, you can enhance the night vision capabilities of your security camera and ensure that it performs optimally even in low-light conditions. Remember to consult the user manual provided by the manufacturer for specific instructions on adjusting night vision settings for your particular camera model.
Adjust camera settings
If the night vision on your security camera is not working properly, adjusting the camera settings might help resolve the issue. Follow these steps to adjust the settings:
1. Access the camera settings
First, you need to access the camera settings. This can usually be done through the camera’s mobile app or web interface. Consult the user manual or manufacturer’s website for instructions on how to access the settings for your specific camera model.
2. Check the night vision settings
Once you have accessed the camera settings, locate the night vision settings. It might be labeled as “Night Vision” or “IR (Infrared) Settings”.

Review the current settings and ensure they are configured correctly. Some of the settings you might need to check are:
- IR sensitivity: Adjust the sensitivity level to determine when the camera switches to night vision mode. Setting it too low might result in the camera not switching to night vision even in low light conditions, while setting it too high might result in the camera being stuck in night vision mode even in well-lit environments.
- IR LED control: Check if the camera has an option to manually control the IR LEDs. If it does, ensure they are not turned off and are functional.
- Automatic infrared: If the camera has this option, make sure it is enabled. This allows the camera to automatically switch to night vision mode when it detects low light conditions.
3. Make adjustments and test
After reviewing the settings, make any necessary adjustments based on your findings. For example, if the IR sensitivity is set too high, lower it to see if it improves the night vision. Alternatively, if the automatic infrared option is disabled, enable it and test the night vision again.
Once you have made the adjustments, test the night vision by viewing the camera feed in a dark or low light environment. Assess if the image quality has improved and if the camera is now correctly switching to night vision when needed.
If the issue persists after adjusting the camera settings, there may be a hardware problem with the camera itself. In such cases, contacting the manufacturer or a professional technician for further assistance is recommended.
Clean the camera lens
One of the most common reasons for night vision issues on security cameras is a dirty lens. Over time, dirt, dust, smudges, and fingerprints can accumulate on the lens, which can greatly affect the camera’s ability to capture clear images in low-light conditions.

To fix this problem, you will need to clean the camera lens. Start by using a soft, lint-free cloth or lens cleaning paper to gently wipe away any loose dirt or dust particles. Avoid using abrasive materials or harsh chemicals, as they can scratch or damage the lens.
If the lens is still dirty, slightly dampen the cloth with a small amount of lens cleaning solution or isopropyl alcohol and gently wipe the lens in a circular motion. Be careful not to apply too much pressure or touch any other parts of the camera.
After cleaning the lens, use a dry part of the cloth to remove any excess moisture and let the lens air dry for a few minutes before reattaching it to the camera.
Regularly cleaning the camera lens can help improve the night vision capabilities of your security camera and ensure clearer images in low-light conditions.
Install additional lighting
One way to fix night vision issues on a security camera is to install additional lighting. This can provide the necessary illumination for the camera to capture clear images in low light conditions.
There are several types of lighting options that can be used to enhance the night vision capabilities of a security camera:
| 1. Infrared (IR) Illuminators: | IR illuminators emit infrared light, which is invisible to the human eye but can be detected by the camera’s sensors. These illuminators can be mounted near the camera and provide a source of light that helps the camera see in the dark. They are available in different ranges, so choose one that suits the needs of your camera. |
| 2. Floodlights: | Floodlights are bright lights that can be installed around the camera’s location. They can illuminate a large area and provide the necessary light for the camera to operate effectively at night. Make sure to position the floodlights in such a way that they do not cause glare or shadows that could affect the camera’s performance. |
| 3. Motion-Activated Lights: | Another option is to install motion-activated lights. These lights only turn on when they detect movement, conserving energy while still providing the necessary illumination for the camera. This can be particularly useful if the camera is used in an area with limited power supply. |
When installing additional lighting, make sure to position the lights strategically to cover the areas that the camera needs to capture. Test the camera’s night vision after installation to ensure that the lighting is sufficient and adjust as needed.
By installing additional lighting, you can enhance the night vision capabilities of your security camera and improve its performance in low light conditions.
Common issues with night vision on security camera
When it comes to security cameras, night vision is a crucial feature that allows you to monitor your property during the dark hours. However, there can be some common issues that affect the night vision capabilities of your security camera:
- Inadequate lighting: One of the most common issues with night vision on security cameras is the lack of sufficient lighting. If the area you are monitoring is pitch black, the camera may struggle to provide clear images. In such cases, it is recommended to install additional lighting sources, such as infrared illuminators or motion sensor lights, to enhance the night vision performance.
- Reflection and glare: Another issue that can affect night vision is reflections and glare. If your security camera is positioned in a way that exposes it to direct light sources, such as streetlights or car headlights, it can create unwanted reflections and glares, obstructing the night vision capabilities. To overcome this issue, try repositioning the camera to avoid direct light sources or use an anti-glare lens cover.
- Dirty lens: A dirty lens can significantly affect the night vision capabilities of your security camera. Dust, dirt, or smudges on the lens can obstruct the infrared light from reaching the sensor, resulting in poor night vision performance. Regularly clean the lens using a soft cloth and lens cleaning solution to ensure clear night vision footage.
- Camera settings: Incorrect camera settings can also lead to night vision issues. Make sure that your camera is set to the appropriate night vision mode, whether it is automatic or manual. Adjust the camera’s sensitivity or exposure settings if needed to improve the quality of the night vision footage.
- Interference: Interference from other electronic devices or nearby light sources can interfere with the night vision capabilities of your security camera. Check for any potential sources of interference and try moving the camera away from them to minimize the effect.
By addressing these common issues, you can ensure that your security camera’s night vision performs optimally, allowing you to have clear and reliable surveillance footage even in low-light conditions.

Infrared LEDs not working
If the night vision on your security camera is not working, one possible reason could be that the infrared (IR) LEDs are not functioning properly. The infrared LEDs are responsible for emitting invisible infrared light that helps the camera see in the dark.
Here are some steps you can take to troubleshoot and fix this issue:
1. Check the power source
Make sure that the security camera is receiving a stable and sufficient power supply. Inadequate power supply can cause the IR LEDs to not work properly. Check the power cable and connections to ensure they are secure.
2. Clean the camera lens and IR filter
Dust, dirt, or smudges on the camera lens or the IR filter can block the infrared light, resulting in poor night vision performance. Clean the lens and the IR filter with a soft, lint-free cloth. Avoid using harsh chemicals or abrasive materials that could damage the lens or filter.
If the issue persists after trying the above steps, it is possible that the infrared LEDs themselves are defective. In this case, it may be necessary to contact the manufacturer or a professional technician to further diagnose and repair the camera.

Glare from external light sources
Glare from external light sources can severely impact the night vision capabilities of your security camera. It occurs when direct or reflected light enters the camera lens and causes an overexposure of the image. This can result in washed-out or completely white areas in the recorded footage, making it difficult to identify any objects or individuals.
To fix the issue of glare, you can take the following steps:
1. Adjust the camera’s position: If possible, reposition the camera to minimize direct exposure to external light sources. This can be achieved by angling the camera downwards slightly or moving it to a different location.
2. Use anti-glare coatings: Consider applying special anti-glare coatings or films over the camera lens to reduce the intensity of direct light entering the lens. These coatings can help minimize the impact of glare on the image quality.
3. Install external housings or shields: Adding external housings or shields around the camera can help block out excessive light and reduce the chances of glare. These accessories act as barriers, preventing direct light from entering the lens.
4. Utilize built-in camera settings: Many security cameras come with built-in settings that can help reduce or compensate for the effects of glare. Explore the camera’s menu or user interface to adjust settings such as exposure, gain, or brightness to optimize the image quality in low-light conditions.
5. Use infrared illuminators: If your security camera supports infrared (IR) technology, consider installing additional infrared illuminators. IR illuminators emit light in the infrared spectrum, which is invisible to the human eye but is picked up by the camera’s infrared sensor. This can enhance the camera’s night vision capabilities without causing glare issues.
By implementing these measures, you can minimize the impact of glare from external light sources on your security camera’s night vision performance, ensuring clearer and more reliable surveillance footage.
Blurry or Grainy Nighttime Images
When your security camera’s nighttime images appear blurry or grainy, it can significantly diminish the effectiveness of your surveillance system. Blurry or grainy images not only make it challenging to identify people or objects, but they can also result in false alarms or missed events. Here are some possible causes and solutions to fix this issue:
1. Insufficient Infrared Illumination
Inadequate infrared (IR) illumination is one of the common reasons for blurry or grainy nighttime images. IR illumination is crucial for capturing clear images in low-light conditions. If your security camera’s IR LEDs are not providing enough illumination, the resulting images may appear blurry or grainy.
Solution:
- Ensure that your camera’s IR LEDs are functioning correctly and are not damaged.
- Check the camera’s specifications to determine the maximum effective IR range. If you need better nighttime visibility, consider upgrading to a camera with longer IR range or adding additional external IR illuminators.
- Make sure the IR illumination is not obstructed by any objects or obstacles.
2. Improper Camera Focus
Another cause of blurry nighttime images is improper camera focus. If the camera is not focused correctly, the images may appear hazy or out of focus.
Solution:
- Check the camera’s focus settings and make sure they are correctly set. Follow the camera’s user manual for instructions on adjusting the focus.
- Clean the camera lens and remove any dirt, dust, or smudges that might be affecting the focus.
- Consider using a camera with autofocus capabilities or investing in a higher-quality lens for improved focus.
3. High Sensitivity or Gain Settings
Excessive sensitivity or gain settings on your camera can cause grainy nighttime images. These settings amplify the camera’s sensor output, but they can also introduce noise into the image, resulting in a grainy appearance.
Solution:
- Adjust the camera’s sensitivity or gain settings to a lower level. Refer to the camera’s manual for instructions on adjusting these settings.
- Experiment with different settings to find the optimal balance between image brightness and graininess.
- If your camera has a noise reduction feature, enable it to minimize the graininess.
By addressing these possible causes of blurry or grainy nighttime images, you can improve the overall performance of your security camera system and ensure clear and detailed surveillance footage in low-light conditions.
FAQ,
Why is the night vision on my security camera not working?
The night vision on your security camera may not be working due to a variety of reasons. It could be a technical issue with the camera itself, such as a faulty infrared sensor or a disconnected power supply. It could also be caused by environmental factors, such as too much ambient light or interference from other nearby electronics. Checking for these issues and troubleshooting or contacting the manufacturer for assistance may help resolve the problem.
What can I do to fix the night vision on my security camera?
There are several steps you can take to fix the night vision on your security camera. First, make sure that the camera’s infrared LEDs are functioning properly and not blocked by any physical obstacles. Clean the camera lens to remove any dirt or debris that may be affecting the night vision. Adjust the camera’s settings, such as the sensitivity or exposure, to optimize the night vision performance. If these steps do not work, consider resetting the camera to its factory settings or contacting the manufacturer for further assistance.
Can I improve the night vision on my security camera?
Yes, there are several ways to improve the night vision on your security camera. One option is to install additional external infrared illuminators or floodlights to provide extra lighting in the camera’s field of view. This can help enhance the visibility and clarity of nighttime footage. Another option is to upgrade to a camera with better night vision capabilities, such as a model with a larger image sensor or higher infrared range. Additionally, ensuring that the camera is properly positioned and focused can also improve the night vision performance.
Why is the night vision on my security camera blurry?
The night vision on your security camera may appear blurry due to a few possible reasons. One reason could be that the camera lens is dirty or smudged, which can affect the clarity of the footage. Cleaning the lens with a soft, lint-free cloth can help resolve this issue. Another reason could be that the camera’s focus is not properly adjusted. Check the camera’s settings or manual to see if there is an option to adjust the focus. If the issue persists, it could be a technical problem with the camera itself, and contacting the manufacturer for assistance may be necessary.


