Every homeowner wants to ensure the safety and security of their property, and one effective way to achieve this is by installing a security camera system. With the advancements in technology, security cameras have become more affordable and easier to install than ever before. Whether you want to monitor your front door, backyard, or driveway, fixing a security camera to your house can provide you with peace of mind and deter potential intruders.
Before you start the installation process, it’s important to choose the right location for your security camera. You should consider the areas that are most vulnerable to break-ins or suspicious activity. Common locations include the front and back doors, garage, and any other access points to your property. Additionally, make sure the camera is positioned high enough to prevent tampering or vandalism.
Once you’ve identified the ideal location, the next step is to gather the necessary tools and equipment for the installation. This may include a drill, screws, mounting brackets, and a power supply. Before drilling any holes, it’s recommended to check if there are any hidden wires or plumbing behind the walls. Safety should always be a priority.
Choosing the Right Security Camera
When it comes to securing your home, one of the most crucial decisions you will make is choosing the right security camera. With so many options available in the market, it can be overwhelming to determine which camera will best suit your needs. To help you make an informed decision, consider the following factors before making your purchase:
1. Purpose
Think about why you need a security camera. Are you looking to monitor the front door, backyard, or multiple areas of your property? Understanding your specific purpose will help you narrow down the type and features of the camera you need.

2. Indoor or Outdoor
Decide whether you need a camera for indoor use, outdoor use, or both. Outdoor cameras should be weatherproof and have built-in protection against dust and moisture.
3. Resolution
The resolution of the camera determines the quality of the video footage. Higher resolutions provide clearer and more detailed images. Consider opting for a camera with at least 1080p resolution for better clarity.
4. Field of View
Consider the field of view you need for your camera. A wider field of view will allow you to monitor a larger area, while a narrow field of view will provide more details within a smaller area.
5. Connectivity
Determine how you want to connect your camera to your monitoring system. Wi-Fi-enabled cameras offer flexibility and easy installation, while wired cameras provide a more reliable and secure connection.
6. Night Vision
If you need to monitor your property during nighttime, consider a camera with night vision capabilities. This feature allows the camera to capture clear footage even in low-light conditions.

7. Motion Detection
Look for a camera that has motion detection capabilities. This feature will send you alerts whenever motion is detected in the camera’s field of view, allowing you to take immediate action if necessary.
8. Storage
Consider how the camera stores its recordings. Some cameras have built-in storage, while others require additional equipment or a monthly subscription for cloud storage. Choose an option that best fits your needs and budget.
By taking these factors into consideration, you can choose the right security camera that will effectively protect your home and provide you with peace of mind.
Gathering the Necessary Tools
Before you start installing a security camera on your house, it’s important to gather all the necessary tools. Having the right tools on hand will make the installation process easier and more efficient.
Here are some tools you will need:

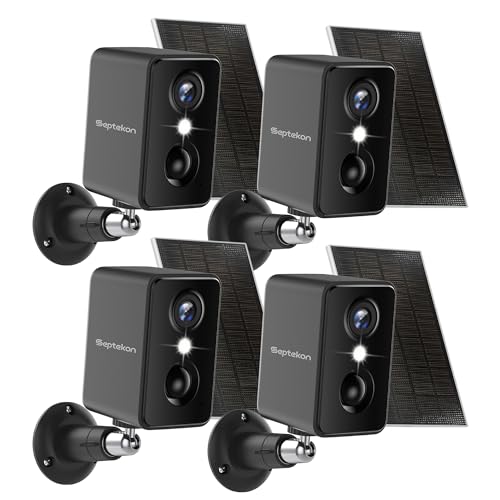
- Security camera: Choose a high-quality security camera that suits your needs. Make sure it has features like night vision and motion detection.
- Mounting brackets: These are used to attach the security camera to the exterior walls of your house.
- Screws and anchors: These will be used to secure the mounting brackets to the walls.
- Drill and drill bits: You will need a drill to create holes in the walls for the screws and anchors.
- Power cables and extension cords: Ensure that you have the necessary cables to connect the security camera to a power source. Extension cords may be required if the power source is far from the camera.
- Monitor or recording device: If you want to view the camera footage in real-time or record it, you will need a monitor or recording device.
- Ethernet cables or Wi-Fi extenders: These will be needed if you plan to connect the security camera to your home network.
- Electrical tape: Use electrical tape to secure and protect the cables from weather conditions.
- Ladder or scaffolding: Depending on the location of your security camera, you may need a ladder or scaffolding to reach it safely.
- Basic tools: Don’t forget to have basic tools like a screwdriver, pliers, and a wrench on hand.
Once you have gathered all the necessary tools, you can proceed with the installation process. Make sure to read the user manual of your security camera and follow the recommended guidelines for installation.
Determining the Best Location
When it comes to fixing a security camera to your house, choosing the best location is crucial for maximizing its effectiveness. Here are some important factors to consider when determining the ideal spot:
1. Coverage area: Determine the area you want your security camera to cover. Assess the vulnerable points around your house, such as entry points and blind spots, and make sure the camera can capture those areas.
2. Mounting options: Depending on the type of camera you have, you may have different mounting options. Choose a location where you can easily mount the camera securely, whether it’s on a wall, ceiling, or pole.
3. Height: Consider the height at which you want to install the camera. Optimal camera placement is typically between 9 and 10 feet above the ground. This height provides a good balance between capturing a wide angle of view and maintaining a clear image.

4. Accessibility: Ensure that the camera is easily accessible for maintenance and adjustments. You may need to clean the lens or make adjustments to the camera’s angle, so choose a location that allows for convenient access.
5. Lighting conditions: Take into account the lighting conditions in the area where you plan to install the camera. Avoid pointing the camera directly at a light source, as it can cause glare or wash out the image. If possible, position the camera in an area with adequate lighting or consider adding additional lighting for better visibility.
6. Privacy concerns: Be mindful of privacy concerns when choosing the camera’s location. Avoid placing the camera in areas where it could intrude on your neighbors’ property or capture sensitive areas, such as windows or swimming pools.
7. Protection from the elements: Make sure to choose a location that provides protection from harsh weather conditions, such as rain, snow, or direct sunlight. This will help prolong the lifespan of the camera and ensure it continues to function properly.
By considering these factors and choosing the best location for your security camera, you will enhance the overall security of your house and gain peace of mind.

Installing the Mounting Bracket
Before you start installing your security camera to the house, it’s important to install the mounting bracket first. The mounting bracket is what will hold your security camera in place and ensure it is secure and stable.
Here are the steps to install the mounting bracket:
1. Choose the Location
Decide on the location where you want to install the security camera. It should be a spot that provides a wide view of the area you want to monitor. Make sure the location is close to a power source and has good Wi-Fi signal if your camera is wireless.
2. Mark the Holes
Hold the mounting bracket against the wall or ceiling and use a pencil to mark the holes where you will attach it. Make sure the bracket is level and straight before marking the holes.
3. Drill Pilot Holes
Using an appropriate drill bit, drill pilot holes into the marked spots. The size of the drill bit will depend on the type of screws that came with your mounting bracket. Make sure the holes are deep enough to securely hold the screws.

4. Attach the Mounting Bracket
Line up the holes on the mounting bracket with the pilot holes and use screws to attach it to the wall or ceiling. Be careful not to overtighten the screws as it may damage the bracket or the surface you are attaching it to.
Once the mounting bracket is securely attached, you can proceed with the next steps of installing your security camera. Following these steps will help ensure that your camera is properly mounted and provides you with the desired security and peace of mind.
Securing the Camera to the Bracket
Once you have positioned the security camera on the bracket, it is important to secure it properly to ensure stability and durability. Following the steps below will help you securely attach the camera to the bracket:
1. Gather the necessary tools
Before you start securing the camera, make sure you have the following tools handy:
| – Screwdriver | – Mounting screws | – Mounting brackets | – Anchors (if needed) |
2. Position the camera on the bracket
Place the camera onto the bracket, aligning the mounting holes of the camera with the holes on the bracket. Ensure that the camera is level and facing the desired direction.

3. Secure the camera
Using the mounting screws and a screwdriver, carefully fasten the camera to the bracket. Make sure the screws are tightened firmly, but be cautious not to over-tighten as it may damage the camera or bracket.
4. Test the stability
Gently tug on the camera to ensure it is securely attached to the bracket. If the camera feels loose, tighten the screws further, or consider using anchors for additional support.
Following these steps will help you properly secure the camera to the bracket, ensuring a stable and secure installation.
Connecting the Camera to Power
Before fixing the security camera in the desired location, it is crucial to connect it to a power source. Follow the steps below to correctly establish the camera’s power connection:
- Identify a nearby power outlet or a power source to which you can connect the camera. Ensure that it is easily accessible and provides a stable power supply.
- Use the power adapter provided with the camera and plug it into the power outlet. Make sure the voltage requirements of the camera match those of the power outlet.
- Connect the other end of the power adapter to the camera’s power input port. It is typically located on the back or bottom of the camera.
- Securely insert the power connector into the camera’s power input port and ensure it is properly aligned.
- Once the camera is connected to the power source, turn on the power outlet switch.
- Verify that the camera’s power indicator light or LED turns on, indicating that it is receiving power.
- Wait for the camera to initialize and start functioning. Refer to the camera’s user manual for specific instructions on the initialization process.
It is important to ensure that the power connection is properly established before proceeding with any further installation steps.
Running the Video Cables
Once you have chosen the ideal locations for your security cameras, it is time to run the video cables. This step is crucial for establishing a proper connection between the cameras and the recording device.
Here are the steps to follow when running the video cables:
|
1. Measure the distance between the camera and the recording device. This will help you determine how much cable you will need. |
|
2. Choose the appropriate type of cable for your security system. Most systems use coaxial cables or CAT5e cables. |
|
3. Start by running the cable from the camera location to the wall or ceiling where the recording device is located. Make sure to secure the cable to prevent it from hanging loose. |
|
4. If you are running the cable through walls or ceilings, use a drill to create holes for the cable to pass through. Be careful not to damage any electrical wiring. |
|
5. Use cable conduits or cable raceways to hide and protect the cables. This will give your installation a cleaner look and protect the cables from potential damage. |
|
6. Connect the video cable to the camera and the recording device using the appropriate connectors. Make sure the connections are secure. |
|
7. Test the video feed before finalizing the installation. Check for any issues with the signal quality or any interference. |
By following these steps, you will be able to successfully run the video cables for your security cameras and ensure a reliable and secure surveillance system for your house.
Connecting the Camera to the DVR
Once you have installed the security camera in your desired location, the next step is to connect it to the Digital Video Recorder (DVR). Follow these steps to ensure a successful connection:
Step 1: Check the cables
Before connecting the camera, make sure you have all the necessary cables. Typically, there will be one cable for power and one cable for video. The power cable is usually a standard power adapter, while the video cable may vary depending on the camera type.
Step 2: Connect the power cable
Plug one end of the power cable into the camera’s power input, and the other end into a power outlet. Ensure that the camera is receiving power by checking for any indicator lights or signs of activity.
Step 3: Connect the video cable
Connect one end of the video cable to the camera’s video output, and the other end to the corresponding video input on the DVR. Make sure to match the colors of the cables for proper connection. This will allow the DVR to receive the video feed from the camera.
Step 4: Secure the connections
Once the cables are connected, ensure that they are securely plugged in and properly fastened. This will prevent any loose connections or interruptions in the video feed.
Step 5: Test the connection
Turn on the DVR and check the connected camera to see if the video feed appears on the monitor. If the video feed is not displaying, double-check the connections and make any necessary adjustments.
By following these steps, you should be able to successfully connect your security camera to the DVR, allowing you to monitor your property and ensure its safety and security.
Adjusting the Camera’s Viewing Angle
Once you have securely mounted your security camera to your house, the next step is to adjust its viewing angle to ensure optimal surveillance coverage. Follow these steps to make sure your camera’s angle is set correctly:
1. Determine the desired field of view
Before making any adjustments, consider the area you want the camera to monitor. Identify the key areas, such as entrances, driveways, or outdoor valuables, that need optimal coverage. This will help you determine the camera’s desired field of view.
2. Loosen the camera’s mounting bracket
Most security cameras come with a mounting bracket that allows for easy adjustments. Locate the bracket and use the appropriate tools to loosen the screws or bolts that hold it in place. This will allow you to adjust the camera’s angle freely.
3. Tilt and pan the camera
With the mounting bracket loosened, tilt the camera up, down, or sideways to achieve the desired angle. Keep in mind the areas you identified in Step 1 and ensure they are within the camera’s field of view. If necessary, adjust the pan settings as well to cover a wider area.
4. Secure the mounting bracket
Once you have adjusted the camera to the desired angle, tighten the screws or bolts on the mounting bracket to secure it in place. Make sure the camera is stable and cannot be easily moved or tampered with.
By properly adjusting the camera’s viewing angle, you can maximize the effectiveness of your security system and ensure that key areas are well-covered. Regularly check and readjust the camera as needed to adapt to changing surveillance requirements or any obstructions that may affect its view.
Testing the Security Camera
After completing the installation of your security camera, it is essential to test its functionality and ensure that it is properly set up to monitor and record activities around your house. Testing the security camera will allow you to identify any issues or areas that may require adjustment for optimal performance.
Here are some steps to follow when testing your security camera:
-
Check the Camera’s Power Supply
Ensure that the camera is receiving power and connected to a reliable power source. Check the power cable and connectors for any damage or loose connections. If the camera is battery-powered, make sure the battery is charged and properly installed.
-
Verify the Camera’s Field of View
Position the camera in the desired location and adjust its angle to capture the intended area. Walk around the monitored area and observe the camera’s field of view through a compatible device such as a smartphone or computer. Ensure that the camera is capturing the desired area without any obstructions.
-
Test the Camera’s Recording Capability
Trigger the camera’s recording feature, either manually or by enabling motion detection depending on the camera’s settings. Walk within the camera’s field of view to verify that it detects and records movement accurately. Review the recorded footage to ensure that it is clear and of satisfactory quality.
-
Check the Camera’s Night Vision
If your security camera is equipped with night vision capabilities, test it in low-light conditions or at night. Verify that the infrared or other night vision technologies are functioning correctly, allowing the camera to capture clear footage in the dark.
-
Test Remote Access and Alerts
If your security camera offers remote access and alerts, ensure that you can successfully access the camera’s feed using a smartphone, tablet, or computer from outside your home network. Test the ability to receive notifications or alerts when there is a motion detection event or any other triggered event.
-
Review and Adjust Settings
Review the camera’s settings and make any necessary adjustments based on your testing. This may include changing the camera’s sensitivity levels, adjusting motion detection zones, or modifying recording schedules.
By following these steps, you can thoroughly test your security camera and address any potential issues or adjustments needed to ensure optimal performance and security for your house. Conduct regular maintenance checks to ensure that your camera continues to function as expected.
FAQ,
What are some tips for fixing a security camera to a house?
When fixing a security camera to a house, there are a few tips to keep in mind. Firstly, choose a location that provides a clear view of the area you want to monitor. Make sure the camera is positioned high enough to prevent easy tampering. Additionally, ensure that the camera is securely attached to the house using screws or mounting brackets. Finally, test the camera to ensure it is functioning properly before relying on it for security.
What tools do I need to fix a security camera to my house?
To fix a security camera to your house, you will need a few tools. These include a power drill, screwdriver, mounting brackets, screws, and a ladder if the camera is being installed at a difficult-to-reach location. Additionally, depending on the camera model, you may need some additional tools for wiring and connecting the camera to a power source or monitoring system.
Can I install a security camera on my own or do I need professional help?
Installing a security camera on your own is possible for most homeowners, especially with the wide availability of DIY camera systems on the market. However, if you are unsure about the installation process or if you have a more complex camera system that requires professional knowledge, it is recommended to seek professional help. They can ensure that the camera is properly installed and functioning to provide maximum security.
How can I hide a security camera on the exterior of my house?
If you want to hide a security camera on the exterior of your house, there are a few strategies you can use. One option is to choose a camera that is designed to be discreet, such as a small dome camera or a camera that resembles an outdoor light fixture. Another option is to camouflage the camera by mounting it behind a plant or other decorative object. However, keep in mind that while hiding the camera may make it less obvious, it could also hinder its effectiveness in deterring potential intruders.
What are the best places to install security cameras on a house?
The best places to install security cameras on a house are typically near entry points such as doors and windows, as well as areas with high foot traffic. This includes the front and back doors, garage, driveway, and backyard. It is also important to cover blind spots and vulnerable areas such as side gates and basement windows. Ultimately, the specific locations will depend on the layout of your house and the areas you want to monitor.


