
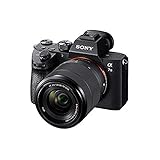
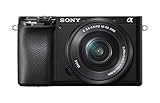
If you own a Sony digital camera and have encountered issues with your lens, you’re not alone. Many camera owners experience problems with their camera lens, ranging from blurry images to lens errors. However, there are several steps you can take to troubleshoot and fix these issues before seeking professional help.
The first step is to check and clean the lens. Sometimes, dust, dirt, or fingerprints can accumulate on the lens surface, affecting the image quality. Use a microfiber cloth or lens cleaning solution to gently wipe the lens, making sure to remove any debris. Be careful not to apply too much pressure, as this may cause damage.
If cleaning the lens doesn’t solve the problem, try resetting the camera. This can be done by removing the battery and memory card for a few minutes and then reinserting them. Resetting the camera can often fix minor software glitches that may be causing the lens issues.
Another troubleshooting step is to update the camera’s firmware. Sony periodically releases firmware updates that can fix known issues and improve performance. Visit the Sony website and search for your camera model to find the latest firmware update. Follow the instructions provided by Sony to install the update correctly.
If none of the above steps solve the lens problem, it is recommended to contact Sony customer support or bring the camera to a professional repair service. They will be able to diagnose and fix the issue properly.
In conclusion, taking care of your Sony digital camera lens is essential for capturing high-quality images. By following the troubleshooting steps mentioned above, you can resolve common lens issues and continue enjoying your photography experience.
How to Repair Sony Digital Camera Lens
If you are experiencing issues with your Sony digital camera lens, there are a few steps you can take to try and fix the problem before resorting to professional help. Here are some troubleshooting tips to help you repair your Sony camera lens:
1. Restart the Camera
First, try restarting the camera by turning it off and then back on again. This simple action can sometimes resolve minor issues and reset the lens mechanism.
2. Check for Obstructions
Inspect the lens and make sure there are no obstructions, such as dirt or debris, preventing it from functioning properly. Use a soft cloth to clean the lens carefully.
3. Disable and Enable Power Saving Mode
Sometimes, power-saving mode can interfere with the operation of the camera lens. Disable power-saving mode and then enable it again to see if this resolves the issue.
4. Remove and Reinsert the Battery
This step can help reset the camera’s internal system. Remove the battery from the camera, wait a few seconds, and then reinsert it. Turn the camera on to check if the lens is working correctly.
5. Update the Firmware
If your Sony camera’s lens issues persist, check for any firmware updates. Visit the Sony website and download the latest firmware for your camera model. Follow the provided instructions to install the update, as this might fix any software-related problems affecting the lens.
6. Consult a Professional
If none of the above steps resolve the issue, it may be time to consult a professional technician or contact Sony customer support. They can provide further assistance and advice on repairing or replacing the camera lens.
Remember that attempting to repair the Sony digital camera lens yourself can void the warranty, so it’s always a good idea to consult the manufacturer or an authorized technician if your camera is still under warranty.
By following these troubleshooting steps, you may be able to repair your Sony camera lens and get it working properly again.

Common Problems with Sony Digital Camera Lenses
1. Lens Error
Sony digital camera lenses may encounter a lens error, which can prevent the lens from extending or retracting properly. This can be caused by physical damage, such as dropping the camera or applying excessive force to the lens. In some cases, dust or debris may also obstruct the lens mechanism.
2. Focus Issues
Another common problem is autofocus or manual focus issues. The camera may struggle to focus properly, resulting in blurry or out-of-focus images. This can be caused by a faulty autofocus motor, misalignment of lens elements, or issues with the camera’s focusing system.
3. Zoom Problems
Some Sony digital cameras may experience zoom problems, where the lens doesn’t zoom in or out as intended. This could be due to a malfunctioning zoom motor, debris in the zoom mechanism, or physical damage to the lens barrel.
4. Stuck Lens
In certain cases, the lens may get stuck in a fixed position and refuse to extend or retract. This can happen if the camera is turned off while the lens is still extended, or if something gets trapped between the lens and camera body. Attempting to force the lens can cause further damage.
5. Lens Barrel Issues
Sony camera lenses can also suffer from issues with the lens barrel, such as misalignment or stiffness. The lens barrel may become misaligned if the camera is dropped or subjected to impact, resulting in difficulty extending or retracting the lens. Stiffness can occur over time due to dirt or debris buildup.

Conclusion
If you encounter any of these common problems with your Sony digital camera lens, it’s recommended to seek professional help or contact Sony customer support. Attempting to fix these issues yourself may cause further damage to the camera or lens. Remember to handle the camera with care and avoid exposing it to extreme conditions or rough handling to prevent lens problems in the first place.
Troubleshooting Steps for Sony Camera Lens Issues
If you are experiencing lens issues with your Sony digital camera, there are several troubleshooting steps you can take to try and fix the problem before seeking professional repairs. Here are a few steps you can follow:
Restart the Camera: Sometimes, a simple restart can help resolve minor issues. Turn off your Sony camera, remove the battery, wait for a few minutes, and then reinsert the battery and turn on the camera again. This may help reset the camera and resolve any temporary glitches with the lens.
Check for Obstructions: Inspect the lens of your Sony camera for any debris or obstructions. Even a small speck of dust or dirt can cause problems with the lens mechanism. Use a blower brush or a can of compressed air to gently clean the lens and ensure there are no obstructions affecting its movement.

Update Firmware: Visit the Sony support website and check if there are any firmware updates available for your camera model. Outdated firmware can cause compatibility issues and may affect the performance of the camera lens. Download and install any available updates following the instructions provided by Sony.
Reset to Factory Settings: If the lens issue persists, you can try resetting your Sony camera to its factory settings. This will restore the camera to its original configuration and may help resolve any software-related issues that are causing problems with the lens. Consult your camera’s manual or the Sony website for instructions on how to perform a factory reset.
Contact Sony Support: If all else fails, it is recommended to contact the Sony support team for assistance. They can provide further troubleshooting steps based on your specific camera model and guide you through the repair process if necessary.
Note: It’s important to handle your Sony camera and its lens with care to avoid further damage. If you are not comfortable performing any of the troubleshooting steps mentioned above, it is best to seek professional repairs from an authorized Sony service center.
Tools and Materials Needed for Sony Digital Camera Lens Repair
Repairing a Sony digital camera lens requires specific tools and materials to ensure a successful fix. Here is a list of the essential items you will need:

| 1. Precision Screwdriver Set | A precision screwdriver set is necessary for removing the screws that hold the camera lens components together. Make sure to choose a set that includes different sizes and types of screwdrivers to match the specific screws used in your Sony digital camera. |
| 2. Lens Cleaning Kit | A lens cleaning kit is essential for removing any dust, fingerprints, or smudges that may be affecting the performance of your camera lens. The kit typically includes a lens cleaning solution, a microfiber cloth, and lens cleaning tissues. |
| 3. Anti-Static Tweezers | Anti-static tweezers are useful for handling delicate camera lens components without causing any damage. They help to avoid static electricity discharge that can harm sensitive electronic parts. |
| 4. Compressed Air Can | A compressed air can is used to blow away any loose dirt, dust, or debris that may have accumulated inside the camera lens. Its high-pressure air stream can effectively clean hard-to-reach areas. |
| 5. Adhesive Tape | Adhesive tape is used for temporarily securing certain parts or wires during the repair process. It keeps them in place and prevents any accidental movements or misalignments. |
| 6. Plastic Opening Tools | Plastic opening tools are designed to safely separate the camera lens housing from the camera body without causing any scratches or damages. They are made of non-conductive materials to prevent any electrical short circuits. |
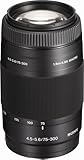
| 7. Replacement Parts | Depending on the type of lens damage, you may need specific replacement parts for your Sony digital camera. This could include a new lens assembly, a motor, or other components. Make sure to source the correct parts based on the camera model and lens type. |
| 8. Repair Guide or Manual | Having a repair guide or manual for your specific Sony digital camera model can provide step-by-step instructions and illustrations to assist you throughout the repair process. It helps ensure that you understand the necessary steps and avoid any unnecessary mistakes. |
Make sure to gather all of these tools and materials before attempting to repair your Sony digital camera lens. This will help you work efficiently and improve the chances of successfully fixing the lens issue.
Step-by-Step Guide to Fixing Sony Digital Camera Lens
If you have a Sony digital camera and are experiencing issues with the lens, you may be able to fix it yourself. Here is a step-by-step guide to help you troubleshoot and fix common lens problems on your Sony camera.
Step 1: Check for any debris or obstructions
Turn off your camera and inspect the lens for any visible debris or obstructions. Use a soft-bristle brush or a can of compressed air to gently remove any dirt or dust particles that may be causing the lens to malfunction.
Step 2: Restart your camera
Sometimes a simple restart can solve lens issues. Turn off your camera, remove the battery, and wait for a few minutes. Then, reinsert the battery and turn on your camera to see if the lens problem has been resolved.
Step 3: Reset your camera to factory settings
If the lens problem persists, try resetting your camera to its factory settings. Refer to your camera’s manual or online resources for instructions on how to perform a factory reset. Keep in mind that resetting your camera will erase any personalized settings, so make sure to back up any important data before proceeding.
Step 4: Update your camera firmware
Check the Sony website for any available firmware updates for your specific camera model. Firmware updates can often address various issues, including lens malfunctions. Follow the instructions provided by Sony to install the latest firmware onto your camera.
Step 5: Contact Sony support
If none of the previous steps have resolved the lens issue, it may be necessary to contact Sony support for further assistance. Provide them with detailed information about the problem you are experiencing and any steps you have already taken. They will be able to guide you through additional troubleshooting steps or advise you on how to proceed with repairs.
Remember to always handle your Sony digital camera with care and avoid exposing it to excessive heat, moisture, or physical impact, as these factors can contribute to lens problems. Regularly clean the lens and follow good maintenance practices to keep your camera in optimal condition.
Note: If you are uncomfortable or unsure about any of the steps mentioned above, it is recommended to seek professional help or take your camera to an authorized Sony service center for repairs.
Preventive Measures to Avoid Sony Camera Lens Problems
Preventing lens problems with your Sony digital camera is crucial for keeping it in optimal condition and ensuring high-quality photographs. Here are some preventive measures you can take to avoid encountering lens issues:
- Protect the lens: Always use a lens cap or cover when the camera is not in use. This will protect the lens from dust, scratches, and other potential damage.
- Avoid touching the lens: Fingerprints and smudges can negatively affect image quality. Try not to touch the lens directly. If necessary, use a clean microfiber cloth to gently wipe away any dirt or smudges.
- Avoid exposure to extreme temperatures: Extreme heat or cold can cause the lens to contract or expand, leading to potential damage. Keep your camera away from direct sunlight or extreme temperature environments.
- Be cautious when changing lenses: If you own a camera with interchangeable lenses, be careful when changing them. Make sure to do it in a clean and dust-free environment to avoid introducing particles into the camera body or lens.
- Use a camera bag or case: When transporting your camera, it is essential to use a bag or case specifically designed for cameras. This will provide additional protection against accidental drops or impacts.
- Regularly clean the camera: Dust, dirt, and other debris can accumulate on the camera body and lens over time. Use a small brush or blower to remove any loose particles, and occasionally clean the lens with a lens cleaning solution and a microfiber cloth
- Handle with care: Always handle your camera with care and avoid dropping or knocking it against hard surfaces. Rough treatment can cause misalignment or damage to the lens mechanism.
- Service the camera regularly: To ensure the camera is functioning correctly and to detect any potential issues early on, consider getting your Sony camera serviced regularly by a professional technician.
By following these preventive measures, you can help prolong the lifespan of your Sony camera lens and ensure that it consistently delivers high-quality images. Remember to always refer to the user manual for specific cleaning and maintenance instructions provided by Sony.
When to Seek Professional Help for Sony Digital Camera Lens Repair
While there are many troubleshooting steps you can take to fix your Sony digital camera lens on your own, there are certain situations where seeking professional help might be your best option. Here are some signs that it is time to consult a professional for lens repair:
Lens Error Messages
If your Sony digital camera is displaying error messages related to the lens, it is a clear indication that there is a problem that requires professional attention. These error messages could be anything from a stuck lens, lens not retracting, or lens focusing issues.
Physical Damage
If your camera lens has suffered physical damage such as being dropped or exposed to water, it is crucial to have it examined by a professional technician. Even if the camera appears to be working fine, there could be internal damage that may worsen over time.
Attempting to repair physically damaged lenses on your own can cause further harm and might make the repair process more complicated and expensive.
Inaccessible or Jammed Lens
If your Sony digital camera lens is jammed or unable to extend or retract properly, it is recommended to seek professional help. Attempting to force the lens open or closed can cause further damage and may even render the camera unusable.
A professional technician will have the necessary tools and expertise to safely and effectively fix the jammed or inaccessible lens without causing additional harm to your camera.
Blurry or Unfocused Images
If your Sony digital camera is consistently producing blurry or unfocused images, even after trying various troubleshooting steps, it is advisable to consult a professional for lens repair. This issue could be due to a misalignment or damage to the lens elements, which requires specialized knowledge and equipment to fix.
| Sign | When to seek professional help? |
|---|---|
| Lens Error Messages | If error messages related to the lens are displayed |
| Physical Damage | If the lens has suffered physical damage |
| Inaccessible or Jammed Lens | If the lens is jammed or unable to retract or extend |
| Blurry or Unfocused Images | If images are consistently blurry or unfocused |
Remember, professional help from a certified technician is recommended when dealing with complex issues concerning your Sony digital camera lens. They will have the knowledge, experience, and tools necessary to diagnose and repair the problem effectively, ensuring the longevity and optimal performance of your camera.
Question-answer:
My Sony digital camera lens is stuck. How can I fix it?
If your Sony digital camera lens is stuck, there are a few things you can try to fix it. First, try turning the camera off and on again. Sometimes, this simple step can reset the lens and fix the issue. If that doesn’t work, you can try gently tapping the camera on a hard surface to see if it can help release any stuck parts. Another option is to carefully apply pressure on the lens barrel and try to manually rotate it. However, be cautious not to apply too much force as it may cause further damage. If none of these methods work, it’s best to take your camera to a professional technician or contact Sony’s customer support for further assistance.
My Sony digital camera lens is not retracting. What should I do?
If your Sony digital camera lens is not retracting, there are a few troubleshooting steps you can try. First, make sure that the battery is fully charged. Sometimes, a low battery level can cause issues with the lens mechanism. If the battery is not the problem, try gently cleaning around the lens barrel with a soft cloth to remove any dirt or debris that may be causing obstructions. If that doesn’t work, try manually rotating the lens barrel while powering on the camera. Be cautious not to apply excessive force. If none of these steps work, it’s best to consult a professional technician or contact Sony’s customer support for further assistance.
My Sony digital camera lens is making a grinding noise. How do I fix it?
If your Sony digital camera lens is making a grinding noise, it could indicate a mechanical issue that needs professional attention. However, you can try a few steps to troubleshoot the problem. First, turn off the camera and remove the battery for a few minutes, then reinsert it and turn the camera on again. Sometimes, this simple reset can resolve the issue. If the grinding noise persists, try gently tapping the camera on a hard surface to see if it helps release any stuck parts. However, avoid applying excessive force. If these steps do not resolve the issue, it’s best to take your camera to a professional technician or contact Sony’s customer support for further assistance.


