
If you are an iPhone user and love taking pictures of small objects, focusing can sometimes be a challenge. The iPhone camera is designed to autofocus on larger objects, making it difficult to capture the details of small items. However, with a few simple techniques, you can easily focus your iPhone camera on small objects and capture stunning close-up shots.
1. Tap to focus: The easiest way to focus on a small object is to simply tap on the screen of your iPhone. When you open the camera app, position the small object within the frame and gently tap on the screen where you want to focus. This will activate the autofocus feature and adjust the focus to the selected area. You can also adjust the exposure by sliding your finger up or down on the screen.
2. Use the AE/AF lock: If you want to ensure that the focus and exposure remain constant while you compose your shot, you can use the AE/AF lock. To activate this feature, tap and hold on the screen until you see a yellow box with the “AE/AF Lock” text. This will lock the focus and exposure, allowing you to move the camera freely without losing the settings. This technique is particularly useful when photographing small objects that may move or when shooting in low light conditions.
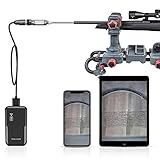
3. Use a macro lens attachment: If you frequently photograph small objects, investing in a macro lens attachment can significantly improve the focus and clarity of your shots. Macro lenses are specifically designed for close-up photography, allowing you to capture intricate details with precision. There are many macro lens attachments available for iPhone, ranging from clip-on lenses to dedicated cases. Choose one that suits your needs and attach it to your iPhone camera to enhance its focus capabilities.
With these simple techniques, you can easily focus your iPhone camera on small objects and capture stunning close-up shots. Whether you are an amateur photographer or a professional, mastering the art of focusing on small objects will take your iPhone photography to the next level.

Understanding the iPhone camera settings
When it comes to taking photos with your iPhone, understanding the camera settings can greatly improve your photography skills. The iPhone camera offers a range of settings and features that allow you to capture the best possible images. Here are some key settings to familiarize yourself with:
1. Focus
The focus setting determines where the camera’s lens is focused. By default, the iPhone camera automatically focuses on the subject in the center of the frame. However, you can adjust the focus manually by tapping on the screen where you want to focus. This is especially useful when you want to capture small objects or details.
2. Exposure
The exposure setting determines how much light is allowed to enter the camera sensor. By default, the iPhone camera automatically adjusts the exposure based on the lighting conditions. However, you can manually adjust the exposure by tapping on the screen and sliding your finger up or down. This is useful when you want to brighten or darken a specific area of the image.
3. HDR
HDR stands for High Dynamic Range and it’s a feature that helps capture better details in both the bright and dark areas of an image. When HDR is enabled, the iPhone camera takes multiple photos at different exposures and combines them into one well-exposed image. It’s recommended to use HDR in situations with high contrast or when capturing landscapes.
4. Grid
The grid setting displays a grid on the camera screen to help you compose your shots. It follows the rule of thirds, which divides the frame into nine equal parts with two horizontal and two vertical lines. Using the grid can assist you in aligning the subject and creating a balanced composition.

5. Burst Mode
Burst mode allows you to capture a series of photos in rapid succession by holding down the shutter button. This is particularly useful for capturing fast-moving subjects or ensuring you get the perfect shot in a moment with a lot of action.
By familiarizing yourself with these key camera settings, you can make the most of your iPhone’s camera and improve your photography skills. Experiment with different settings in various shooting conditions to find what works best for you.
| Setting | Function |
|---|---|
| Focus | Determines where the camera’s lens is focused |
| Exposure | Determines the amount of light that enters the camera sensor |
| HDR | Captures better details in both bright and dark areas of an image |
| Grid | Displays a grid on the camera screen to assist with composition |
| Burst Mode | Captures a series of photos in rapid succession |
Tips for positioning the small object
When trying to focus the iPhone camera on a small object, positioning is key. Here are some tips to help you to get the best focus:
1. Choose a well-lit area
Good lighting is essential for capturing clear and focused images. Make sure to position the small object in an area with ample natural or artificial light. Avoid backlighting, as it can make it difficult for the camera to focus properly.
2. Place the object on a stable surface
A shaky hand can result in blurry images. To ensure a sharp focus, place the small object on a stable surface such as a table or tripod. This will help to minimize any movement and allow the camera to focus more accurately.

3. Use the grid feature for alignment
The grid feature on the iPhone camera can be a helpful tool for positioning the small object. Enable the grid in the camera settings and use the intersecting lines to align the object. This can assist in achieving a more balanced and visually appealing composition.
By following these tips, you can improve the focus of your iPhone camera on small objects and capture detailed and sharp images.
Using the manual focus feature on your iPhone camera
If you want to focus your iPhone camera on a small object, you can use the manual focus feature available on most iPhone models. The manual focus feature allows you to have greater control over what you want to focus on, ensuring you capture the desired details with precision.
To activate the manual focus feature, follow these steps:
|
Step 1: |
Open the Camera app on your iPhone. |
|
Step 2: |
Tap on the screen to set the focus point. By default, the camera will automatically focus on the center of the frame. |
|
Step 3: |
After tapping on the screen, you will see a yellow rectangle or square appear on the focused area. To refine the focus, swipe up or down on the screen. Swiping up will increase the exposure and focus, while swiping down will decrease it. |
|
Step 4: |
Once you have achieved the desired focus on the small object, tap on the shutter button to capture the image. |


Using the manual focus feature can greatly enhance your photography skills, especially when capturing close-up shots of small objects. Experiment with different focal points and lighting conditions to achieve the best results.
Remember, practice makes perfect, so don’t hesitate to explore this feature and unleash your creativity with your iPhone camera!
Adjusting the exposure settings for better focus
When trying to focus the iPhone camera on a small object, adjusting the exposure settings can greatly improve the clarity and sharpness of the image. The exposure settings control how much light is allowed into the camera sensor, which can directly affect the focus.

1. Tap on the small object to focus
Start by tapping on the small object you want to focus on. This will not only adjust the exposure automatically but also set the focus point on the object.
2. Lock the focus
To ensure that the camera maintains focus on the small object, you can lock the focus by tapping and holding on the screen until the yellow box appears, indicating that the focus is locked. This will prevent the camera from refocusing if you move the device or if the lighting conditions change.
3. Adjust the exposure manually
If the automatic exposure settings are not providing the desired focus, you can manually adjust the exposure. To do this, tap on the screen where the small object is located and then swipe up or down to adjust the exposure. Swiping up will increase the exposure, making the image brighter, while swiping down will decrease the exposure, making the image darker.
| Swipe Up | Swipe Down |
|---|---|
| Increases exposure | Decreases exposure |
Experiment with different exposure settings until you find the optimal level that results in better focus on the small object.
Utilizing third-party camera apps for greater control
If you find that the default camera app on your iPhone isn’t providing the desired level of focus on small objects, you might want to consider using third-party camera apps. These apps often offer more advanced features and settings that can help you achieve a clearer and more focused shot.
One popular third-party camera app is Camera+. This app allows you to manually adjust various focus settings, including focus point, focus area, and even focus lock. By experimenting with these settings, you can find the right combination to achieve the optimal focus on the small object you’re trying to capture.
Another great option is ProCamera. This app not only offers manual focus control but also includes a macro mode specifically designed for capturing close-up shots of small objects. The macro mode allows you to get extremely close to the subject while maintaining sharp focus, making it ideal for capturing intricate details.
Moreover, both Camera+ and ProCamera provide additional features such as exposure control, white balance adjustment, and image stabilization. These features can further enhance your ability to capture sharp and focused images of small objects.
When utilizing third-party camera apps, it’s important to keep in mind that each app has its own interface and set of features. Take the time to explore and familiarize yourself with the app’s controls and settings, adjusting them as needed to achieve the desired level of focus on your small object.
By utilizing third-party camera apps, you can gain greater control over the focus of your iPhone camera when capturing small objects. Experiment with different apps and settings to find the combination that works best for you and your photography needs.
Optimizing lighting conditions for improved focus
When trying to focus the camera on a small object with your iPhone, proper lighting conditions play a crucial role in achieving optimum focus. Here are some tips to optimize lighting conditions for improved focus:
1. Natural light: Whenever possible, take pictures of small objects in natural light. Position the object near a window or move outdoors to benefit from the softer light provided by the sun. This natural light helps eliminate harsh shadows and provides a more even illumination, enabling your iPhone camera to focus better.
2. Avoid direct light: Direct light can cause severe reflections and shadows, making it difficult for the iPhone camera to focus on the small object. Try positioning the object in a way that avoids direct light hitting it directly.
3. Use reflectors: Reflectors can be used to bounce light onto the small object, reducing shadows and improving overall lighting conditions. A simple white piece of paper or a reflector disc can work wonders in enhancing the focus of your iPhone camera.
4. Indoor lighting: If shooting indoors, be mindful of the type of lighting you have. Incandescent bulbs can give off a yellowish tint, while fluorescent lights can result in a bluish hue. Experiment with different light sources to find the one that provides the most natural and neutral lighting for your small object.
5. Avoid harsh lighting: Harsh lighting conditions, such as direct sunlight or bright artificial lights, can create strong contrasts and wash out details. To optimize focus, try diffusing harsh lighting by utilizing curtains, diffusers, or light tents.
Remember, finding the right lighting conditions for your small object is a crucial part of achieving improved focus with your iPhone camera. Experiment with different lighting setups to find the one that works best for your specific object and desired outcome.
Using macro lenses for close-up shots
If you want to take close-up shots of small objects with your iPhone, using a macro lens is a great solution. A macro lens allows you to focus on objects that are very close to your camera, capturing intricate details and textures.
Choosing the right macro lens: There are various macro lenses available for iPhones, ranging from clip-on lenses to dedicated cases with built-in macro lenses. Consider the magnification level and the compatibility of the lens with your iPhone model before making a purchase.
Using the macro lens: Once you have obtained a macro lens for your iPhone, follow these steps to take close-up shots:
- Attach the lens to your iPhone’s camera, ensuring that it is securely in place.
- Position your iPhone close to the object you want to photograph.
- Tap on the area of the object you want to focus on. This will help your iPhone’s camera to adjust the focus to that specific area.
- Hold your iPhone steady and press the shutter button to capture the close-up shot.
Tips for better close-up shots: To enhance the quality of your close-up shots, keep the following tips in mind:
1. Lighting: Use natural light or find a well-lit area to ensure that the details of your subject are properly illuminated.
2. Stability: It is important to keep your iPhone steady while taking close-up shots. Use a tripod or stabilize your iPhone against a steady surface to avoid blur.
3. Composition: Experiment with different angles and perspectives to capture unique and interesting close-up shots.
By utilizing a macro lens and following these tips, you can capture stunning close-up shots of small objects with your iPhone camera. Now you can capture every intricate detail and create visually captivating images!
Cleaning the iPhone camera lens for better focus
One common reason why the iPhone camera may have difficulty focusing on small objects is a dirty lens. Over time, the camera lens on your iPhone can accumulate dust, fingerprints, and smudges, which can affect the clarity and focus of your photos. Fortunately, cleaning the lens is a simple and effective way to improve the focus of your iPhone camera for capturing small objects.
Gather the necessary materials
To clean your iPhone camera lens, you will need a microfiber cloth and a lens cleaning solution. It is important to use a microfiber cloth because it is gentle and will not scratch the lens. Additionally, be sure to use a lens cleaning solution that is specifically designed for use on camera lenses, as other products may damage the lens.
Step-by-step guide
Follow these steps to clean your iPhone camera lens:
- Power off your iPhone to prevent any accidental button presses.
- Gently wipe the camera lens with the microfiber cloth to remove any loose dirt or debris. Avoid applying excessive pressure or rubbing the lens vigorously.
- Spray a small amount of lens cleaning solution onto the microfiber cloth, ensuring that it is damp but not dripping.
- Gently wipe the camera lens using a circular motion, starting from the center and moving towards the edges. This helps to evenly distribute the cleaning solution and remove any smudges or fingerprints.
- Inspect the lens for any remaining dirt or smudges. If necessary, repeat the previous step until the lens is clean and clear.
- Allow the lens to dry completely before turning your iPhone back on or taking photos.
By regularly cleaning the camera lens of your iPhone, you can ensure optimal focus and capture crisp, clear photos of small objects. It is recommended to clean the lens whenever you notice a decrease in focus or the presence of smudges. With a clean lens, you’ll be able to capture the intricate details of your small objects and enhance your overall photography experience.
Troubleshooting common focus issues
If you are having trouble focusing your iPhone camera on a small object, there are a few common issues you may encounter. Here are some troubleshooting steps to help you resolve these focus issues:
1. Clean the lens
The first thing you should check is the cleanliness of your iPhone camera lens. Fingerprints, dust, and smudges can all affect the focus of the camera. Use a microfiber cloth or lens cleaning solution to gently clean the lens. Avoid using harsh cleaners or abrasive materials that could scratch the lens.
2. Reset the camera settings
If cleaning the lens doesn’t resolve the focus issue, you can try resetting the camera settings. Go to Settings > Camera > Preserve Settings and toggle off any options that are enabled. Then, go to Settings > General > Reset and choose Reset All Settings. This will not delete any of your data, but will reset your camera settings to their default values.
3. Adjust the focus manually
If the automatic focus is not working well for your small object, you can try adjusting the focus manually. Tap and hold on the screen where your object is located to bring up the focus square. Then, swipe up or down to adjust the focus manually. This can help you get a crisper focus on your small object.
4. Use the focus lock
If you find that the focus keeps shifting away from your small object, you can use the focus lock feature. After tapping to focus on your object, press and hold on the screen until you see the AE/AF Lock indicator. This will lock the focus and exposure settings, ensuring that your small object stays in focus even if you move the camera.
5. Update your iPhone software
If you are still experiencing focus issues, it’s possible that there may be a software bug causing the problem. Make sure that your iPhone is running the latest software version by going to Settings > General > Software Update. If an update is available, download and install it to see if it resolves the focus issue.
Following these troubleshooting steps should help you resolve common focus issues with your iPhone camera when photographing small objects. If the problem persists, it may be worth contacting Apple Support for further assistance.
FAQ
How can I focus the iPhone camera on a small object?
To focus the iPhone camera on a small object, you can tap on the screen where the object is located. This will prompt the camera to focus on that area and adjust the focus accordingly. You can also try using the iPhone’s autofocus feature by tapping and holding on the screen until the “AE/AF Lock” indicator appears. This will lock the focus and exposure on the selected object.
Is there a specific mode or setting that can help me focus on small objects using the iPhone camera?
Yes, the iPhone camera has a macro mode specifically designed for close-up photography. To access the macro mode, open the camera app, tap on the “Auto” button at the top of the screen, and select the flower icon. This will enable the macro mode and allow you to focus on small objects with greater detail.
Why does my iPhone camera struggle to focus on small objects?
There could be several reasons why your iPhone camera is having difficulty focusing on small objects. One possibility is that the object is too close to the camera, and the lens is unable to focus properly. Try moving the object slightly further away to see if that helps. Another reason could be poor lighting conditions, as the camera needs sufficient light to focus accurately. Finally, if you have a dirty or smudged lens, it can also affect the focusing capability. Make sure to clean the lens with a soft cloth before taking photos of small objects.
Are there any third-party apps that can help me focus on small objects using my iPhone camera?
Yes, there are several third-party camera apps available on the App Store that offer advanced focusing capabilities. Some popular options include ProCamera, Halide, and Camera+ 2. These apps often include manual focus controls, allowing you to adjust the focus manually for precise focusing on small objects. Additionally, they may offer other features like focus peaking, which highlights the areas in focus, making it easier to capture sharp images of small objects.


