
How to Get iPhone Camera to Focus Close Up
The camera on your iPhone is a powerful tool that allows you to capture stunning photos and videos. However, it can be frustrating when the camera struggles to focus on objects up close. Whether you’re trying to photograph a flower or capture details of a small item, getting the iPhone camera to focus close up can make a big difference in the quality of your photos.
Fortunately, there are a few tips and tricks that can help you achieve sharp and clear close-up shots with your iPhone camera. In this article, we will guide you through the steps to get your iPhone camera to focus close up and capture those intricate details that you want to preserve forever.
1. Use the Tap to Focus Feature
One of the easiest ways to get your iPhone camera to focus close up is by using the tap to focus feature. This feature allows you to manually select the area you want to focus on by simply tapping on it on your iPhone screen. To use this feature, open the Camera app on your iPhone and frame your shot. Once you have the subject in focus, tap on the area you want to emphasize. The camera will adjust the focus accordingly, allowing you to capture a sharp close-up image.
2. Use the Macro Lens Attachment
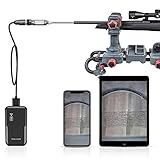
If you want to take close-up shots regularly, consider investing in a macro lens attachment for your iPhone. The macro lens attachment allows you to get incredibly close to your subject while maintaining sharp focus. Simply attach the macro lens to your iPhone camera and adjust the focus until you achieve the desired result. With a macro lens, you’ll be able to capture intricate details in flowers, insects, or any small object.
3. Adjust the Distance
Another method to get your iPhone camera to focus close up is to adjust the distance between your iPhone and the subject. Getting physically nearer to the subject can help the camera to focus better. Try moving closer to your subject until you see the focus lock on your iPhone screen. Experiment with different distances to find the sweet spot that allows you to capture crisp and detailed close-up shots.
4. Clean the Camera Lens
A dirty or smudged camera lens can cause the iPhone camera to struggle with focusing, especially up close. Make sure to clean the camera lens before capturing close-up shots. Use a microfiber cloth or a lens cleaning solution to gently wipe away any fingerprints, smudges, or dust particles that may be obstructing the lens. A clean lens will help the camera to focus accurately and produce high-quality close-up images.

5. Enable AE/AF Lock
When shooting close-up photos, the exposure and focus settings may change as you move the camera. To prevent this, you can enable the AE/AF (Auto Exposure/Auto Focus) lock on your iPhone. This feature allows you to lock the exposure and focus settings, ensuring that they remain constant throughout the capturing process. To enable AE/AF lock, tap and hold on the screen until you see the AE/AF lock indicator. This will help you maintain a consistent focus while taking close-up shots.
With these tips and tricks, you can improve the capabilities of your iPhone camera to focus close up. The ability to capture sharp and detailed close-up shots will enhance your photography skills and allow you to explore new creative possibilities. Experiment with these techniques, and unleash your creativity with your iPhone camera!
Understanding iPhone Camera Focus Settings
When it comes to taking close-up photos with your iPhone camera, understanding how the focus settings work is essential. The camera focus settings allow you to control the sharpness and clarity of your subject and can greatly enhance the quality of your close-up shots.
1. Auto Focus
The default focus setting on your iPhone camera is the Auto Focus mode. This mode automatically adjusts the focus based on what it detects in the frame. When you tap on the screen to select a subject, the camera will focus on that area and adjust accordingly.

2. Manual Focus
If you want more control over the focus of your close-up shots, you can switch to the Manual Focus mode. To access this mode, tap on the screen where you want to focus and hold until the yellow square appears. You can then adjust the focus manually by sliding your finger up or down on the screen.
In the Manual Focus mode, you can also use the AE/AF lock feature to lock the exposure and focus settings for the selected area. This is particularly useful when taking macro shots or capturing small details.
3. Focus Peaking
Another helpful feature available on some iPhone models is Focus Peaking. This feature emphasizes the areas that are in focus by highlighting them with a color. To enable Focus Peaking, go to the camera settings, tap on Focus, and select Focus Peaking. This can help you achieve precise focus when taking close-up photos.
It’s important to note that different iPhone models may have slightly different camera focus settings and features. Therefore, it’s always recommended to consult your device’s user manual or explore the camera settings to fully understand the options available.
By familiarizing yourself with the different focus settings and experimenting with them, you can take stunning close-up photos with your iPhone camera. Whether you’re capturing the delicate details of a flower or the texture of a piece of jewelry, understanding and utilizing these focus settings will greatly enhance your photography skills.

Adjusting focus manually on the iPhone camera
If you want to capture close-up shots with your iPhone camera, adjusting the focus manually can greatly improve the results. By default, the iPhone camera automatically focuses on the subject in the center of the frame. However, you can take control of the focus to achieve precise and crisp photos.
Using the iPhone camera’s manual focus feature
To manually adjust the focus on the iPhone camera, follow these steps:
- Launch the Camera app on your iPhone.
- Tap on the screen where your subject is located to set the focus point.
- A yellow box will appear around the focus point, indicating that the focus is locked on that area.
- Next, swipe up or down on the screen to adjust the exposure. This will help you get the right brightness for your close-up shot.
- Once you have set the focus and exposure, tap the shutter button to capture the photo.
Remember that when adjusting the focus manually, it’s important to make small adjustments to ensure that your subject remains sharp. Additionally, be mindful of the lighting conditions and try to avoid shooting in low-light situations, as it can affect the focus and image quality.
Using additional accessories for close-up photography
If you frequently take close-up shots, you might consider using additional accessories to enhance the focus capabilities of your iPhone camera. Macro lenses and lens attachments can be attached to your iPhone to achieve even better results for close-up photography. These accessories allow you to focus on subjects as close as a few centimeters away, capturing intricate details with clarity.
When using additional accessories, be sure to follow the manufacturer’s instructions and properly attach and align the lens with your iPhone camera. Taking care of your accessories and keeping them clean will also help maintain optimal image quality.

| Pros | Cons |
|---|---|
| Ability to manually adjust focus for precise close-up shots | Requires some practice to achieve the desired focus |
| Provides better control over exposure for accurate brightness | May not work well in low-light conditions |
| Additional accessories can enhance focus capabilities | Extra cost for buying and maintaining accessories |
By adjusting the focus manually on your iPhone camera and using additional accessories, you can capture impressive close-up shots with excellent clarity and detail. Experiment with different subjects and settings to explore the full potential of your iPhone camera.
Using the “Tap to Focus” feature on the iPhone camera
The iPhone camera has a feature called “Tap to Focus” that allows users to manually adjust the focus of their photos. This feature is especially useful when trying to capture close-up shots of objects or subjects.
To use the “Tap to Focus” feature, follow these steps:
| Step 1: | Open the camera app on your iPhone. |
| Step 2: | Position your iPhone so that the object or subject you want to focus on is in the center of the frame. |
| Step 3: | Tap on the part of the screen where you want to focus. The camera will adjust the focus and exposure settings to prioritize the area you tapped. |
| Step 4: | If needed, you can adjust the exposure manually by sliding your finger up or down on the screen. This can be helpful if the lighting conditions are challenging. |
| Step 5: | Once you are satisfied with the focus and exposure, press the shutter button to capture the photo. |
By using the “Tap to Focus” feature, you have more control over how your photos turn out, especially when capturing close-up shots. Experiment with different focal points and lighting conditions to achieve the desired result.
Maximizing lighting for close-up photos on the iPhone camera
When taking close-up photos with your iPhone camera, it’s important to maximize lighting in order to capture clear and detailed shots. Here are a few tips to help you achieve great lighting for your close-up photos:

1. Natural Lighting
Whenever possible, take advantage of natural lighting when capturing close-up photos. Find a well-lit area, preferably near a window or outside, where the subject is illuminated by natural light. This will help to avoid harsh shadows and create a more even and balanced exposure.
2. Use Additional Lighting
If natural lighting is not sufficient or available, consider using additional artificial lighting sources. There are various portable LED lights and smartphone camera attachments available that can help to provide supplementary lighting. Experiment with different light angles and positions to find the best lighting configuration for your close-up photos.
Remember to avoid placing the light source directly in front of the subject, as this can create overexposure or washed-out images. Instead, try positioning the light source slightly off to the side or at a 45-degree angle to achieve a more flattering lighting effect.
By maximizing the lighting for your close-up photos on the iPhone camera, you can ensure that your subjects are well-lit and the details are captured in sharp focus. Experiment with different lighting techniques and find what works best for you.
Using additional lenses for close-up photography on the iPhone camera
While the iPhone camera is powerful on its own, sometimes you may want to capture close-up shots with even more detail and precision. By using additional lenses designed specifically for the iPhone camera, you can enhance its capabilities and take stunning close-up photographs.

There are various types of lenses available for the iPhone camera, each serving a different purpose. One popular option is the macro lens, which is designed to capture tiny details and focus on objects at a very close distance. This lens allows you to capture intricate textures and patterns that may not be visible with the naked eye.
When using a macro lens on the iPhone camera, it’s important to get as close to the subject as possible to achieve the desired level of detail. You may also need to adjust the focus manually by tapping on the subject on your iPhone screen to ensure optimal clarity.
Another type of lens that can be used for close-up photography is the telephoto lens. This lens allows you to zoom in on subjects from a distance, making it ideal for capturing close-up shots of wildlife or objects that may be difficult to get close to physically.
To attach additional lenses to your iPhone camera, you can use lens attachments or clip-on lenses specifically designed for your iPhone model. These lenses are typically easy to install and remove, allowing you to quickly switch between different lens options depending on your photography needs.
When using additional lenses for close-up photography on the iPhone camera, it’s important to experiment with different angles, lighting conditions, and compositions to create visually appealing images. Play around with different settings and techniques to find the style that best suits your artistic vision.
In conclusion, using additional lenses for close-up photography on the iPhone camera can greatly enhance your ability to capture intricate details and unique perspectives. Whether you choose a macro lens for up-close shots or a telephoto lens for subjects at a distance, these lenses can unlock a whole new world of photography possibilities.
Using third-party camera apps for better close-up focusing on the iPhone
If you’re looking to improve the close-up focusing capabilities of your iPhone camera, one solution is to use third-party camera apps. These apps often offer advanced features and settings that can help you achieve better focus and detail when capturing close-up shots.
One popular option is the Camera+ 2 app. This app allows you to manually adjust the focus and exposure settings, which can be beneficial when attempting close-up shots. The app also offers a macro mode specifically designed for capturing detailed images at close distances.
Another great choice is the Halide app. This app provides an intuitive and user-friendly interface, making it easy to focus on specific subjects in close proximity. The app also includes advanced tools such as focus peaking, which highlights areas of sharp focus, and manual controls for precise adjustments.
If you’re interested in exploring more options, ProCamera is worth considering. This app offers a range of features, including focus stacking, which combines multiple images with different focus points to create a fully detailed close-up shot. Additionally, ProCamera provides tools for adjusting focus position and exposure separately, allowing for greater control over close-up shots.
Before using a third-party camera app, it’s essential to familiarize yourself with its features and settings. Take the time to experiment and find the options that work best for your close-up photography needs. With practice and the right app, you can take your iPhone close-up shots to the next level!
Getting the Best Angle for Close-up Photos on the iPhone Camera
Capturing close-up photos with your iPhone camera allows you to capture fine details and create stunning images. However, getting the right angle is crucial to ensure the subject is in focus and the image is composed well. Here are some tips to help you achieve the best angle for close-up photos on your iPhone camera:
1. Position your iPhone at eye-level with the subject
When taking a close-up photo, positioning your iPhone at eye level with the subject helps create a natural perspective and brings the details into focus. This is especially important when capturing portraits or detailed shots of objects.
2. Use the gridlines to compose your shot
The gridlines feature on the iPhone camera can help you compose your close-up shots. Enable the gridlines in your camera settings to divide the screen into thirds vertically and horizontally. Align your subject along these lines or at their intersections to create a visually appealing composition.
3. Experiment with different angles and perspectives
Don’t be afraid to experiment with different angles and perspectives when shooting close-up photos. Try shooting from a lower angle to capture a subject’s height or from a higher angle to emphasize certain details. Move around the subject and capture it from various viewpoints to find the most visually interesting composition.
4. Use natural light to enhance your close-up photos
Natural light can greatly enhance the quality of your close-up photos. When shooting indoors, position your subject near a window or any other source of natural light to create soft, diffused lighting. Avoid using the iPhone flash, as it can create harsh and unflattering shadows.
5. Adjust the focus and exposure manually
In close-up photography, it is important to ensure that the subject is in sharp focus. To do this, tap on the subject on your iPhone screen to set the focus manually. Additionally, you can adjust the exposure by swiping up or down on the screen to brighten or darken the image as needed.
Remember, practice makes perfect. Keep experimenting with different angles and techniques to improve your close-up photography skills with the iPhone camera. With time and experience, you will be able to capture stunning close-up shots with ease.
Editing close-up photos taken with the iPhone camera
When taking close-up photos with your iPhone camera, you may notice that some of the details are not as clear or sharp as you’d like them to be. Luckily, there are several editing techniques you can use to enhance your close-up photos and make them stand out.
1. Adjusting exposure and contrast
One of the first steps you can take when editing close-up photos is to adjust the exposure and contrast. This can help bring out the details and make the subject of your photo pop. To do this, you can use the editing tools available in the Photos app on your iPhone.
2. Sharpening the image
Another important aspect of editing close-up photos is sharpening the image. This can be especially useful if you notice any blurriness or lack of detail in certain areas. The sharpening tool in your editing app can help enhance the edges and bring out the fine details in your close-up photos.
Additionally, you can also use other editing tools such as adjusting the saturation, vibrance, or temperature of the photo to further enhance the colors and overall look of your close-up shots.
| Editing steps for close-up photos on iPhone |
|---|
| 1. Open the Photos app on your iPhone and select the close-up photo you want to edit. |
| 2. Tap on the Edit button in the top right corner of the screen. |
| 3. Use the exposure and contrast sliders to adjust the lighting and bring out the details in your close-up photo. |
| 4. If needed, use the sharpening tool to enhance the edges and fine details. |
| 5. Experiment with other editing tools like saturation, vibrance, and temperature, to further enhance the colors in your close-up shot. |
| 6. Once you are satisfied with the edits, tap on the Done button to save your changes. |
By following these steps and experimenting with different editing techniques, you can improve the quality of your close-up photos taken with the iPhone camera and make them look even more stunning.
Troubleshooting common issues with close-up focusing on the iPhone camera
If you are facing difficulties getting your iPhone camera to focus on close-up subjects, there are several troubleshooting steps you can take to resolve the issue. Here are some common problems and their solutions:
| Problem | Solution |
|---|---|
| Blurred or out-of-focus images | Make sure you are holding the iPhone steady and avoiding any camera shake. Try tapping on the subject on the screen to activate the autofocus feature. If the issue persists, consider cleaning the camera lens with a microfiber cloth. |
| Camera unable to focus at close distances | Ensure that you are within the minimum focusing distance of your iPhone camera. This distance may vary depending on the model of your iPhone. Refer to your device’s user manual or manufacturer’s website for specific details. Additionally, try turning on the macro mode if available. |
| Lack of light | Insufficient lighting can negatively affect the focusing capabilities of your iPhone camera. Ensure that the subject is well-lit or consider using external lighting sources, such as lamps or a ring light. You can also try tapping on the subject to activate the camera’s focus lock feature. |
| Software issues | Update your iPhone’s operating system and camera app to the latest version available. Software updates often include bug fixes and improvements to camera functionality. If the issue persists, consider resetting the camera settings or restoring your iPhone to its factory settings. |
By following these troubleshooting steps, you should be able to resolve common issues with close-up focusing on your iPhone camera. If the problem still persists, it may be necessary to contact Apple support or visit an authorized service center for further assistance.
FAQ
Why is my iPhone camera not focusing up close?
If your iPhone camera is not focusing up close, there are several possible reasons for this. Firstly, make sure that there is enough lighting in the area where you are trying to take the close-up photo. Low light conditions can cause the camera to struggle with focusing. Secondly, check if there is any dirt or smudges on the camera lens. Wiping it gently with a soft cloth may help improve focus. Thirdly, try tapping on the area of the screen where you want the camera to focus. This can help the camera adjust its focus to the desired subject. If none of these solutions work, it is possible that there may be a hardware issue with your iPhone camera and you may need to contact Apple support for further assistance.
Is there a way to manually adjust the focus on an iPhone camera?
Yes, you can manually adjust the focus on an iPhone camera. To do this, open the camera app and tap on the screen where you want to focus. A yellow box will appear to indicate the focus point. You can then use the slider that appears next to the yellow box to adjust the focus manually. Simply slide your finger up or down to increase or decrease the focus. This can be useful when you want to take a close-up photo and the auto-focus is not working properly. However, keep in mind that manually adjusting the focus may require some trial and error to get the desired result.
What should I do if the close-up photos taken with my iPhone camera are blurry?
If the close-up photos taken with your iPhone camera are blurry, there are a few things you can try to improve the focus. Firstly, make sure that you are holding the iPhone steady while taking the photo. Shaky hands can result in blurry images. Secondly, ensure that there is enough light in the area where you are taking the close-up photo. Low light conditions can cause blurry images as the camera has to use a slower shutter speed. Alternatively, you can try using the flash or external lighting to improve the lighting conditions. Finally, check if there are any obstructions between the camera and the subject. Removing any obstructions, such as smudges on the lens or obstacles in the way, can help improve the focus and clarity of your close-up photos.


