
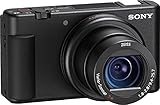
Do you own a Sony camera and wonder how to transfer your cherished photos onto your iPhone? Look no further! In this guide, we will walk you through the step-by-step process of getting your photos from your Sony camera to your iPhone, so you can easily share them with friends and family or edit them on the go.
Step 1: Connect your Sony camera and iPhone
The first thing you need to do is connect your Sony camera and iPhone using a USB cable. Ensure that your camera is turned on and in the correct mode for photo transfer. Once connected, your iPhone should prompt you to import photos. Tap “Import” to proceed.
Step 2: Select the photos you want to transfer
Next, you will see a screen with all the photos available for transfer from your Sony camera. You can select individual photos by tapping on them, or you can choose “Select All” if you want to transfer all the photos at once. After making your selection, tap “Import” to begin the transfer process.

Step 3: Wait for the transfer to complete
During the transfer process, you will see a progress bar indicating the status of the transfer. The time it takes will depend on the number and size of the photos being transferred. Ensure that both your Sony camera and iPhone are connected until the transfer is complete. Once finished, you can tap “Done” to exit the importing screen.
Step 4: Access your transferred photos on your iPhone
After the transfer is complete, you can access your photos on your iPhone by opening the Photos app. Your transferred photos will be available in the “Imported” or “Camera Roll” album, depending on your iPhone’s settings. From there, you can organize, edit, or share your photos with ease.
Now that you know how to get photos from your Sony camera to your iPhone, you can enjoy your captured moments on a larger screen, share them instantly, or unleash your creativity by editing them using the various tools available on your iPhone. Happy transferring!
Connecting Sony camera and iPhone
When it comes to transferring photos from your Sony camera to your iPhone, there are a few different methods you can try. Here are some options to consider:
1. USB connection
The most straightforward way to connect your Sony camera to your iPhone is by using a USB cable. Your Sony camera likely came with a USB cable that can be used for this purpose.
To begin, make sure your Sony camera is turned off. Then, locate the USB port on your camera and connect one end of the USB cable to it. Next, take the other end of the USB cable and plug it into the lightning port on your iPhone.
Once the connection is established, turn on your Sony camera. Your iPhone should recognize the camera and prompt you to import the photos. Follow the on-screen instructions to transfer the desired photos from the camera to your iPhone.
2. Wireless transfer
If you prefer a wireless method, you can use the built-in Wi-Fi or Bluetooth capabilities of your Sony camera and iPhone.

First, check if your Sony camera has Wi-Fi or Bluetooth features. If it does, enable the respective feature on both devices.
On your iPhone, go to the Settings app and select the Wi-Fi or Bluetooth section. Ensure that Wi-Fi or Bluetooth is turned on and search for your Sony camera in the available devices list.
Once you find your camera, establish a connection by following the prompts on both devices. Once the connection is established, you should be able to transfer photos wirelessly from your camera to your iPhone, either through a dedicated app or the default photo-transfer feature on your camera.
Remember to disable Wi-Fi or Bluetooth on your devices after the transfer is complete to save battery life.
Whichever method you choose, make sure both your Sony camera and iPhone are fully charged to avoid any interruptions during the transfer process. Additionally, you may need to install the appropriate apps or drivers on your iPhone or camera to enable seamless file transfers.

Transferring photos using a USB cable
If you have a USB cable handy, transferring photos from your Sony camera to your iPhone is a relatively quick and simple process. Follow the steps below:
Step 1: Connect your Sony camera to your iPhone
Using the appropriate USB cable, connect your Sony camera to your iPhone. Ensure that both devices are securely connected.
Note: Depending on the model of your Sony camera and iPhone, you may need a USB adapter to connect the two devices.
Step 2: Importing the photos
Once your camera and iPhone are connected, your iPhone will detect the camera as an external device. You should see a prompt on your iPhone asking if you would like to import the photos.
Note: If the prompt does not appear automatically, you can manually trigger it by opening the Photos app on your iPhone and selecting the “Import” option.

Step 3: Select and transfer the photos
In the prompt or Photos app, you will see a list of the photos available for importing. You can select individual photos or choose to import all of them.
Note: If you have previously imported photos from your Sony camera, only the new and unimported photos will be shown in the prompt.
After selecting the desired photos, click on the “Import” button to initiate the transfer process. You may be asked to confirm the import, and your iPhone will display a progress bar showing the transfer status.
Step 4: Accessing the transferred photos
Once the transfer process is complete, you can access the imported photos in the Photos app on your iPhone. They will be saved in the “Camera Roll” or “All Photos” album, depending on your iPhone’s settings.
Congratulations! You have successfully transferred photos from your Sony camera to your iPhone using a USB cable.
Sending Photos via Wi-Fi
If you have a Sony camera with built-in Wi-Fi capabilities, you can easily send photos directly to your iPhone without the need for any additional accessories or cables. Here is a step-by-step guide on how to do it:
Step 1: Enable Wi-Fi
On your Sony camera, navigate to the settings menu and locate the Wi-Fi options. Enable Wi-Fi connectivity by selecting the appropriate option.
Step 2: Connect iPhone to Camera
On your iPhone, go to the “Settings” app and tap on “Wi-Fi”. Find the Wi-Fi network name of your Sony camera and select it to establish a connection between your iPhone and the camera.
Step 3: Download Sony PlayMemories Mobile App
Open the App Store on your iPhone and search for “Sony PlayMemories Mobile”. Download and install the app on your device.
Step 4: Launch PlayMemories Mobile App
Launch the PlayMemories Mobile app on your iPhone. It will automatically detect the connected Sony camera and establish a connection.

Step 5: Select and Send Photos
Once the connection is established, you can browse through the photos on your camera using the PlayMemories Mobile app. Select the photos you want to send to your iPhone and tap on the “Send to Smartphone” button. Follow the on-screen instructions to complete the transfer process.
By following these steps, you can easily send photos from your Sony camera to your iPhone using Wi-Fi, without the hassle of cables or additional equipment.
Importing photos through Sony’s app
In order to transfer photos from your Sony camera to your iPhone, you can make use of Sony’s Imaging Edge Mobile app. This app allows for easy and seamless file transfers between your camera and iPhone.
Here are the steps to import your photos through Sony’s app:
Step 1: Download and install the app
Search for “Imaging Edge Mobile” on the App Store and download the application onto your iPhone.
Step 2: Connect your camera to your iPhone
Enable Wi-Fi on your Sony camera and go to the app’s settings on your iPhone. Select the camera you want to connect to and establish a Wi-Fi connection between your camera and iPhone.
Step 3: Access the photos
Once your camera and iPhone are connected, open the Imaging Edge Mobile app. You will now be able to see and access the photos on your camera through the app’s interface.
Step 4: Select and import photos
Browse through the available folders and select the photos you want to import. You can choose multiple photos at once by tapping on them. Once you have selected all the desired photos, tap on the import button to start the transfer process.
Note: The time taken for the transfer to complete may vary depending on the number and size of the photos being transferred.
By following these steps, you can easily import your photos from your Sony camera to your iPhone using Sony’s Imaging Edge Mobile app.
Using cloud storage solutions
If you want a seamless way to transfer photos from your Sony camera to your iPhone, using a cloud storage solution is a great option. Cloud storage allows you to store your photos in a remote server and access them from any device with an internet connection.
Here are the steps to transfer photos from your Sony camera to your iPhone using a cloud storage solution:
1. Choose a cloud storage provider:
There are several cloud storage providers available, such as Google Drive, Dropbox, iCloud, and OneDrive. Choose the one that best suits your needs and create an account if you don’t have one already.
2. Upload your photos to the cloud:
Install the cloud storage app on your Sony camera if available, or transfer the photos to your computer and upload them to the cloud storage platform using the desktop client or web interface.
3. Install the cloud storage app on your iPhone:
Download and install the cloud storage app from the App Store on your iPhone. Sign in with the same account you used to upload the photos.
4. Access and download the photos:
Open the cloud storage app on your iPhone and navigate to the folder where you uploaded the photos. You can now view and download the photos to your iPhone’s Camera Roll or any other desired location on your device.
Using a cloud storage solution not only allows you to transfer photos from your Sony camera to your iPhone, but it also provides a convenient way to back up and access your photos from multiple devices. It is a reliable and efficient method for managing your photo library across different platforms.
| Cloud storage providers | Max storage capacity | Mobile app availability |
|---|---|---|
| Google Drive | 15GB (free), 100GB – 30TB (paid) | Yes |
| Dropbox | 2GB (free), 2TB (paid) | Yes |
| iCloud | 5GB (free), 50GB – 2TB (paid) | Yes |
| OneDrive | 5GB (free), 100GB – 1TB (paid) | Yes |
Transferring photos with a memory card reader
If you prefer a direct and hassle-free way to transfer photos from your Sony camera to your iPhone, you can use a memory card reader. This method allows you to bypass any cables or wireless connections, making it quick and efficient.
To begin, make sure you have a memory card reader that is compatible with your iPhone model. There are many card readers available on the market, so be sure to choose one that is compatible with both your camera’s memory card format and your iPhone’s Lightning connector.
Once you have the memory card reader, follow these steps:
| 1. | Remove the memory card from your Sony camera and insert it into the memory card reader. |
| 2. | Attach the memory card reader to your iPhone’s Lightning connector. It should fit snugly. |
| 3. | Your iPhone should automatically detect the memory card and open the Photos app. If not, open the Photos app manually. |
| 4. | In the Photos app, you will see the imported photos from your camera’s memory card. You can now view, edit, and organize them as desired. |
| 5. | If you want to save the photos to your iPhone’s Camera Roll, tap the “Import” button and select the desired destination album. |
| 6. | Once the import is complete, you can disconnect the memory card reader from your iPhone. |
Using a memory card reader is a simple and reliable method for transferring photos from your Sony camera to your iPhone. It eliminates the need for additional cables or wireless connections and allows you to quickly access and organize your photos on your iPhone.
Syncing Sony camera with iCloud
If you own a Sony camera and an iPhone, you may want to sync your camera photos with your iPhone to easily access and share them. One convenient way to do this is by using iCloud, Apple’s cloud storage and syncing service. By setting up iCloud on your Sony camera and iPhone, you can automatically upload and sync your camera photos with your iCloud Photo Library, making them accessible on your iPhone and other Apple devices.
Step 1: Check compatibility
Before syncing your Sony camera with iCloud, make sure it is compatible with the service. Check the Sony camera’s specifications or user manual to see if it supports wireless connectivity or has the ability to install apps. If your camera doesn’t have built-in Wi-Fi or app installation capabilities, you may need to explore alternate methods for transferring photos to your iPhone.
Step 2: Connect your Sony camera to Wi-Fi
To sync your camera with iCloud, it needs to be connected to the internet. Ensure that your Sony camera is connected to a Wi-Fi network by going to the camera’s settings menu and selecting the appropriate network. If your camera supports NFC, you can also try using NFC to establish a connection with your iPhone.
Step 3: Install Sony PlayMemories Mobile app
Download and install the Sony PlayMemories Mobile app on your iPhone from the App Store. This app allows you to connect your camera with your iPhone and transfer photos wirelessly. Open the app and follow the on-screen instructions to connect your camera.
Step 4: Enable iCloud Photo Library on your iPhone
On your iPhone, go to Settings and tap on your name at the top. Then, tap on “iCloud” > “Photos” and enable iCloud Photo Library. This will ensure that any photos synced from your Sony camera will be automatically uploaded and stored in your iCloud account.
Step 5: Sync photos from Sony camera to iPhone
Launch the Sony PlayMemories Mobile app on your iPhone and select the option to “Send to Smartphone” or “Import” the photos from your camera. Choose the photos you want to sync and tap on the “Send” or “Import” button. The selected photos will be transferred from your camera to your iPhone and stored in iCloud Photo Library.
Once the photos are synced to iCloud, you can access them on your iPhone by opening the Photos app. They will be available in the “All Photos” section under the “Photos” tab.
By following these steps, you can easily sync your Sony camera photos with iCloud, allowing you to access and share them conveniently on your iPhone and other Apple devices. Keep in mind that syncing large files may take some time, so ensure that your camera and iPhone have sufficient battery life and a stable internet connection during the syncing process.
Using third-party transfer apps
If you are unable to directly connect your Sony camera to your iPhone or if the built-in transfer apps are not compatible, you can use third-party transfer apps to transfer photos from your Sony camera to your iPhone. These apps provide a seamless and convenient way to transfer files wirelessly between your devices.
To get started, you will need to download and install a third-party transfer app from the App Store. Some popular apps for transferring photos include Wi-Fi Transfer, PhotoSync, and ShutterSnitch. These apps offer different features and functionalities, so you can choose the one that best suits your needs.
Once you have installed the transfer app on both your Sony camera and iPhone, follow the app’s instructions to establish a wireless connection between the two devices. This typically involves connecting both devices to the same Wi-Fi network and launching the app on both devices.
Once the app is connected, you can select the photos you want to transfer from your Sony camera and initiate the transfer process. The app will transfer the selected photos wirelessly to your iPhone and save them to your device’s camera roll or a designated folder.
Using a third-party transfer app can be a convenient solution if you want to transfer photos from your Sony camera to your iPhone wirelessly. Just make sure to choose a reputable app and follow the app’s instructions carefully to ensure a successful transfer.
Troubleshooting tips
If you are experiencing difficulties transferring photos from your Sony camera to your iPhone, here are some troubleshooting tips to help you resolve the issue:
|
1. Check compatibility: Make sure that both your Sony camera and iPhone are compatible with each other. Check the specifications of both devices to ensure they support the necessary file transfer methods and formats. |
|
2. Update firmware: Ensure that both your Sony camera and iPhone are running the latest firmware versions. Check for any available updates and install them if necessary, as firmware updates often include bug fixes and improvements to file transfer functionality. |
|
3. Connect using USB cable: Try connecting your Sony camera to your iPhone using a USB cable. This direct connection can often provide a more reliable and stable transfer method compared to wireless options. Make sure to use the appropriate USB adapter for your iPhone if needed. |
|
4. Close background apps: Close any unnecessary apps running in the background on your iPhone. This can free up system resources and help ensure a smoother transfer process. |
|
5. Restart devices: Try restarting both your Sony camera and iPhone. This can refresh their software and resolve any temporary issues that may be affecting the photo transfer process. |
|
6. Clear camera settings: On your Sony camera, navigate to the settings menu and look for any options related to file transfer or connectivity. Resetting these settings to their default values can sometimes resolve compatibility issues with your iPhone. |
|
7. Use a different transfer method: If you are still unable to transfer photos from your Sony camera to your iPhone, try using a different transfer method. This could include using a memory card reader to transfer photos directly from the camera’s memory card to your iPhone, or using a cloud storage service to upload the photos and then downloading them onto your iPhone. |
FAQ
Can I transfer photos from my Sony camera to my iPhone?
Yes, you can transfer photos from your Sony camera to your iPhone. There are different methods you can use to do this.
What are the different methods to transfer photos from a Sony camera to an iPhone?
There are several methods you can use to transfer photos from a Sony camera to an iPhone. One method is to use a USB cable to connect the camera to the iPhone and transfer the photos directly. Another method is to use a memory card reader to transfer the photos to your computer, and then transfer them to your iPhone using iTunes or iCloud. You can also use wireless transfer methods such as Wi-Fi or Bluetooth to transfer the photos.
Do I need any special software to transfer photos from a Sony camera to an iPhone?
No, you don’t need any special software to transfer photos from a Sony camera to an iPhone. If you are using a USB cable or a memory card reader, you can transfer the photos directly. If you are using wireless transfer methods, you may need to download a specific app or enable certain settings on your devices.
Is it possible to transfer photos from a Sony camera to an iPhone without a computer?
Yes, it is possible to transfer photos from a Sony camera to an iPhone without a computer. You can use wireless transfer methods such as Wi-Fi or Bluetooth to transfer the photos directly between the devices. Some Sony cameras also have built-in Wi-Fi capabilities that allow you to transfer photos to your iPhone without the need for a computer.


