
Security cameras are an essential part of any modern security system, providing valuable surveillance footage for both personal and commercial use. While battery operated security cameras offer flexibility and convenience, they do require regular battery changes, which can be inconvenient and time-consuming. One way to avoid this hassle is by hardwiring a battery operated security camera.
Hardwiring a battery operated security camera involves connecting it directly to a power source, eliminating the need for batteries. This method provides a reliable and uninterrupted power supply to the camera, ensuring continuous surveillance without the need for frequent maintenance. In this article, we will guide you through the process of hardwiring a battery operated security camera, so you can enjoy the benefits of constant power and peace of mind.
Step 1: Choose the Right Power Supply
Before you begin the hardwiring process, it is crucial to select the appropriate power supply for your camera. Most battery operated security cameras are designed to be compatible with a wide range of power sources, including AC power, DC power, and ethernet power over ethernet (PoE). Check the specifications of your camera to determine the compatible power options and choose the one that best suits your needs.

Disclaimer: It is important to ensure that the power supply you choose complies with the safety standards and requirements specific to your region.
What is a battery operated security camera?
A battery operated security camera is a type of surveillance camera that is powered by batteries instead of being hardwired to an electrical source. These cameras are designed to provide flexibility and convenience, making them an ideal choice for locations where wiring may be difficult or impossible.
These cameras are typically wireless and can be placed and mounted in various locations without the need for drilling holes or running cables. This makes them a popular choice for outdoor areas, remote locations, or areas where power sources are limited or not readily available.
Battery operated security cameras are often equipped with built-in rechargeable batteries, ensuring a continuous power supply. Some models can operate for several months on a single charge, depending on usage and settings.
Benefits of battery operated security cameras:
1. Easy installation: Battery operated security cameras can be easily installed without the need for professional help or complicated wiring. This makes them a suitable option for both homeowners and renters.

2. Flexibility: These cameras can be easily moved or repositioned as needed. They can be placed in different areas of a property or even used as temporary surveillance in construction sites or event venues.
Factors to consider when using a battery operated security camera:
1. Battery life: It’s important to consider the battery life of the camera and how often it needs to be recharged or replaced. Higher resolution and continuous recording may drain the battery faster.
2. Placement: Choosing the right location and angle for the camera is crucial for capturing clear footage and maximizing its effectiveness. Consider factors such as lighting conditions, potential obstructions, and the area you want to monitor.
Overall, battery operated security cameras offer convenience, flexibility, and ease of installation, making them an excellent option for those who need a portable surveillance solution without the hassle of wiring.
Why hardwire a battery operated security camera?
Hardwiring a battery operated security camera has several advantages over relying solely on battery power:

- Continuous power: By hardwiring the camera to a power source, you can ensure that it has a constant power supply and doesn’t run out of battery at crucial moments.
- Extended recording time: When connected to a power source, the camera can record for longer periods without worrying about battery life limitations.
- No need for frequent recharging: Hardwiring eliminates the need to regularly recharge the camera’s battery, saving time and effort.
- Reduced maintenance: With a stable power source, you don’t have to worry about battery health or replacing batteries frequently.
- Better performance: Hardwired cameras can often provide higher quality video footage and faster response times compared to battery operated cameras.
- Compatibility with other devices: Some advanced features and functions of a security camera may require a constant power connection, making hardwiring necessary.
In summary, hardwiring a battery operated security camera provides a more reliable and convenient solution for continuous surveillance without the need for frequent battery replacements or recharging.
Step 1: Gather the necessary tools and materials
To successfully hardwire a battery-operated security camera, you will need to gather the following tools and materials:
- A battery-operated security camera
- A power adapter or transformer
- Electrical wires
- A wire stripper
- A screwdriver
- A drill (optional)
- An electrical tape
- A power source (outlet or battery pack)
Make sure you have all of these tools and materials ready before starting the hardwiring process. Having everything prepared will help you complete the installation smoothly and efficiently.
What tools do you need?
Before hardwiring a battery operated security camera, you will need the following tools:
1. Screwdriver set
A set of screwdrivers will be necessary to remove the back cover of the camera and access the wiring terminals. Make sure to have both flathead and Phillips head screwdrivers in various sizes.

2. Wire strippers
Wire strippers are essential for removing the protective insulation from the wires. You will need to expose the bare copper ends of the wires for proper connectivity.
3. Power supply
To hardwire the camera, you will need a power supply that matches the voltage and current requirements of the camera model. Make sure to use a power supply with sufficient output to meet the camera’s needs.
4. Electrical tape or wire connectors
Electrical tape or wire connectors will be needed to secure and insulate the wires once they are connected. These will help prevent any accidental short circuits or exposed wires.
5. Wire cutter
A wire cutter is necessary for cutting the wires to the desired length and removing any excess wire once the hardwiring is complete.
6. Voltage meter or multimeter
A voltage meter or multimeter will help you test the voltage and ensure that the camera is receiving the correct power supply. This tool is important for troubleshooting any power-related issues.

| Screwdriver set | Wire strippers | Power supply | Electrical tape or wire connectors | Wire cutter | Voltage meter or multimeter |
|---|
What materials do you need?
Here is a list of materials you will need to hardwire a battery-operated security camera:
- Battery-operated security camera
- Power adapter
- Power cable
- Drill
- Electric tape
- Screwdriver
- Electrical wire
- Cable clips
- Wire strippers
- Wire connectors
- Screws
- Anchor bolts (if needed)
These materials will help you successfully hardwire your battery-operated security camera, providing a reliable power source for continuous surveillance. Make sure to gather all the necessary materials before starting the installation process to ensure a smooth and efficient setup.
Step 2: Prepare the camera for hardwiring
Before you can start hardwiring your battery operated security camera, you need to make some preparations. Follow these steps to prepare the camera:
| Step | Description |
|---|---|
| 1 | Locate the power adapter input on the camera. It is usually located on the back or bottom of the camera. |
| 2 | Disconnect the battery or remove it from the camera, depending on the camera model. |
| 3 | Identify the power cable that came with the camera. It should have a connector that matches the power adapter input on the camera. |
| 4 | Connect one end of the power cable to the power adapter and the other end to the power adapter input on the camera. |
Once you have completed these steps, your camera will be ready for hardwiring. Make sure all connections are secure and double-check the camera’s user manual for any specific instructions related to hardwiring.
Disconnect the battery
Before hardwiring your battery operated security camera, it is important to disconnect the battery. This will ensure your safety and prevent any electrical damage during the installation process.
To disconnect the battery, follow these steps:
| Step 1: | Locate the battery compartment on your security camera. It is usually located on the back or bottom of the camera. |
| Step 2: | Open the battery compartment by using a screwdriver or by sliding the cover off, depending on the design of your camera. |
| Step 3: | Remove the batteries from the compartment. Make sure to handle them carefully and avoid touching the metal contacts. |
| Step 4: | Check the battery compartment for any residue or corrosion. If you notice any, clean it with a dry cloth or a small brush. |
| Step 5: | Close the battery compartment securely. Ensure that it is properly sealed to prevent any moisture or dust from entering. |
Once the battery is disconnected, you can proceed with the hardwiring process for your security camera. Remember to refer to the manufacturer’s instructions for proper installation guidelines.
Locate the power input
Before proceeding with hardwiring your battery operated security camera, you need to locate the power input on the device. Typically, the power input is located on the back or bottom of the camera.
Check the camera’s user manual or the manufacturer’s website for specific instructions on the power input location if you’re having trouble finding it. It’s important to identify the correct power input to ensure a successful hardwiring process.
Once you’ve identified the power input, make sure to take note of the voltage and polarity requirements. This information is crucial for selecting the right power source and connecting the wires correctly.
Caution: Make sure to disconnect any existing power source, such as batteries, before attempting to hardwire the security camera. This is important for your safety and to avoid any damage to the camera or other electrical components.
Step 3: Install the power supply
Installing the power supply is an important step in hardwiring a battery-operated security camera. Here are the instructions to help you with this process:
1. Gather the necessary tools and materials
Before you begin, make sure you have the following tools and materials:
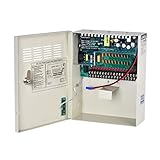
| Power supply unit | – | The power supply unit converts the AC voltage from your electrical outlet to the appropriate DC voltage that your camera requires. Ensure that the power supply unit is compatible with your camera. |
| Power cable | – | A power cable will connect the power supply unit to your camera. Check the length and compatibility of the power cable before purchasing. |
| Screwdriver | – | You will need a screwdriver to attach the power supply unit to a wall or other surface if necessary. |
| Wire cutters/strippers | – | These tools are necessary to cut and strip the wires, allowing you to connect them to the power supply unit. |
2. Choose a suitable location for the power supply unit
Select a location near an electrical outlet where you plan to install the power supply unit. Ensure that the location is easily accessible and provides enough space for the unit.
3. Mount the power supply unit
If necessary, use a screwdriver to mount the power supply unit securely to a wall or other surface near the chosen location. Ensure that it is mounted firmly and does not obstruct any other electrical connections.
4. Connect the power cable
Take the power cable and connect one end to the power supply unit. Ensure that it is securely attached.
5. Connect the other end of the power cable to the camera
Using wire cutters/strippers, carefully cut and strip the wires at the opposite end of the power cable. Follow the manufacturer’s instructions for your camera to connect the wires to the appropriate terminals.
6. Test the power supply
Once all connections are made, plug the power supply unit into the electrical outlet. Check the camera to ensure that it is receiving power. If the camera does not turn on, double-check all connections and troubleshoot as necessary.
By following these steps, you can successfully install the power supply for your battery-operated security camera, allowing you to hardwire it for continuous operation.
Choose the right power supply
When hardwiring a battery operated security camera, choosing the right power supply is crucial for proper functionality and longevity of the device. Here are a few factors to consider when selecting a power supply:
- Voltage: Ensure that the power supply voltage matches the voltage requirements of the security camera. Using a power supply with the incorrect voltage can damage the camera or lead to inconsistent performance.
- Current: Check the current rating of the camera and select a power supply that can provide enough current to meet its needs. Insufficient current may cause the camera to malfunction or stop working altogether.
- Connection type: Determine the type of power connector used by the camera and make sure the power supply has a matching connector. It’s important to have a secure and reliable connection to avoid power loss or intermittent power supply.
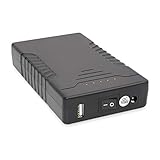
- Backup power: Consider whether you need a power supply with backup capabilities. This could involve using a battery backup or a UPS (Uninterruptible Power Supply) to ensure continuous power supply in case of power outages.
By carefully choosing the right power supply for your battery operated security camera, you can ensure its optimal performance and reliability in the long run.
Connect the power supply to the camera
Once you have chosen the appropriate power supply for your battery operated security camera, you can now connect it to the camera itself. Follow these steps:
Step 1: Locate the power input on the camera
First, locate the power input on your camera. This is usually a small jack or connector found on the back or bottom of the camera.
Step 2: Prepare the power supply
If your power supply has a detachable cable, make sure to attach the appropriate connector to the end of the cable. Some power supplies may come with multiple connectors to fit different devices.
Step 3: Insert the power connector into the camera
Take the power connector and carefully insert it into the power input on the camera. Make sure it is inserted fully and securely to ensure a good connection.

Step 4: Connect the power supply to a power source
Next, connect the power supply to a suitable power source, such as a power outlet or a power extension cord. Ensure that the power source is providing the correct voltage and current for your camera.
Once you have completed these steps, your battery operated security camera should now be powered by the hardwired power supply. Make sure to double-check all connections and test the camera to ensure it is receiving power properly.
FAQ,
Can I hardwire a battery-operated security camera?
Yes, you can hardwire a battery-operated security camera. However, keep in mind that not all battery-operated cameras are designed to be hardwired. You will need to check the specifications of your camera to see if it supports hardwiring.
What are the advantages of hardwiring a battery-operated security camera?
Hardwiring a battery-operated security camera has several advantages. Firstly, it eliminates the need to constantly recharge or replace batteries, ensuring uninterrupted surveillance. Additionally, hardwiring provides a more reliable power source, reducing the risk of camera downtime. Lastly, hardwiring allows for continuous recording, as the camera will not be dependent on battery life.


