
When it comes to photography, holding your digital SLR camera properly is crucial. Not only will it allow you to take steady and sharp photos, but it will also prevent hand fatigue and discomfort during long shoots. Whether you are a beginner or an experienced photographer, mastering the art of holding your camera correctly is a skill that will greatly improve the quality of your shots.
Firstly, it is important to hold the camera with both hands. Use your right hand to grip the camera’s grip, ensuring that your index finger is resting lightly on the shutter button. This will allow you to easily capture a photo without any unwanted movement. Place your left hand under the lens to provide additional support and stability.
Additionally, it is crucial to keep your body steady and stable while holding the camera. Stand with your feet shoulder-width apart and slightly bend your knees to create a solid foundation. This will help minimize any shaking or movement that could result in blurry images. Keeping your elbows tucked into your sides will also aid in providing more stability to your camera.
Remember, practice makes perfect. Spend some time getting comfortable with the feel and weight of your camera. Experiment with different hand positions and find the one that feels the most natural and secure. By mastering the proper technique, you will be able to unleash your creativity and capture stunning photos with ease.
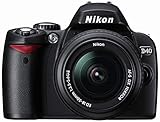
Why You Should Use a Digital SLR Camera
A digital SLR camera offers numerous advantages over other types of cameras, making it the perfect choice for professional photographers and photo enthusiasts alike. Here are some reasons why you should consider using a digital SLR camera:

|
Image Quality: A digital SLR camera delivers high-quality images with exceptional clarity and detail. Its large image sensor allows for better capturing of light and produces images with low noise levels. This ensures that your photos will be sharp and vibrant, even in low-light conditions. |
Adaptability: One of the main advantages of a digital SLR camera is its versatility. It allows you to change lenses and choose the right one for each shooting situation. Whether you want to capture a wide-angle landscape, zoom in on a distant subject, or create a blurry background with a shallow depth of field, a digital SLR camera gives you the flexibility to achieve the desired result. |
|
Speed and Performance:
5K Digital Camera for Photography, WiFi Auto Focus Vlogging Video Camera for YouTube with 32GB SD...

$103.99
2 new from $103.99
1 used from $128.69
as of September 9, 2024 11:21 am
Amazon.com
Digital SLR cameras are known for their fast autofocus systems and rapid shutter speeds. This enables you to capture fast-moving subjects, such as sports or wildlife, with precision and accuracy. Additionally, digital SLR cameras can shoot continuously at high frame rates, allowing you to capture multiple shots in quick succession. |
Manual Control: A digital SLR camera gives you full manual control over settings like aperture, shutter speed, and ISO. This allows you to have complete creative control over your photos and experiment with different exposure settings to achieve the desired effect. It is especially beneficial for those who want to learn and improve their photography skills. |
In conclusion, a digital SLR camera offers superior image quality, adaptability, speed, and manual control, making it the preferred choice for professionals and photography enthusiasts who value versatility and creative control in their work.
Choosing the Right Digital SLR Camera
When it comes to choosing the right digital SLR camera, there are several factors to consider. Here are some important aspects to keep in mind:
1. Camera Type
There are different types of digital SLR cameras available on the market, including entry-level, mid-range, and professional models. Consider your level of expertise and photography needs when selecting a camera type.
2. Megapixel Count
The number of megapixels determines the resolution of your photographs. Higher megapixel count results in sharper and more detailed images, but it also affects the file size and processing speed. Determine the optimal balance between image quality and practicality.
3. ISO Range
The ISO range determines the camera’s sensitivity to light. A wider ISO range allows for better performance in low-light conditions but may introduce noise or graininess to the images. Consider your shooting environment and the type of photography you will be doing.
4. Frames per Second (FPS)
If you are interested in capturing fast-moving subjects or sports photography, consider a camera with a higher FPS rate. A faster FPS allows you to capture multiple frames in a single second, increasing your chances of getting the perfect shot.
5. Lens Compatibility
Check for lens compatibility when choosing a digital SLR camera. The availability and variety of lenses play a crucial role in expanding the creative possibilities of your photography. Ensure that the camera you choose works with the lenses you plan to use.

6. Camera Controls and Interface
Consider the ergonomics and ease of use of the camera controls and interface. A user-friendly interface with easily accessible controls allows you to quickly adjust settings and capture photos without delay.
7. Budget
Lastly, determine your budget before making a purchase. Digital SLR cameras vary widely in price, so it’s essential to establish a budget and choose a camera that fits within your financial limitations.
By considering these factors and conducting thorough research, you can select the right digital SLR camera that meets your photography requirements and enhances your skills.
Understanding Camera Settings and Controls
When using a digital SLR camera, it is important to understand the various camera settings and controls in order to capture the best possible photographs. Here are some key settings and controls to familiarize yourself with:
1. Shooting Modes
Digital SLR cameras usually have different shooting modes such as Aperture Priority, Shutter Priority, Manual Mode, and Program Mode. Each mode offers different levels of control over the camera’s settings. It’s important to understand when and how to use each mode to achieve the desired effect.

2. ISO
ISO refers to the sensitivity of the camera’s image sensor to light. Adjusting the ISO allows you to control the camera’s performance in low-light conditions. A higher ISO setting will result in a brighter image, but it may also introduce more digital noise.
3. White Balance
White balance is used to adjust the color temperature of your images. Different lighting conditions can result in different color casts, so adjusting the white balance helps to ensure accurate and natural-looking colors in your photographs.
4. Exposure Compensation
Exposure compensation allows you to manually adjust the exposure of your images. It is useful in situations where the camera’s metering system may not accurately assess the exposure, such as high contrast scenes or backlit subjects.
5. Focus Point Selection
Digital SLR cameras offer multiple focus points that allow you to choose where the camera should focus in the frame. Understanding how to select the appropriate focus point is crucial for getting sharp and properly focused images.
6. Metering Modes
Metering modes determine how the camera measures the light in a scene to calculate the exposure settings. The most common metering modes include Evaluative (or Matrix), Center-Weighted, and Spot metering. Each mode has its own strengths and is suitable for different situations.

By familiarizing yourself with these camera settings and controls, you will gain greater control over your digital SLR camera and be able to capture images that meet your creative vision.
Proper Camera Grip and Stance
When it comes to holding a digital SLR camera, having a proper grip and stance is essential to ensure stability and minimize camera shake. Here are some tips to help you hold your camera correctly:
1. Positioning your hands
Start by placing your right hand on the camera’s grip, with your index finger resting comfortably on the shutter button. Your other fingers should wrap around the grip, providing support and stability.
Your left hand should cradle the lens, with your palm facing slightly upwards. Use your fingers to support the weight of the lens and stabilize it.
2. Body stance
Stand with your feet shoulder-width apart and position yourself in a way that feels comfortable and balanced. Tuck your elbows in against your body to provide additional stability.

3. Firm grip
Hold the camera firmly but avoid gripping it too tightly, as this can lead to tension and camera shake. Find a balance between a secure hold and being relaxed.
4. Use a neck strap or camera strap
Always use the neck strap or camera strap that comes with your camera. This adds an extra layer of security, preventing accidental drops and providing additional stability.
5. Practice proper breathing
Before taking a photo, take a deep breath and exhale slowly to relax your body. Avoid holding your breath while pressing the shutter button, as this can introduce shake into your photos.
By following these tips, you’ll be able to hold your digital SLR camera with confidence and capture clear, sharp images.
Mastering the Art of Focus
One of the key skills to master when using a digital slr camera is the art of focus. Whether you are shooting in auto focus or manual focus mode, understanding how to control and manipulate focus can greatly enhance the quality of your photographs.
Auto Focus Mode
In auto focus mode, the camera automatically adjusts the focus based on the subject it detects. To ensure accurate focus, first select the appropriate focus mode on your camera, such as single or continuous autofocus. Then, use the focus points in your viewfinder to align with your subject, typically by half-pressing the shutter button. Finally, fully press the shutter button to capture the image.
It’s important to understand that auto focus mode might not always provide perfect focus, especially in difficult lighting conditions or with moving subjects. In such situations, switching to manual focus mode may be necessary.
Manual Focus Mode
In manual focus mode, you have full control over the focus of your camera. Start by switching your lens to manual focus mode, which can usually be done by sliding a switch on the lens barrel. Then, use the focus ring on your lens to adjust the focus manually.
When using manual focus, it can be helpful to use the magnification feature of your camera’s live view or electronic viewfinder to zoom in on your subject, allowing you to fine-tune the focus. Additionally, using a tripod can provide stability and enable precise focus adjustments.
Tips for Achieving Sharp Focus:
- Take your time and be patient when focusing, especially in challenging conditions.
- Utilize the depth of field preview button to preview how the selected aperture affects the focus.
- Experiment with different focusing techniques, such as focus and recompose or zone focusing, to achieve the desired results.
Mastering the art of focus takes practice and experimentation, but with time, you will become more confident and skilled in capturing sharp and well-focused images.
Using the Manual Shooting Mode
In order to have complete control over your digital SLR camera and capture the perfect shot, it is important to understand and use the manual shooting mode. This mode allows you to adjust various settings, such as aperture, shutter speed, and ISO, giving you the ability to create the desired effect in your photographs.
1. Aperture
Aperture refers to the size of the opening in the lens through which light enters the camera. In manual mode, you can adjust the aperture to control the depth of field in your photos. A wider aperture (lower f-number) will result in a shallow depth of field, where the subject is in focus and the background is blurred. On the other hand, a narrower aperture (higher f-number) will lead to a larger depth of field, where both the subject and the background are in focus.
2. Shutter Speed
Shutter speed refers to the length of time that the camera’s shutter remains open. When shooting in manual mode, you can adjust the shutter speed to control the amount of light entering the camera and to freeze or blur motion. A faster shutter speed (e.g., 1/1000) will freeze action, making it ideal for capturing fast-moving subjects. Conversely, a slower shutter speed (e.g., 1/30) will create motion blur, which can be used artistically or for capturing low-light scenes.
In addition to controlling the exposure, the shutter speed also affects the amount of light that reaches the camera’s sensor. When using a slower shutter speed, it is important to use a tripod to prevent camera shake, which can result in blurry images.
It is important to note that adjusting the aperture and shutter speed impacts the exposure of your photo. If you make the aperture wider (lower f-number), you will need to compensate by increasing the shutter speed to prevent overexposure.
By utilizing the manual shooting mode and understanding how to adjust the aperture and shutter speed, you can take full control of your digital SLR camera and capture stunning and creative photographs.
Composition Techniques for Digital SLR Photography
Composition is a crucial aspect of photography, and understanding how to properly compose your shot can greatly enhance the impact of your digital SLR photos. These composition techniques will help you create visually appealing and compelling images that capture the viewer’s attention.
Rule of Thirds
The rule of thirds is a fundamental composition technique that involves dividing your frame into a grid of nine equal parts using two equally spaced horizontal lines and two equally spaced vertical lines. The points where the lines intersect are known as the “power points”. By placing your subject or points of interest along these lines or at the power points, you can create a more balanced and visually pleasing image.
Leading Lines
Leading lines are lines or shapes in a photograph that lead the viewer’s eye towards the main subject or points of interest. These lines can be found naturally in the scene or created using objects in the environment. By incorporating leading lines into your composition, you can create depth, add visual interest, and guide the viewer’s attention to the focal point of your image.
Table: Composition Techniques for Digital SLR Photography
| Composition Technique | Description |
|---|---|
| Rule of Thirds | A technique that involves dividing your frame into a grid of nine parts to create a balanced composition. |
| Leading Lines | Lines or shapes that lead the viewer’s eye towards the main subject or points of interest. |
By utilizing these composition techniques in your digital SLR photography, you can add depth, balance, and visual interest to your images. Experiment with different compositions to find what works best for your subject and convey the desired message or mood in your photographs.
Tips for Preventing Camera Shake
Camera shake can result in blurry or distorted images. To ensure sharp and clear photos, here are some tips for preventing camera shake:
1. Hold the camera correctly
Hold the camera with both hands, making sure to grip it firmly but not too tight. Keep your elbows close to your body for added stability and support.
2. Use a tripod or a stable surface
If possible, use a tripod to stabilize the camera. This will eliminate any movement caused by shaky hands. If a tripod is not available, you can also place the camera on a stable surface like a table or wall.
3. Use a faster shutter speed
A faster shutter speed helps to freeze the motion and reduces the chances of camera shake. Experiment with different shutter speeds to find the optimal one for your shooting conditions.
4. Use image stabilization
If your camera has built-in image stabilization, make sure it is turned on. This feature helps to compensate for small movements and reduces the impact of camera shake.
5. Take a breath and steady yourself
Before pressing the shutter button, take a deep breath and steady yourself. Holding your breath for a moment can help reduce camera shake caused by your own movements.
6. Use the camera’s self-timer
If you find it difficult to keep the camera steady while pressing the shutter button, use the camera’s self-timer function. This will introduce a delay between pressing the button and the actual photo being taken, allowing any vibrations to subside.
7. Avoid zooming in too much
Using a high zoom level can amplify even the smallest movements, resulting in camera shake. Try to maintain a moderate zoom level or use wide-angle lenses whenever possible.
By following these tips, you can significantly reduce the chances of camera shake and capture sharp, clear images with your digital SLR camera.
Question-answer:
How do I hold a digital SLR camera?
When holding a digital SLR camera, it is important to have a stable grip. Hold the camera with both hands, using your right hand to grip the camera body and your left hand to support the lens. Keep your elbows close to your body for added stability.
Should I use a camera strap when holding a digital SLR camera?
Yes, using a camera strap is recommended when holding a digital SLR camera. The strap will help distribute the weight of the camera and prevent accidental drops. It is best to wear the strap around your neck or across your body for easy access and added security.
What should I do to minimize camera shake when holding a digital SLR camera?
To minimize camera shake when holding a digital SLR camera, there are a few things you can do. First, make sure your hands are steady and relaxed. Maintain a firm grip on the camera but avoid squeezing it too tightly. Second, use a faster shutter speed to reduce the chances of capturing motion blur. Lastly, consider using a tripod or other camera stabilizer for added stability.
Are there any specific techniques for holding a digital SLR camera while shooting in different situations?
Yes, there are certain techniques you can use when holding a digital SLR camera in different shooting situations. For example, when shooting in landscape mode, you may want to hold the camera lower to the ground for a steady shot. For portrait mode, try holding the camera at eye level or slightly above for a more flattering angle. Experiment with different positions and angles to find the most comfortable and stable grip for each situation.


