Ensuring the safety of your home or workplace is of utmost importance, and installing a wireless security camera system is an effective way to achieve this. With advanced technology, these cameras have become more accessible and user-friendly than ever before. Whether you want to monitor your property remotely or keep an eye on your loved ones, setting up a wireless security camera system can provide you with peace of mind.
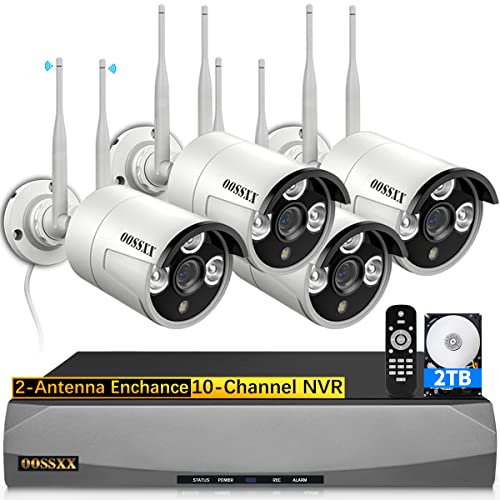
Before you begin the installation process, it’s essential to familiarize yourself with the components of a wireless security camera system. Typically, a system includes cameras, a wireless transmitter, a receiver, and a monitor or digital video recorder (DVR). Each camera is equipped with a lens and an image sensor that captures the footage. The wireless transmitter sends the video and audio signals to the receiver, which is connected to a monitor or DVR for viewing and recording.
When choosing the right wireless security camera system for your needs, consider factors such as the coverage area, camera resolution, night vision capability, and whether you need indoor or outdoor cameras. Once you have selected the system that suits your requirements, follow these steps to hook up your wireless security camera system:
Step 1: Determine Camera Locations
Decide where you want to install your cameras, taking into account the areas you want to monitor and the visibility required. Common locations include entrances, driveways, and hallways.

Step 2: Mount the Cameras
Use the mounting brackets and screws provided to securely attach the cameras to the chosen locations. Ensure they are positioned at the correct angle to capture the desired view.
Step 3: Install the Wireless Transmitter and Receiver
Connect the wireless transmitter to the camera using the provided cables. Place the transmitter within the recommended range of the camera for optimal signal transmission. Connect the receiver to the monitor or DVR.
Step 4: Power Up the System

Connect the cameras, wireless transmitter, receiver, and monitor/DVR to a power source. Make sure all components are properly plugged in and powered up.
Step 5: Test and Configure the System
Turn on the monitor/DVR and check if the cameras are sending video signals. Make any necessary adjustments to the camera angles or wireless transmission settings for the best results.
Congratulations! You have successfully hooked up your wireless security camera system. Now, you can enjoy the benefits of enhanced security and real-time monitoring, giving you peace of mind knowing your property and loved ones are protected.
Choosing the Right Wireless Security Camera System
Choosing the right wireless security camera system is essential to ensure the safety and security of your property. With so many options available, it can be overwhelming to decide which camera system best suits your needs. Here are some factors to consider when making your decision:
|
Camera Quality: Look for cameras that offer high-resolution images and a wide field of view. This will allow you to capture clear and detailed footage, ensuring that you can easily identify any potential threats. |
Wireless Range: Consider the range of the wireless signal and make sure it is sufficient to cover the desired area. Keep in mind that the range can be affected by obstacles such as walls and other electronic devices. |
|
Weather Resistance: If you plan to install your cameras outdoors, ensure they are weather-resistant. Look for cameras with an IP (Ingress Protection) rating to ensure they can withstand various weather conditions. |
Night Vision: Having the ability to see clearly in low-light or no-light conditions is crucial for a security camera system. Look for cameras with infrared LEDs or other night vision technologies. |
|
Storage: Consider how you want to store your camera footage. Some systems offer local storage options, while others use cloud-based storage. Decide which option best suits your needs and budget. |
Remote Access: Check if the camera system allows for remote access via a mobile app or web browser. This feature enables you to monitor your property from anywhere at any time, providing added convenience and peace of mind. |

By considering these factors when choosing a wireless security camera system, you can ensure that you find the right system to meet your specific needs and provide optimal security for your property.
Understanding the Basics of Wireless Security Camera Systems
Wireless security camera systems have become increasingly popular due to their convenience and flexibility. Unlike traditional wired systems, wireless cameras can be easily installed and moved without the need for extensive wiring or professional installation. Understanding the basics of how these systems work can help you make an informed decision when setting up your own wireless security camera system.
1. Components of a Wireless Security Camera System:

- Wireless Cameras: These cameras are equipped with built-in transmitters that send video signals to the receiver.
- Receiver: The receiver accepts the video signals from the cameras and connects to a monitor or recording device.
- Monitor or Recording Device: This device displays the video feed from the cameras or records it for later viewing.
- Power Source: Wireless cameras require a power source, which can be batteries, solar power, or an AC adapter.
2. Wireless Transmission:
Wireless security camera systems rely on digital signals to transmit video data from the cameras to the receiver. These signals can travel through walls and other obstacles, but the range may be limited depending on environmental factors and interference. It is important to consider the distance between the cameras and the receiver when setting up your system.
3. Network Security:
Just like any other wireless device, wireless security camera systems need to be secured from potential hackers. It is crucial to protect your network by using strong passwords and encryption protocols. Additionally, regularly updating the firmware of your cameras and receiver can help prevent vulnerabilities and improve the overall security of your system.
4. Installation and Placement:
When installing your wireless security camera system, it is important to strategically place the cameras to ensure optimal coverage. Consider areas where potential intruders may enter your property, such as doors, windows, and garages. The cameras should be positioned to capture clear footage without any obstructions.
5. Remote Viewing and Monitoring:
Many wireless security camera systems allow for remote viewing and monitoring through mobile devices or computers. By connecting your system to the internet, you can access live footage, receive notifications, and even control your cameras from anywhere in the world. Make sure to follow the manufacturer’s instructions for setting up remote viewing features.
Conclusion:
Understanding the basics of wireless security camera systems is essential for setting up and maintaining an effective surveillance system for your home or business. By considering the components, transmission, network security, installation, and remote viewing capabilities, you can make informed decisions to ensure the safety and security of your property.

Determining the Ideal Location for Your Wireless Security Camera System
When setting up a wireless security camera system, one of the most important steps is determining the ideal location for each camera. Proper placement ensures optimal coverage and maximum effectiveness. Here are some factors to consider when deciding where to install your cameras:
1. Coverage Area
First, consider the areas you want to monitor and identify the coverage area for each camera. Determine the range of each camera and ensure that it covers the desired area without any blind spots. Keep in mind that different cameras may have different coverage angles and distances, so you may need to experiment with placement to achieve the desired coverage.
2. Entry Points
Next, focus on areas where potential intruders could gain access to your property. These include doors, windows, and other entry points. Install cameras in strategic locations that capture clear images of anyone entering or exiting your premises. Placing a camera at each entrance is a good practice to ensure comprehensive coverage.
3. Height and Angle
The height and angle at which you install your cameras can greatly affect their effectiveness. Mount the cameras at a height that allows them to capture faces and other identifying features of individuals in the frame. Aim the cameras down slightly to minimize blind spots and maximize the field of view. Avoid pointing cameras directly at the ground or too high up, as this can limit their effectiveness.
Note: When installing cameras outdoors, ensure they are protected from weather elements and tampering.
4. Power and Connectivity
Consider the power source and connectivity options when deciding on camera placement. Ensure that cameras have access to a power outlet or use battery-powered cameras if wiring is not feasible. Also, make sure cameras are within the range of your wireless network, or use signal boosters if needed.
5. Privacy Considerations
Respect your neighbors’ privacy and local regulations when positioning cameras. Avoid pointing cameras towards areas where your neighbors may have a reasonable expectation of privacy, such as inside their homes. Being mindful of privacy concerns will help maintain good relationships with those around you.
By carefully considering these factors, you can determine the ideal locations for your wireless security camera system, ensuring comprehensive coverage and peace of mind.
Installing Your Wireless Security Camera System
Installing a wireless security camera system can provide you with peace of mind by keeping a watchful eye on your property. Follow these steps to ensure a successful installation:
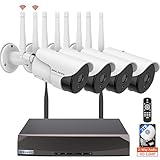
1. Determine the optimal camera placement:
![[3TB WiFi Kit] SANSCO Wireless CCTV Security Camera System with 3TB HDD & Audio Rec., 8 Channel NVR, (8) 3MP HD Outdoor IP Bullet Camera (Night Vision, Rapid USB Backup, App/Email Alert, Waterproof)](https://m.media-amazon.com/images/I/41qqfhuX27L._SL160_.jpg)
Before beginning the installation process, it’s important to determine where you want to place your cameras. Consider areas that are vulnerable to break-ins or suspicious activity. Common locations include entrances, backyards, and garages.
2. Set up the camera mounts:
Once you’ve identified the ideal camera locations, use the provided mounts and screws to securely attach the cameras. Make sure they are positioned at the desired angle and facing the correct direction.
3. Connect the cameras to the power source:
Your wireless security camera system will come with power adapters or batteries. Connect the cameras to a power source, such as an electrical outlet or a battery pack, ensuring they have a steady power supply.
4. Connect the cameras to the receiver:
Most wireless security camera systems include a receiver that connects to your viewing device, such as a TV or computer. Follow the manufacturer’s instructions to pair the cameras with the receiver and establish a wireless connection.
5. Adjust the camera settings:
Access the camera settings on your viewing device to adjust important features such as motion detection sensitivity and recording settings. These settings will help you customize your security system based on your specific needs.
6. Test the cameras:
After completing the installation, it’s crucial to test the cameras to ensure they are working properly. Walk around the areas being monitored to check the camera angles and video quality. Make any necessary adjustments to optimize your camera system.
7. Set up remote viewing:
If your wireless security camera system supports remote viewing, follow the manufacturer’s instructions to enable this feature. Remote viewing allows you to monitor your cameras from anywhere using a smartphone or other internet-connected device.
8. Ensure the security of your wireless network:
Wireless security camera systems transmit data through your home’s Wi-Fi network. Take measures to protect your network, such as setting a strong password and enabling encryption, to prevent unauthorized access to your camera feed.
In conclusion, installing a wireless security camera system requires careful planning and attention to detail. By following these steps, you can effectively set up your cameras to enhance the security of your property.
Connecting Your Wireless Security Camera System to the Internet
Once you have set up your wireless security camera system, the next step is to connect it to the internet so that you can access and monitor the camera feed remotely. Here are the steps to connect your wireless security camera system to the internet:
-
Check your camera’s Wi-Fi compatibility
Before connecting your wireless security camera system to the internet, make sure that your camera is Wi-Fi compatible. This means that it has the ability to connect to a wireless network using Wi-Fi technology.
-
Position the camera within range of your Wi-Fi router
To establish a stable and reliable connection, position the camera within range of your Wi-Fi router. This will ensure that the camera receives a strong signal from the router and minimizes the chances of signal interference.
-
Connect the camera to your Wi-Fi network
Using the camera’s provided instructions, connect the camera to your Wi-Fi network. This typically involves accessing the camera’s settings, selecting the Wi-Fi network you want to connect to, and entering the network’s password. Follow the on-screen prompts to complete the connection process.
-
Configure port forwarding on your router
To access and monitor your wireless security camera system remotely, you need to configure port forwarding on your router. This will allow incoming connections to reach the camera’s IP address. Refer to your router’s documentation or manufacturer’s website for instructions on how to set up port forwarding.
-
Set up remote access
Once port forwarding is configured, you need to set up remote access to your wireless security camera system. This typically involves creating an account with the camera’s manufacturer, installing the manufacturer’s app or software on your smartphone or computer, and linking your camera system to your account. Follow the manufacturer’s instructions for setting up remote access.
-
Test the remote access
After completing the setup process, test the remote access by accessing your wireless security camera system from a different network or location. Make sure that you can view the camera feed and perform any necessary functions, such as recording or taking snapshots.
By following these steps, you can successfully connect your wireless security camera system to the internet and enjoy the convenience of remote monitoring and access.
Setting Up Remote Viewing for Your Wireless Security Camera System
Setting up remote viewing for your wireless security camera system allows you to access your camera feed from anywhere using your smartphone or computer. This convenient feature provides added peace of mind and enables you to stay connected with your home or business even when you are away.
Step 1: Install the Mobile App or Access the Web Interface
To set up remote viewing, you will first need to install the mobile app provided by your camera system manufacturer. This app allows you to connect to your camera system and view the live feed directly on your smartphone. If your camera system does not have a mobile app, you can mostly access the camera feed through a web interface by entering the camera system’s IP address in your browser.
Step 2: Connect Your Camera System to a Network
Next, you will need to connect your wireless security camera system to a network that has internet access. This can be done by connecting your camera system’s base station or NVR (Network Video Recorder) to your router using an Ethernet cable. Ensure that your camera system and router are powered on.
It’s important to note that some wireless camera systems may require a separate network for optimal performance. In such cases, it’s recommended to create a dedicated network for your cameras to avoid interference from other devices.
Step 3: Configure Port Forwarding
In order to access your camera system remotely, you may need to configure port forwarding on your router. This process involves opening specific ports on your router to allow incoming connections from the internet. Consult your camera system’s documentation or the manufacturer’s website for specific instructions on port forwarding.
Step 4: Create an Account and Pair Your Camera System
Once your camera system is connected to the network and port forwarding is configured, you will need to create an account with your camera system’s mobile app or web interface. This account will allow you to pair your camera system with the app or web interface, giving you access to view the camera feed remotely.
During the pairing process, you may be required to enter the device ID, which can usually be found on the camera or in the camera system’s settings. Follow the instructions provided by the app or web interface to complete the pairing process.
Step 5: Access Your Camera System Remotely
Once your camera system is paired, you can now access it remotely. Open the mobile app on your smartphone or enter the camera system’s IP address in your browser to access the web interface. Sign in to your account, and you should be able to see the live feed from your camera system.
Using the app or web interface, you can also customize settings, such as motion detection, notifications, and recording schedules, to suit your preferences.
With remote viewing set up, you can now keep an eye on your property, loved ones, or business from anywhere in the world, providing you with peace of mind and an extra layer of security.
Note:
It’s important to ensure that your camera system’s firmware is up to date, as manufacturers often release updates to address security vulnerabilities and improve functionality.
Always use strong, unique passwords for your camera system and change them periodically to protect your privacy.
Configuring Motion Detection for Your Wireless Security Camera System
Setting up motion detection for your wireless security camera system is an essential step in ensuring maximum security and efficiency. By configuring motion detection, you can receive real-time notifications and alerts whenever any movement is detected within the camera’s field of view. Follow these steps to configure motion detection for your wireless security camera system:
1. Access the Camera’s Settings
First, log in to the camera’s web interface using the provided credentials or the manufacturer’s app. Access the settings section to proceed with the configuration.
2. Enable Motion Detection
Locate the motion detection settings within the camera’s settings menu and enable it. This option is usually found under the “Advanced” or “Detection” section.
3. Adjust Motion Sensitivity
Next, you’ll need to adjust the motion sensitivity level according to your requirements. A higher sensitivity level means even the slightest movement is detected, while a lower sensitivity level might ignore some movements. Test different sensitivity levels and choose the one that works best for your needs.
4. Define Motion Detection Zones
To avoid false alarms caused by irrelevant movement, define specific areas where you want the camera to detect motion. These areas can be selected within the camera’s field of view by drawing rectangles or polygons on the screen. Focus on areas that are more critical for surveillance, such as doors, windows, or walkways.
5. Set Up Alerts and Notifications
Configure the alerts and notifications settings to receive real-time notifications whenever motion is detected. Choose your preferred method of notification – it could be through email, push notifications on your smartphone, or an audible alarm. Make sure to provide accurate contact details for receiving the alerts.
Following these steps will help you configure motion detection for your wireless security camera system. Remember to regularly test the motion detection functionality and make adjustments if necessary to ensure the system is working optimally.
Securing Your Wireless Security Camera System from Hackers
When setting up a wireless security camera system, it is crucial to take steps to ensure that your system is safe from hackers. Here are some tips to help you secure your wireless security camera system:
- Change the default username and password: Many wireless security camera systems come with default login credentials, which are widely known and easily exploitable by hackers. Make sure to change the default username and password to a strong and unique combination.
- Enable encryption: Encryption is a crucial security feature that helps protect the communication between your wireless security camera system and the monitoring device. Ensure that your system supports encryption protocols like WPA2 (Wi-Fi Protected Access 2) and enable them.
- Set up a secure Wi-Fi network: A strong and secure Wi-Fi network provides an additional layer of protection for your wireless security camera system. Use WPA2 encryption for your Wi-Fi network and create a unique and complex network password.
- Regularly update firmware: Manufacturers often release firmware updates that address security vulnerabilities and improve the performance of the wireless security camera system. Check for firmware updates regularly and install them to keep your system secure.
- Disable remote access: Disable remote access to your wireless security camera system unless absolutely necessary. By disabling remote access, you minimize the risk of unauthorized access to your system.
- Secure physical access: Protect your wireless security camera system physically by placing the cameras out of easy reach and securing them with tamper-resistant screws. This prevents hackers from physically tampering with the system.
- Monitor network activity: Keep an eye on the network activity of your wireless security camera system. Monitor the logs and look out for any suspicious activity or unauthorized access attempts.
- Use strong passwords for all connected devices: In addition to securing the wireless security camera system itself, ensure that all devices connected to the system, such as smartphones or computers, have strong and unique passwords.
- Regularly check for software updates: Along with firmware updates, make sure to check for software updates on the devices connected to your wireless security camera system. Keeping all software up to date helps protect against known security vulnerabilities.
By following these security measures, you can significantly reduce the risk of your wireless security camera system being hacked and ensure the privacy and safety of your home or business.
Maintaining and Troubleshooting Your Wireless Security Camera System
Once you have successfully set up your wireless security camera system, it is important to ensure its smooth operation by performing regular maintenance. Additionally, if you encounter any issues or difficulties, you can try troubleshooting before seeking professional help.
Here are some tips for maintaining and troubleshooting your wireless security camera system:
Perform Regular Maintenance:
1. Keep the camera lenses clean: Use a soft, lint-free cloth to gently clean the lenses of your cameras. Avoid using harsh chemicals or abrasive materials that could damage the lens surfaces.
2. Check the power supply: Ensure that your cameras are receiving a steady power supply. Check the power cables and connections periodically to ensure they are secure and free from damage.
3. Inspect the mounting hardware: Ensure that the mounting brackets and screws are secured tightly to prevent any movement or loss of camera positioning.
Troubleshooting Common Issues:
1. No video signal: If you are not receiving a video signal from your cameras, check the power supply and ensure that the cameras are properly connected to the receiver or monitoring device.
2. Poor image quality: If the video feed appears blurry or pixelated, check the camera lenses for dirt or debris. Additionally, adjust the focus and zoom settings to improve image quality.
3. Wi-Fi connectivity issues: If you experience problems with the wireless connection, ensure that the Wi-Fi signal is strong and that the cameras are within range of the router. Consider repositioning the cameras or installing Wi-Fi range extenders if needed.
4. False motion detection alerts: If your cameras are constantly triggering false motion detection alerts, adjust the sensitivity settings or the motion detection zones to better match your requirements. Ensure that there are no moving objects or environmental factors causing false alarms.
5. Network access issues: If you are unable to access your camera system remotely, check your network settings and ensure that the appropriate ports are open and forwarded correctly. Consider resetting your network router or contacting your internet service provider for assistance.
Remember, it is always a good idea to consult the user manual or contact the manufacturer’s customer support for specific troubleshooting steps tailored to your wireless security camera system.
Expanding Your Wireless Security Camera System
Once you have set up your wireless security camera system, you might decide that you want to expand it in order to increase the coverage of your surveillance. Expanding your system can provide you with a greater sense of security and peace of mind.
There are several ways you can expand your wireless security camera system:
Add More Cameras: If you have identified areas that are not currently covered by your system, you can simply add more cameras. Wireless cameras are easy to install and configure, making it a simple process to expand your system. Make sure to choose cameras that are compatible with your existing system.
Upgrade to High-Quality Cameras: If you initially installed budget-friendly cameras, you might want to consider upgrading to higher-quality models. High-resolution cameras can provide you with clearer images and better video quality, making it easier to identify potential threats.
Install a Network Video Recorder (NVR): Adding an NVR to your wireless security camera system can greatly enhance its capabilities. An NVR provides centralized storage for your video footage, allowing you to easily access and manage your recordings. It can also support more cameras, giving you the option to expand even further.
Consider Motion Detection Technology: Motion detection technology can add an extra layer of security to your system. By installing cameras with built-in motion sensors, you can receive alerts whenever motion is detected in a specific area. This can help you quickly respond to potential security threats.
Utilize Remote Viewing: If you haven’t already, make sure to take advantage of remote viewing capabilities. By connecting your system to a smartphone, tablet, or computer, you can monitor your cameras from anywhere at any time. This allows you to keep an eye on your property, even when you are not physically present.
Expanding your wireless security camera system allows you to tailor it to your specific needs and requirements. Whether you need more coverage, improved video quality, or additional features, there are various options available that can help you achieve your desired level of security.
FAQ,
What is a wireless security camera system?
A wireless security camera system is a setup that allows you to monitor your home or property from anywhere using wireless cameras. These cameras do not require any physical wires to connect to the recording device or the internet.
How do I choose the right wireless security camera system?
When choosing a wireless security camera system, you should consider several factors. First, decide whether you want indoor or outdoor cameras. Then, determine the number of cameras you need and their resolution. You should also think about the range of the wireless signal. Lastly, check if the system offers additional features like motion detection or night vision.