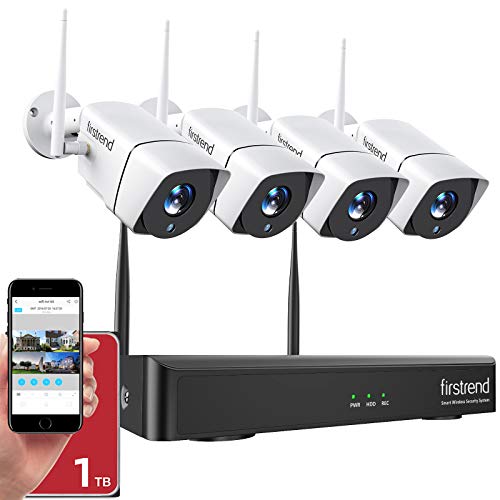
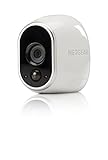
If you’re looking to enhance the security of your home or office, Arlo wire-free security cameras offer a reliable and user-friendly solution. These cameras provide high-quality video surveillance without the hassle of wires and cables, allowing you to easily monitor your property from anywhere.
Setting up Arlo wire-free security cameras may seem like a daunting task, but it’s actually quite simple. With the right tools and a little guidance, you’ll have your cameras up and running in no time. In this article, we’ll walk you through the process step by step, so you can enjoy the peace of mind that comes with a secure and protected environment.
First and foremost, you’ll need to gather all the necessary equipment. Arlo wire-free security cameras come with a base station that connects to your Wi-Fi network and acts as a hub for all your cameras. You’ll also need the cameras themselves, which can be placed both indoors and outdoors, and a power adapter for each camera. Additionally, a reliable internet connection and a compatible mobile device or computer are essential for accessing the camera feeds remotely.
Once you have all the equipment ready, it’s time to set up the base station. Find a suitable location near your Wi-Fi router and connect the base station to a power source. Use an Ethernet cable to connect the base station to your router, and follow the instructions provided to complete the setup process.
Next, it’s time to set up the Arlo cameras themselves. Start by inserting the batteries into each camera and ensuring they are fully charged. Then, sync each camera with the base station by pressing the sync button on the camera and on the base station simultaneously. Once the camera is synced, you can place it at the desired location and adjust the viewing angle as needed.

Step-by-step guide to setting up Arlo wire-free security cameras
Arlo wire-free security cameras are a reliable and convenient option for securing your home or office. This step-by-step guide will help you set up your Arlo wire-free security cameras quickly and easily.
Step 1: Unbox and charge the cameras
Start by unboxing your Arlo wire-free security cameras and their accompanying accessories. Each camera comes with a rechargeable battery. Connect the battery to the camera and plug it into a power source. Allow the cameras to charge fully before proceeding to the next step.
Step 2: Connect the base station to your network
Next, connect the base station to your home or office network using the provided Ethernet cable. Make sure the base station is placed near your Wi-Fi router for a stable connection. Once connected, power on the base station and wait for the LED lights to turn solid green.
Step 3: Sync the cameras with the base station
Now it’s time to sync your cameras with the base station. Press the sync button on the base station, then press the sync button on each camera. The LED lights on the cameras will blink blue during the sync process. Once the cameras are successfully synced, the LED lights will turn solid green.
Step 4: Position the cameras
Choose suitable locations for your Arlo cameras. Ensure that they have a clear view of the area you want to monitor. You can mount the cameras using the provided magnetic mounts or attach them to a flat surface using screws. Adjust the angle and position of the cameras for the best coverage.

Step 5: Set up the Arlo app
Download and install the Arlo app on your smartphone or tablet. Create an Arlo account or log in to your existing account. Follow the on-screen instructions to connect the app to your base station. Once connected, you will be able to access the live feed from your cameras and customize settings such as motion detection and notifications.
Step 6: Test and optimize
After setting up your Arlo wire-free security cameras, perform a test to ensure they are functioning correctly. Walk around the monitored area and check the live feed and recordings on the app. Adjust camera positions and settings as needed to optimize the coverage and performance of your Arlo system.
Following these step-by-step instructions will enable you to set up your Arlo wire-free security cameras efficiently and start protecting your home or office with ease. Enjoy the peace of mind that comes with having a reliable security system in place.
Choosing the right location for your Arlo cameras
When it comes to setting up your Arlo wire-free security cameras, choosing the right location is crucial for maximizing their effectiveness and ensuring optimal security coverage. Here are some key considerations when determining the placement of your Arlo cameras:
1. Coverage Area
Determine the specific areas you want your Arlo cameras to monitor. This could include entrances, driveways, backyards, or any other high-risk areas where you want to keep an eye on activities. Make sure that the camera’s field of view adequately covers these areas.

2. Mounting Height
The height at which you mount your Arlo camera plays a significant role in capturing clear and unobstructed footage. It is generally recommended to mount the camera at a height of 7-10 feet above the ground. This height strikes a balance between having a wide-angle view and maintaining a good level of detail.
3. Power Source
Since Arlo cameras are wire-free, you have the flexibility to place them anywhere within range of your home’s Wi-Fi network. However, keep in mind that they require a power source, whether it be battery-powered or connected to an electrical outlet. Ensure that your chosen location is easily accessible for changing or recharging the batteries, if applicable.
4. Wi-Fi Signal Strength
Make sure the location you choose for your Arlo camera has a strong and stable Wi-Fi signal. A weak connection can result in laggy video streams or even interrupted recording. Perform a Wi-Fi signal strength test in the area to ensure that it meets the recommended requirements for smooth operation.
5. Weatherproofing
Consider the weather conditions the camera will be exposed to when choosing its location. Arlo cameras are designed to withstand various weather elements, but it’s still advisable to avoid direct exposure to heavy rain or extreme temperatures. Choose a location that provides some protection from the elements while still capturing the desired coverage area.
By taking these factors into consideration and strategically placing your Arlo cameras, you can ensure optimal performance and peace of mind when it comes to monitoring your premises and enhancing your security measures.

Mounting your Arlo cameras securely
Properly mounting your Arlo wire-free security cameras is essential to ensure optimal performance and coverage. Follow these steps to securely mount your Arlo cameras:
- Choose the right location: Select a spot that provides a clear and unobstructed view of the area you want to monitor. Consider factors such as lighting conditions and potential blind spots.
- Attach the magnetic mount: Place the magnetic mount on the desired surface, such as a wall or ceiling, using the included screws or adhesive. Make sure the mount is securely attached.
- Adjust the camera angle: Position the camera on the mount and adjust the angle to capture the desired area. Use the tilt and swivel capabilities of the camera to fine-tune the view.
- Secure the camera: Use the provided screw or another type of locking mechanism to secure the camera onto the magnetic mount. Ensure it is firmly attached to prevent tampering or theft.
- Test the camera’s view: Once mounted, verify that the camera’s field of view covers the intended area. Adjust the angle if necessary to capture all important areas.
- Connect the camera to the base station: Follow the manufacturer’s instructions to sync your camera with the Arlo base station. Make sure the connection is stable before completing the setup process.
Maintaining a secure mounting for your Arlo cameras is crucial to ensure reliable surveillance and peace of mind. Regularly check the camera’s position and stability to prevent any issues with its performance.
Follow these guidelines and enjoy the added security and convenience of your Arlo wire-free security cameras!
Connecting the Arlo base station to your router
To ensure that your Arlo wire-free security cameras are connected to your network and functioning properly, you need to connect the Arlo base station to your router. Here are step-by-step instructions to guide you through the process:
Step 1: Placement
Choose the ideal location for your Arlo base station. It should be placed near your router for a strong and stable internet connection. Keep in mind that the base station needs to be plugged into a power outlet.
Step 2: Connect the Ethernet cable
Take the Ethernet cable provided with your Arlo base station and plug one end into the Ethernet port on the back of the base station. Then, connect the other end of the cable to an available Ethernet port on your router.
Step 3: Power on the base station
Plug the power adapter into the base station and connect it to a power outlet. The base station should power on automatically once it is connected to electricity.
Step 4: Sync the base station
Wait for the base station to start up and synchronize with your router. You’ll see that the LED lights on the front of the base station will slowly blink green. This indicates that the base station is successfully establishing a connection with your router.
Once the base station is connected, you can proceed with adding your Arlo wire-free security cameras to the system and setting up any additional features you may require. Remember, a stable internet connection is crucial for the proper functioning of your Arlo cameras, so ensure that the base station remains connected to your router at all times.
Syncing your Arlo cameras with the base station
Before you can start using your Arlo wire-free security cameras, you need to sync them with the base station. This process allows the camera to communicate with the base station and ensures that the camera’s footage is sent to the Arlo app on your mobile device or computer.

To sync your Arlo cameras with the base station, follow these steps:
- Make sure your base station is powered on and connected to the internet. The base station needs to have an active internet connection to sync and transmit the camera’s footage.
- Find the sync button on the base station. It is usually located on the back or side of the device.
- Press and release the sync button. The LED lights on the front of the base station will start blinking.
- Within a few seconds, press and release the sync button on the camera. The LED on the camera will start blinking blue, indicating that it is syncing with the base station.
- Wait for the camera’s LED to turn solid blue, which means that the sync process is complete. The camera is now ready to be used.
- Repeat the sync process for each additional camera you want to connect to the base station.
It is important to note that the base station can only support a certain number of cameras, so make sure to check the manufacturer’s specifications for the maximum number of cameras that can be synced.
By following these steps, you can easily sync your Arlo cameras with the base station and start using your wire-free security system to monitor your property.
Adjusting camera settings and preferences
Once you have successfully hooked up your Arlo wire-free security cameras, it is important to adjust the camera settings and preferences to suit your specific needs. Here are some steps to help you get started:
1. Launch the Arlo mobile app or open the Arlo web application on your computer.
2. Sign in to your Arlo account using your registered email address and password.
3. On the dashboard, select the camera whose settings you want to adjust.
4. Tap or click on the “Settings” option to access the camera settings menu.
5. In the camera settings menu, you will find various options such as video quality, motion detection sensitivity, audio settings, and more.
6. Adjust the video quality setting to your preferred level. Higher quality settings may consume more data and battery life.
7. Fine-tune the motion detection sensitivity based on your specific requirements. You can adjust it to detect only significant movements or to capture even the slightest motion.
8. Configure the audio settings, such as enabling or disabling the microphone or speaker based on your needs.
9. Explore other options in the camera settings menu, such as scheduling recording times, turning on/off night vision, and adjusting the field of view.
10. Once you have made the necessary adjustments, tap or click on the “Save” or “Apply” button to save your settings.
By customizing the camera settings and preferences, you can optimize the performance of your Arlo wire-free security cameras and ensure they meet your unique surveillance requirements.
Testing your Arlo wire-free security camera system
Once you have successfully connected your Arlo wire-free security camera system, it is important to test the cameras to ensure they are functioning correctly. Follow these steps to perform a thorough system test:
1. Check camera placement:
Make sure the cameras are positioned in the desired locations and are facing the correct angles to capture the intended areas. Adjust the position if needed.
2. Verify camera connectivity:
Ensure that all cameras are properly connected to the Arlo Base Station or SmartHub. Check the LED lights on both the cameras and the base station to confirm a solid connection.
3. Test camera recordings:
Walk in front of each camera to trigger motion detection and verify that the cameras are recording and saving video footage. Check the Arlo app or web portal to view the recorded videos to ensure they are clear and of good quality.
4. Test live view:
Open the Arlo app or web portal and select the Live View option for each camera. Ensure that you are able to view the live video feed from each camera without any issues.
5. Test night vision:
If your Arlo cameras have night vision capabilities, test them by turning off the lights in the area being monitored. Verify that the cameras are able to capture clear video footage in low-light or no-light conditions.
6. Test motion detection:
Walk in front of each camera again and verify that motion detection is working as expected. Ensure that the cameras are detecting motion and triggering recordings or notifications accordingly.
Note: It is recommended to test your Arlo wire-free security camera system periodically to ensure ongoing functionality.
FAQ,
What are Arlo wire-free security cameras?
Arlo wire-free security cameras are wireless surveillance cameras that can be easily placed anywhere in your home or office without the need for any wired connections.
How do I set up Arlo wire-free security cameras?
Setting up Arlo wire-free security cameras is simple. First, make sure you have a base station connected to your Wi-Fi network. Then, install the Arlo app on your smartphone and follow the on-screen instructions to sync the cameras with the base station. Once synced, you can place the cameras wherever you want and start monitoring your surroundings.
Can Arlo wire-free security cameras be used outdoors?
Yes, Arlo wire-free security cameras are designed to work both indoors and outdoors. They are weatherproof and can withstand various weather conditions, making them suitable for outdoor surveillance.
What are the advantages of using Arlo wire-free security cameras?
There are several advantages of using Arlo wire-free security cameras. Firstly, since they are wireless, you can place them anywhere without the need for complex wiring. Secondly, they are easy to install and set up, requiring only a few simple steps. Thirdly, they offer high-quality video recording and remote monitoring through the Arlo app. Lastly, they have long battery life, allowing for continuous surveillance without frequent recharging.