
Security cameras are an essential tool for ensuring the safety and security of your home or business. By connecting them to a VCR (video cassette recorder), you can easily record and review any suspicious activity. This can be especially helpful in providing evidence in case of a break-in or other security breach.
Step 1: Gather the necessary equipment. You will need a security camera with video output cables, a VCR with video input ports, and RCA cables to connect the two devices.
Step 2: Locate the video output port on the security camera. This port is typically labeled “VIDEO OUT” or “CVBS OUT.” Connect one end of the RCA cable to this port.
Step 3: Find the video input ports on the VCR. These ports are usually color-coded yellow and labeled “VIDEO IN” or “AV IN.” Connect the other end of the RCA cable to one of these ports.
Step 4: Power on both the security camera and the VCR. Set the VCR to the appropriate video input channel by pressing the “INPUT” or “SOURCE” button on your VCR’s remote control or on the VCR itself.

Step 5: Adjust the settings on your VCR to begin recording. This may involve selecting the appropriate recording mode (e.g., continuous or motion detection) and setting the desired recording duration.
By following these simple steps, you can easily connect a security camera to a VCR and enhance the security of your property. Remember to consult the user manuals for your specific devices for any additional instructions or troubleshooting tips.
Choosing the Right Equipment
When hooking up a security camera to a VCR, it is important to choose the right equipment to ensure optimal performance and compatibility. Here are some key factors to consider when selecting the necessary components:
1. Security Camera:
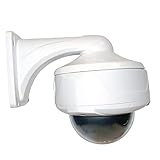
Look for a security camera that meets your specific requirements. Consider factors such as resolution, night vision capabilities, and the type of camera (e.g., dome, bullet, or PTZ camera) based on your surveillance needs.

2. VCR:
Ensure that the VCR you choose is compatible with your security camera. Look for a VCR that has video input/output connections and supports the same video format as your camera (e.g., analog or digital).
3. Cables:
Choose high-quality cables that are capable of transmitting video signals without loss of quality. Opt for cables that are long enough to connect your security camera to the VCR without compromising the functionality or placement of the equipment.
4. Power Supply:
Make sure your security camera and VCR have an adequate power supply. Check the power requirements of both devices and ensure that the power source can support the combined power needs.
5. Additional Accessories:
Consider any additional accessories that may be required for your specific setup. This may include mounting brackets, extension cables, connectors, or adaptors.
By carefully considering these factors and choosing the right equipment, you can effectively hook up your security camera to a VCR and ensure reliable surveillance footage.
Setting Up Your Security Camera
Setting up a security camera system is an important step in protecting your property and loved ones. Here are some steps to help you get started:

1. Selecting the Right Location
Choose the best location for your security camera. Consider areas of high risk, such as entrances, windows, or driveways. Make sure the camera has a clear view of the area you want to monitor.
2. Mounting the Camera
Install the camera securely using the appropriate mounting hardware. Make sure it is positioned at the desired angle and height for optimal monitoring. Ensure that the camera is protected from harsh weather conditions.
3. Connecting the Camera to the VCR
Connect the camera to the VCR using the provided cables. Plug one end of the cable into the camera’s video output port and the other end into the VCR’s video input port. Repeat this process for the audio output and input ports.
4. Adjusting Camera Settings
Access the camera’s settings menu to adjust picture quality, recording mode, motion detection, and other desired settings. Make sure to follow the manufacturer’s instructions for accessing and navigating the settings menu.
5. Testing and Troubleshooting
After connecting the camera to the VCR and adjusting the settings, test the system to ensure that the camera is recording properly. Verify that the video and audio are being recorded and that playback is clear and smooth.

If you encounter any issues or need further assistance, refer to the camera or VCR’s user manual for troubleshooting tips or contact customer support for help.
By following these steps, you can successfully set up your security camera system and have peace of mind knowing that your property is being monitored and protected. Remember to regularly check the camera and VCR to ensure they are functioning correctly.
Connecting the Security Camera to VCR
Connecting your security camera to a VCR allows you to record and store surveillance footage for later viewing. Here is a step-by-step guide on how to connect your security camera to a VCR:
- Ensure that your security camera has an RCA or BNC video output. This is usually a yellow-colored jack or connector.
- Locate the corresponding video input on your VCR. This is usually labeled as “Video In” or “Line In” and also has yellow-colored jacks.
- Use a compatible RCA or BNC video cable to connect the video output of the security camera to the video input of the VCR. Insert one end of the cable into the video output jack of the camera and the other end into the video input jack of the VCR.
- Make sure to match the colors of the connectors. Connect the yellow connector to the yellow jack on both the camera and the VCR.
- Next, connect the audio output of the camera to the audio input of the VCR if desired. This is usually a white or red-colored jack. Repeat the same process as above, using an audio cable.
- Once the camera is connected to the VCR, power on both devices.
- On the VCR, select the appropriate input source. This may involve pressing the “Input” or “Source” button on the VCR remote control to cycle through different input options.
- You should now see the video feed from your security camera on the VCR’s screen. Adjust the VCR to the desired recording mode (e.g., continuous or time-lapse) if applicable.
- To start recording, press the “Record” button on the VCR. The recorded footage can be accessed by rewinding the tape or by using the playback controls on the VCR.
Remember to test the setup after connecting the camera to the VCR to ensure that the video and audio signals are being successfully transferred. Additionally, check the user manuals of both the camera and the VCR for any specific instructions or troubleshooting tips.
Adjusting the VCR Settings
Once you have connected your security camera to your VCR, it is important to adjust the VCR settings to ensure proper recording and playback. Follow the steps below to adjust the settings:

| 1. | Turn on your VCR and navigate to the menu options using the remote control or the buttons on the VCR itself. |
| 2. | Find the “Record Mode” or “Recording Options” menu in the VCR settings. This menu allows you to select the recording quality and time duration. |
| 3. | Choose the desired recording mode based on your preference. The options may include “SP” (Standard Play), “LP” (Long Play), or “EP” (Extended Play). Keep in mind that the higher the quality, the shorter the recording time available on the tape. |
| 4. | Adjust the recording time duration according to your needs. This setting determines how long the VCR will continue recording before automatically stopping. It is recommended to set the duration based on the length of time you want to monitor and record the surveillance footage. |
| 5. | Save the settings and exit the VCR menu. Your VCR is now properly adjusted for recording from the security camera. |
It is important to periodically check and adjust the VCR settings to ensure optimal recording performance. Additionally, make sure to properly label and store the recorded tapes for future reference or evidence, if necessary.
Testing the Connection
Once you have successfully connected your security camera to the VCR, it is important to test the connection before finalizing the setup. Proper testing ensures that the system is functioning correctly and will provide you with a clear and reliable footage.
To test the connection, follow these steps:
- Power on the VCR and the security camera.
- Make sure the television is turned on and set to the correct input channel.
- Check if the video signal is being transmitted by looking at the television screen. You should see the live feed from the camera.
- Adjust the positioning and angle of the camera if needed to improve the field of view.
- Test different camera functions, such as pan, tilt, and zoom, if available, to ensure they are working properly.
- Observe the video quality to make sure it is clear and without any distortion or interference.
- Check the audio if your camera has a built-in microphone. Ensure that the sound is audible and free from any abnormalities.
Additional Tips:
- If you encounter any issues during the testing process, double-check all the connections and make sure they are secure.
- Refer to the user manuals of both the VCR and the security camera for troubleshooting steps or contact customer support if necessary.
- Perform regular maintenance and testing to ensure the system remains in proper working condition.
By thoroughly testing the connection between your security camera and VCR, you can ensure that your surveillance system is functioning as intended and providing reliable video footage for enhanced security.
Recording and Playback
Once you have successfully connected your security camera to your VCR, you can start recording and playback. This allows you to capture and review footage whenever needed. Here are the steps to record and playback:

Recording:
- Make sure your VCR is connected to a power source and turned on.
- Insert a blank VHS tape into the VCR.
- Access the camera’s menu settings and select the recording mode. You can choose continuous recording or set up a schedule based on your preferences.
- Start the recording by either pressing the record button on the VCR or through the camera’s interface if available.
- Monitor the camera’s feed to ensure the recording is ongoing.
- When done with recording, press the stop button on the VCR or through the camera’s interface if available.
Playback:
- Make sure the VCR is powered on and the recorded tape is inserted.
- Using the VCR’s control buttons or remote, press the play button to start playback.
- Monitor your TV or monitor connected to the VCR to view the recorded footage.
- You can pause, rewind, or fast-forward the tape using the VCR’s controls.
- When you want to stop playback, press the stop button on the VCR or through the remote control.
Remember to keep your recorded tapes in a safe place to ensure the longevity and availability of your surveillance footage. Label them properly with dates and times to make it easier to locate specific recordings when needed.
Troubleshooting Common Issues
When hooking up a security camera to a VCR, you may encounter some common issues. Here, we will discuss these issues and provide troubleshooting steps to help you resolve them.
| Issue | Troubleshooting Steps |
|---|---|
| No video signal on VCR |
|
| Poor video quality |
|
| No audio on recorded footage |
|
By following these troubleshooting steps, you should be able to resolve common issues when hooking up a security camera to a VCR. If you continue to experience difficulties, consider consulting the user manuals for your specific camera and VCR models or reaching out to the manufacturers for further assistance.
Additional Security Camera Features
Along with the basic functionality of monitoring and recording activities, modern security cameras come with a range of additional features that enhance their effectiveness and usability. These features include:
Motion Detection
Many security cameras are equipped with motion detection technology, which allows them to automatically start recording when movement is detected within their field of view. This feature helps conserve storage space by eliminating the need to record continuous footage of inactive areas.
Night Vision
Some security cameras are equipped with infrared LEDs that enable them to capture clear footage even in low-light or completely dark conditions. This feature ensures that your surveillance system is effective 24/7, regardless of the lighting conditions.
Two-Way Audio
Two-way audio capability allows you to not only hear what is happening in the surveillance area, but also to communicate with the people on the other end. This feature can be useful for remotely greeting visitors, issuing warnings, or even deterring potential intruders.
Remote Access and Mobile App Integration
With remote access and mobile app integration, you can monitor your security cameras and access recordings from anywhere using your smartphone, tablet, or computer. This convenience allows you to keep an eye on your property even when you’re not physically present.
Weather Resistance
For outdoor security cameras, weather resistance is an important feature. Look for cameras that are built to withstand harsh weather conditions, such as rain, snow, and extreme temperatures. These cameras are designed to provide reliable performance, regardless of the outdoor environment.
Ease of Installation
Many security cameras are designed for easy installation, allowing you to set them up yourself without the need for professional help. Look for cameras that come with detailed instructions and user-friendly interfaces to ensure a hassle-free installation process.
By considering these additional features, you can choose a security camera that meets your specific requirements and enhances the overall effectiveness of your surveillance system.
FAQ,
What is a VCR?
A VCR, or Video Cassette Recorder, is a device used for playing and recording video and audio content on videocassettes.
Can I connect a security camera to a VCR?
Yes, you can connect a security camera to a VCR. You will need to use RCA cables to connect the video output of the camera to the video input of the VCR. Make sure to check the compatibility between your camera and VCR before connecting them.
What are the benefits of connecting a security camera to a VCR?
Connecting a security camera to a VCR allows you to record and store the video footage captured by the camera. This can be useful for surveillance purposes or for reviewing any incidents that may have occurred.
What are the steps to connect a security camera to a VCR?
To connect a security camera to a VCR, you will need to:
– Use RCA cables to connect the video output of the camera to the video input of the VCR
– Use additional audio cables if you want to record audio as well


