Installing security cameras at your home or office is an essential step in ensuring the safety and security of your property. IP66 iCamera security cameras provide high-quality video surveillance, and by connecting them to a DVR (Digital Video Recorder), you can easily record and manage the footage.
Step 1: Choose the Right DVR
Before hooking up your IP66 iCamera security cameras to a DVR, it’s crucial to select a compatible DVR that supports IP cameras. Look for a DVR with sufficient channels to accommodate the number of cameras you plan to install. Ensure that the DVR is capable of recording and storing high-resolution footage for better clarity.
Step 2: Connect the Cameras to the DVR
Once you have the DVR, follow these steps to connect the IP66 iCamera security cameras:

- Identify the camera ports on the back of the DVR. These ports are typically labeled as “POE” or “LAN”.
- Connect one end of a CAT5e or CAT6 Ethernet cable to the LAN port on the camera and the other end to a free port on the back of the DVR.
- Repeat this process for each camera, ensuring that each camera is connected to a separate port on the DVR.
Step 3: Configure the DVR
After physically connecting the cameras to the DVR, you need to configure the DVR to recognize and manage the cameras. Here’s what you should do:
- Turn on the DVR and log in using the provided credentials.
- Navigate to the network settings or camera setup section in the DVR’s menu.
- Select the option to search for connected cameras.
- The DVR should automatically detect the IP66 iCamera security cameras and display them in a list.
- Assign each camera a unique name or ID to make it easier for you to identify and manage them later.
Step 4: Test the System
After configuring the DVR, it’s essential to test the system to ensure that the cameras are working correctly. Use the DVR’s interface to view the live feed from each camera. If you encounter any issues, double-check the connections and settings.
Note: It’s recommended to consult the user manual or contact the manufacturer for specific instructions on connecting and configuring IP66 iCamera security cameras to a DVR, as the steps may vary depending on the model.

By following these steps, you can easily hook up your IP66 iCamera security cameras to a DVR and start monitoring your property with enhanced security and peace of mind.
What are IP66 iCamera security cameras?
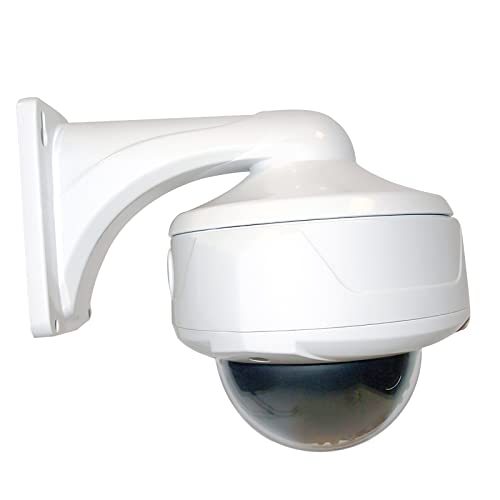
IP66 iCamera security cameras are advanced surveillance cameras that offer high-quality video recording and monitoring capabilities. They are designed to withstand harsh outdoor conditions and provide reliable security for homes, businesses, and other properties.
The “IP66” designation refers to the camera’s weatherproof rating, which means it is built to withstand dust, moisture, and extreme temperatures. This makes IP66 iCamera security cameras ideal for outdoor use in various climates.
These cameras feature a durable and rugged construction that makes them resistant to vandalism and tampering. They are typically made with high-quality materials, such as metal or polycarbonate, which provide additional protection against physical damage.
IP66 iCamera security cameras offer high-resolution video recording, allowing users to capture clear images and details. They are equipped with advanced imaging sensors and lenses that can capture footage in various lighting conditions, including low-light or nighttime scenarios. This makes them suitable for monitoring areas with limited visibility.

These cameras can be connected to a digital video recorder (DVR), which allows for continuous recording and playback of the captured footage. Some IP66 iCamera security cameras also support remote viewing, which enables users to monitor their property from anywhere using a smartphone, tablet, or computer.
In addition to their advanced surveillance capabilities, IP66 iCamera security cameras can also be integrated with other security systems, such as alarms or motion sensors. This enhances the overall security of the property and provides users with a comprehensive security solution.
Overall, IP66 iCamera security cameras are an excellent choice for those who require reliable outdoor surveillance. With their weatherproof design, high-quality imaging capabilities, and integration options, they provide an effective and versatile solution for protecting homes, businesses, and other valuable assets.
| Key Features | Benefits |
|---|---|
| Weatherproof design (IP66 rating) | Can withstand dust, moisture, and extreme temperatures |
| Durable and rugged construction | Resistant to vandalism and tampering |
| High-resolution video recording | Clear images and details |
| Advanced imaging sensors and lenses | Effective monitoring in various lighting conditions |
| DVR compatibility | Continuous recording and playback |
| Remote viewing support | Monitor property from anywhere |
| Integration with other security systems | Enhanced overall security |
What is a DVR?
A DVR, or Digital Video Recorder, is a device that is used to record and store video footage captured by security cameras. It is a vital component of a surveillance system and serves as a central hub for managing and accessing recorded footage. DVRs are commonly used in both residential and commercial settings for security and surveillance purposes.
DVRs are designed to work with different types of security cameras, including IP cameras such as the IP66 iCamera. They are equipped with multiple video inputs, allowing users to connect multiple cameras to a single DVR unit. The recorded footage is stored on a hard drive inside the DVR, which can be accessed and viewed later.

Modern DVRs often come with advanced features to enhance their functionality. These may include motion detection, which triggers recording only when there is movement in the camera’s field of view, and remote access, which allows users to view live or recorded footage remotely using a computer or mobile device.
Key Features of a DVR
- Video recording and storage
- Multiple camera support
- Remote access and viewing
- Motion detection
- Ability to search and retrieve specific footage
Benefits of Using a DVR
- Continuous monitoring and recording
- Evidence collection for security investigations
- Remote access for real-time monitoring
- Ability to customize recording settings
- Peace of mind and enhanced security
Overall, a DVR is an essential component of a security camera system, providing users with a reliable and convenient way to monitor and record video footage. Whether it is for home security or business surveillance, a DVR helps enhance safety and protect valuable assets.
Benefits of IP66 iCamera security cameras
IP66 iCamera security cameras are a reliable and efficient solution for your surveillance needs. With their advanced features and durable design, these cameras offer several benefits that make them an ideal choice for both indoor and outdoor settings.
1. Weatherproof and Dustproof
One of the major advantages of IP66 iCamera security cameras is their weatherproof and dustproof capabilities. These cameras are designed to withstand harsh weather conditions, such as heavy rain, snow, and extreme temperatures. Additionally, they are sealed to prevent dust, dirt, and other particles from entering the camera, ensuring continuous and clear monitoring in any environment.
2. High-Quality Image and Video
IP66 iCamera security cameras are equipped with high-resolution sensors, allowing them to capture clear and sharp images and videos. Whether it’s day or night, these cameras offer excellent performance, providing detailed footage that is crucial for effective surveillance. With advanced image and video processing technology, you can expect superior quality even in low-light conditions.

3. Wide Viewing Angle
These security cameras come with a wide viewing angle, providing a larger coverage area without compromising on image quality. The wide-angle lens allows you to monitor a larger space, reducing the need for additional cameras and ensuring comprehensive surveillance.
Overall, IP66 iCamera security cameras are a reliable and efficient solution that offers weatherproof and dustproof capabilities, high-quality image and video, and a wide viewing angle. By choosing these cameras, you can ensure stable and effective surveillance for your property or establishment.
High level of outdoor protection
The ip66 icamera security cameras are designed to provide a high level of outdoor protection in various weather conditions. With their robust construction and excellent sealing, these cameras are built to withstand extreme temperatures, rain, dust, and even vandalism.
Here are some key features that contribute to the high level of outdoor protection:
- IP66 Rating: The ip66 rating indicates that the cameras are dust-tight and protected against powerful jets of water. This makes them ideal for outdoor use, ensuring reliable performance even in harsh environments.
- Durable Housing: The cameras are housed in tough enclosures made of weather-resistant materials, such as aluminum or stainless steel. These housings provide additional protection against impacts and vandalism.
- IR Night Vision: Many ip66 icamera security cameras are equipped with infrared (IR) night vision capabilities. This allows them to capture clear video footage even in complete darkness, making them suitable for 24/7 surveillance.
- Wide Operating Temperature Range: These cameras can operate in a wide temperature range, typically from -20°C to 60°C (-4°F to 140°F). This enables them to function reliably in both extremely cold and hot climates.
- Tamper Detection: Some ip66 icamera models include tamper detection features. These cameras can detect and alert you if someone is attempting to tamper with them, further enhancing the security of your surveillance system.
Whether you need to monitor your home, office, or outdoor premises, the ip66 icamera security cameras offer a high level of outdoor protection, ensuring the safety and security of your property.

Clear and detailed image capture
One of the key features of the IP66 iCamera security cameras is their ability to capture clear and detailed images. With their high resolution lenses and advanced image sensor technology, these cameras can provide you with a crystal-clear view of your surroundings.
Whether you are monitoring the interior or exterior of your property, these cameras ensure that every detail is captured with precision. You can easily identify people, objects, and even license plates, making these cameras ideal for both residential and commercial use.
The IP66 iCamera security cameras also come equipped with infrared night vision technology. This allows them to capture clear images in low-light or completely dark conditions. So, whether it’s day or night, you can rely on these cameras to effectively monitor your property.
In addition to their high-quality image capture capabilities, these cameras also offer a wide viewing angle. This means that you can cover a larger area with fewer cameras, saving you money and reducing clutter.
With their IP66 weatherproof rating, these cameras are built to withstand harsh weather conditions. Whether it’s rain, snow, or extreme temperatures, you can count on these cameras to continue capturing clear and reliable footage.

In conclusion, the IP66 iCamera security cameras provide you with clear and detailed image capture, making them an excellent choice for your surveillance needs. With their high resolution, infrared night vision, wide viewing angle, and weatherproof design, these cameras offer both versatility and reliability.
Steps to hook up IP66 iCamera security cameras to DVR
To connect your IP66 iCamera security cameras to a DVR system, follow the steps below:
Step 1: Check the connectivity requirements
Before connecting the IP66 iCamera security cameras to the DVR, make sure that your DVR system supports IP cameras. Check the documentation or specifications of your DVR system to confirm this.
Step 2: Set up the camera and DVR
Ensure that both the IP66 iCamera security cameras and the DVR are connected to a power source and turned on. Make sure that the correct cables are connected to the cameras and the DVR for power and video transmission.
Step 3: Connect the cameras to the DVR
Using Ethernet cables, connect each IP66 iCamera security camera to an available Ethernet port on the DVR. Make sure to use cables of sufficient length to reach each camera from the DVR.
Step 4: Configure camera settings
Access the camera settings menu on the DVR system. Here, you will be able to configure the IP addresses of the cameras. Assign a unique IP address to each camera to ensure proper connectivity.
Step 5: Verify the connection
After configuring the camera settings, check the connectivity by viewing the camera feeds on the DVR system. Ensure that each camera is displaying a clear video feed and that all cameras are functioning properly.
Following these steps will allow you to successfully hook up your IP66 iCamera security cameras to a DVR system. Enjoy the added security and peace of mind provided by your surveillance setup!
Ensure compatibility between camera and DVR
When setting up a security camera system, it is crucial to ensure compatibility between the camera and the DVR (Digital Video Recorder). Here are a few important considerations to keep in mind:
Camera and DVR technology
The first step in ensuring compatibility is to understand the technology used by both the camera and the DVR. It is essential to check whether the camera and DVR are using the same technology or protocol.
For example, if you have an IP66 iCamera security camera, it uses the IP (Internet Protocol) technology for transmitting video footage. Therefore, it is crucial to make sure that your DVR is compatible with IP cameras and has the necessary network capabilities to receive and record the camera’s video feed.
Resolution and frame rate
Another vital aspect of compatibility to consider is the camera’s resolution and frame rate. The resolution refers to the camera’s image quality, typically measured in pixels, while the frame rate indicates the number of frames per second the camera can capture.
Check the specifications of both the camera and the DVR to verify that they support the desired resolution and frame rate. Mismatched resolutions or frame rates can result in video quality degradation or recording issues.
Note: Upgrading to a higher resolution camera may require a compatible DVR that can handle the increased data processing and storage requirements.
Cable compatibility
Lastly, it is important to assess cable compatibility between the camera and the DVR. Different cameras may use various types of cables to connect to the DVR, such as coaxial cables or Ethernet cables.
Make sure to check the camera’s specifications and the DVR’s input options to ensure they are compatible. Additionally, consider the distance between the camera and the DVR and verify that the cable length is sufficient for your installation needs.
By taking these compatibility factors into account, you can ensure that your IP66 iCamera security camera and DVR work seamlessly together, providing you with a reliable and effective security system.
Connect the cameras to the DVR using Ethernet cables
Once you have positioned your IP66 iCamera security cameras in the desired locations, the next step is to connect them to the DVR using Ethernet cables. This will enable the transmission of video footage from the cameras to the DVR for recording and monitoring purposes.
To get started, locate the Ethernet ports on both the cameras and the DVR. These ports are typically labeled as “LAN” or “Ethernet” and are usually located at the back of the devices.
Now, take one end of an Ethernet cable and insert it into the Ethernet port on the back of one of the cameras. Make sure the cable is securely connected and the locking tab clicks into place.
Next, take the other end of the Ethernet cable and plug it into one of the available Ethernet ports on the back of the DVR. Again, ensure that the cable is firmly inserted and the locking tab is engaged.
Repeat this process for each camera, connecting them one by one to the available Ethernet ports on the DVR. Make sure to use a separate Ethernet cable for each camera.
Once all the cameras are connected to the DVR, you can proceed to power on the devices. Plug the power adapter of each camera into a power outlet and ensure that they receive a stable power supply.
Finally, power on the DVR by plugging its power adapter into a power outlet. Wait for the devices to boot up and establish a connection.
At this point, the cameras should be successfully connected to the DVR using Ethernet cables, allowing you to remotely monitor and record surveillance footage.
If you encounter any connectivity issues or difficulties during the setup process, refer to the user manual of your IP66 iCamera security cameras and DVR for detailed instructions and troubleshooting tips.
Power on the cameras and DVR
Before starting the setup process, it is important to ensure that all the security cameras and the DVR are properly powered on. Here are the steps to power on the cameras and DVR:
| 1. | Connect the power adapter of each camera to a power outlet or a power source. |
| 2. | Check that the power indicator lights on each camera are illuminated, indicating that the cameras are receiving power. |
| 3. | Connect the power adapter of the DVR to a power outlet or a power source. |
| 4. | Check that the power indicator light on the DVR is illuminated, indicating that the DVR is receiving power. |
Once all the cameras and the DVR are powered on, you can proceed to the next steps for setting up the security cameras and connecting them to the DVR.
FAQ,
What is the IP66 iCamera security camera?
The IP66 iCamera security camera is a weatherproof camera that is designed to withstand harsh outdoor conditions. It is rated IP66, which means it is dust tight and protected against powerful jets of water.
Can I connect the IP66 iCamera security cameras to a DVR?
Yes, you can connect the IP66 iCamera security cameras to a DVR. The camera has a BNC (Bayonet Neill-Concelman) connector, which is a common type of connector used in CCTV systems. You can connect the camera to the DVR using a coaxial cable.