Connecting your iPhone camera to a projector can be a great way to showcase your photos, videos, or presentations on a larger screen. Whether you’re giving a business presentation or sharing your vacation slideshow with friends and family, this simple guide will walk you through the steps to connect your iPhone camera to a projector.
Step 1: Check your equipment
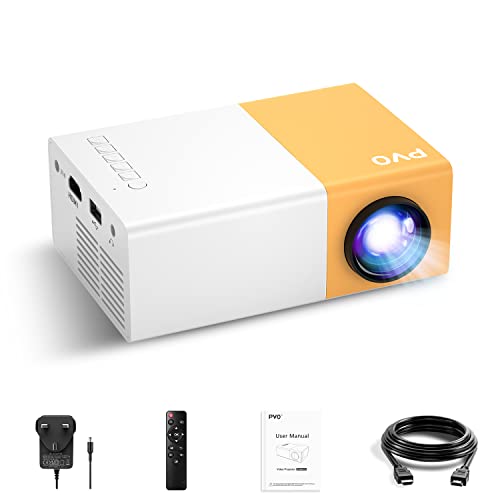
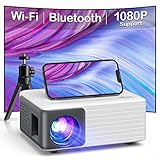
Before getting started, make sure you have all the necessary equipment on hand. You’ll need an iPhone with a working camera, a compatible projector, and the appropriate adapter or cable to connect the two devices. Different iPhone models may require different adapters, so be sure to check the specifications of your phone and projector to determine the correct adapter.
Step 2: Connect the adapter to your iPhone
Once you have the necessary equipment, connect the adapter or cable to your iPhone. The adapter should have a lightning port that matches the charging port on your iPhone. Plug the adapter into your iPhone, making sure it is securely connected. If using a cable, simply connect one end to your iPhone and the other end to the appropriate port on the projector.
Step 3: Connect the projector to power
Connecting a Projector to Your iPhone Camera: Step-by-Step Guide
If you want to connect your iPhone camera to a projector and share your photos or videos with a larger audience, you’re in the right place! In this step-by-step guide, we will walk you through the process of connecting your iPhone camera to a projector.
Step 1: Check compatibility
Before setting up the connection, make sure your projector supports iPhone connectivity. Some projectors may require additional adapters or cables for connecting to an iPhone. Refer to the user manual or contact the manufacturer to ensure compatibility.
Step 2: Prepare the equipment
Make sure you have the necessary equipment ready: your iPhone, a compatible adapter or cable (such as a Lightning to HDMI adapter), and a HDMI or VGA cable to connect the projector to the adapter. Ensure the projector is also turned on and ready to receive a signal.
Step 3: Connect the adapter
Connect the adapter or cable to your iPhone’s charging port. For Lightning to HDMI adapters, plug one end into the iPhone and the other end into the HDMI cable. For Lightning to VGA adapters, use the VGA cable instead.
Step 4: Connect the projector
Using the HDMI or VGA cable, connect the adapter to the projector’s corresponding input port. HDMI is recommended for better video and audio quality, but VGA can be used as an alternative if the projector doesn’t have an HDMI port.

Step 5: Set up the projector
On the projector, select the input source that matches the port you connected the iPhone to (e.g., HDMI or VGA). Use the projector’s remote control or on-screen menus to navigate and select the correct input source.
Step 6: Display iPhone content
Once the connection is established and the projector is set up, your iPhone screen should be mirrored on the projector display. You can now open the Camera app or any other app with media content on your iPhone to share it with your audience.
Step 7: Adjust settings if needed

You may need to adjust the video resolution or aspect ratio on your iPhone or the projector to optimize the display quality. Refer to the user manuals for both devices to learn how to make these adjustments.
Step 8: Enjoy the show!
Now you can enjoy showing your photos or videos to a larger audience using your iPhone camera and a projector. Make sure to test the connection before any important presentation or event to ensure seamless operation.
By following these simple steps, you can easily connect your iPhone camera to a projector and share your media content with a wider audience. Enjoy the enhanced viewing experience!
Find the Right Adapter
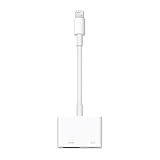
Before connecting your iPhone camera to a projector, you will need to find the right adapter that allows for the connection between the two devices. iPhones typically use Apple’s proprietary Lightning connector, so you will need an adapter that supports this type of connection.

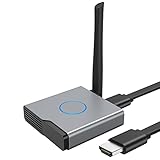
There are several options available when it comes to adapters. One option is to use an HDMI adapter, which allows you to connect your iPhone to the projector using an HDMI cable. This is a common option, as HDMI ports are available on most projectors. Another option is to use a VGA adapter, which is useful if your projector only has a VGA port. Additionally, there are wireless adapters available that allow you to connect your iPhone to the projector without the need for any cables.
When choosing an adapter, make sure it is compatible with your specific iPhone model and projector. You can check Apple’s website or consult the user manuals of both devices to ensure compatibility. It’s also important to consider the length of the adapter cable, as well as any additional features or functionalities you may require.
Once you have found the right adapter, you can proceed with connecting your iPhone camera to the projector. Follow the instructions provided with the adapter to ensure a proper connection. Once connected, you can then use your iPhone’s camera to display photos, videos, or even live streams directly on the projector screen.
Connect the Adapter to Your iPhone
To connect your iPhone camera to a projector, you will need a Lightning to HDMI adapter. This adapter allows you to convert the Lightning port on your iPhone into an HDMI output.
Follow the steps below to connect the adapter to your iPhone:

Step 1: Purchase a Lightning to HDMI Adapter
Firstly, you will need to purchase a Lightning to HDMI adapter. These adapters can usually be found at electronics stores or online. Make sure to choose a reputable brand to ensure compatibility and quality.
Step 2: Insert the Adapter into Your iPhone
Once you have the adapter, locate the Lightning connector on one end and the HDMI port on the other. Insert the Lightning connector into the charging port on your iPhone.
Note: Some adapters may require an additional power source, such as a USB connection, to function properly. Make sure to check the instructions provided with your adapter for any additional requirements.
Step 3: Connect the HDMI Cable
Take the other end of the adapter and connect it to one end of an HDMI cable. The other end of the HDMI cable should be plugged into the HDMI input port on your projector. Ensure that the connection is secure on both ends.
Tip: If your projector does not have an HDMI input, you may need to use a different type of adapter or connector that is compatible with your projector’s input ports.
Once the adapter is connected to your iPhone and the HDMI cable is securely plugged into your projector, you should be able to see the output from your iPhone camera on the projector screen. Use your iPhone’s camera app to take pictures or record videos, and they will be displayed on the projector in real-time.
Select the Appropriate Cable
To connect your iPhone camera to a projector, you will need to select the appropriate cable that is compatible with both devices. Apple devices typically use a proprietary connection called Lightning, so you will need to find a cable that has a Lightning connector on one end.
If your projector has an HDMI input, you can use an Apple Lightning Digital AV Adapter, which allows you to connect your iPhone camera to the projector using an HDMI cable. This adapter also includes an additional Lightning port, so you can charge your iPhone while it is connected to the projector.
If your projector does not have an HDMI input, you can use an Apple Lightning to VGA Adapter instead. This adapter allows you to connect your iPhone camera to the projector using a VGA cable. However, please note that VGA does not support audio, so you will need to use your iPhone’s speaker or connect external speakers for sound.
It is important to make sure you have the right cable and adapters before attempting to connect your iPhone camera to the projector. Check the specifications of your projector and consult with the manufacturer or an electronics store to ensure you have the correct cables for your specific devices.
Connect the Cable to the Adapter
First, make sure that both the cable and the adapter are unplugged and turned off. Then, locate the port on the adapter that matches the connector of the cable. Insert the cable’s connector firmly and securely into the adapter’s port until you hear a click or feel it lock into place.
Next, take the other end of the cable and find the port on the projector that matches its connector. Align the connector correctly and push it gently into the port until it is fully inserted.
It is important to ensure that the cable is connected firmly and securely to both the adapter and the projector. A loose connection can result in a poor or unstable connection, causing the projection to be distorted or flickering.
Properly Handling the Cable
When connecting the cable, be careful not to twist or bend it excessively. Twisting or bending the cable too much can damage the internal wires and affect the quality of the signal. Make sure to handle the cable with care to prevent any unnecessary strain.
Turning on the Projector
Once the cable is securely connected, you can turn on the projector. Locate the power button or switch on the projector and press it to turn it on. Depending on the projector model, you may need to wait for it to warm up before it is ready to display the content from your iPhone camera.
Connect the Cable to the Projector
Once you have gathered all the necessary equipment, it’s time to connect your iPhone to the projector. Follow these steps:
- Locate the HDMI or VGA port on the back of the projector. Most projectors have either one or both of these ports.
- Make sure your adapter supports the port on the projector. If you have an HDMI port, use an HDMI adapter. If you have a VGA port, use a VGA adapter.
- Connect one end of the cable to the adapter, and the other end to the corresponding port on the projector.
- If you are using an HDMI adapter, ensure your projector is set to the correct HDMI input. If you are using a VGA adapter, you may need to adjust the projector’s input settings accordingly.
- Power on the projector and select the correct input source.
- Now, take the Lightning cable that came with your iPhone and connect it to the Lightning port on the adapter.
- Finally, connect the other end of the Lightning cable to the charging port on your iPhone.
With the cable connected to both the projector and your iPhone, you should be ready to display your iPhone’s camera on the big screen.
Set Up the Projector
Before connecting your iPhone camera to a projector, it is essential to set up the projector correctly. Follow these steps:
1. Position the Projector
Find a suitable location for the projector where it can project onto a flat surface, such as a wall or a projector screen. Ensure that the projector is in a stable position and aligned correctly with the surface.
2. Connect the Power
Plug in the power cord of the projector and connect it to a wall outlet or power source. Turn on the projector and allow it to warm up for a few minutes, as indicated by the manufacturer’s instructions.
3. Adjust the Focus and Zoom
Use the projector’s focus and zoom controls to adjust the image size and clarity. Refer to the projector’s manual for the specific instructions on how to adjust these settings.
4. Connect the iPhone Camera
Depending on the projector model, you may need to use an adapter or cable to connect your iPhone camera to the projector. Apple offers several adapters that allow you to connect your iPhone to various display devices. Consult your projector’s manual or the manufacturer’s website for the recommended adapter or cable for your specific model.
Once you have the proper adapter or cable, connect one end to your iPhone’s port and the other end to the corresponding port on the projector. Make sure the connection is secure.
Some projectors may also support wireless connectivity with iOS devices. In this case, you can use AirPlay or other wireless projection methods to connect your iPhone camera to the projector.
5. Set the Input Source
On the projector, select the appropriate input source that corresponds to the port you connected your iPhone camera to. This may involve navigating through the projector’s menu system or using a remote control.
Once the input source is set, your projector should display the content from your iPhone camera on the projected surface.
Remember to adjust the volume settings on your iPhone and the projector, if necessary, to ensure the audio is properly routed to the projector’s speakers or an external sound system.
Note: Some projectors may also require additional settings or configurations to display the content correctly. Refer to the projector’s manual for any specific instructions on configuring the settings for your desired viewing experience.
By following these steps, you should be able to successfully set up your projector and connect your iPhone camera, allowing you to project the camera feed onto a larger screen or surface.
Adjust the Display Settings on Your iPhone
If you want to connect your iPhone to a projector, it’s important to adjust the display settings on your device to ensure the best possible viewing experience. Here’s how you can do it:
- Unlock your iPhone and go to the Settings app.
- Scroll down and tap on the “Display & Brightness” option.
- In the Display & Brightness menu, you can adjust the brightness of your iPhone’s screen by dragging the slider.
- Next, tap on the “Text Size” option to adjust the size of the text displayed on your iPhone’s screen.
- In the Text Size menu, you can drag the slider to increase or decrease the text size according to your preference.
- If you want to change the appearance of the text, you can tap on the “Bold Text” option to toggle the setting on or off.
- To further customize your display settings, go back to the previous menu and tap on the “View” option under the “Display Zoom” section.
- In the View menu, you can choose between the “Standard” and “Zoomed” display modes. The Zoomed mode offers larger app icons and text.
- Tap on the desired display mode and then tap on the “Set” button to apply the changes.
By adjusting these display settings, you can optimize the viewing experience when connecting your iPhone to a projector. Take your time to experiment with different settings to find what works best for you.
Project Content from Your iPhone
If you have an iPhone and want to project its content onto a larger screen using a projector, there are a few options available to you. Here are some methods you can use to connect your iPhone camera to a projector and project your content:
Method 1: HDMI Adapter
One option is to use an HDMI adapter that is compatible with your iPhone model. There are different types of HDMI adapters available, so make sure to choose one that matches your iPhone’s connector type (Lightning or 30-pin dock connector). Connect one end of the HDMI adapter to your iPhone and the other end to the HDMI input on the projector. Once connected, you should be able to project the content from your iPhone camera onto the projector screen.
Method 2: AirPlay
If you have an Apple TV or a projector that supports AirPlay, you can use this method to wirelessly project content from your iPhone. Make sure your iPhone and Apple TV or compatible projector are connected to the same Wi-Fi network. On your iPhone, swipe up from the bottom of the screen to access the Control Center. Tap the “Screen Mirroring” option and select your Apple TV or compatible projector. Your iPhone’s screen will be mirrored on the projector screen, allowing you to project your camera content.
Method 3: Wireless Video Adapter
Another option is to use a wireless video adapter, such as a Miracast or Chromecast device. These adapters can be connected to the HDMI input of the projector and allow you to wirelessly stream the content from your iPhone camera to the projector. To use this method, make sure your iPhone and the wireless video adapter are connected to the same Wi-Fi network. Follow the instructions provided with the adapter to connect your iPhone and start projecting the camera content.
When connecting your iPhone camera to a projector, it’s important to check the compatibility of the devices and ensure they have the necessary ports or features for the connection method you choose. Additionally, make sure your iPhone is fully charged or connected to a power source to avoid any interruptions during the projection.
With these methods, you can easily connect your iPhone camera to a projector and project your content onto a larger screen for a better viewing experience.
Troubleshooting Common Issues
Connecting your iPhone camera to a projector can sometimes come with its own set of challenges. Here are a few common issues that you might encounter and some solutions to help you troubleshoot:
No image on the projector: If you’re not seeing any image on the projector screen, make sure that your iPhone is properly connected to the projector using the appropriate cable. Check if the projector is set to the correct input source. If necessary, read the user manual for your projector model to ensure you have selected the right input.
Cannot connect to the projector: If you’re having difficulty connecting your iPhone camera to the projector, try restarting both devices. Make sure that the projector and your iPhone are on the same Wi-Fi network, and that you have enabled screen mirroring on your iPhone. If the issue persists, try connecting with a different cable or consult the user manual for your specific projector model.
Poor image quality: If the image quality on the projector screen is not up to your expectations, double-check the resolution settings on your iPhone. Adjust the brightness and contrast settings on the projector itself. Also, ensure that the projector lens is clean and free from dirt or smudges that may affect the image quality.
No sound on the projector: If you’re not getting any sound from the projector, ensure that the volume on both your iPhone and the projector is turned up. Check if the audio cable is properly connected and that it’s not damaged. If you’re using Bluetooth audio, make sure that your iPhone is paired with the projector. If the issue persists, try connecting external speakers to the projector.
Interference or signal loss: If you experience interference or signal loss during the display, verify there are no obstructions between your iPhone and the projector. Move your iPhone closer to the projector and ensure there are no other electronic devices causing interference nearby. Additionally, ensure that your iPhone is fully charged or connected to a power source to prevent any interruptions.
By following these troubleshooting tips, you can overcome common issues and successfully connect your iPhone camera to a projector for an enhanced viewing experience.
Disconnecting Your iPhone from the Projector
After you have finished using your iPhone with the projector, it is important to properly disconnect it to avoid any potential issues. Here are the steps to follow:
Step 1: Stop Screen Mirroring
On your iPhone, swipe up from the bottom of the screen to access the Control Center. Look for the AirPlay icon, which is a rectangle with an arrow pointing upward. Tap on it to open the AirPlay menu. In the menu, tap on the option that says “Stop Mirroring” to stop the screen mirroring to the projector.
Step 2: Disconnect Cable or Wireless Connection
If you connected your iPhone to the projector using a cable, simply unplug the cable from both your iPhone and the projector. If you connected wirelessly, go to the settings on your iPhone and disable the wireless connection that was used for the projector.
Step 3: Power Off the Projector
Once you have disconnected your iPhone, it is a good idea to turn off the projector. This will prevent any accidental connection attempts to your iPhone in the future and also save power.
Remember to always follow the manufacturer’s instructions for properly disconnecting devices to ensure the longevity and optimal performance of both your iPhone and the projector.
| Related Topics | References |
|---|---|
| How to Connect a Projector to Your iPhone Camera | 1. Insert the iPhone camera adapter into the charging port of your iPhone. 2. Connect the HDMI cable to the projector’s HDMI input port. 3. Connect the other end of the HDMI cable to the iPhone camera adapter. 4. Turn on the projector and select the HDMI input. 5. Open the camera app on your iPhone. 6. Enjoy projecting your iPhone’s camera display on the big screen! |
FAQ
Can I connect my iPhone camera to a projector?
Yes, you can connect your iPhone camera to a projector. There are different ways to do it depending on the type of projector and iPhone model you have.
What cables do I need to connect my iPhone camera to a projector?
To connect your iPhone camera to a projector, you will need an HDMI adapter or a VGA adapter, depending on the ports available on your projector. You will also need a Lightning to USB cable or a Lightning to HDMI cable.
How do I connect my iPhone camera to a wireless projector?
To connect your iPhone camera to a wireless projector, make sure both devices are connected to the same Wi-Fi network. Then, open the Control Center on your iPhone, tap on “Screen Mirroring,” and select the name of the projector from the list of available devices.
Can I connect my iPhone camera to a projector without cables?
Yes, you can connect your iPhone camera to a projector without cables if both devices support wireless connectivity. Make sure both devices are connected to the same Wi-Fi network, and use the screen mirroring function on your iPhone to connect to the projector.
Is it possible to connect my iPhone camera to a projector with an app?
Yes, some projectors have companion apps that allow you to connect your iPhone camera wirelessly. Check if your projector brand has a dedicated app available on the App Store, and follow the instructions provided to establish the connection.


