
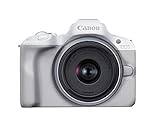
Canon cameras are known for their high-quality images, and if you’re a photography enthusiast, you probably love capturing moments with your Canon camera. But what do you do when you want to share those amazing photos with your friends and family who are eagerly waiting to see them on your iPhone?
Fortunately, importing pictures from a Canon camera to an iPhone is a relatively simple process. In this article, we will guide you through the steps necessary to transfer your precious memories from your Canon camera to your iPhone in no time.
Step 1: Prepare your Canon camera and iPhone. Before you begin the transfer process, make sure your Canon camera is turned on and connected to your computer via a USB cable. Also, ensure that your iPhone is charged and has enough available storage space to accommodate the transferred photos.
Step 2: Enable the Wi-Fi function on your Canon camera. To establish a connection between your Canon camera and iPhone, you need to enable the Wi-Fi function on your camera. Refer to your camera’s user manual to find the exact steps for enabling Wi-Fi.
Step 3: Connect your iPhone to the Canon camera’s Wi-Fi network. On your iPhone, go to the Settings app and look for the Wi-Fi section. From there, select the Wi-Fi network that corresponds to your Canon camera. Once connected, you will see a checkmark next to the network name.

Step 4: Download the Canon Camera Connect app. Open the App Store on your iPhone and search for the Canon Camera Connect app. Download and install the app.
Step 5: Open the Canon Camera Connect app. Launch the Canon Camera Connect app on your iPhone and follow the on-screen instructions to establish a connection between your Canon camera and iPhone.
Step 6: Transfer your photos. Once the connection is established, you will be able to see your Canon camera on the app’s home screen. From there, you can select the photos you want to transfer and tap on the download button to initiate the transfer process.
With these simple steps, you can easily import pictures from your Canon camera to your iPhone and share your amazing photography with the world. So, what are you waiting for? Grab your Canon camera and start transferring those breathtaking images to your iPhone now!
Disclaimer: The process may vary slightly depending on the model of your Canon camera and your iPhone’s operating system. For detailed instructions, refer to the user manuals of your Canon camera and iPhone or visit the Canon website for support.

Connect Canon Camera to iPhone
Connecting your Canon camera to your iPhone allows you to easily transfer photos and videos from your camera to your iPhone for editing, sharing, and viewing on the go. Here are the steps to connect your Canon camera to your iPhone:
Step 1: Check Compatibility
Make sure that your Canon camera and iPhone are compatible for direct connection. Check the user manuals or the official websites of both devices for compatibility information.
Step 2: Install Canon Camera Connect App
Download and install the Canon Camera Connect app from the App Store on your iPhone. This app enables the connection between your Canon camera and iPhone.
Step 3: Connect the Camera to Your iPhone
Connect your Canon camera to your iPhone using a USB cable or Wi-Fi, depending on the supported connection method of your camera.
| Connection Method | Steps |
|---|---|
| USB Cable |
|
| Wi-Fi |
|
Note: The specific steps may vary depending on the Canon camera model and the iOS version on your iPhone. Refer to the user manual of your camera or the Canon website for detailed instructions.

Step 4: Transfer Photos and Videos
Once the connection between your Canon camera and iPhone is established, you can start transferring photos and videos. Open the Camera Connect app on your iPhone, select the files you want to transfer, and choose the option to transfer them to your iPhone’s photo library or another desired location.
By following these steps, you can easily connect your Canon camera to your iPhone and enjoy the convenience of transferring and accessing your photos and videos on the go.
Turn on Camera’s Wi-Fi
To import pictures from your Canon camera to your iPhone, you first need to turn on your camera’s Wi-Fi. Follow these steps:
- Turn on your camera and navigate to the settings menu.
- Look for the Wi-Fi or Network settings option and select it.
- From the available options, choose Wi-Fi settings.
- Select the option to enable Wi-Fi on your camera.
- Your camera will start searching for available Wi-Fi networks.
- When the list of networks appears, choose your iPhone’s Wi-Fi network.
- If prompted, enter the password for your Wi-Fi network.
- Once connected, your camera’s Wi-Fi indicator should show that it is connected to your iPhone.
With the camera’s Wi-Fi turned on and connected to your iPhone, you’ll now be able to transfer pictures from your camera to your iPhone wirelessly.
Connect iPhone to Camera’s Wi-Fi
To import pictures from your Canon camera to your iPhone, you need to connect your iPhone to your camera’s Wi-Fi network. Follow the steps below to establish a Wi-Fi connection:
- On your Canon camera, go to the Wi-Fi settings or Wi-Fi function menu.
- Select the option to enable Wi-Fi and create a new Wi-Fi network.
- On your iPhone, open the Settings app.
- Tap on Wi-Fi.
- Under “Choose a Network”, you should see the Wi-Fi network name of your Canon camera. Tap on it to connect.
- If prompted, enter the password for the camera’s Wi-Fi network. The password is usually provided in the camera’s user manual or can be set in the camera’s Wi-Fi settings.
- Wait for your iPhone to establish a connection with the camera’s Wi-Fi network. This may take a few seconds.
Once your iPhone is connected to the camera’s Wi-Fi, you can proceed with the process of importing pictures from your Canon camera to your iPhone using the appropriate app or method. Refer to the camera’s user manual or the app’s documentation for further instructions on importing pictures.
Download Canon Camera Connect App
If you want to import pictures from your Canon camera to your iPhone, the first step is to download the Canon Camera Connect App. This app allows you to connect your Canon camera to your iPhone wirelessly, making it easy to transfer photos and videos.
To download the app, follow these simple steps:
| Step 1: | Open the App Store on your iPhone. |
| Step 2: | Search for “Canon Camera Connect” in the search bar. |
| Step 3: | Tap on the app when it appears in the search results. |
| Step 4: | Tap the “Get” button to download and install the app. |
| Step 5: | Open the app once it’s installed on your iPhone. |
Now that you have the Canon Camera Connect App downloaded on your iPhone, you are ready to start importing pictures from your Canon camera. The app will guide you through the necessary steps to establish a connection between your camera and iPhone, allowing for seamless photo and video transfer.
Open Canon Camera Connect App
To begin transferring pictures from your Canon camera to your iPhone, you will need to have the Canon Camera Connect app installed on your iPhone. This app allows you to connect your camera to your phone wirelessly and import your photos and videos.

First, open the App Store on your iPhone and search for “Canon Camera Connect”. Once you find the app, click on the “Get” button to download and install it on your device.
After the app is installed, go ahead and open it. You will be prompted to allow the app to access your camera and location. Make sure to select “Allow” so that the app can connect to your camera and import the pictures.
Connect Your Camera
Once you have opened the Canon Camera Connect app, you will need to connect your camera to your iPhone. Turn on your camera and navigate to the Wi-Fi settings. There, you should see a Wi-Fi network with the name of your camera model. Tap on it to connect.
Return to the Canon Camera Connect app and tap on the “Connect to Camera” button. The app will search for your camera and establish a connection. Once the connection is successful, you will see a live view of your camera’s viewfinder on your iPhone screen.
Import Pictures
With your camera connected to your iPhone through the Canon Camera Connect app, you can now import your pictures. Tap on the “Images on Camera” button to view all the pictures and videos stored on your camera.

Select the pictures you want to import to your iPhone by tapping on them. You can choose multiple pictures at once by tapping on each picture. Once you have selected the pictures, tap on the “Download” button to start the import process.
The app will transfer the selected pictures from your camera to your iPhone. The progress of the transfer will be displayed on your screen. Once the transfer is complete, you can find your imported pictures in the Photos app on your iPhone.
Choose “Import Images from Camera” Option
After connecting your Canon camera to your iPhone, you need to choose the option “Import Images from Camera” to transfer the pictures.
To do this, follow the steps below:
- Unlock your iPhone and go to the home screen.
- Launch the “Photos” app on your iPhone by tapping on its icon.
- In the bottom menu, tap on the “Import” option. It is represented by a square with an arrow pointing upwards.
- A list of sources will appear. Scroll down until you find your Canon camera listed under the “IMPORT” section. Make sure your camera is connected to your iPhone.
- Tap on your Canon camera’s name to select it.
- Now, you will see a preview of the pictures on your Canon camera. You can select all the pictures you want to import by tapping on them, or you can tap on the “Import All” option to import all the pictures.
- You will be prompted to choose whether you want to keep the imported photos on your Canon camera or delete them after importing. Select the option that suits you best.
- The selected pictures will now be imported and stored in the “All Photos” section of your iPhone’s Photos app.
By following these steps, you can easily import pictures from your Canon camera to your iPhone and have them readily available for viewing, editing, and sharing.
Select Pictures to Import
To import pictures from your Canon camera to your iPhone, follow these steps:
- Connect your Canon camera to your iPhone using a USB cable. Make sure the camera is turned on.
- On your iPhone, open the Photos app. If prompted, grant access to the camera.
- In the bottom menu, tap on the “Import” tab.
- You will see the pictures available for import from your Canon camera. Scroll through the thumbnails to browse the images.
- To select specific pictures for import, tap on each thumbnail to mark them with a checkmark. You can select multiple pictures at once. If you want to import all pictures, tap on the “Select All” option.
- After selecting the pictures, tap on the “Import” button located at the bottom right corner of the screen.
- The selected pictures will start importing to your iPhone’s Photos library. Once the import is complete, you can find the pictures in the “Photos” tab or inside specific albums.
That’s it! You have successfully imported pictures from your Canon camera to your iPhone using the Photos app.
Tap “Import” Button
Once the Canon camera and iPhone are connected using the appropriate cable or adapter, you can proceed to import pictures quickly and easily.
Step 1: Launch the Photos App
On your iPhone, locate and tap the Photos app to open it. The app icon is a multicolored flower.
Step 2: Select the Camera
In the Photos app, tap on the “Albums” tab located at the bottom of the screen. Then, tap on the “Import” option.
If your Canon camera is connected properly, it should appear under the “Import” section. Tap on the camera to select it.
Step 3: Choose Photos to Import
You will now see all the photos and videos available for import from your Canon camera. To select specific pictures, tap on each one individually. A checkmark will appear on the selected photos.
If you want to import all the photos, tap on the “Import All New Photos” option instead. This will transfer all the pictures and videos from your camera to your iPhone.
Step 4: Begin Importing
Once you have selected the photos you want to import, tap on the “Import X Selected” button at the bottom of the screen. Replace “X” with the actual number of photos you have selected. The import process will now begin.
Make sure to keep your iPhone connected to the Canon camera until the import is complete. The imported photos will then be available in your iPhone’s Photos app, organized in your camera roll or other albums.
After the import is finished, tap on the “Done” button to exit the import mode.
Now you can easily import pictures from your Canon camera to your iPhone using the “Import” button in the Photos app. Enjoy your newly imported photos and share them with friends and family!
Wait for Pictures to Finish Importing
After connecting your Canon camera to your iPhone and initiating the import process, you will need to wait for the pictures to finish importing. The time it takes for the import process to complete will depend on the number and size of the pictures being imported.
While the pictures are being imported, it is important to keep your camera connected and ensure that it remains turned on. Disconnecting the camera during the import process may result in incomplete or corrupted picture files.
You can track the progress of the import by keeping an eye on the photo import icon or progress bar that may be displayed on your iPhone’s screen. This will give you an indication of how much longer the import process will take to complete.
Once the import process is finished, you will see a notification or a message confirming that the pictures have been successfully imported to your iPhone. At this point, you can safely disconnect your Canon camera from your iPhone.
Importing Errors
If you encounter any errors or issues during the import process, make sure to double-check the connection between your iPhone and Canon camera. Ensure that the cable is securely plugged in and that the camera is turned on and in the correct mode for importing.
If the import process continues to fail, try restarting both your iPhone and Canon camera and attempt the import again. It may also be helpful to consult the user manual or online resources for troubleshooting steps specific to your Canon camera model.
Organizing Imported Pictures
After the import process is complete, you can organize the imported pictures in the Photos app on your iPhone. You can create albums, add tags, or organize them into folders to make it easier to find and view them later.
| Device | Steps |
|---|---|
| iPhone |
|
FAQ
Can I import pictures from my Canon camera to my iPhone?
Yes, you can import pictures from your Canon camera to your iPhone. There are several methods you can use to do this.
What are the different methods to import pictures from a Canon camera to an iPhone?
There are several ways to import pictures from a Canon camera to an iPhone. You can use a card reader to transfer the photos directly from the camera’s memory card to your iPhone. Alternatively, you can connect your camera to your iPhone using a USB cable and transfer the photos through the Camera Connect app or the built-in Photos app on your iPhone.
Can I import RAW photos from my Canon camera to my iPhone?
Yes, you can import RAW photos from your Canon camera to your iPhone. However, not all iPhone models support the RAW format. It’s always a good idea to check if your iPhone model and iOS version support RAW photo import before attempting to transfer them.
Is it possible to import pictures from a Canon camera to an iPhone wirelessly?
Yes, it is possible to import pictures from a Canon camera to an iPhone wirelessly. Some Canon cameras have built-in Wi-Fi functionality that allows you to transfer photos directly to your iPhone using the Camera Connect app. Additionally, you can use a Wi-Fi-enabled SD card in your Canon camera to transfer photos wirelessly to your iPhone.


