
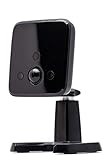
If you want to ensure the safety and security of your home or office, installing a security camera is a smart decision. Xfinity offers a range of high-quality security cameras that are not only easy to install, but also provide reliable surveillance.
In this step-by-step guide, we will walk you through the process of setting up and installing your Xfinity security camera. Whether you are a tech-savvy individual or a beginner, you will find these instructions easy to follow.
Step 1: Choose the Ideal Location
The first step in installing your Xfinity security camera is to choose the best location for it. Consider areas that require the most surveillance, such as entrances, driveways, or backyard. Ensure the camera has a wide-angle view and is placed out of reach.
Note: Check for any local laws or regulations that may restrict the placement of security cameras.

Step 2: Mount the Camera
Next, mount the camera securely on the chosen location. You can use screws or adhesive mounts provided with the camera. Make sure the camera is properly aligned and angled to capture the desired area.
Tip: It is recommended to install the camera at a higher position to avoid tampering.
Step 3: Connect the Camera
Now, it’s time to connect the camera to your Xfinity system. Follow the instructions provided with the camera to connect it to your home’s Wi-Fi network. Once connected, ensure a stable internet connection for uninterrupted surveillance.
Important: You may need to download and install the Xfinity Home security app on your smartphone or tablet for easy access and control.
Step 4: Configure the Settings
After successfully connecting the camera, you will need to configure the settings according to your preferences. This includes adjusting motion detection sensitivity, enabling notifications, and setting up storage options for recorded footage.
Pro Tip: Regularly check and update the camera’s firmware to ensure optimal performance and security.
Congratulations! You have now successfully installed your Xfinity security camera. Enjoy peace of mind knowing that your property is under constant surveillance. Remember to consult the user manual or contact Xfinity support for any additional assistance you may need.

What is Xfinity Security Camera?
Xfinity Security Camera is a home security system offered by Xfinity, a subsidiary of Comcast Corporation. It is designed to help protect your home and provide you with peace of mind by monitoring and recording activity around your property.
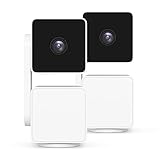
The Xfinity Security Camera system includes a set of cameras that can be installed both indoors and outdoors, allowing you to keep an eye on your home from anywhere at any time. These cameras are equipped with advanced features such as motion detection, night vision, and two-way audio, which allow you to see and hear what’s happening around your property.
The Xfinity Security Camera system also includes a central hub, which acts as the control center for all the cameras. This hub connects wirelessly to your home’s internet network, allowing you to access live video feeds, receive notifications, and control the cameras using your smartphone or computer.
Additionally, Xfinity offers a range of subscription plans that provide additional features and benefits. These plans may include cloud storage for video recordings, professional monitoring services, and extended warranty coverage for the cameras.
With Xfinity Security Camera, you can enjoy the convenience of remote monitoring and the peace of mind knowing that your home is protected by a reliable and advanced security system.

Benefits of Xfinity Security Camera
The Xfinity security camera offers a range of benefits that can enhance the security and peace of mind for homeowners. Here are some of the key advantages:
24/7 Surveillance: The Xfinity security camera provides round-the-clock surveillance, allowing homeowners to monitor and protect their property at all times. With high-definition video quality and a wide viewing angle, the camera captures clear footage day and night.
Live View and Alerts: Homeowners can access live video feeds from their Xfinity security camera through the Xfinity mobile app or website. This feature enables users to keep an eye on their home in real-time, providing immediate updates and alerts in case of any suspicious activities or emergencies.
Remote Access: With the Xfinity mobile app, users can monitor their security camera remotely from anywhere in the world. Whether you’re at work, traveling, or simply away from home, you can stay connected and have peace of mind knowing that you can check in on your property at any time.
Two-Way Audio: The Xfinity security camera is equipped with two-way audio, allowing homeowners to communicate with visitors or potential intruders directly through the camera. This feature is particularly useful for remotely greeting guests, giving delivery instructions, or deterring suspicious individuals.

Cloud Storage: Xfinity offers cloud storage for recorded footage, ensuring that valuable evidence is securely stored and accessible even if the camera is damaged or stolen. This allows homeowners to review past events or incidents and provide crucial evidence to authorities if needed.
Integration with Other Devices: The Xfinity security camera can be integrated with other smart home devices, such as door locks, motion sensors, and smart thermostats. This integration allows for enhanced security automation and customization, creating a comprehensive home security system.
Professional Monitoring: Xfinity also offers professional monitoring services for added security. With 24/7 monitoring and immediate notifications to emergency services, homeowners can have peace of mind knowing that their property is being monitored by trained professionals.
Overall, the Xfinity security camera provides a range of benefits that go beyond basic surveillance. With advanced features, remote accessibility, and integration with other devices, homeowners can enhance their home security and have greater control over their property’s protection.
Preparation
Before beginning the installation process of your Xfinity security camera, it is important to ensure that you have all the necessary tools and materials ready. This will help to make the installation process smoother and more efficient.
Here are some steps you can take to prepare for the installation:
- Read the user manual: Familiarize yourself with the instructions provided in the user manual that came with your Xfinity security camera. This will help you understand the installation process better and avoid any potential errors.
- Select a suitable location: Decide where you want to install the camera. Consider factors such as the coverage area, visibility, and accessibility. Make sure the camera is within range of your Wi-Fi network if it is a wireless camera.
- Check the Wi-Fi signal strength: Ensure that the Wi-Fi signal is strong enough in the chosen location. This will help ensure a stable connection for your camera.
- Ensure power supply availability: If your camera requires a power source, make sure that there is an electrical outlet nearby. If necessary, consider using an extension cord.
- Gather the necessary tools: Prepare the tools you will need for the installation, such as a drill, screws, screwdriver, and a ladder if required. Having these tools ready will save you time and effort during the installation process.
- Download the Xfinity Home app: If your camera requires the use of the Xfinity Home app, download it onto your smartphone or tablet. This app will allow you to monitor and control your security camera.
By following these preparation steps, you will be well-equipped to begin the installation process of your Xfinity security camera.
Gather the Required Materials
Before you begin installing your Xfinity security camera, make sure you have the following materials:
- Xfinity security camera
- Mounting bracket
- Power adapter
- Power cable
- Ethernet cable
- Drill and drill bit
- Screws and wall anchors
- Level
- Marker or pencil
- Wireless network information (SSID and password)
- Smartphone or tablet with the Xfinity Home app installed
Ensuring that you have all the necessary materials will help you complete the installation process smoothly and efficiently.
Choose an Installation Location
Before installing your Xfinity security camera, it is important to choose an optimal location for it to ensure maximum coverage and effectiveness. Here are some factors to consider:

- Visibility: The camera should be easily visible to deter potential burglars or intruders. Make sure it is placed in a location where it can be easily seen.
- Entry Points: Identify the main entry points of your home or property and install the camera in a position that covers these areas effectively.
- Mounting: Determine whether you want to mount the camera on a wall or ceiling. Consider the best vantage point and angle for capturing the desired area.
- Power Supply: Ensure that the camera is within reach of a power outlet or consider alternative power options such as battery-powered cameras or solar-powered cameras.
- Connectivity: Check the Wi-Fi signal strength in the installation location to ensure a reliable connection. Additionally, consider the proximity to your wireless router for optimal signal strength.
- Weatherproofing: If installing the camera outdoors, choose a location that provides adequate protection from the elements. Look for areas with overhead coverage or consider purchasing a weatherproof casing for the camera.
- Privacy Concerns: Be mindful of the camera’s field of view and ensure that it does not capture sensitive areas such as bedrooms or bathrooms of your home or your neighbors’ properties.
By carefully considering these factors, you can select the best installation location for your Xfinity security camera and enhance the safety and security of your home.
Installation Steps
Follow these steps to successfully install your Xfinity security camera:
Step 1: Determine the Camera Location
Choose a suitable location for your camera, ensuring it has a clear view of the area you want to monitor. Consider factors such as coverage, accessibility, and power source availability.
Step 2: Assemble the Camera
Take the camera out of the packaging and gather all the necessary components, including the mounting brackets, screws, and power adapter.
Step 3: Mount the Camera
Using the mounting brackets and screws, securely attach the camera to the desired location. Make sure it is level and stable.
Step 4: Connect Power
Plug in the power adapter to an electrical outlet and connect it to the camera. Ensure that the power connection is secure.
Step 5: Connect to Wi-Fi
Using a computer or mobile device, connect to the Wi-Fi network you want the camera to be connected to. Follow the instructions provided by Xfinity to set up the camera on your Wi-Fi network.
Step 6: Download the App
Download the Xfinity Home app from the App Store or Google Play Store onto your smartphone or tablet. Create an account or sign in if you already have one.
Step 7: Add Camera to App
Open the Xfinity Home app and follow the instructions to add the camera to your account. This may involve scanning a QR code or entering a unique code provided with the camera.
Step 8: Test and Adjust
Once the camera is successfully connected and added to the app, test it by viewing the live feed and adjusting the camera angle, if necessary. Ensure that you have a clear and reliable connection to the camera.
Step 9: Set up Alerts and Notifications
Configure the app to receive alerts and notifications for events captured by the camera, such as motion detection or sound detection. Customize the settings according to your preferences.
Step 10: Mount Additional Cameras (if applicable)
If you have more than one Xfinity security camera to install, repeat the above steps for each additional camera, ensuring proper placement and connection.
Follow these installation steps carefully to set up and configure your Xfinity security camera efficiently. Refer to the user manual or reach out to Xfinity support for any troubleshooting or additional assistance.
Mounting the Camera
Once you have unpacked your xfinity security camera, you will need to find a suitable location to mount it. Here are some steps to help you properly mount your camera:
Step 1: Selecting the Location
Choose a location that provides a clear view of the area you want to monitor. Make sure the camera is out of reach of potential intruders and protected from extreme weather conditions.
Step 2: Attaching the Mounting Bracket
Using the provided screws and anchors, attach the mounting bracket to the selected location. Ensure that the bracket is securely fastened to provide a stable support for the camera.
Step 3: Adjusting the Camera Angle
Before attaching the camera to the mounting bracket, adjust the angle to capture the desired view. Tilt the camera up, down, or side-to-side until you are satisfied with the positioning.
Step 4: Mounting the Camera
Hold the camera against the mounting bracket and secure it in place using the screws provided. Make sure the camera is firmly attached and does not wobble.
Note: It is recommended to double-check the camera’s angle and positioning after mounting to ensure optimal coverage.
By following these steps, you will be able to properly mount your xfinity security camera and enhance the overall security of your property.
Connecting the Camera
Once you have decided on the location for your Xfinity security camera, it’s time to connect it to your network. Follow these steps to ensure a successful installation:
1. Power on the Camera:
Plug the power adapter into a wall outlet and connect the other end to the camera’s power input port. Ensure that the camera is receiving power by checking for a solid power indicator light.
2. Connect to Wi-Fi:
Using the Xfinity Home app, navigate to the “Devices” section and select “Add Device.” Follow the prompts to connect the camera to your home Wi-Fi network. Make sure to enter the correct Wi-Fi network name and password.
3. Position the Camera:
Place the camera in the desired location, ensuring that it provides a clear view of the area you want to monitor. Use the camera’s adjustable mount to angle it correctly and tighten any screws or brackets to secure it in place.
4. Test the Connection:
Once the camera is connected to Wi-Fi, wait for a few moments for it to establish a stable online connection. Open the Xfinity Home app and navigate to the camera’s live feed to verify that the video feed is displaying properly.
Note: If you are experiencing connectivity issues, try moving the camera closer to your Wi-Fi router or consider using a Wi-Fi extender to improve the signal strength.
Following these steps will ensure that your Xfinity security camera is properly connected and ready to provide you with the peace of mind of a secure home. Enjoy the added protection and monitoring capabilities that come with your Xfinity Home security system.
Setting up the Xfinity Security System
Installing your Xfinity security camera is a simple process that can help provide you with peace of mind knowing that your home and loved ones are protected. Follow these steps to set up your Xfinity security system:
1. Determine camera placement
Before you start installing your security camera, decide where you want to place it. Consider areas that provide a good vantage point and cover the entrances and important areas of your home. Also, ensure that the camera is mounted securely and protected from the elements.
2. Connect the camera to power
Locate a power outlet near the chosen camera placement and connect the camera to power using the provided power adapter. Make sure the power source is reliable and stable to ensure uninterrupted operation of the camera.
3. Connect the camera to your Xfinity Home system
To connect your camera to your Xfinity Home system, follow these steps:
- Open the Xfinity Home mobile app on your smartphone or tablet.
- Select the “Cameras” tab.
- Tap “Add New Camera” and follow the on-screen instructions.
- When prompted, scan the QR code or manually enter the camera’s serial number, which can be found on the camera or packaging.
- Follow the app’s instructions to complete the setup process, including connecting the camera to your Wi-Fi network.
4. Test the camera
After setting up the camera, it’s important to test its functionality to ensure it’s working properly. Open the Xfinity Home app and select the camera to view the live feed. Check if the video quality is clear and if the camera captures the desired area. Adjust the camera angle if necessary.
5. Set up additional features
Your Xfinity Security System offers additional features to enhance your home security. Explore the Xfinity Home app to set up motion detection alerts, video recording, and other customized settings based on your preferences.
By following these steps, you can easily set up your Xfinity Security System and start enjoying the peace of mind that comes with a secure home.
Troubleshooting
If you are having trouble installing your Xfinity security camera, there are a few steps you can take to troubleshoot the issue.
1. Check the Wi-Fi Connection
Make sure that your camera is within range of your Wi-Fi network and that the network is stable. Check if other devices can connect to the Wi-Fi network to ensure that it is functioning correctly.
2. Restart the Camera
Try restarting the camera by unplugging it from the power source, waiting for a few seconds, and then plugging it back in. This can often resolve minor connectivity issues.
3. Reset the Camera
If restarting the camera doesn’t work, you may need to reset the camera to its factory settings. Look for a small reset button on the camera or refer to the manufacturer’s instructions on how to do this.
4. Check the Camera’s Firmware
Ensure that the camera’s firmware is up to date. Visit the manufacturer’s website or refer to the user manual to learn how to update the firmware if needed.
5. Check the Xfinity Home App
If you are using the Xfinity Home App to install and control your camera, make sure that the app is up to date. Try restarting the app or reinstalling it if necessary.
If you have tried these troubleshooting steps and are still experiencing issues, it may be best to contact Xfinity customer support for further assistance. They will be able to provide you with more specific guidance based on your camera model and setup.
FAQ,
What is the process for installing an Xfinity security camera?
To install an Xfinity security camera, you will need to follow several steps. First, ensure that you have a stable internet connection and a compatible device, such as a smartphone or tablet. Then, download the Xfinity Home app from the App Store or Google Play. Once you have the app, create a new Xfinity Home account or log in with your existing account credentials. Follow the on-screen instructions to add your security camera to your account, including selecting the specific camera model and connecting it to your home Wi-Fi network. Finally, position the camera in the desired location, making sure it has a clear view of the area you want to monitor.
Can I install my Xfinity security camera without professional help?
Yes, you can install your Xfinity security camera without professional help. The installation process is designed to be user-friendly and does not usually require any technical expertise. As long as you have a stable internet connection and a compatible device, you should be able to follow the step-by-step instructions provided in the Xfinity Home app to set up your security camera. However, if you encounter any difficulties or have specific questions, you can always reach out to Xfinity customer support for assistance.


